How to Enable or Disable Sync Provider Notifications in File Explorer in Windows 11

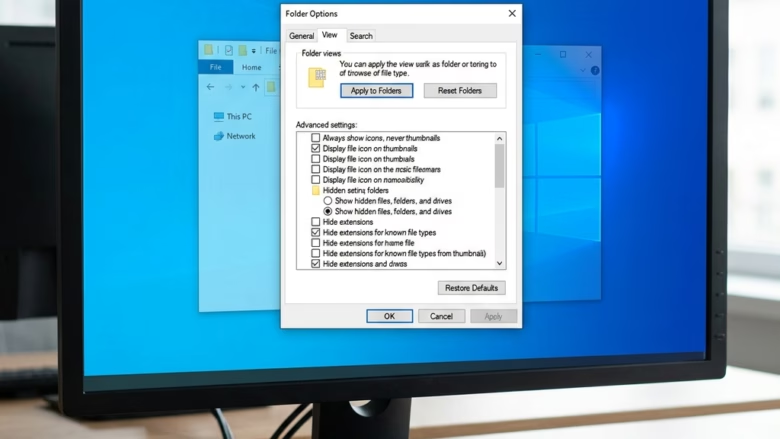
Sync provider notifications in Windows 11 are the pop-up tips and ads that appear near the address bar in File Explorer . They promote features such as OneDrive storage plans and backup.
If you would rather not see these prompts while you browse folders, you can turn them off. The change only affects the messages. Your files keep syncing to the cloud as before, and OneDrive or any other sync client keeps running. This guide covers three methods: Folder Options, the Registry Editor and PowerShell. All three work the same on Windows 11 Home and Pro.
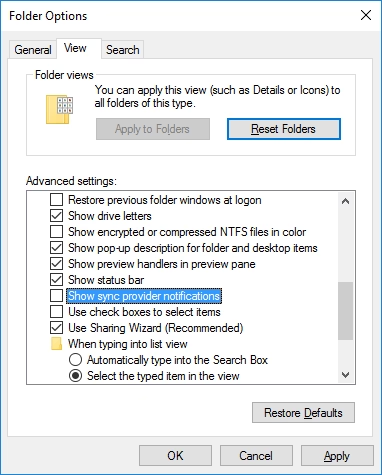
Open File Explorer , click the three dots menu, select Options, go to the View tab, uncheck Show sync provider notifications, and click OK. The pop-up prompts disappear immediately without affecting file syncing.
Comparison of Methods
| Method | Difficulty | Best For |
|---|---|---|
| Folder Options | Easy | Average users |
| Registry Editor | Advanced | Power users |
| PowerShell | Advanced | Automation |
Option 1Using Folder Options (GUI)
This is the safest way to change the setting. It uses the normal File Explorer interface, so there is no risk of mistyping a registry path or command. The setting applies to your user account only. It is on by default.
- Open File Explorer (press Win+E if you prefer).
- Click the three dots (…) in the top menu bar. A drop-down menu appears.
- Select Options. The Folder Options window opens.
- Click the View tab. You will see a long list under Advanced settings.
- Scroll down the list and find Show sync provider notifications.
- Check the box to enable the notifications, or uncheck it to disable them.
- Click OK. The window closes and the change applies.
If the prompts still show in a folder window that was already open, close that window and open a new one. To undo the change, repeat the steps and set the box back to how it was.
Option 2Using Registry Editor
The method sets a single value that File Explorer reads. Use it if you prefer manual tweaks, or if you need to apply the setting by script or on several machines. Be careful in the Registry Editor. A change in the wrong place can cause problems, so check each name before you confirm it.
- Press Win+R, type regedit, and press Enter. (Requires Admin Privileges) If a User Account Control prompt appears, click Yes. The Registry Editor opens.
- Navigate to:
HKEY_CURRENT_USER\SOFTWARE\Microsoft\Windows\CurrentVersion\Explorer\AdvancedYou can paste the path into the address bar at the top of the Registry Editor. - Check the right pane for an existing ShowSyncProviderNotifications value. If it is there, skip to step 5.
- If it is missing, right-click an empty area in the right pane and select New DWORD (32-bit) Value. Name it ShowSyncProviderNotifications.
- Double-click the value. In the Value data box, enter 1 to enable the notifications or 0 to disable them. Click OK.
Close and reopen File Explorer windows. If the prompts remain, sign out of Windows and sign back in. To undo the change, set the value back to 1, or delete the value to return to the default behavior.
Option 3Using PowerShell
You can control sync provider notifications with a single command in PowerShell. This lets you switch the pop-ups on or off without clicking through menus. It is useful if you like command-line tools or want to reuse the command in a script.
- Right-click the Start button and select Terminal (Admin). (Requires Admin Privileges) Click Yes at the User Account Control prompt. Terminal opens, normally with a PowerShell tab.
- To disable the notifications, copy and paste this command and press Enter:
Set-ItemProperty -Path 'HKCU:\Software\Microsoft\Windows\CurrentVersion\Explorer\Advanced' -Name 'ShowSyncProviderNotifications' -Value 0 - To enable them again, run the same command but change -Value 0 to -Value 1.
If PowerShell shows no error, the command worked. As with the registry method, close and reopen File Explorer windows to see the change. If that is not enough, sign out and back in.
Summary
Sync provider notifications in Windows 11 are prompts for features such as cloud storage, and you can turn them off if you want a cleaner File Explorer. The simplest way is the Show sync provider notifications option in Folder Options. The Registry Editor and PowerShell do the same thing for people who prefer those tools. None of these methods changes how your files sync, and you can reverse any of them at any time.
Did this guide fix your problem?

About the Author
Richard
Tech Writer, IT Professional
Richard is a writer at Geek Rewind who turns complex IT tasks into clear, step-by-step guides. He draws on years of hands-on experience in system administration and enterprise IT operations, focusing on Windows, Linux and WordPress: the problems people actually run into, and the fixes that work. His server and WordPress guides come from systems he runs himself. Richard builds and maintains the platform behind Geek Rewind, from its Ubuntu servers and Nginx configuration to its custom WordPress plugins. Many new tutorials start with readers' questions, and he's always glad to answer them in the comments.
No comments yet — be the first to share your thoughts!