How to Hide the App & Browser Control Section in Windows 11 Security
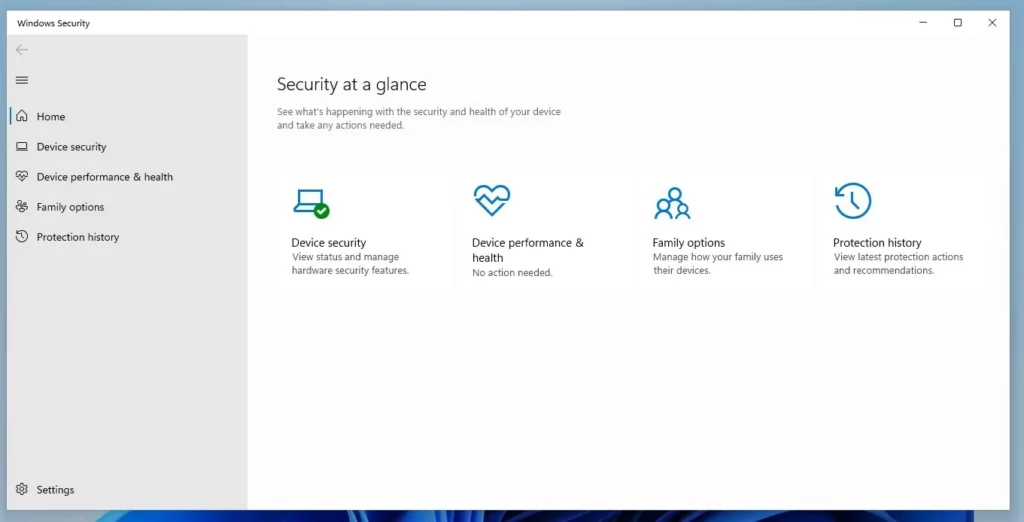
The App & browser control section in Windows 11 Security lets you manage how Windows defends against unsafe apps and websites.
This important area is part of Windows Defender SmartScreen, a built-in tool that checks downloads and website links for threats.
SmartScreen stops malware before it gets on your PC, but sometimes you might want to hide this section for a cleaner look or if you use other security software. Doing so helps prevent accidental changes to your settings.
To hide the App & browser control section in Windows 11 Security, open the Local Group Policy Editor and navigate to Computer Configuration > Administrative Templates > Windows Components > Windows Security > App and browser protection. Double-click “Hide the App and browser protection area” and set it to Enabled.
Understanding Reputation-Based Protection
Reputation-based protection in Windows 11 security checks apps and files to determine if the software is known good or bad. This protection helps prevent unwanted apps and potentially harmful files from running on your computer, as it uses cloud-based intelligence to identify threats.
Smart App Control and Exploit Protection
Smart App Control in Windows 11 only lets trusted apps run, while Exploit Protection guards against advanced attacks.
Why hide this section?
Hiding the App & Browser Control section prevents unauthorized users from altering your security preferences. Locking down your device settings is useful in shared environments or workplaces where you want to ensure security policies remain unchanged.
What happens when done?
The App & browser control menu in Windows Security will disappear or reappear after you make these changes, based on your chosen option. This action only hides the settings menu from the user interface and does not disable the protection itself.
Hide or Show via Group Policy
You can hide or show the App & browser control section in Windows 11 using the Local Group Policy Editor. This tool lets you change specific settings on your computer, including whether the App & browser protection features are visible in Windows Security.
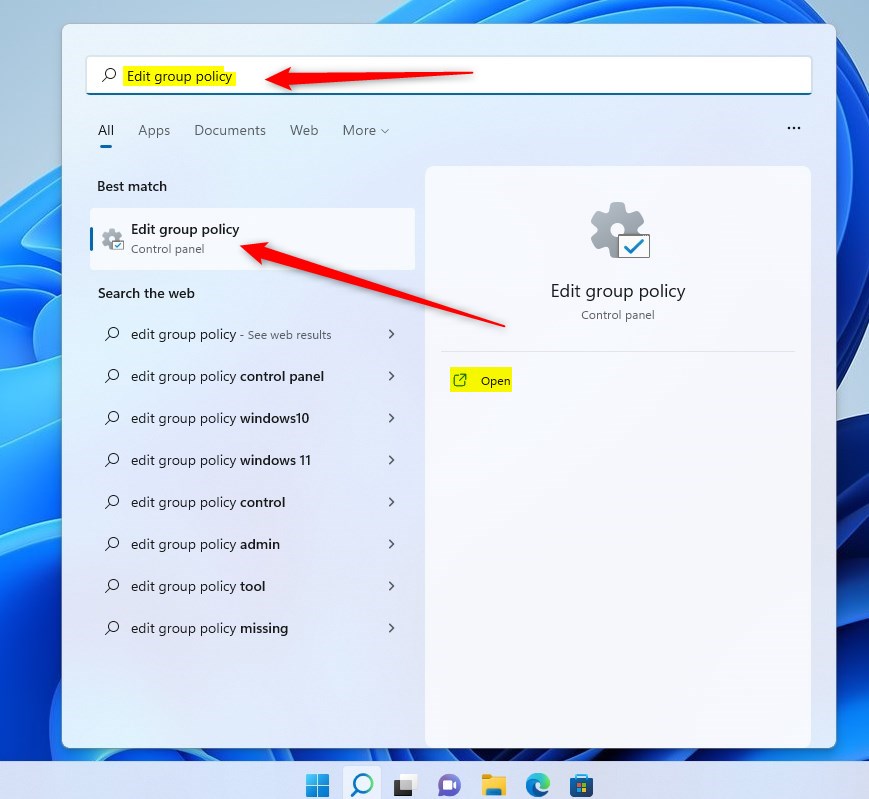
First, open Local Group Policy Editor by clicking the Start Menu and searching for “Edit group policy.” Select the result to open the editor.
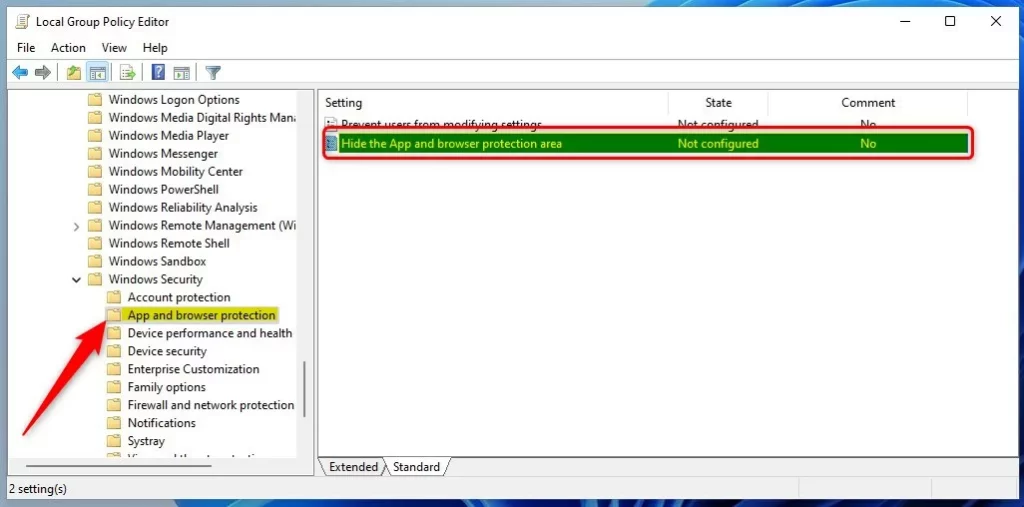
In the window that opens, follow this path on the left side:
Computer Configuration > Administrative Templates > Windows Components > Windows Security > App and browser protection
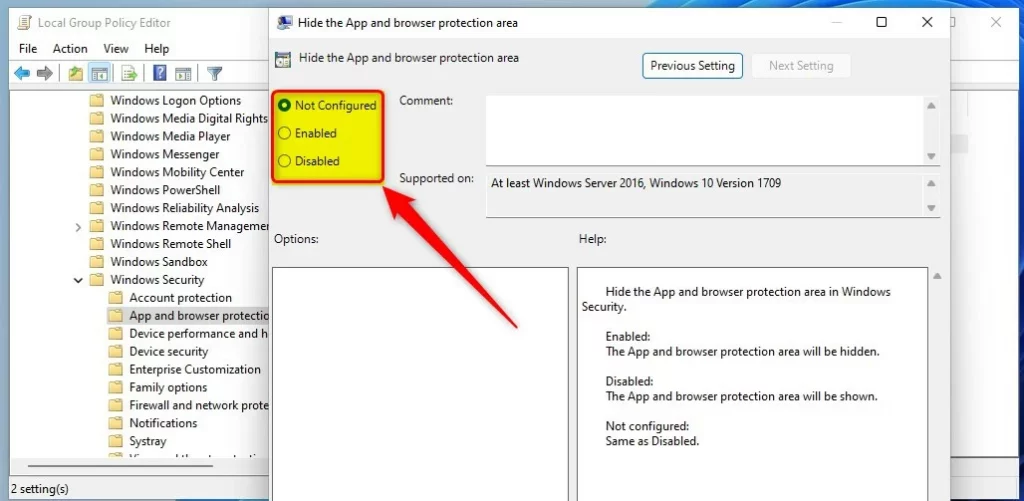
Look to the right side of the window and double-click the setting named “Hide the App and browser protection area.”
Select one of the following options:
- Not Configured: This is the default setting.
- Enabled: This hides the section.
- Disabled: This shows the section.
Hide or Show via Registry
If you can’t use Group Policy, you can hide or show the App & browser control settings in Windows 11 by editing the Registry. The Registry Editor lets you make advanced changes to Windows, and by adjusting specific values here, you can control the visibility of the App & browser protection section.
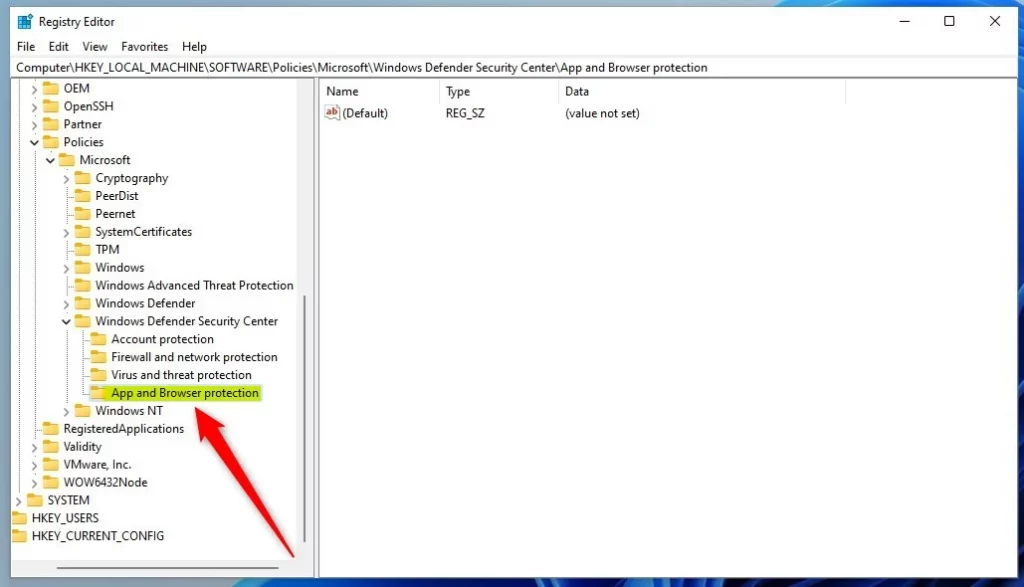
If the Group Policy Editor isn’t an option, you can achieve the same result using the Windows Registry. Open the Registry Editor and go to this path:
🗝️HKEY_LOCAL_MACHINE\SOFTWARE\Policies\Microsoft\Windows Defender Security Center\App and Browser protection
If you do not see the “App and Browser protection” folder, right-click the “Windows Defender Security Center” folder, select New, and create the missing keys.
Right-click in the empty space on the right side and select New > DWORD (32-bit) Value. Name this new item UILockdown.
Double-click UILockdown and change the Value data:
- Enter
0to show the section. - Enter
1to hide the section.
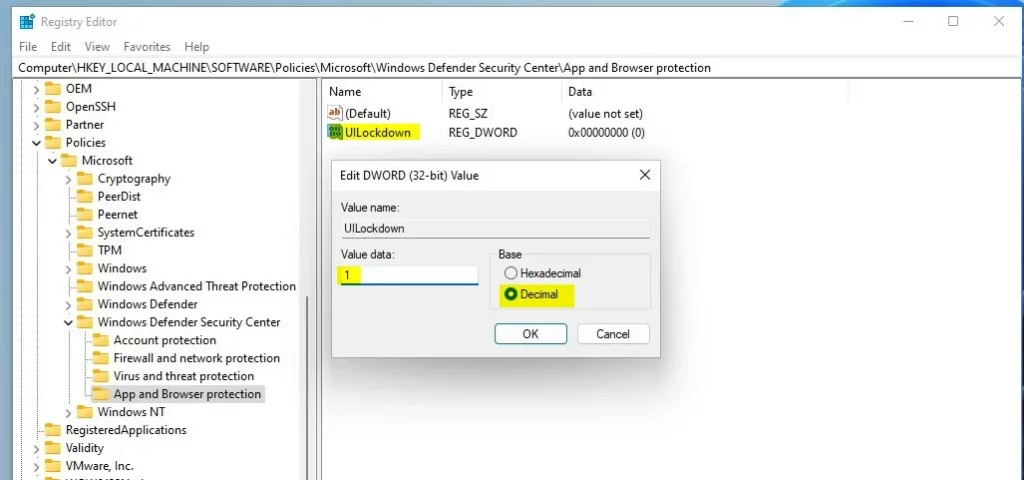
Restart your computer to finish the process.
Summary
Managing the App & browser control section in Windows 11 lets you customize your security settings and understand features like SmartScreen.
Does App & browser control affect third-party browsers?
Yes, Windows 11’s App & browser control features like SmartScreen also protect other browsers such as Chrome and Firefox.
Was this guide helpful?

About the Author
Richard
Tech Writer, IT Professional
Richard, a writer for Geek Rewind, is a tech enthusiast who loves breaking down complex IT topics into simple, easy-to-understand ideas. With years of hands-on experience in system administration and enterprise IT operations, he’s developed a knack for offering practical tips and solutions. Richard aims to make technology more accessible and actionable. He's deeply committed to the Geek Rewind community, always ready to answer questions and engage in discussions.


[…] the status of your virus and threat protection, firewall and network security, Account protection, App and Browser Control, Device Security, and […]
[…] This guide explains how to hide or show the Windows Security app Device security section in Windows 11. Windows Security is a built-in app that acts as a dashboard for your computer’s health. It shows the status of your virus and threat protection, firewall and network security, Account protection, and App and Browser Control. […]