How to Enable or Disable Sign-in in Google Chrome

Google Chrome sign-in connects your browser to your Google account so you can share bookmarks, passwords, history, and settings across devices. With it on, your personal browsing data is available on both your desktop computer and your phone.
You can turn sign-in on or off at any time, either from Chrome’s settings or with a registry policy. Leaving Chrome signed out stops it from saving your passwords to your account and from applying your custom setup to other computers. This guide covers both methods, and what each one does and doesn’t do.
To enable or disable sign-in in Google Chrome, open the Windows Registry Editor. Navigate to Computer\🗝️HKEY_LOCAL_MACHINE\
Why manage browser sign-in?
Limit browser sign-in to keep your data private, or to stop other people from syncing information on a shared computer. When you sign in, Chrome saves your bookmarks, passwords, and history to your Google account. Anyone who can open that signed-in profile can see that data, so on a shared PC it’s safer to stay signed out or to use a separate Chrome profile for each person.
What happens when done?
When sign-in is disabled, Chrome stops syncing your personal data and you are signed out of your Google account inside the browser. Here is what to expect:
- Bookmarks, passwords, and history already saved on this computer stay in the browser unless you choose to clear them.
- Changes you make from now on are no longer sent to your Google account, and changes from your other devices no longer arrive here.
- Signing in to a Google website such as Gmail in a tab is separate from signing in to Chrome. Depending on your Chrome version, you may be asked whether to sign in to the browser as well.
To turn it back on, sign in again from the profile icon in the top-right corner of Chrome. Your synced data is still in your Google account and comes back after you sign in.
Enable/Disable Browser Sign-in in Chrome
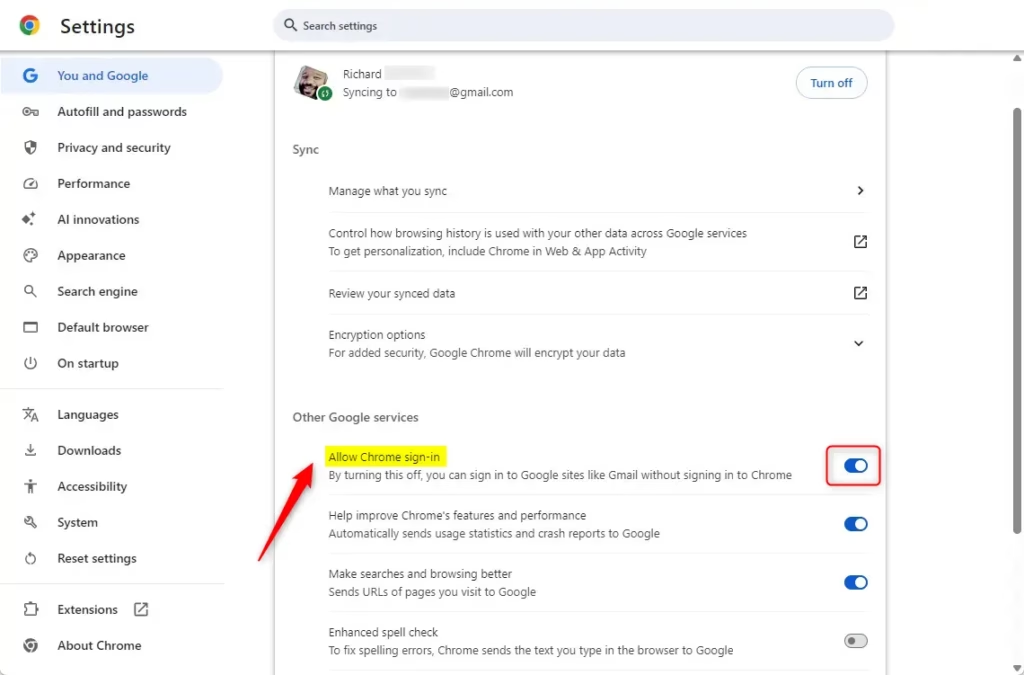
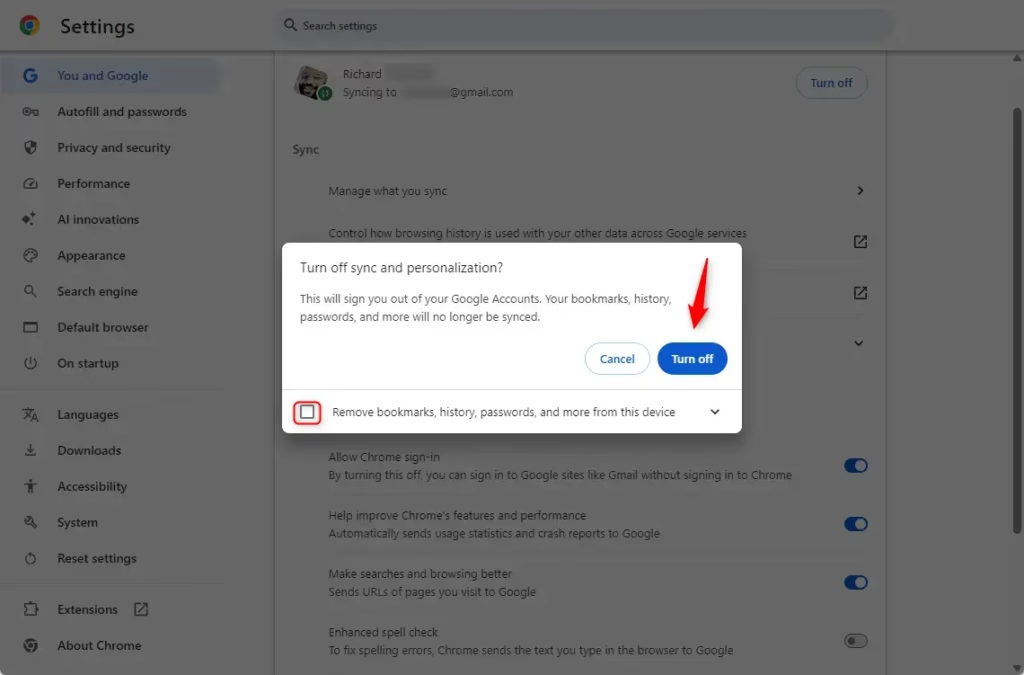
Browser sign-in in Google Chrome can’t be switched off with a simple toggle in the browser settings, because Chrome ties it to your Google Account profile. You can manage your account details under the You and Google section in Settings. If you want to disable Chrome sign-in completely on a computer, you need an alternative method, such as the registry policy described later in this guide.
To look at your account options, follow these steps:
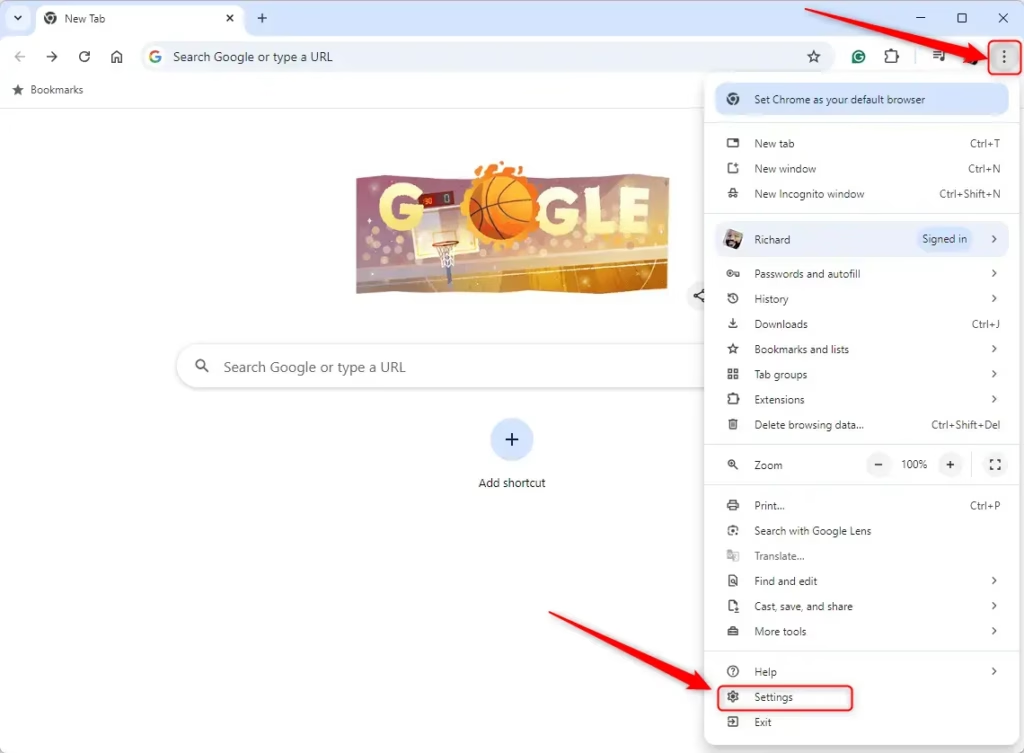
- Open Chrome and click the three-dot menu in the top-right corner.
- Click Settings.
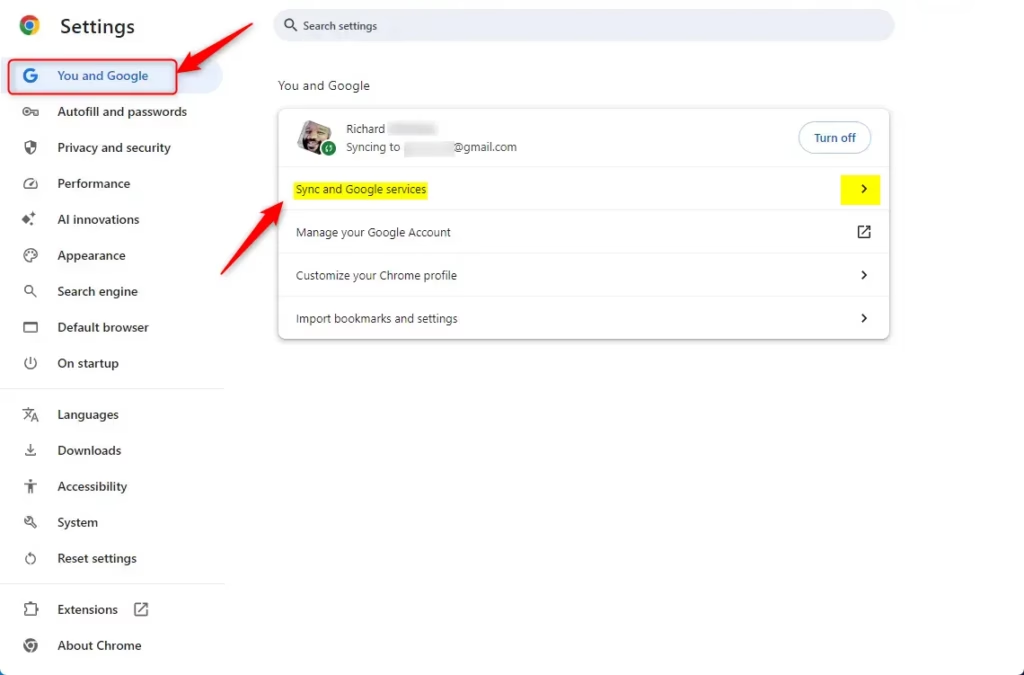
- Click You and Google in the left-hand list. You should see your account details and the sync options.
Note that turning off sign-in from the user interface is no longer a standard option. Chrome is designed to stay integrated with your Google profile for a better experience. The exact wording of the buttons in this area changes between Chrome versions, so use the registry method if you need sign-in blocked for good.
Enable / Disable Browser Sign-in using the Registry
Registry Editor is a tool for changing advanced Windows settings. You can use it to disable Chrome sign-in by adding a policy value to your system. Chrome will then show a Managed by your organization message in its menu and settings. That is normal and just means the registry rule is working. You need an administrator account to make this change. It works on both Windows 11 Home and Pro.
The registry method for managing Chrome sign-in displays a "Managed by your organization" message. This is expected Chrome behavior when a policy is set. It does not mean an employer is monitoring your PC, and it goes away when you remove the policy.
Back up your registry before making any changes. Then open Registry Editor:
- Press Win + R to open the Run box.
- Type regedit and press Enter.
- Click Yes if User Account Control asks for permission. Registry Editor opens.
- Click File Export, choose a location, name the file, and click Save. To restore it later, double-click the saved file.
Navigate to this folder path. You can expand the folders in the left pane one at a time, or paste the path into the address bar at the top of Registry Editor:
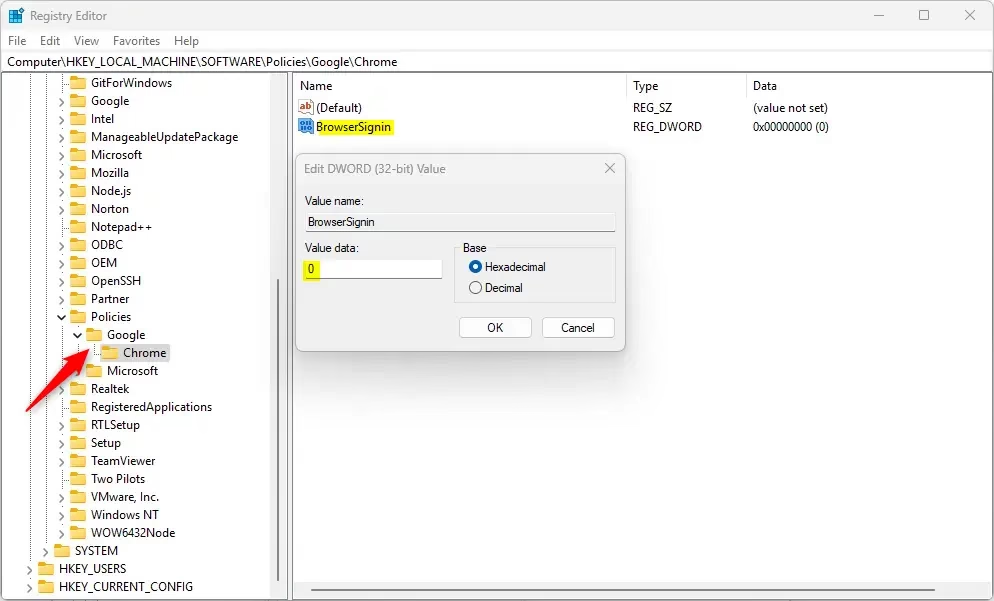
Computer\HKEY_LOCAL_MACHINE\SOFTWARE\Policies\Google\Chrome
The Google and Chrome folders (called keys) often don't exist on a PC that has never had Chrome policies set. Create what is missing:
- If the Google folder is missing, right-click the Policies folder, choose New Key, and name it Google.
- If the Chrome folder is missing, right-click the Google folder, choose New Key, and name it Chrome.
- Right-click an empty area in the right pane of the Chrome folder and choose New DWORD (32-bit) Value.
- Name the new value BrowserSignin. You should now see it listed in the right pane.
Now set the value:
- Double-click BrowserSignin. The Edit DWORD (32-bit) Value box opens.
- Enter a number in the Value data box. Leave Base on Hexadecimal, since these small numbers read the same in either base.
- Click OK.
These are the values Chrome accepts:
- 0: Disable browser sign-in
- 1: Enable browser sign-in
- 2: Force users to sign-in
Use 0 if your goal is to turn sign-in off. Be careful with 2, because Chrome will then require a sign-in before the browser can be used.
To return to the default setting, delete the BrowserSignin value you created:
- Go back to the Chrome folder in Registry Editor.
- Right-click BrowserSignin and choose Delete.
- Click Yes to confirm.
Close all Chrome windows and reopen the browser so it reads the change. If it still shows the old behavior, restart your computer. If the "Managed by your organization" message stays after you delete the value, check that no other policy values remain in the Chrome folder.
For more information, visit Chrome Enterprise Policy.
Have a question about this guide?
Answered by AI from this guide. Good questions may be added to this page — please don't include personal details.
Did this guide fix your problem?

About the Author
Richard
Tech Writer, IT Professional
Richard is a writer at Geek Rewind who turns complex IT tasks into clear, step-by-step guides. He draws on years of hands-on experience in system administration and enterprise IT operations, focusing on Windows, Linux and WordPress: the problems people actually run into, and the fixes that work. His server and WordPress guides come from systems he runs himself. Richard builds and maintains the platform behind Geek Rewind, from its Ubuntu servers and Nginx configuration to its custom WordPress plugins. Many new tutorials start with readers' questions, and he's always glad to answer them in the comments.
No comments yet — be the first to share your thoughts!