How to Link your Google Account and Microsoft account
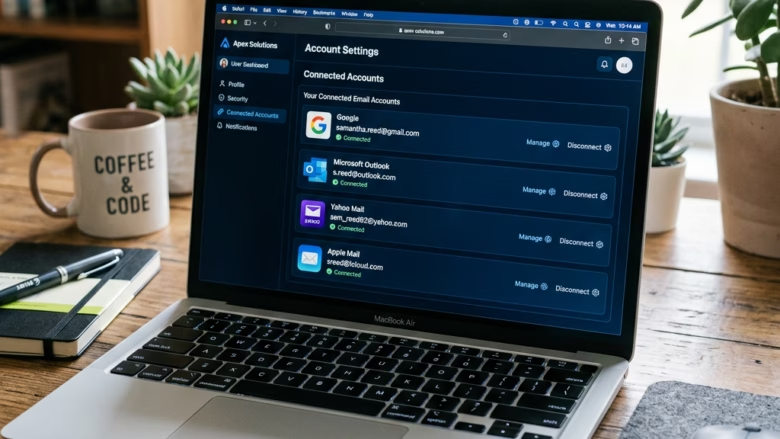
Linking your Google account to your Microsoft account lets you use your Gmail address as a sign-in name for Microsoft services. This connects your Gmail email and password to your Microsoft account, making it easier to sign in.
You can think of it like giving your Microsoft account a nickname that’s your Google email. This doesn’t change your main Microsoft account password or let you log into Windows itself with Google. It just gives you another way to prove who you are.
Once linked, you can use your Gmail username and password to access Microsoft services like Outlook.com or OneDrive. This means one login can work for multiple Microsoft services, simplifying how you get into them.
Add your Gmail address as a sign-in alias in your Microsoft account settings. Go to account.microsoft.com, sign in, and navigate to “Sign-in preferences” to add your Gmail. This provides an alternative way to verify your identity for Microsoft services.
Why Link Your Gmail to Your Microsoft Account?
Linking your Gmail to your Microsoft account gives you another way to sign in, which is super helpful if you ever forget your Microsoft password. It acts as a backup, making it easier to get back into your Microsoft account if you get locked out.
- Another Way to Sign In: If you forget your main Microsoft account password, having your Gmail address linked means you have another way to prove who you are. This can be very helpful if you need to get back into your account.
- Things Feel More Connected: This doesn’t merge your emails or services together. But, it does create a connection. You can use your familiar Gmail address to access things linked to your Microsoft account. This can feel more organized for some people.
- Helps Recover Your Account: It gives you an extra way to recover your account. If someone gets into your Microsoft account, having a linked Gmail address can help you prove it’s yours and secure it better.
Linking Google and Microsoft accounts creates an alternative login method using a Gmail address. This process does not combine Google and Microsoft services. Your emails remain in their original inboxes, and cloud storage stays separate between the two accounts.
What You Need to Get Started
Before you link your Google account and Microsoft account, make sure you have your Microsoft account login details, your Gmail login details, and a web browser open. Having these ready will make the process of linking your accounts much smoother.
- Your Microsoft Account Details: This is the email address and password you usually use for services like Outlook.com, Xbox Live, or Windows.
- Your Gmail Account Details: You will need to be able to log into your Gmail account, including its password, to prove you own it.
- A Web Browser: Any current web browser like Edge, Chrome, or Firefox will work.
- An Internet Connection: You will need to be online to make these changes.
Make sure you can access both accounts before you begin. Trying to link them without being able to log into one will likely cause issues.
How to Link Your Gmail Address Step-by-Step
Here’s how to add your Gmail address as a sign-in option for your Microsoft account. We’ll go through this carefully.
Step 1Go to Microsoft Account Management
First, go to the Microsoft account management page at account.microsoft.com and sign in with your Microsoft account email and password. This is the main place where you’ll manage your account settings and start the linking process.
https://account.microsoft.com/
Once it loads, sign in using the email and password for the Microsoft account you want to link your Gmail to.
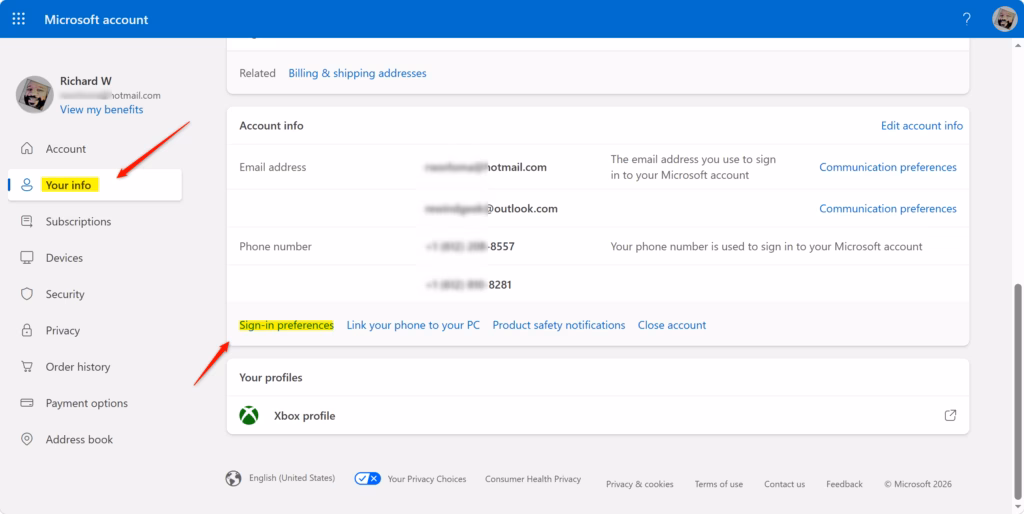
Step 2Find the “Sign-in preferences” Section
Once you’re signed into your Microsoft account, look for and click on the ‘Sign-in preferences’ section, which is usually in the menu on the left side. This is where you can manage how you sign in and add new ways to access your account.
Click on that option. This will take you to a page where you can manage all the ways you sign in to your Microsoft account. You can add alternative sign-in methods here.
The Account settings page lets you manage your sign-in options. You can remove existing methods, but it’s smart to add a new one first to avoid losing login access. For example, if you want to remove a Microsoft account login, add a Google account login first to keep access, as Microsoft’s account management guidelines recommend.
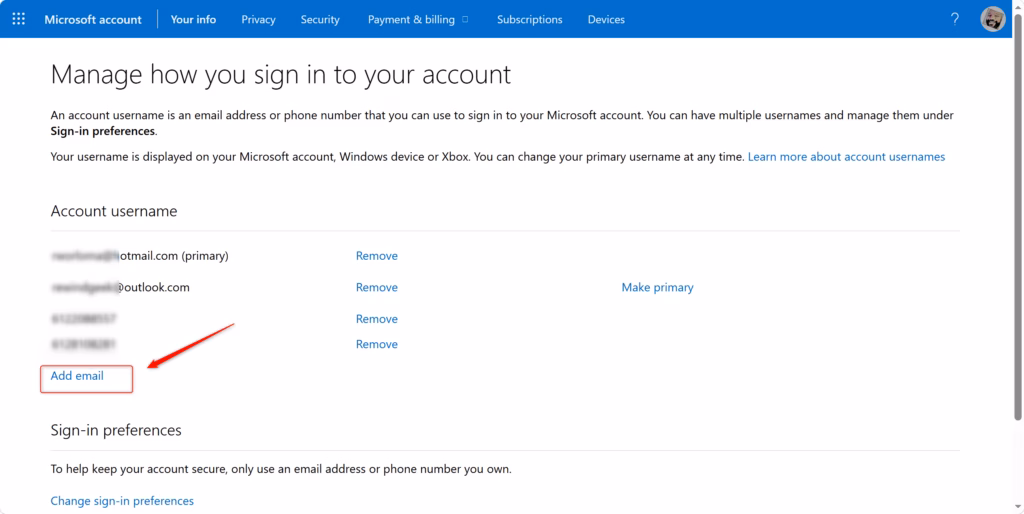
Step 3Add Your Gmail Address as an Alias
In the ‘Sign-in preferences’ area, click ‘Add an alias’ and choose the option to ‘Use an existing email address.’ Then, type your full Gmail address into the box provided to start linking it to your Microsoft account.
You’ll likely see a choice: create a new Outlook.com email address or use an existing email address. Select the option to “Use an existing email address.”
In the box provided, type your full Gmail address (for example, your_email@gmail.com). Then, click “Add alias.”
An email alias is an extra email address or phone number for an existing account. This guide shows you how to add your Gmail address as one. After adding your Gmail address, you can add at least one more type of email alias.

Step 4Verify Your Gmail Account
To verify your Gmail account, open your Gmail inbox at mail.google.com in a new browser tab. Find the email from Microsoft and click the verification link within that email to confirm you own the Gmail address.
Now, you need to access your Gmail account. Open a new tab or window in your browser and go to:
https://mail.google.com/
Sign in to your Gmail account if you haven’t already. Look for an email from Microsoft. The subject line will probably be something like “Verify your email address” or “Confirm your alias.”
The verification email contains a link or button. Clicking this verification link or button confirms your email address for account linking.
Important Warning: Never click on links if the email doesn’t seem to be genuinely from Microsoft. Be vigilant against scams.
Step 5Finish Verification and Make it Primary (Optional)
Once you click the verification link, your Gmail address is officially added to your Microsoft account. You can then choose to make your Gmail address the primary sign-in name if you want it to be the main way you log in.
Your Gmail address appears in your Microsoft account’s “Sign-in preferences” after linking. You can then choose if your Gmail address becomes the main sign-in name.
A primary alias is the main email address Microsoft uses for all messages and when sending emails from Outlook.com. You can have multiple email aliases, but only one address can be set as the primary alias.
Setting a Gmail address as the primary email for a Google account requires locating the Gmail address on the “Sign-in preferences” page. A “Make primary” button appears beside the Gmail address. Clicking this button confirms the change, and the system then asks for confirmation of this primary email change.
Using Your Linked Gmail Address
Linking your Google Account and Microsoft account allows you to sign in to Microsoft services, such as Outlook.com or Xbox, using your Gmail address and your Microsoft account password. This linked account functions as an alternative login method, using your Gmail as the identifier.
Linking your Google Account and Microsoft account provides an alternative login method, but this process does not change your existing Gmail or Microsoft account passwords. This connection allows you to sign into one service using credentials from the other, improving convenience without affecting the security of individual passwords.
Reference:
Summary
Linking your Gmail to your Microsoft account is a smart move for better security and easier account recovery, giving you another way to access Microsoft services. Remember, this links your accounts for signing in, but doesn’t merge them.
Keep in mind, this process links your accounts for sign-in purposes, offering a helpful backup without merging your services. Take a moment to review your “Sign-in preferences” to ensure everything appears correct. You’re now better equipped to manage your online identity across various platforms. Happy computing!
Can I link my Gmail account to Microsoft?
Yes, you can link your Gmail account to your Microsoft account. This allows you to use your Gmail address and password as an alternative sign-in method for your Microsoft services, such as Outlook.com and OneDrive, without changing your primary Microsoft account details.
How to sync Microsoft email with Gmail?
To sync Microsoft email with Gmail, you can add your Gmail address as a sign-in alias to your Microsoft account. This doesn’t directly sync emails but allows you to use your Gmail credentials to sign into Microsoft services, offering a streamlined login experience.
Is Gmail POP3 or IMAP for Outlook?
Gmail supports both POP3 and IMAP protocols. For Outlook, IMAP is generally recommended as it synchronizes emails across all your devices, ensuring consistency. POP3 downloads emails to a single device and can remove them from the server.
Is my Microsoft account tied to my Gmail?
Your Microsoft account is not automatically tied to your Gmail. However, you can manually link your Gmail address as an alias to your Microsoft account. This provides an additional way to sign in and recover your account if needed.
Was this guide helpful?

About the Author
Richard
Tech Writer, IT Professional
Richard, a writer for Geek Rewind, is a tech enthusiast who loves breaking down complex IT topics into simple, easy-to-understand ideas. With years of hands-on experience in system administration and enterprise IT operations, he’s developed a knack for offering practical tips and solutions. Richard aims to make technology more accessible and actionable. He's deeply committed to the Geek Rewind community, always ready to answer questions and engage in discussions.

No comments yet — be the first to share your thoughts!