
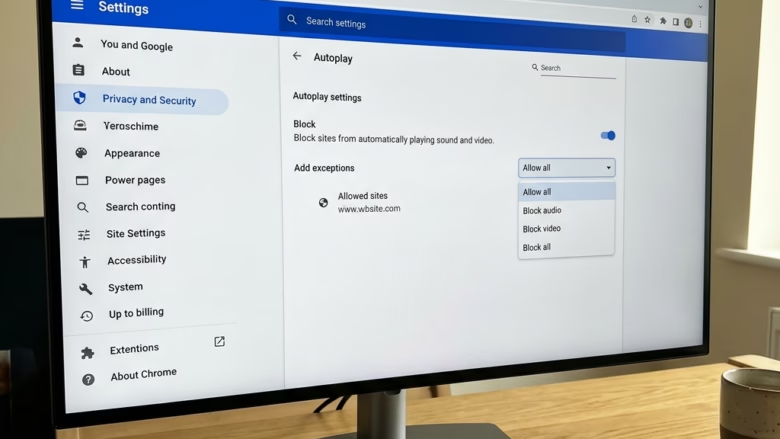
Disabling autoplay in Microsoft Edge on Windows 11 stops websites from playing unwanted videos and audio the moment you open a page. Edge allows media playback by default. A quick settings change blocks these surprise interruptions, saves internet data, and keeps your browsing quiet.
You can manage this inside the browser settings, either to limit media playback globally or to add specific websites to an exception list. There are three ways to do it, and this guide covers each:
- Edge settings work on every edition of Windows 11 and suit most people.
- The Registry Editor enforces the rule at system level and needs administrator rights.
- Group Policy is for Windows 11 Pro, Enterprise or Education, or for managed and multi-user PCs.
Open Microsoft Edge, click the 3-dot menu and select Settings. Go to Cookies and site permissions, scroll down to Media autoplay, and select Block. Reload your tabs to apply the change. This stops websites from playing videos and audio automatically when you open a page.
Why the ‘Block’ Option Might Be Missing
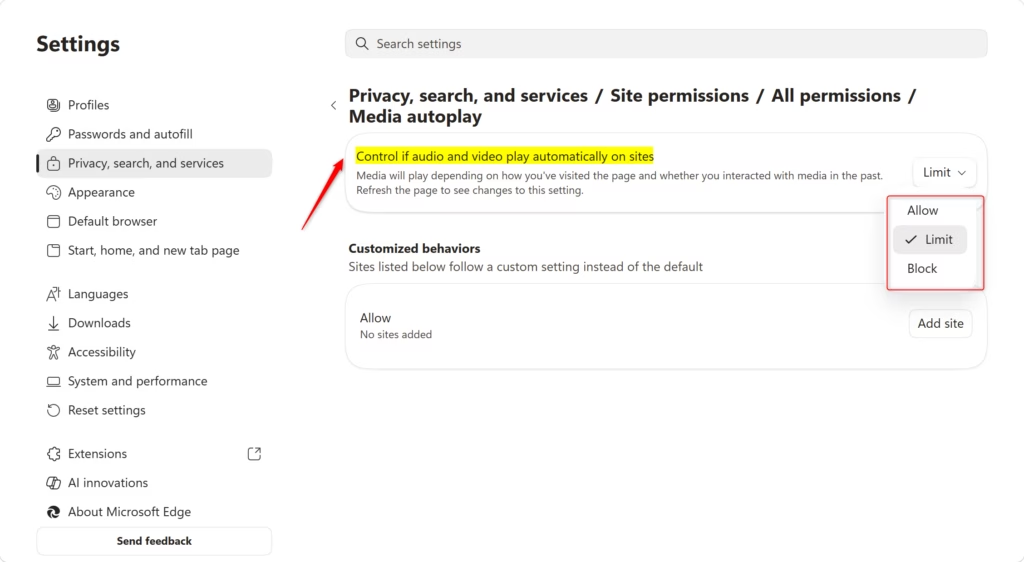
Missing the “Block” option entirely? That is common. Depending on your Edge version, the Media autoplay setting may only offer Allow and Limit. A stricter Block choice is tied to experimental features known as browser flags, and Edge often hides it unless that flag is switched on. If you do not see Block, try Limit first. It stops most pages from starting media on their own.
Option 1Standard Settings
It takes only a few clicks, which makes it the best method for everyday users and the only one you need on Windows 11 Home.
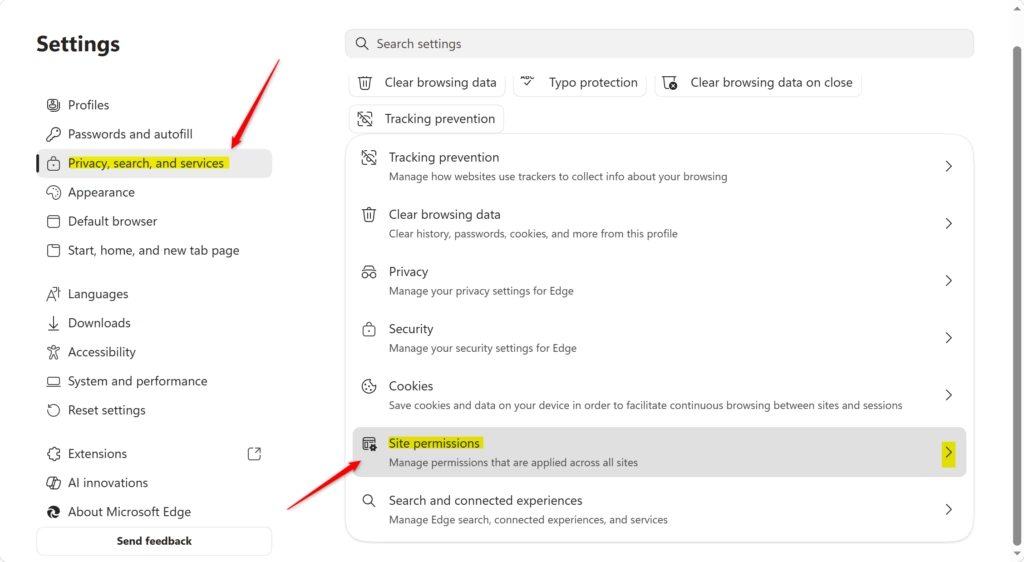
In short, open Edge and go to Settings Cookies and site permissions > Media autoplay. Pick the most restrictive option available, then follow the numbered steps below. After you change the setting, reload any tab that is already open. Pages that were loaded earlier can keep playing until you refresh them.
- Open Microsoft Edge.
- Click the 3-dot menu and select Settings.
- Click Cookies and site permissions on the left.
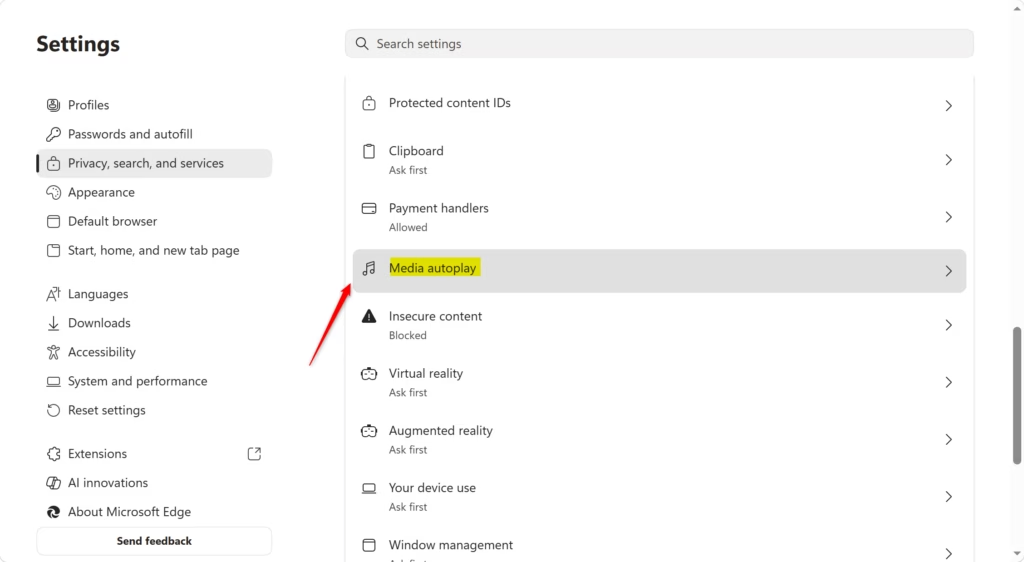
- Scroll down and click Media autoplay.
- Select Block to stop all media from playing automatically.

Option 2Using the Registry Editor
This method requires administrator privileges and lets you enforce restrictions across the browser using specific registry keys. Registry edits can break things if you mistype, so back up the registry or create a restore point first. Also close Edge before you start.
- Press Win + R, type regedit, and press Enter. Approve the User Account Control prompt if it appears. The Registry Editor opens.
- Navigate to:
HKEY_LOCAL_MACHINE\SOFTWARE\Policies\Microsoft\Edge - If the key does not exist, right-click Microsoft, select New Key, and name it Edge. The new key appears in the left pane.
- Right-click the Edge key, select New DWORD (32-bit) Value, and name it MediaAutoplayLimit. The new value appears in the right pane.
- Double-click MediaAutoplayLimit and set the Value data to 1 to limit or 2 to block. Click OK.
- Close the Registry Editor and restart Edge. Reload your tabs and test with a site that normally plays video on load.
To undo this, return to the same key, delete the MediaAutoplayLimit value, and restart Edge. If the setting seems to have no effect, check that you entered the key and value names exactly as shown. Edge ignores entries it does not recognize.
Option 3Group Policy (GPO)
You can disable autoplay in Edge using the Group Policy Editor to manage browser behavior on professional or multi-user hardware. This approach provides centralized control over media playback rules across the operating system.
Keep these points in mind before you start:
- The Local Group Policy Editor is only included in Windows 11 Pro, Enterprise and Education. Home users should use the Edge settings or registry method instead.
- Edge policies only show up in Group Policy once the Microsoft Edge administrative templates are installed. If you cannot find the Edge section, the templates are the usual reason.
- A setting applied by policy normally appears greyed out in Edge's own settings page, and users cannot change it there.
Follow the steps below, then restart Edge so it picks up the policy.
- Press Win + R, type gpedit.msc, and press Enter.
- Go to Computer Configuration Administrative Templates Microsoft Edge.
- Find Configure autoplay settings.
- Set it to Enabled and choose your preferred restriction level from the dropdown menu.
Summary
Standard settings, registry tweaks, and group policies all provide viable paths for silencing unwanted media. Blocking autoplay preserves bandwidth while making browsing sessions much quieter. Applying rules via the registry or Group Policy suits administrators who need consistent behavior across multiple local accounts.
If you only need quiet pages on your own PC, the Edge settings are enough. To reverse any method, set the option back to Allow in Edge, delete the registry value, or set the policy back to Not Configured, then restart the browser.
Was this guide helpful?
0% of readers found this helpful (2 votes)

About the Author
Richard
Tech Writer, IT Professional
Richard is a writer at Geek Rewind who turns complex IT tasks into clear, step-by-step guides. He draws on years of hands-on experience in system administration and enterprise IT operations, focusing on Windows, Linux and WordPress: the problems people actually run into, and the fixes that work. His server and WordPress guides come from systems he runs himself. Richard builds and maintains the platform behind Geek Rewind, from its Ubuntu servers and Nginx configuration to its custom WordPress plugins. Many new tutorials start with readers' questions, and he's always glad to answer them in the comments.



No comments yet — be the first to share your thoughts!