How to Enable Automatic Do Not Disturb Scheduling in Windows 11

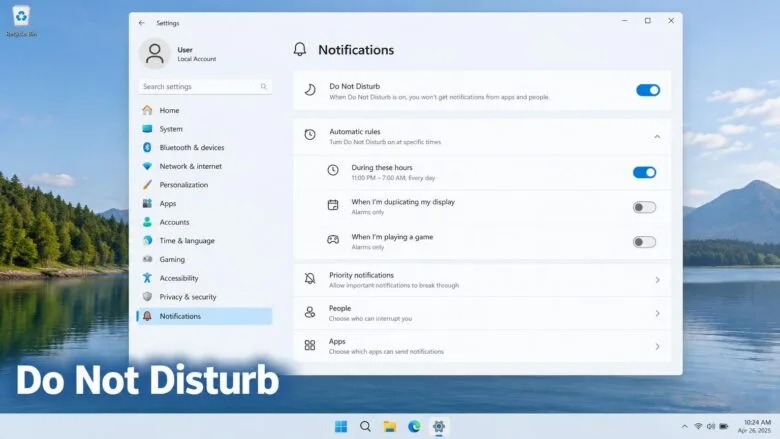
Do Not Disturb in Windows 11 stops notification sounds and banners from popping up while you’re playing a game, presenting, or using a full-screen app. You can set it to turn on automatically at certain times of day, so your computer stays quiet during work hours or at night without you having to switch it manually each time.
Open Settings System Notifications and look for the “Turn on do not disturb automatically” section. The exact steps depend on which build of Windows 11 you’re running, and we cover both versions below.
No administrator rights are needed. These settings apply to your account only, take effect right away, and don’t require a restart.
Open Settings System Notifications, find the Turn on do not disturb automatically section, and tick the conditions you want: When duplicating my display, When playing a game, When using an app in full-screen mode, or For the first hour after a Windows feature update. The changes save immediately.
Check Which Version of the Setting Your PC Has
Older builds have Focus assist (the original feature that silenced notifications on a schedule or under certain conditions). Newer builds replace it with Do not disturb. Which one you see decides which steps to follow.
- Open Settings by pressing Win+I.

Windows 11 Start menu with Settings gear icon highlighted. - Select System in the left pane.
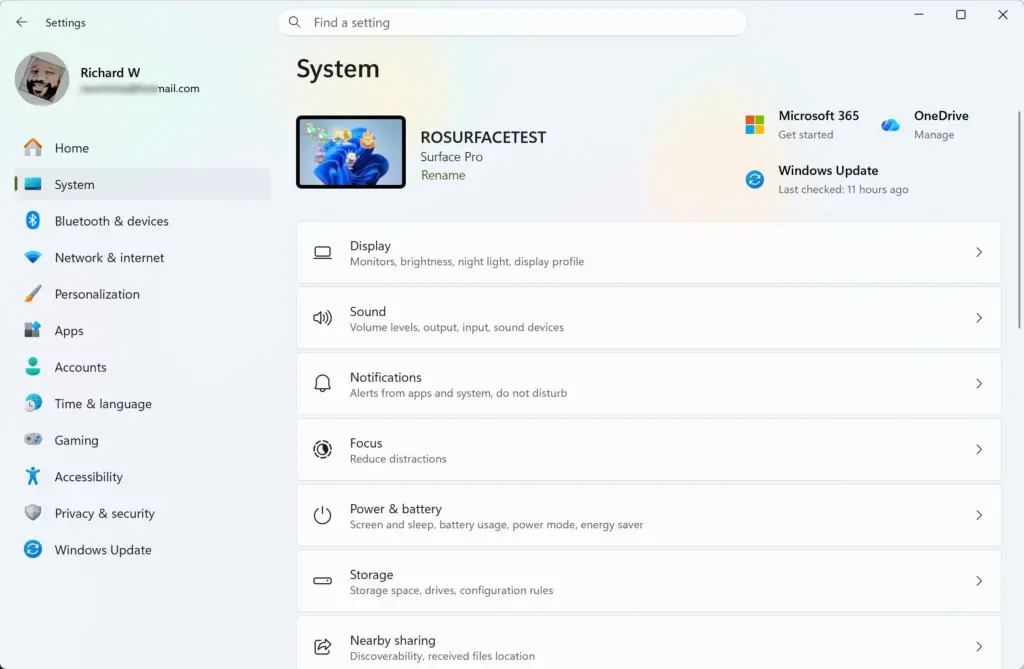
Settings › System - Look at the list of pages. If you see Focus assist, use the Focus assist steps further down. If you see only Notifications, use the Do not disturb steps in the next section.
Some builds show both pages while the change rolls out. If so, Notifications is the newer one.
Turn On Automatic Do Not Disturb on Current 🪟 Windows 11 Builds
Current builds keep the automatic rules in the Notifications page. Each rule is a checkbox that switches Do not disturb on when a condition is met, and off again when it ends.
Open the Automatic Rules
- Open Settings System Notifications
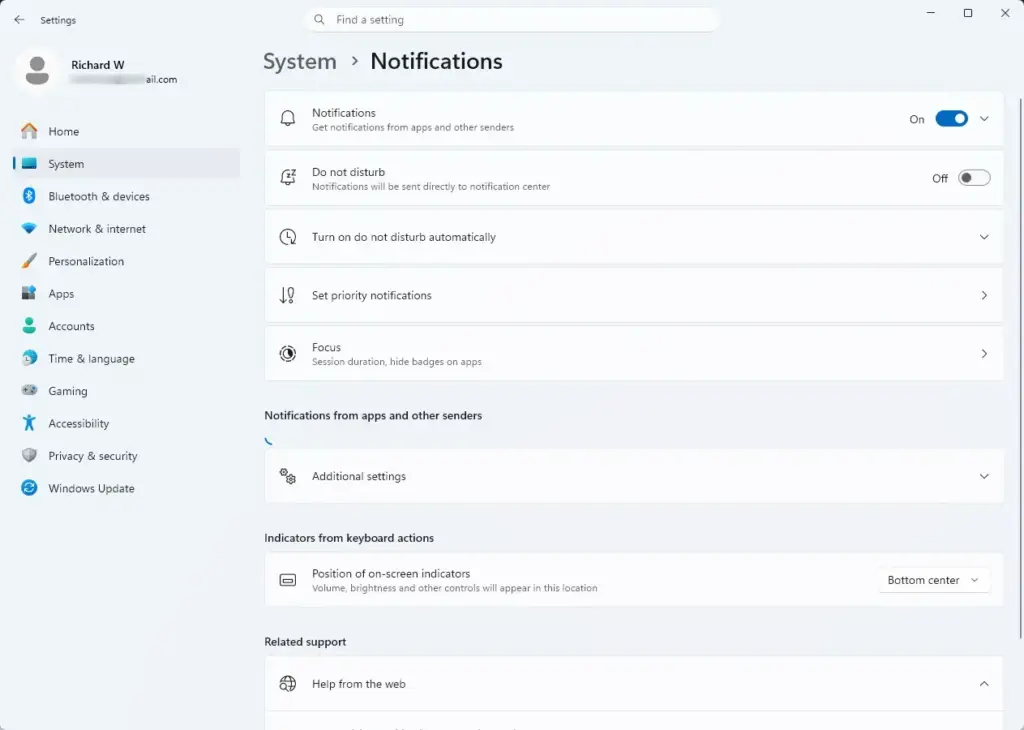
Settings › System › Notifications - Check that the Notifications toggle at the top is On. If it is off, Windows already blocks all app notifications, and Do not disturb has nothing left to silence.
- Find Do not disturb and select it to expand the options, or look for the Turn on do not disturb automatically section. You should see a list of checkboxes.
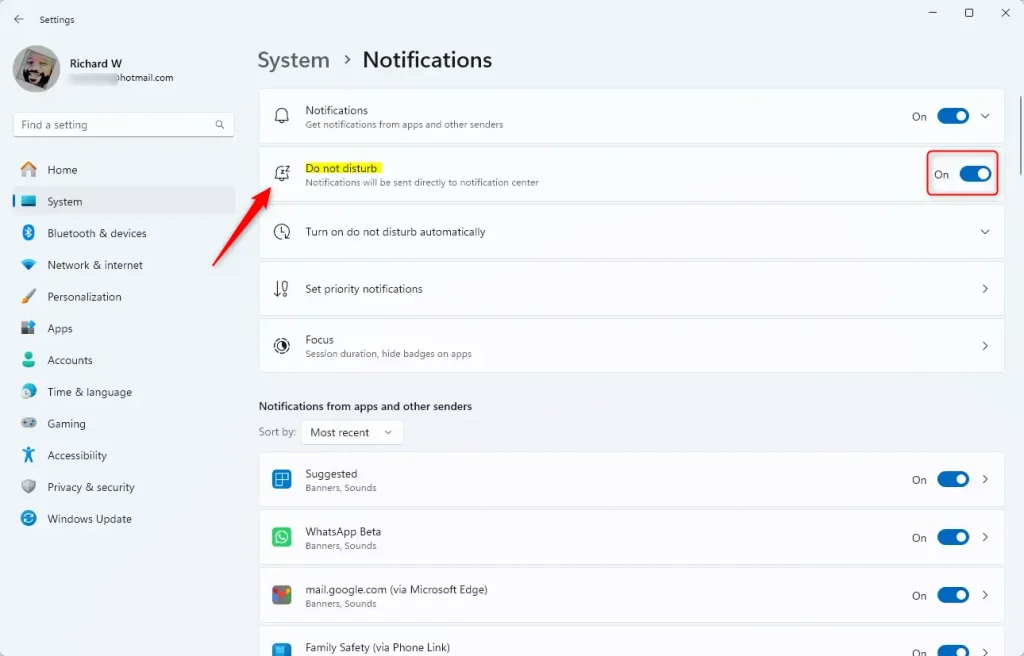
Choose When It Switches On
Tick the conditions you want. The wording varies slightly between builds, but these are the standard rules:
- When duplicating my display silences notifications while you mirror your screen to a projector or second display. This stops a private message from appearing in front of an audience.
- When playing a game silences notifications while Windows detects a game running.
- When using an app in full-screen mode silences notifications while an app fills the whole screen, such as a video player or a presentation.
- For the first hour after a Windows feature update silences notifications for an hour after a major update installs, so post-update prompts don't interrupt you.
- Tick the checkbox for each rule you want. The change saves as soon as you tick it.
- Close Settings. To test a rule, trigger it. Start a full-screen video, then press Win + N after you exit. Any notifications that arrived while the rule was active should be waiting in the Notification Center (the panel that holds your notifications and calendar).
Set Quiet Hours at a Fixed Time of Day
Time-based scheduling is where Windows 11 builds differ most. If your Turn on do not disturb automatically section includes a During these times option, tick it and set the start time, end time and repeat days. I can't confirm that every current build includes this option. If it isn't in your list, your build doesn't offer a time-of-day rule in Do not disturb. Use one of these instead:
- Switch Do not disturb on yourself when you want quiet. Press Win + N to open the Notification Center, then select the bell icon at the top. Select it again to switch Do not disturb off.
- Use a focus session from the Clock app, described later in this article. It runs for a length of time you choose, not at a set hour.
No registry value I can verify controls a Do not disturb schedule, so this article uses the Settings app only.
Schedule Quiet Hours With Focus Assist on Older 🪟 Windows 11 Builds
On builds that still show Focus assist, you can set recurring quiet hours. Focus assist has a Priority only mode (silences everything except the apps and contacts on a list you choose) and an Alarms only mode (silences all notifications except alarms).
Create the Schedule
- Open Settings System Focus assist
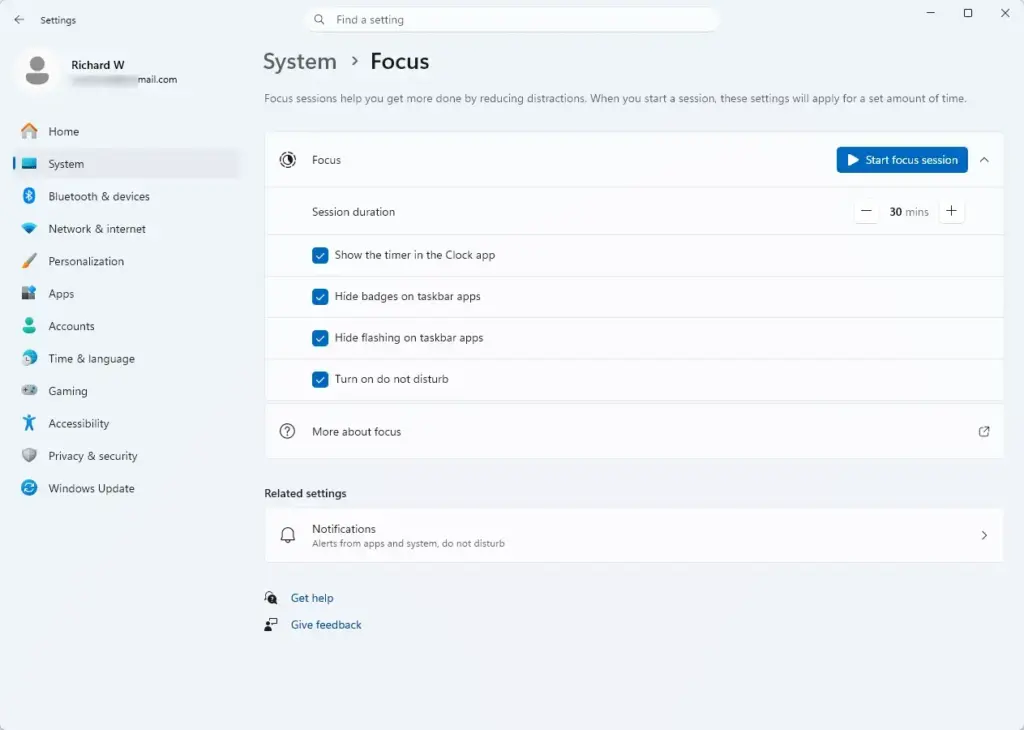
Settings › System › Focus - Scroll to the Automatic rules section. You should see a list of rules, each with its own toggle.
- Select During these times. A panel opens with the schedule options.
- Turn the During these times toggle to On.
- Set the Start time and the End time. Windows uses your PC's local time, so check that your time zone is correct if the schedule fires at the wrong hour.
- Open the Repeats list and choose Daily, Weekends, or Weekdays.
- Open the Focus level list and choose Priority only or Alarms only. Choose Alarms only for sleep hours so only your alarms make a sound.
- Select the back arrow to return to the rules list. The schedule is saved and starts at the next start time.
The same Automatic rules list includes rules for duplicating your display, playing a game, using an app in full-screen mode, and the first hour after a feature update. Turn each one on or off to suit you.
Choose What Still Gets Through
To edit that list, go to Settings System Focus assist and select Customize your priority list. If you don't want anything to break through during your schedule, use Alarms only instead.
Use a Focus Session in the Clock App
The Clock app can start a timed focus session that turns on Do not disturb for its duration. A focus session is not a recurring schedule, but it is the quickest way to get quiet for a set stretch of time. (This is also why Do not disturb may turn on without you triggering it—a focus session you started earlier could still be running.)
- Open the Start menu, type Clock, and select the Clock app.
- Select Focus sessions in the left pane.
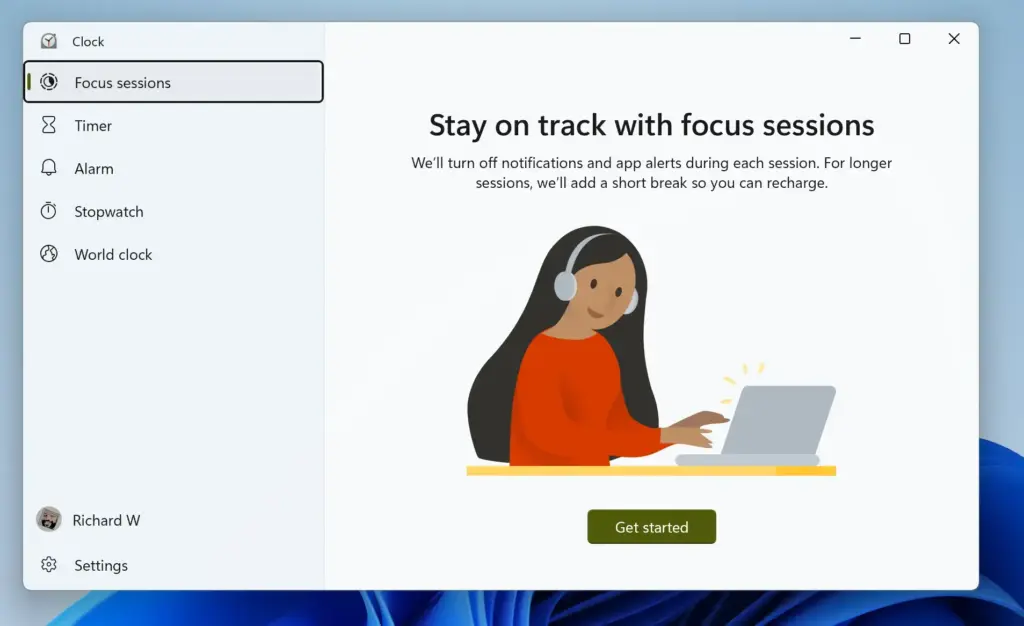
- Check the session settings. Look for a toggle to turn on Do not disturb during the session. Make sure it is on.
- Set the session length and select Start focus session.
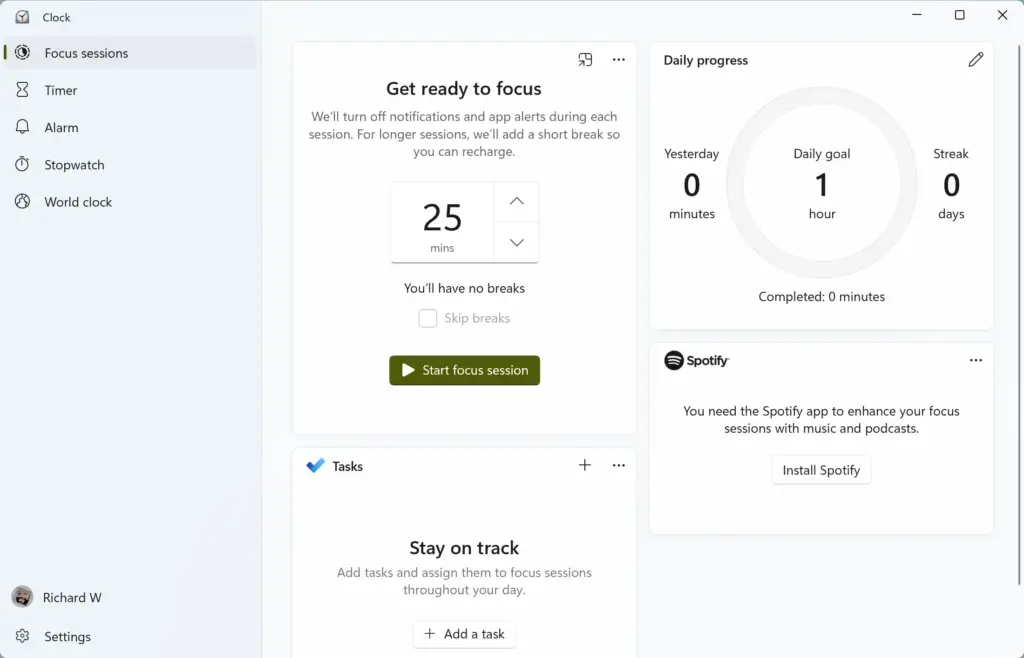
Do not disturb switches off again when the session ends. If you end the session early, it should switch off then. The Clock app's session options have changed between releases, so if a label differs, look for the one that mentions Do not disturb.
Why Automatic Do Not Disturb Turns On When You Don't Expect It
Automatic rules fire on conditions, not on a clock, so they can catch you out. Check these causes in order:
- Full-screen apps. A browser video, a presentation or a game in full-screen mode triggers the full-screen rule. Untick When using an app in full-screen mode if this happens too often.
- Second display or projector. Plugging in a screen set to duplicate your display triggers the duplicate-display rule.
- A recent feature update. The first-hour rule keeps Do not disturb on for an hour after a major update. It switches off by itself.
- A running focus session. A session started in the Clock app turns Do not disturb on until it ends.
- A leftover schedule. If you or someone else set a During these times schedule, it runs every day at the same time until you turn it off.
When the Option Is Missing or Greyed Out
If you can't find or change an automatic rule, work through these checks:
- The Notifications toggle is off. Turn on Notifications at the top of Settings System Notifications With it off, the rules have no effect.
- Your build has no time-based rule. If During these times isn't listed, your build doesn't offer it. See the workarounds in the section on fixed times above.
- Your PC is managed by an organisation. A work or school PC can have notification settings locked by an administrator. If a setting is greyed out and a message says your organisation manages some settings, ask your IT team. You can't override this from your account.
- Windows isn't up to date. Open Settings Windows Update and select Check for updates. Install what is offered and look again.
Turn Automatic Do Not Disturb Off Again
You can reverse every change in this article from the same page you used to set it. Each change takes effect immediately.
- Open Settings System Notifications
- Clear the checkbox for each automatic rule you ticked. If your build has Focus assist, open Settings System Focus assist and turn off each rule you enabled, including During these times.
- If Do not disturb is on right now, press Win + N and select the bell icon, or turn off the Do not disturb toggle in Notifications.
If This Didn't Work
If a rule still doesn't behave as expected, check Settings System Notifications for per-app settings. Individual apps can have their own notification toggles that override what you expect. A feature update can change how these pages look and may reset your choices, so recheck them after a major update. If you need alarm sounds to break through, test the setup before you rely on it overnight.
Does Windows have a do not disturb mode?
Yes. Windows 11 has Do Not Disturb, which stops notification sounds and banners while you work, game, or present. Open Settings System Notifications to turn it on. Older Windows 11 builds call this feature Focus assist instead.
How do I adjust the sleep mode settings in 🪟 Windows 11?
Open Settings and select System Power. Choose your screen timeout under Screen and sleep. Adjust how long Windows waits before your display turns off or the system sleeps. Changes take effect immediately without restarting.
How do I remove notifications from the taskbar in 🪟 Windows 11?
Open Settings System Notifications and scroll down. Find each app in the list below and toggle its notification switch off. You can also disable all notifications by turning off "Notifications" at the top of the page.
Is it possible to schedule do not disturb?
Yes. Open Settings System Notifications and find "Turn on do not disturb automatically." Set a start and end time, or choose to turn it on during focus sessions. It activates on your schedule without manual switching.
Was this guide helpful?

About the Author
Richard
Tech Writer, IT Professional
Richard is a writer at Geek Rewind who turns complex IT tasks into clear, step-by-step guides. He draws on years of hands-on experience in system administration and enterprise IT operations, focusing on Windows, Linux and WordPress: the problems people actually run into, and the fixes that work. His server and WordPress guides come from systems he runs himself. Richard builds and maintains the platform behind Geek Rewind, from its Ubuntu servers and Nginx configuration to its custom WordPress plugins. Many new tutorials start with readers' questions, and he's always glad to answer them in the comments.

No comments yet — be the first to share your thoughts!