How to Configure Typing Insights and Autocorrect in Windows 11 Time & Language Settings

Windows 11’s Typing settings page controls two separate features. Typing insights tracks how many words and keystrokes you type. Autocorrect fixes misspelled words as you type on a physical keyboard. Both live in the same place, Settings Time & language Typing, and you can turn each one on or off independently.
Typing insights is a tracking feature. It counts your total words typed, your total keystrokes, and which apps you type in most often. It doesn’t change how your keyboard works. Think of it as a fitness tracker for your typing habits.
Autocorrect does change what you type. When it’s on, Windows fixes common spelling mistakes on a physical keyboard as you go, the way word processors have worked for years. It is separate from the on-screen touch keyboard’s own autocorrect, which you control in a different place (covered below).
Open Settings with Win+I, then go to Time & language Typing. Switch on Typing insights to start counting your words, keystrokes and most-used apps, or switch on Autocorrect misspelled words to fix typos on a physical keyboard. Both toggles take effect immediately, with no restart needed, and insights only builds data from the moment you turn it on.
Before You Start
They’ll save you a troubleshooting detour later.
- No administrator rights needed. These are per-user settings stored in your own profile, not machine-wide settings. A standard account can change them without an admin password.
- No restart required. Toggles on this page take effect immediately. Switch to any app and test the change right away.
- Hardware keyboard vs. touch keyboard are different. The Autocorrect toggle on the Typing page only affects typing on a physical keyboard. The on-screen touch keyboard appears on tablets, or when you tap a text box on a touchscreen device. It has its own autocorrect switch, reached from the gear icon on the touch keyboard itself, not from this Settings page.
- Typing insights needs time to build data. Turning the toggle on doesn’t show you historical stats. It counts from that point forward. If you turn it on and check straight away, you’ll see mostly zeros. Type normally for a while, then come back.
How to Open the Typing Settings Page
- Open Settings by pressing Win+I. The Settings window opens.

Windows 11 Start menu with Settings gear icon highlighted. - Click Time & language in the left-hand navigation pane. A list of language and region options appears on the right.

Settings › Time & language - Click Typing in that list. This opens the page with every toggle covered in this guide: Typing insights, Text suggestions, Multilingual text prediction, Autocorrect misspelled words, Highlight misspelled words, and a link to Advanced keyboard settings.
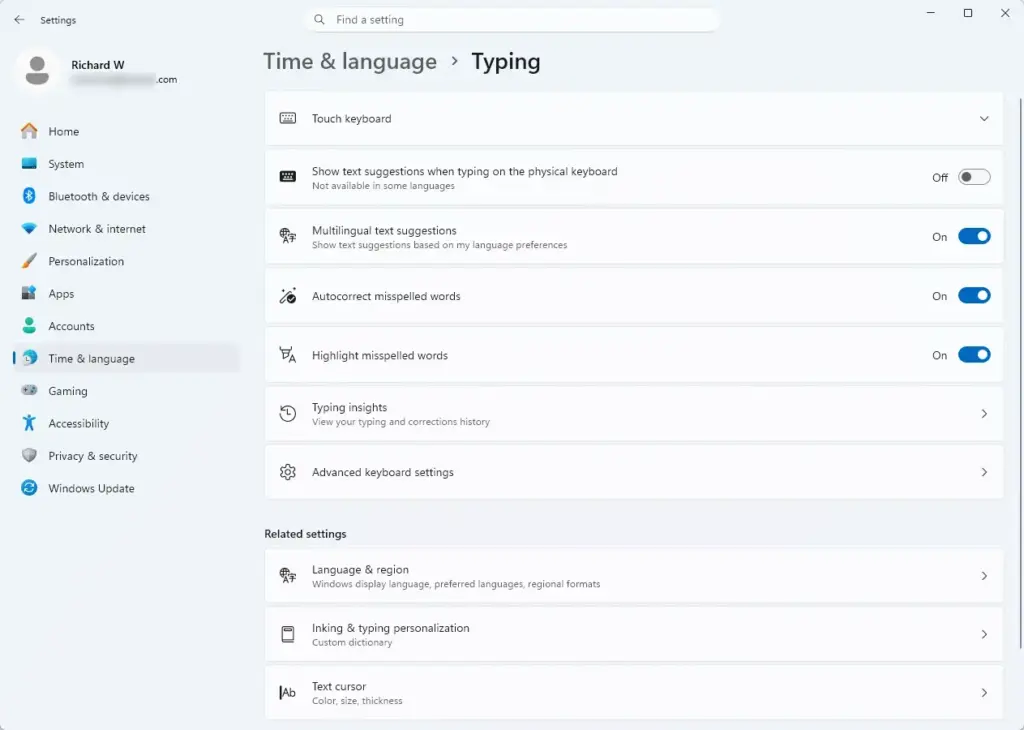
Settings › Time & language › Typing
How to Turn On Typing Insights
- Scroll to the Typing insights section on the Typing settings page. It’s described as giving you stats about your typing, such as word counts and your most-used apps.
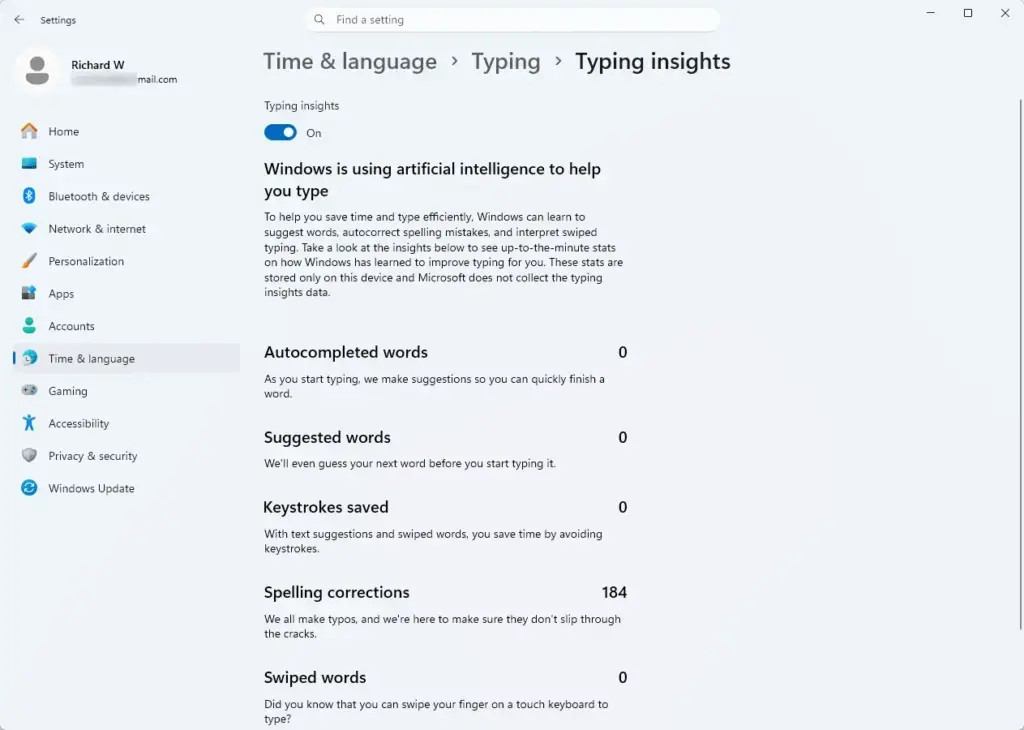
Settings › Time & language › Typing › Typing insights - Turn on the toggle switch next to Typing insights. The switch now shows as enabled. Windows starts tracking from this moment, and nothing else on screen changes.
If the toggle is missing entirely rather than just off, see the troubleshooting section further down. It’s usually a version issue, not something you did wrong.
How to View Your Typing Insights Stats
- Return to Settings Time & language Typing after you’ve used your keyboard for a while. A day or two gives you enough data to make the numbers meaningful.
- Look under the Typing insights toggle for a link or expandable section showing your stats. Depending on your Windows 11 version, you’ll see total words typed, total keystrokes, and the apps where you type most.
If your stats section looks different or shows fewer categories, that’s a version difference, not an error on your end.
How to Turn On or Adjust Autocorrect
- Find the Spelling section near the top of the Typing settings page.
- Turn on Autocorrect misspelled words. Windows now fixes common typos automatically as you type on a physical keyboard. This only works in apps that support Windows’ spelling correction. Most Microsoft apps and many others do, but some programs use their own spelling system instead.
- Turn on Highlight misspelled words if you also want a red squiggly underline on words Windows doesn’t recognize, without changing them for you. You can run this alongside Autocorrect. You can also use it alone if you’d rather review corrections yourself.
If you want suggestions as you type, not just corrections after the fact, check the Text suggestions section on the same page. Turn on the option for showing suggestions on the hardware keyboard. This is separate from Autocorrect. Suggestions show you a list of possible words to pick from, while Autocorrect changes the word for you without asking.
How to Turn Everything Back Off
Every toggle here is reversible with no side effects. Flipping one off just stops the behavior going forward.
- Go back to Settings Time & language Typing
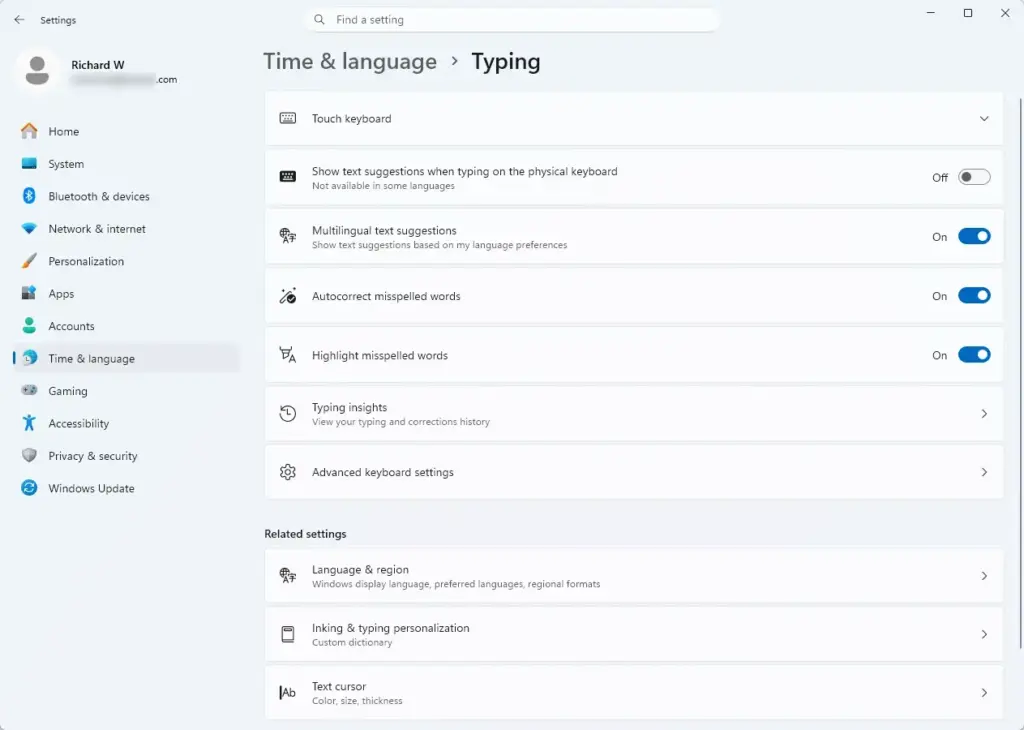
Settings › Time & language › Typing - Turn off Autocorrect misspelled words to stop Windows from changing what you type on a physical keyboard. Anything already corrected stays as it is. Only new typing is affected.
- Turn off Typing insights to stop the stats tracking. This doesn't necessarily erase numbers already collected. It only stops new collection. If you're turning it off for privacy reasons and want the history cleared too, look for a clear or reset option near the stats view before you turn the toggle off.
Why Typing Insights or Autocorrect Might Be Missing or Greyed Out
A few reasons these options might not behave as expected:
- Managed device policy. On a work or school PC, your IT administrator can lock these settings with group policy. If a toggle is greyed out with a note that it's managed by your organization, you can't change it yourself. Contact your IT department.
- Windows version is behind. Typing insights rolled out gradually across Windows 11 feature updates. If you don't see the option at all, check Settings Windows Update for pending updates. It may not have reached your build yet.
- You're testing on the wrong keyboard. If you turned on Autocorrect and nothing happens, confirm you're typing on a physical keyboard, not the on-screen touch keyboard. Also confirm you're testing in an app that uses Windows' spelling correction. Some browsers and office apps override the system setting with their own spellchecker.
What to Do Next
With Typing insights and Autocorrect set the way you want, check your keyboard language settings if you regularly type in more than one language. That's where Multilingual text prediction becomes useful. If autocorrect still misfires in a specific app, check that app's own spelling settings, since some programs ignore the system-wide setting entirely. If a physical keyboard is misbehaving in ways that go beyond spelling, a general keyboard troubleshooting pass in Windows 11 is the next step.
A few related typing tools are worth knowing about, because people often look for them on this same page:
- Voice typing: Click into a text field, then press Windows key + H to start dictating instead of typing. Voice typing generally needs an internet connection, so if it doesn't respond, check that first.
- Clipboard history: Press Windows key + V to open a list of items you've recently copied. If clipboard history is switched off, Windows offers to turn it on the first time you press the shortcut.
- Emoji panel: Press Windows key + . (the period key) to open the emoji picker in any text field. You can also search it by typing.
- Advanced keyboard settings: This is the link at the bottom of the Typing page, in Settings Time & language Typing It leads to extra keyboard options, such as input method and language bar behavior. These matter most if you use several keyboard layouts or languages.
Frequently asked questions
How to enable typing suggestions in 🪟 Windows 11?
Open Settings, go to Time & language Typing, and under Text suggestions turn on Show text suggestions when typing on the physical keyboard. Typing insights is separate: it only tracks your word count and keystrokes. Autocorrect fixes spelling mistakes as you type and has its own toggle in the same menu.
How do I set the correct time on 🪟 Windows 11?
Open Settings, go to Time & language Date & time, and turn on Set time automatically. Windows will sync with an internet time server. If that doesn't work, turn it off, click Change under Date and time, and set the correct date and time manually.
How do I enable autocorrect in 🪟 Windows 11?
Open Settings, go to Time & language Typing, then turn on Autocorrect. This fixes common spelling mistakes on your physical keyboard as you type. You can toggle it on or off independently from Typing insights in the same settings area.
How can I fix delayed typing in 🪟 Windows 11?
Delayed typing usually means your hard drive or CPU is busy. Open Task Manager (Ctrl+Shift+Esc), check what's using resources, and close unnecessary apps. If that doesn't help, restart your computer. Persistent delays may indicate a hardware problem or driver update needed.
Still have a question?
Answered by AI from this guide. Good questions may be added to this page — please don't include personal details.
Did this guide fix your problem?

About the Author
Richard
Tech Writer, IT Professional
Richard is a writer at Geek Rewind who turns complex IT tasks into clear, step-by-step guides. He draws on years of hands-on experience in system administration and enterprise IT operations, focusing on Windows, Linux and WordPress: the problems people actually run into, and the fixes that work. His server and WordPress guides come from systems he runs himself. Richard builds and maintains the platform behind Geek Rewind, from its Ubuntu servers and Nginx configuration to its custom WordPress plugins. Many new tutorials start with readers' questions, and he's always glad to answer them in the comments.
No comments yet — be the first to share your thoughts!