Installed app sizes and install dates in Windows 11 tell you how much storage your programs take up and when you added them to your PC. The Settings ⚙️ app lists every app on your system with its size and installation date, so you can see the biggest space users at a glance.
Advertisement
Checking this list helps you spot large games or unused software you no longer need, so you can clear disk space. This guide covers the Installed apps page in Settings first, then the classic Control Panel 🎛️, PowerShell, Command Prompt, Task Manager 📊 and a text-file export. Each method shows something slightly different, so use whichever fits your task.
⚡ Quick Answer
Open Settings ⚙️, select Apps from the left sidebar, then click Installed apps. You’ll see a list of all software on your PC with file sizes and installation dates. Use the Sort by dropdown to reorder by size or install date, or search for a specific app by name.
Advertisement
Using the Settings App
The Settings ⚙️ app is the quickest way to see app sizes and install dates in Windows 11. It works the same on Home and Pro. It covers Microsoft Store apps and most regular desktop programs.
Press the Win+I together to open Settings ⚙️. Windows 11 Start menu with Settings gear icon highlighted.
Select Apps from the left sidebar.
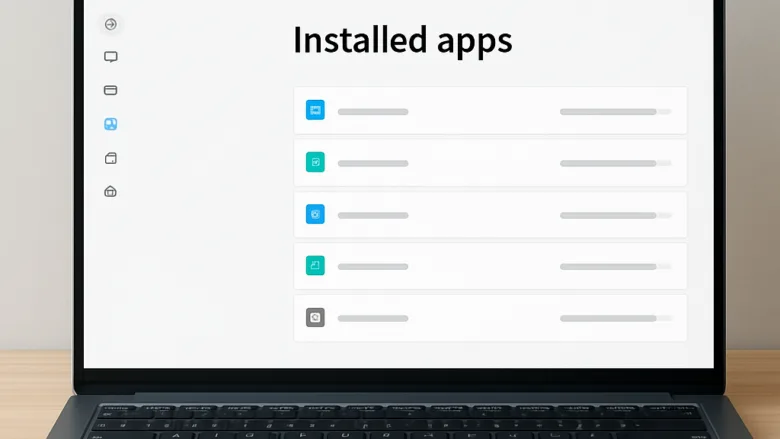
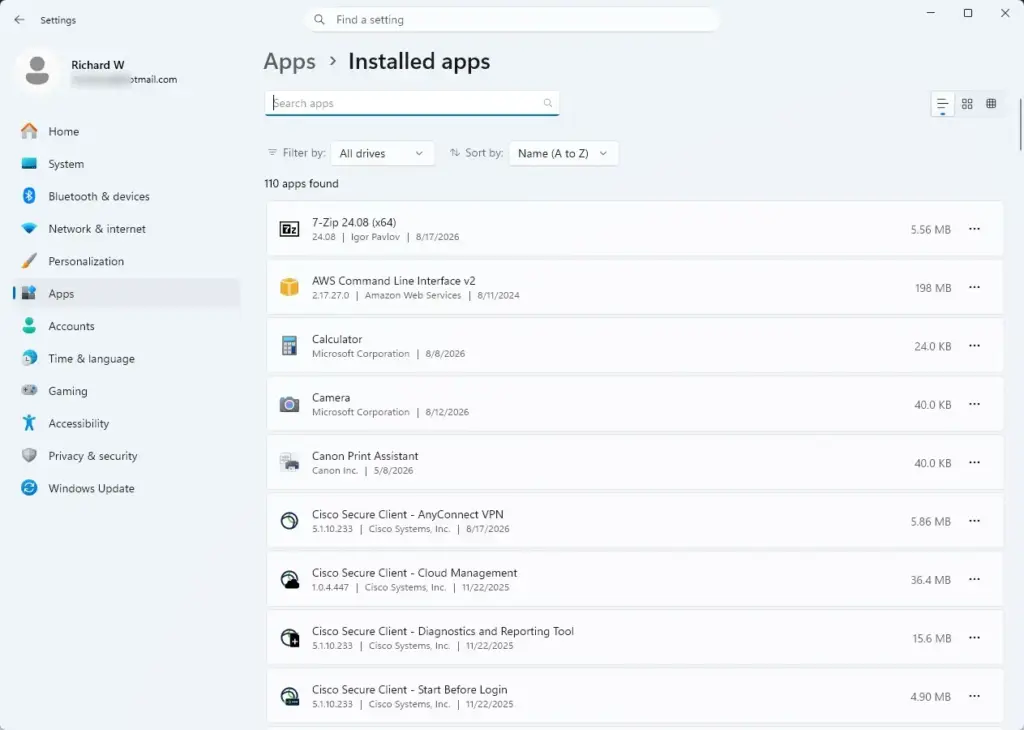
Click Installed apps. Settings › Apps › Installed apps You should now see the full list of software on your machine.
Read the list. Each entry shows the app name, its file size and its install date. Windows sorts the list alphabetically by default.
Use the Sort by drop-down above the list to reorder it. Sorting by size puts the biggest apps at the top, and sorting by install date shows your newest installs first.
Type an app name in the search 🔍 bar at the top of the page to find a specific application instantly.
Some apps show no size, or show a date that looks wrong. This usually happens when a program’s installer did not report that information to Windows. If you need to check one of those, try the Control Panel 🎛️ method below.
Using the Control Panel
The classic Control Panel 🎛️ is useful for older desktop software and system components that may not show up in the modern Settings menu. It also lets you sort by install date and size with one click on a column header.
Open the Start menu ⊞ search bar 🔍, type Control Panel, and press Enter. Control Panel The Control Panel 🎛️ window opens.
Click Programs and Features. In the default category view it sits under the Programs heading. If your view is set to large or small icons, select Programs and Features directly.
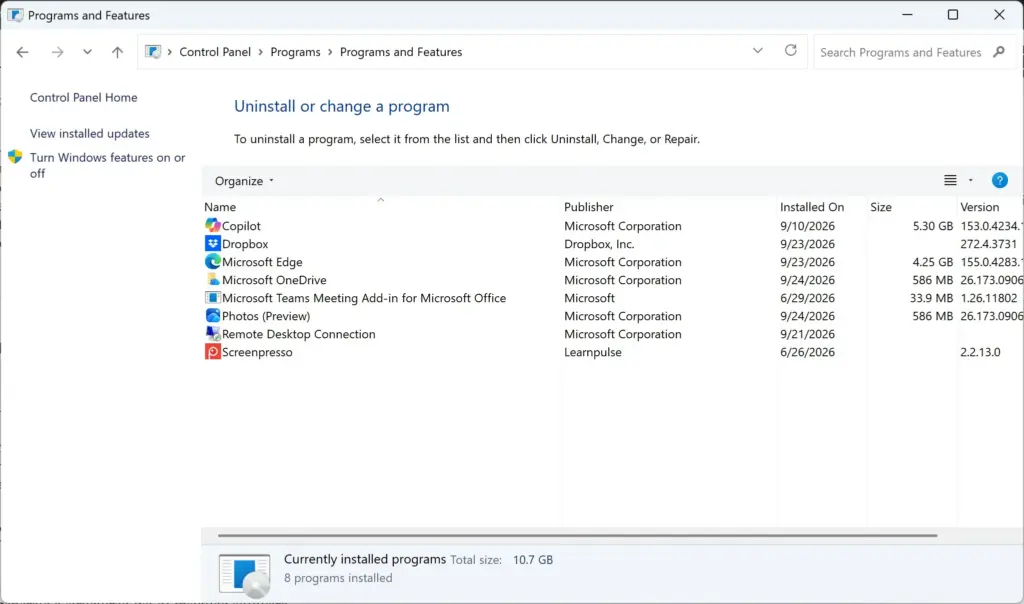
Look at the list that loads. Control Panel › Programs › Programs and Features It displays program names, publishers, installation dates and file sizes.
Click any column header, such as Name, Installed On or Size, to sort the list. Click the same header again to reverse the order.
If you cannot see the Size or Installed On column, right-click a column header and tick the missing column. Some programs leave the Size field blank. That is normal and does not mean the program is empty.
Advertisement
Using PowerShell
📝Good to KnowPowerShell is a command-line tool for managing computer settings.
You can use it to pull a complete record of every modern package and hidden system component on your computer. Standard users can run these commands, so you do not need administrator rights for this section.
Right-click the Start button and select Terminal or PowerShell. A window opens with a command prompt waiting for input.
Type the following command to retrieve all modern packages, then press Enter: Get-AppxPackage | Select-Object Name
To export a text file containing every traditional desktop application installed via the registry, type Get-ItemProperty HKLM:\Software\Microsoft\Windows\CurrentVersion\Uninstall\* | Select-Object DisplayName, DisplayVersion, Publisher, InstallDate | Format-Table -AutoSize and press Enter.
The first command prints its results straight into the window, so the list may be long. Scroll up in the window to read it. The registry-based command is the one to use for classic desktop programs, which the modern package list does not cover.
Using Command Prompt
Command Prompt can query your operating system and show a text list of installed programs. This method needs administrator rights, so you will see a User Account Control prompt along the way.
Open the Start menu search bar and type cmd.
Right-click Command Prompt in the results and select Run as administrator. [Requires administrator privileges] If a User Account Control prompt appears, click Yes.
Type Get-CimInstance -ClassName Win32_Product | Select-Object Name, Version and press Enter.
Wait while the system queries its database. The list of installed software then appears directly inside your command window.
If Run as administrator is missing, you are probably signed in with a standard account. Sign in with an administrator account, or ask the person who manages the PC. Querying can take a little while, so give it time before you close the window.
Advertisement
Auditing Hidden and Background Applications
Task Manager is not a size list, but it helps you find background services and helper tools that do not appear in standard software lists. Startup apps are programs that run automatically when your computer turns on.
Press Ctrl + Shift + Esc together to open Task Manager.
Click the Startup apps icon in the left sidebar. You should see the applications configured to run automatically when Windows boots.
Examine the Publisher and Status columns to identify unknown background utilities running on your device.
Switch to the Processes tab and expand any running application to view its associated background helper tasks and helper executables.
If Task Manager opens in a compact view, click More details first. To stop a startup app launching at boot, right-click it and choose Disable. You can undo that later by right-clicking it and choosing Enable. Disabling does not uninstall anything.
Exporting Your Installed Apps List
Exporting your installed apps list to a text file is a good habit before troubleshooting performance problems or reinstalling Windows. You end up with a record of what to put back afterwards.
Right-click the Start button and select Terminal (Admin). [Requires administrator privileges] Click Yes if a User Account Control prompt appears.
Type the export command with a destination path, such as Get-ItemProperty HKLM:\Software\Microsoft\Windows\CurrentVersion\Uninstall\* | Select-Object DisplayName | Out-File -FilePath C:\installed-apps.txt, and press Enter.
Open your C drive in File Explorer to verify that the text file was created. It should contain your complete application inventory.
⚠️WarningIf the file is missing, check that the command ran without an error message in the window.
Also check that the path in your command points to a folder you can write to. Save the file to a USB drive or cloud folder before reinstalling Windows, because a clean install may wipe the C drive.
Advertisement
What to do next
Once you know which programs are large or unused, the next step is clearing them out. Use Storage Sense to reclaim disk space on your device. You can find it in Settings under System, then Storage.
Frequently asked questions
What is my Microsoft app?
Your Microsoft apps are programs made by Microsoft, such as Microsoft Edge, Microsoft Teams, and Microsoft 365. To see which ones are on your PC, press Windows key + I to open Settings, select Apps, click Installed apps, and search for Microsoft.
What are all the apps available on 🪟 Windows 10?
Windows 10 has no single list of every app it offers. Apps come from three places: built-in apps like Calculator and Photos, programs you get from Microsoft Store, and desktop software you download yourself. To see what is on your PC, click Start and select All apps.
How to check installed apps in PC?
Open Settings by pressing Windows key + I. Select Apps, then click Installed apps. Each app shows its name, file size, and install date. Scroll the list or use the search box to find a specific program. Use the Sort by menu to order the list by size or install date.
Where is the registry path for installed Programs?
The main location is HKEY_LOCAL_MACHINE\SOFTWARE\Microsoft\Windows\CurrentVersion\Uninstall, which lists programs installed for all users. On 64-bit Windows, 32-bit programs appear under HKEY_LOCAL_MACHINE\SOFTWARE\WOW6432Node\Microsoft\Windows\CurrentVersion\Uninstall. Open Registry Editor to view them. Back up the registry before you change anything.
Still have a question?
Answered by AI from this guide. Good questions may be added to this page — please don't include personal details.
📬 Get new Windows tips in your inbox
One email when we publish something worth your time. No spam, unsubscribe anytime.
Richard is a writer at Geek Rewind who turns complex IT tasks into clear, step-by-step guides. He draws on years of hands-on experience in system administration and enterprise IT operations, focusing on Windows, Linux and WordPress: the problems people actually run into, and the fixes that work.
His server and WordPress guides come from systems he runs himself. Richard builds and maintains the platform behind Geek Rewind, from its Ubuntu servers and Nginx configuration to its custom WordPress plugins.
Many new tutorials start with readers' questions, and he's always glad to answer them in the comments.
One email when we publish a guide worth your time — new Windows features, the fixes that actually
work, and a heads-up when Microsoft breaks something. Unsubscribe in one click.
📬 Get new Windows tips in your inbox
One email when we publish something worth your time. No spam, unsubscribe anytime.




No comments yet — be the first to share your thoughts!