How to Enable or Disable Console lock display off timeout in Windows 11

You enable or disable the Console lock display off timeout in Windows 11 to manage how long your screen stays on after you lock your PC.
This setting specifically prevents your display from turning off while your PC is locked, overriding typical power saving configurations. Without this, Windows 11 defaults to turning off the lock screen after a mere 60 seconds to save power.
Keeping your screen active longer allows you to see notifications or system information without fully unlocking your computer. You can customize this duration to suit your needs.
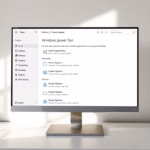
You can enable or disable the console lock display off timeout in Windows 11 by first unhiding the setting using the PowerCfg command or Registry Editor. Once visible, navigate to Advanced Power Settings to adjust the display timeout duration.
Prerequisites
Method 1Using PowerCfg Command Line
You can make the Console Lock Display Timeout setting reappear in Windows 11 using the PowerCfg command. If you don’t see the option to change how long your screen stays on before locking, this command will unhide it for you. Just open Command Prompt as an administrator and type the specific command.
- Press the Windows key, type cmd, right-click it, and select Run as administrator.
- Type the following command to unhide the setting:Code
powercfg /attributes SUB_VIDEO 8EC4B3A5-6868-48c2-BE75-4F3044BE88A7 -ATTRIB_HIDE
- Press Enter.
Method 2Using the Registry Editor
You can adjust the Console Lock Display Timeout setting through the Windows Registry Editor. This method lets you change how long your screen stays on before Windows locks. Be very careful when editing the registry, as mistakes can cause problems with your computer.
- Press ⊞ Win+R, type regedit, and press Enter.
- Navigate to:
HKEY_LOCAL_MACHINE\SYSTEM\CurrentControlSet\Control\Power\PowerSettings\7516b95f-f776-4464-8c53-06167f40cc99\8ec4b3a5-6868-48c2-be75-4f3044be88a7 - Double-click Attributes and change the value to 2 to make it visible in Power Options.
Method 3Group Policy (GPO) for IT Admins
For enterprise environments, use the Group Policy Management Console to enforce this setting across multiple machines. Navigate to Computer Configuration > Administrative Templates > System > Power Management > Video and Display Settings and enable the Specify the console lock display off timeout policy.
Summary Table
| Method | Requirement | Action |
|---|---|---|
| PowerCfg | Admin CMD | Run command to unhide |
| Registry | Regedit | Set Attributes to 2 |
| Control Panel | Standard User | Adjust advanced power settings |
Summary
You can manage your Console Lock Display Timeout by first making it visible using either the Command Prompt or Registry Editor, then adjusting it in your power settings.
Why does my screen turn off faster than the power plan settings?
Windows uses a specific hidden attribute called Console Lock Display Off Timeout for the lock screen. This setting overrides your standard power plan display settings to ensure security and power savings when the system is unattended, often defaulting to just one minute of inactivity.
Is this setting available on 🪟 Windows 11 Home edition?
Yes, the Console Lock Display Off Timeout setting is available on Windows 11 Home. While Group Policy is restricted to Pro and Enterprise editions, you can still use the Command Prompt or Registry Editor methods to unhide and adjust this setting on the Home edition.
Was this guide helpful?

About the Author
Richard
Tech Writer, IT Professional
Richard, a writer for Geek Rewind, is a tech enthusiast who loves breaking down complex IT topics into simple, easy-to-understand ideas. With years of hands-on experience in system administration and enterprise IT operations, he’s developed a knack for offering practical tips and solutions. Richard aims to make technology more accessible and actionable. He's deeply committed to the Geek Rewind community, always ready to answer questions and engage in discussions.


No comments yet — be the first to share your thoughts!