How to Enable or Disable Screen Savers in Windows 11
Screen savers in Windows 11 protect your computer when you step away.
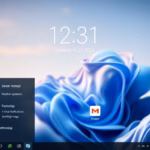
A screen saver is a moving picture or pattern that pops up on your screen if you haven’t used your PC for a certain amount of time. It helps keep your information private by locking the screen.
You can set your screen saver to appear after just one minute of inactivity. This prevents anyone from seeing what’s on your screen or accessing your files without permission.
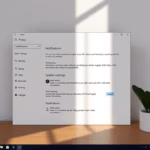
Open Settings, go to Personalization > Lock screen, and click Screen saver. Choose a screen saver, set the wait time, and optionally check “On resume, display logon screen” to lock your PC. Click OK to save.
How to enable screen savers in 🪟 Windows 11
You can enable screen savers in Windows 11 through the Settings app. Open Settings, navigate to Personalization, then Lock screen, and you’ll find the screen saver option. This lets you pick a visual animation or a simple clock to display when your computer is idle.
1. Press Windows key + I to open Settings.

2. Click Personalization in the left sidebar, then select Lock screen.
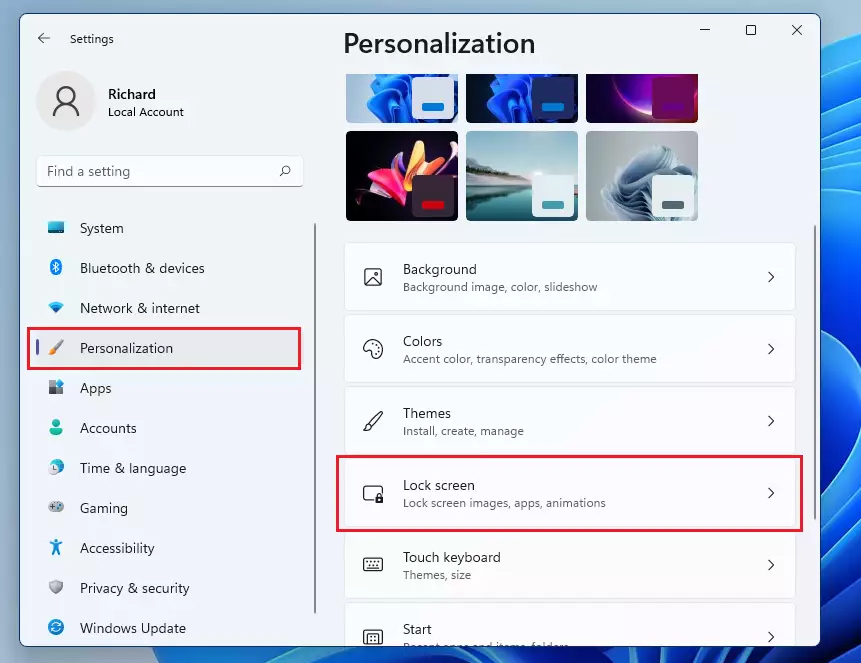
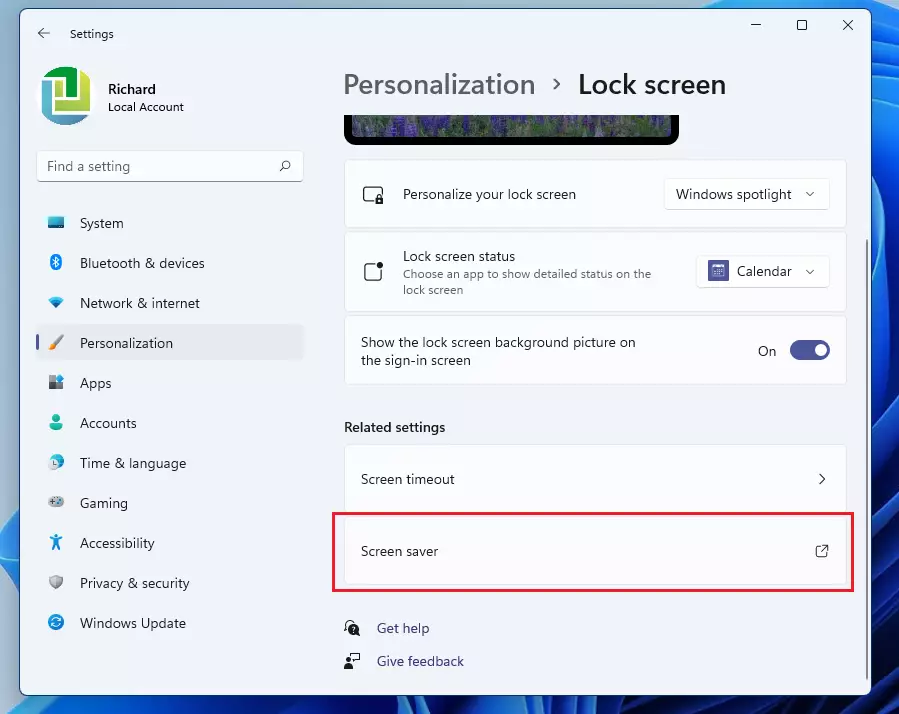
3. Scroll to the bottom and click Screen saver.
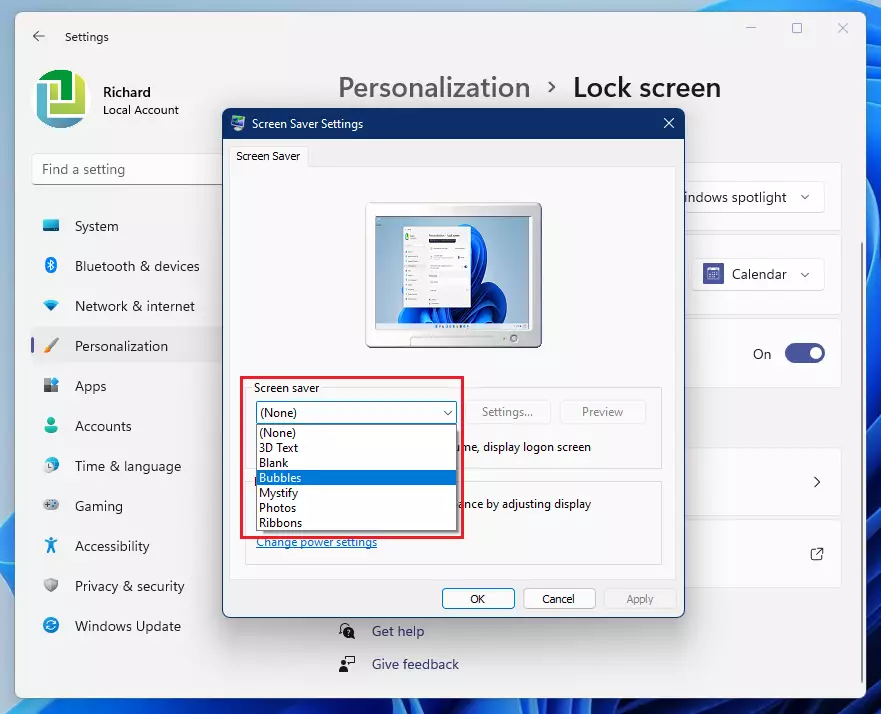
4. A small window will pop up. Choose your preferred screen saver from the drop-down menu.
The wait time for a Windows 11 screen saver is set in minutes. This setting controls the duration of computer inactivity before the chosen screen saver activates. For example, setting the wait time to 5 minutes means the screen saver will appear after 5 minutes of no keyboard or mouse activity.
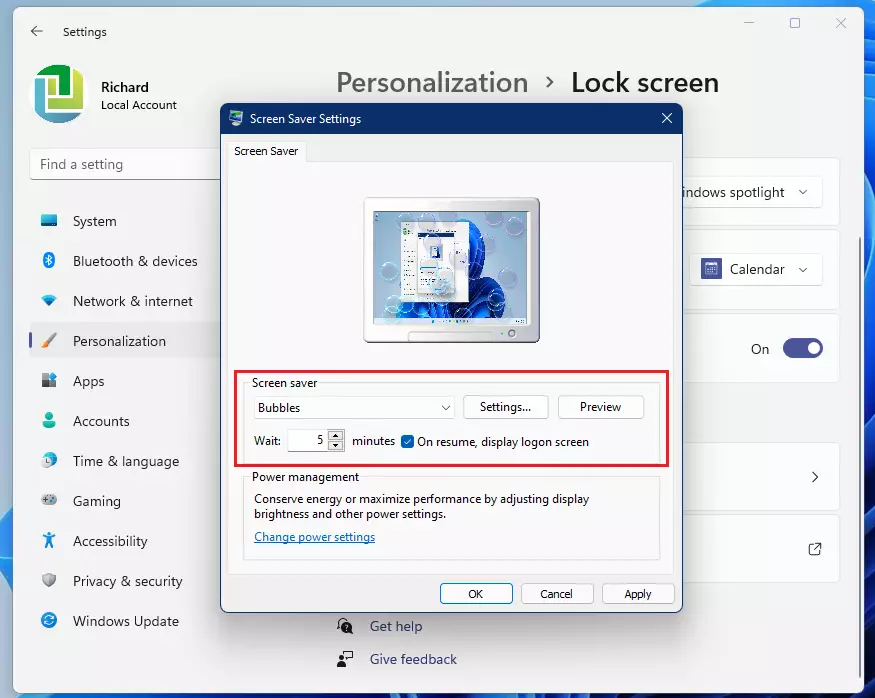
7. Click OK to save your changes.

Advanced Configuration: Registry and GPO
For more advanced control, screen saver settings can be adjusted using the Registry or Group Policy (GPO) in Windows 11. This is for users comfortable with more complex configurations. You can alter the wait time before the screen saver appears or disable it entirely. To adjust screen savers via the Registry, navigate to 🗝️HKEY_CURRENT_USER\Control Panel\Desktop and modify the ScreenSaveActive and ScreenSaveTimeOut keys. In a business setting, administrators often use Group Policy (GPO) to enforce screen saver settings across all company computers. This setting is located under User Configuration > Administrative Templates > Control Panel > Personalization.
Troubleshooting: Why is the screen saver missing or not working?
If your screen saver option is missing or not working in Windows 11, it might be turned off by your organization’s policy, or a connected device like a game controller could be keeping your PC awake.
How to set a custom photo as a screen saver
In the Screen Saver Settings dialog, select Photos from the drop-down list. Click Settings to browse your folders. You can choose any folder containing your favorite images. Windows will then cycle through these photos when the screen saver activates.
Summary
Screen savers in Windows 11 are an older feature that can still help lock your screen for security and add a personal touch, even though they aren’t needed for modern computer health.
Why is the screen saver option missing in 🪟 Windows 11 settings?
The screen saver option isn’t actually missing in Windows 11 settings; it’s just hidden in the older Lock screen menu, and your system administrator might have disabled it with a policy.
Does a screen saver save power on modern 🪟 Windows 11 monitors?
No, screen savers do not save power. In fact, they keep your monitor active and consuming electricity. If your goal is to save energy, you should use the ‘Power & Sleep’ settings to turn off the display or put the computer into sleep mode after a period of inactivity.
Was this guide helpful?

About the Author
Richard
Tech Writer, IT Professional
Richard, a writer for Geek Rewind, is a tech enthusiast who loves breaking down complex IT topics into simple, easy-to-understand ideas. With years of hands-on experience in system administration and enterprise IT operations, he’s developed a knack for offering practical tips and solutions. Richard aims to make technology more accessible and actionable. He's deeply committed to the Geek Rewind community, always ready to answer questions and engage in discussions.

No comments yet — be the first to share your thoughts!