How to Add or Remove Remote Desktop Users in Windows 11
You add or remove Remote Desktop users in Windows 11 to precisely control who can connect to your PC from another location.
Remote Desktop allows you to access and manage your Windows 11 computer as if you were physically present, making it a powerful tool for remote work and IT support.
This capability is restricted to specific Windows 11 editions, such as Pro, Enterprise, or Education, and is not available on Windows 11 Home.
By managing user permissions, you grant or revoke access for individuals, thereby enhancing your PC’s security and ensuring only authorized personnel can connect.
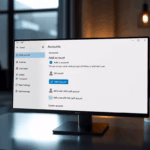
Open Settings, go to System, then Remote Desktop, and click the Remote Desktop users tile. Click Add to grant access or select a user and click Remove to deny it.
Is it Safe to Allow Remote Access?
Remote access presents security risks. If an unauthorized person gains access, that person could see your private files or install harmful software. Grant access only to people you trust. Always use strong, unique passwords for all your user accounts to keep unauthorized people out.
Methods to Manage Remote Desktop Users
You can manage Remote Desktop users through several methods in Windows 11. Choosing the best method depends on your preference. Review the following options to select the approach that works best for you.
| Method | Ease of Use | Best For |
|---|---|---|
| Settings App | Easy | General users |
| Control Panel | Moderate | Users familiar with legacy menus |
| Command Prompt | Advanced | Power users and IT admins |
Using the Settings App (Requires Admin Privileges)
You can easily add or remove people who can connect to your computer using Remote Desktop in Windows 11 through the Settings app, as long as you have administrator permissions. Just open Settings, find System, then select Remote Desktop, and click on the Remote Desktop users button to manage who has access.
- Open the Settings app and click System on the left side.
- Select the Remote Desktop tile.
- Click the Remote Desktop users tile.
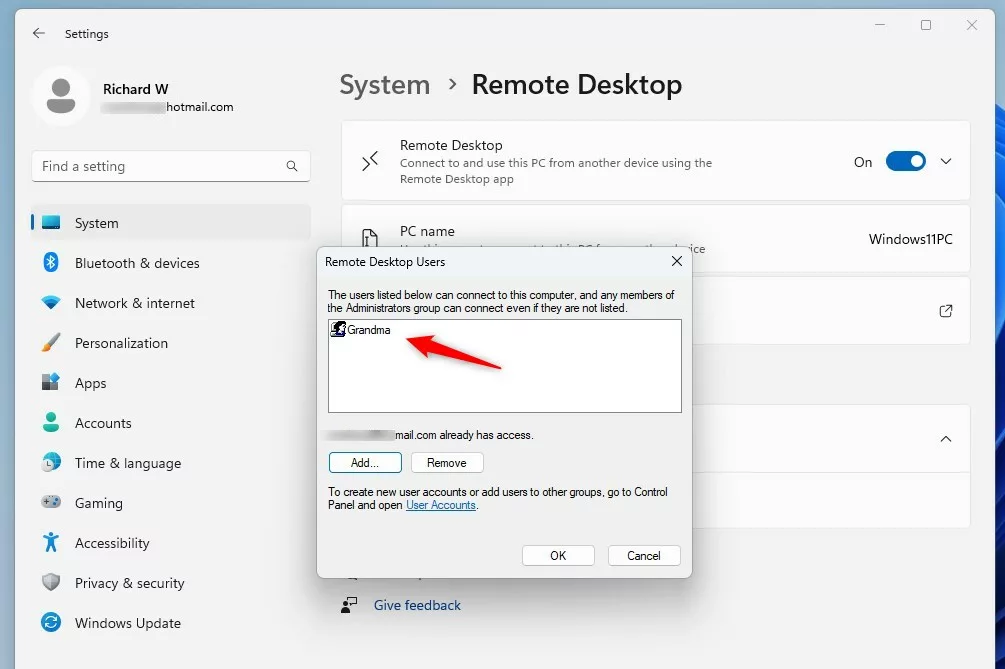
- Click Add to give someone access, or select a name and click Remove to take it away.
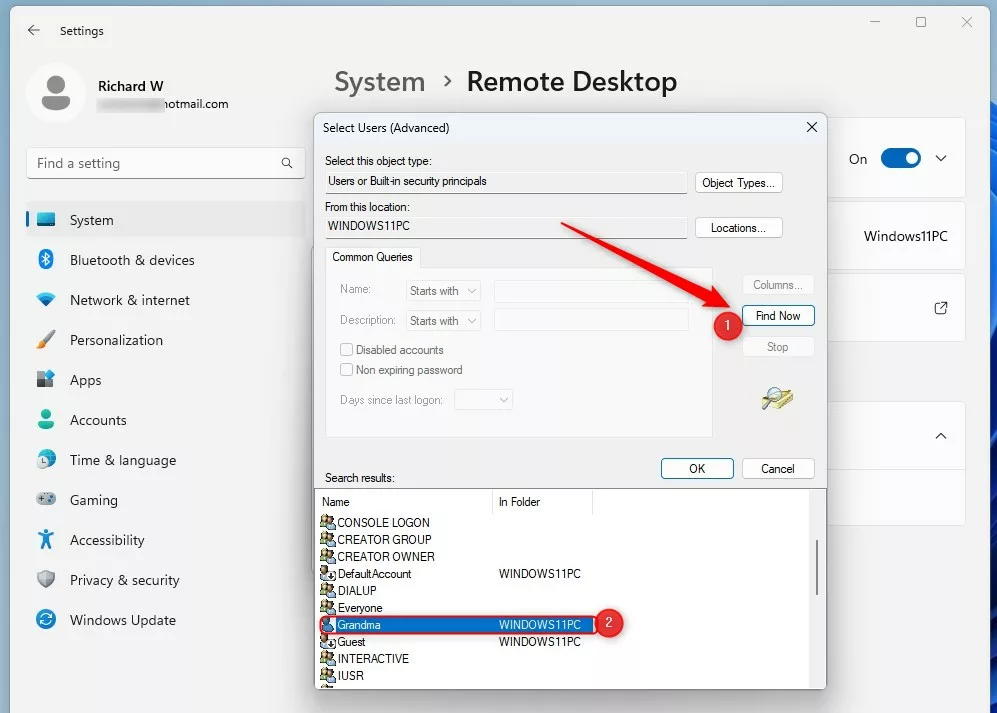
- In the pop-up, click Advanced to search for a specific user.
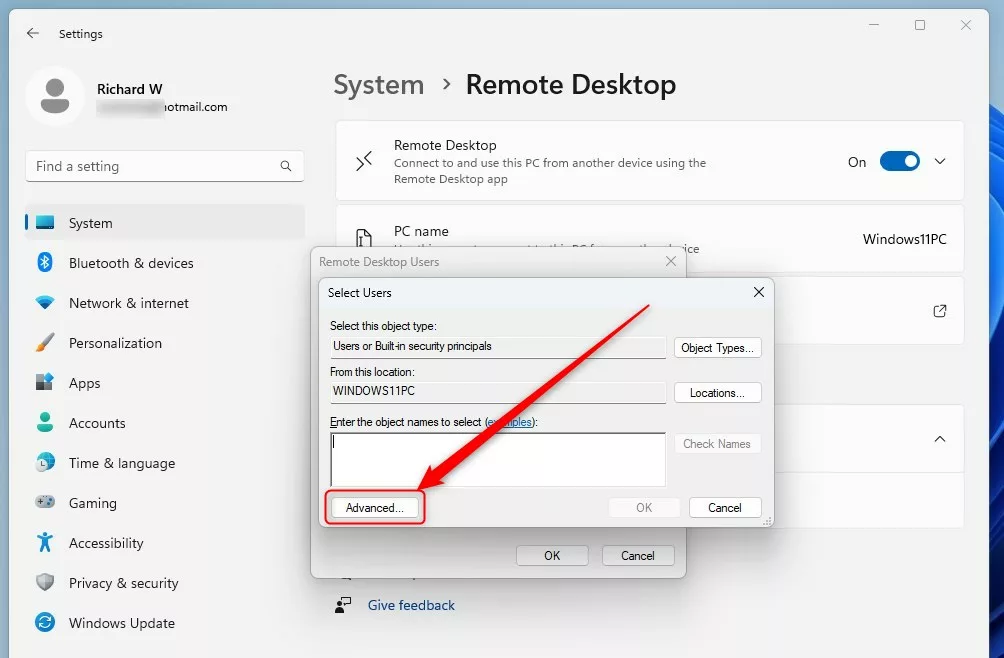
- Click Find Now, choose the user from the list, and click OK.
- Click OK again to finish.
Using the Control Panel (Requires Admin Privileges)
The classic Control Panel provides a direct path to system properties. Note: Adding or removing Remote Desktop users requires administrator privileges, meaning you must have administrative rights on the computer to perform this action.
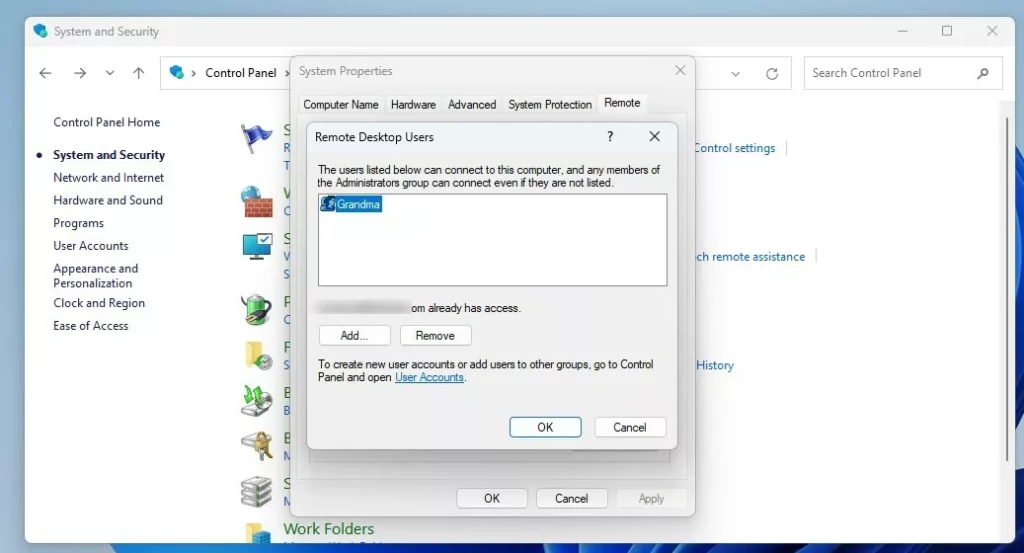
- Go to System and Security and click Allow remote access.
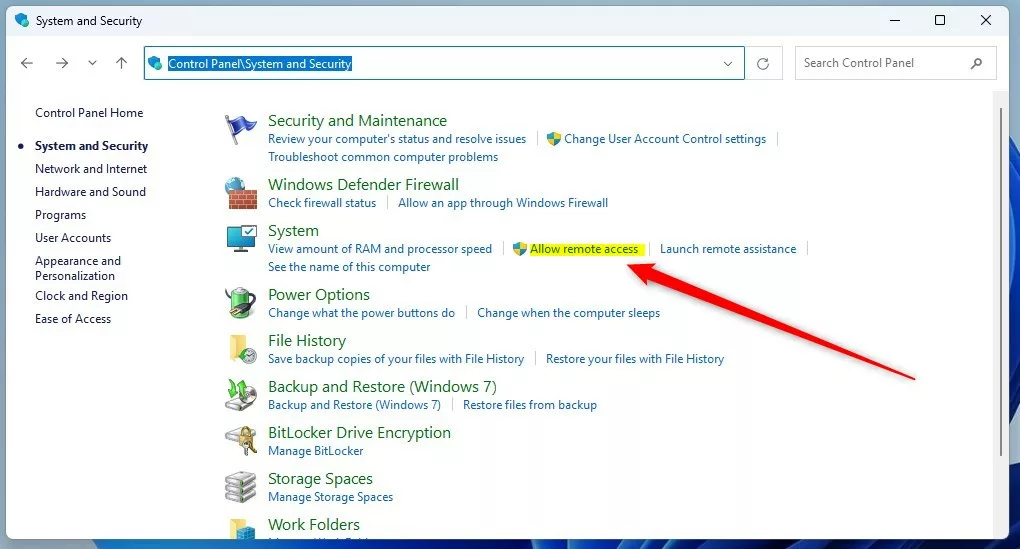
- On the window that appears, click Select Users.
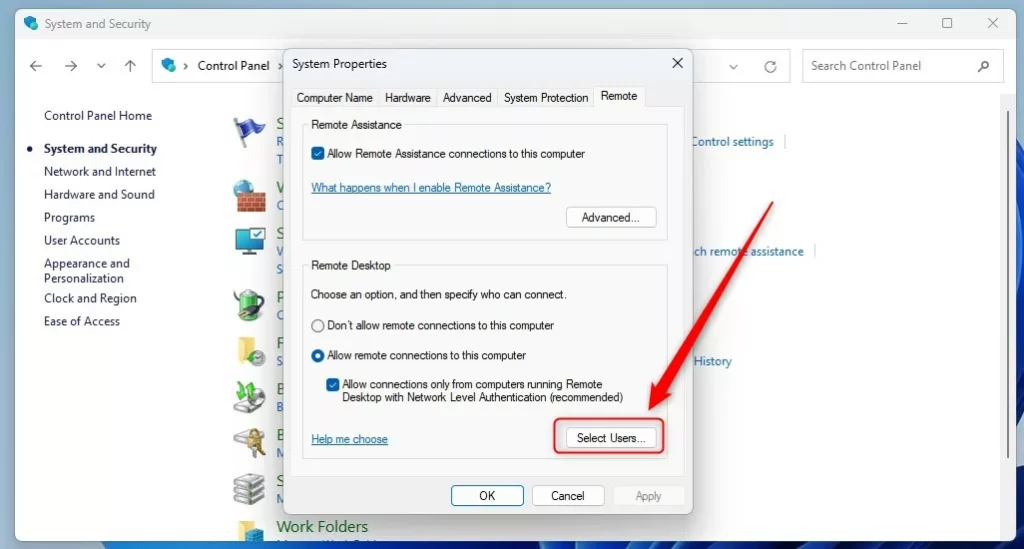
- Follow the same steps as above to add or remove names.
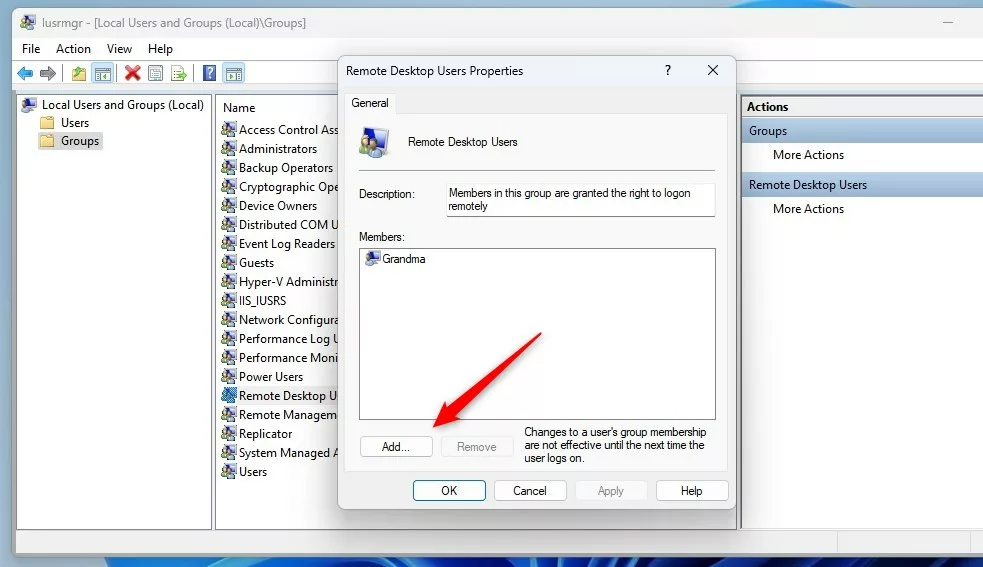
Using Local Users and Groups (Requires Admin Privileges)
You can use the lusrmgr.msc tool. Note: This action requires administrator privileges.
- Search for “lusrmgr.msc” and open it.
- Select Groups on the left and double-click Remote Desktop Users.
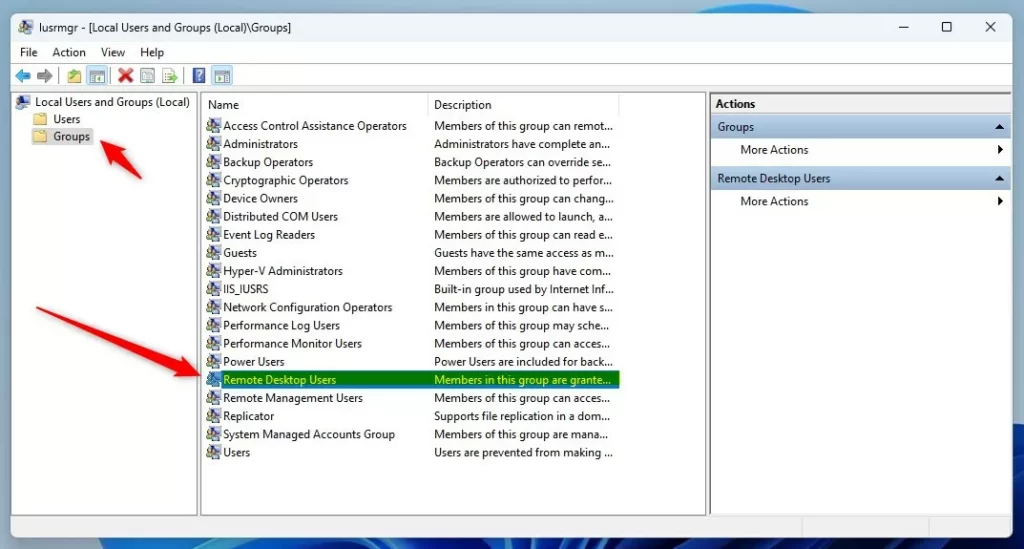
- Click Add or Remove to change who has access.
Using Command Prompt or PowerShell (Requires Admin Privileges)
You can manage Remote Desktop Users in Windows 11 using Command Prompt or PowerShell by running these tools as an administrator. To allow a user to connect remotely, type 'net localgroup "Remote Desktop Users" "UserName" /add'. To stop a user's remote connection, use 'net localgroup "Remote Desktop Users" "UserName" /delete'.
To add a user via Command Prompt:
net localgroup "Remote Desktop Users" "GenericUser" /add
To remove a user via Command Prompt:
net localgroup "Remote Desktop Users" "GenericUser" /delete
To add a user via PowerShell:
Add-LocalGroupMember -Group "Remote Desktop Users" -Member "GenericUser"
To remove a user via PowerShell:
Remove-LocalGroupMember -Group "Remote Desktop Users" -Member "GenericUser"
Troubleshooting Access Issues
If you’re having trouble connecting to your computer using Remote Desktop in Windows 11, checking a few common things can often fix the problem.
Summary
Keeping your Remote Desktop users list up-to-date in Windows 11 is key for security and making sure only the right people can connect.
Can I use Remote Desktop on 🪟 Windows 11 Home?
No, the Remote Desktop host feature is exclusive to Windows 11 Pro, Enterprise, and Education editions. While you can use the Remote Desktop client on Windows 11 Home to connect to other computers, you cannot host a remote session on a Home edition PC without third-party software.
Why is the ‘Select Users’ button greyed out?
The ‘Select Users’ button might be greyed out if Remote Desktop is turned off or if you’re not logged in with an administrator account. Ensure you have enabled remote connections in your system settings and that you have the necessary User Account Control (UAC) permissions to modify access lists.
Was this guide helpful?

About the Author
Richard
Tech Writer, IT Professional
Richard, a writer for Geek Rewind, is a tech enthusiast who loves breaking down complex IT topics into simple, easy-to-understand ideas. With years of hands-on experience in system administration and enterprise IT operations, he’s developed a knack for offering practical tips and solutions. Richard aims to make technology more accessible and actionable. He's deeply committed to the Geek Rewind community, always ready to answer questions and engage in discussions.


No comments yet — be the first to share your thoughts!