How to Add or Remove Lock in Power Menu on Start Menu in Windows 11
The Start menu’s power options in Windows 11 let you quickly shut down, restart, or sleep your PC, and it can also include a Lock option.
Locking your computer is a simple way to secure it when you step away, preventing others from accessing your files without your permission. It’s faster than signing out, as it keeps all your apps running in the background.
You can choose to add or remove the Lock option from the power menu, giving you control over how you secure your PC. This change involves adjusting a setting related to the Start menu’s behavior.
To make this adjustment, you’ll need administrator rights on your Windows 11 computer.
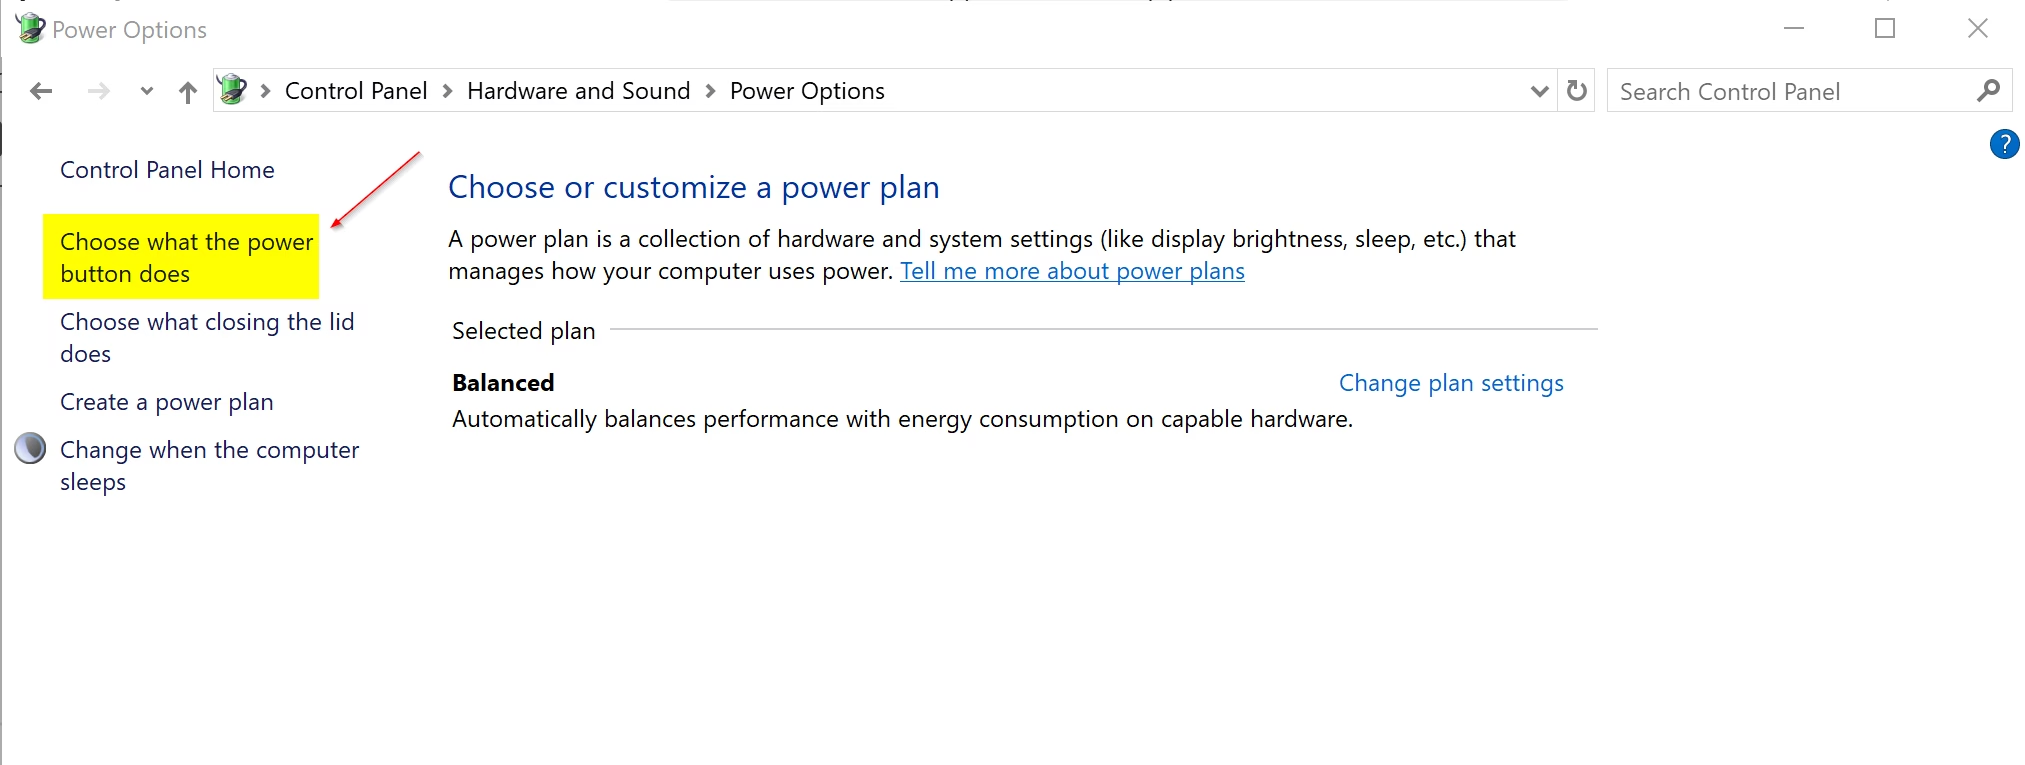
To add or remove the Lock option from the Start menu’s power menu, open Control Panel, go to Power Options, and then select “Choose what the power buttons do.” Change the link “Change settings that are currently unavailable” to check or uncheck the Lock option, then save changes.
Option One
Adding or removing the Lock option from the Start menu’s power menu in Windows 11 is achievable by changing your power button settings in the Control Panel. This method lets you choose whether the Lock choice shows up when you click the power icon on the Start menu.
- Open Control Panel (icons view), and click/tap on the Power Options icon.
- Click/tap on the Choose what the power buttons do link in the left pane.
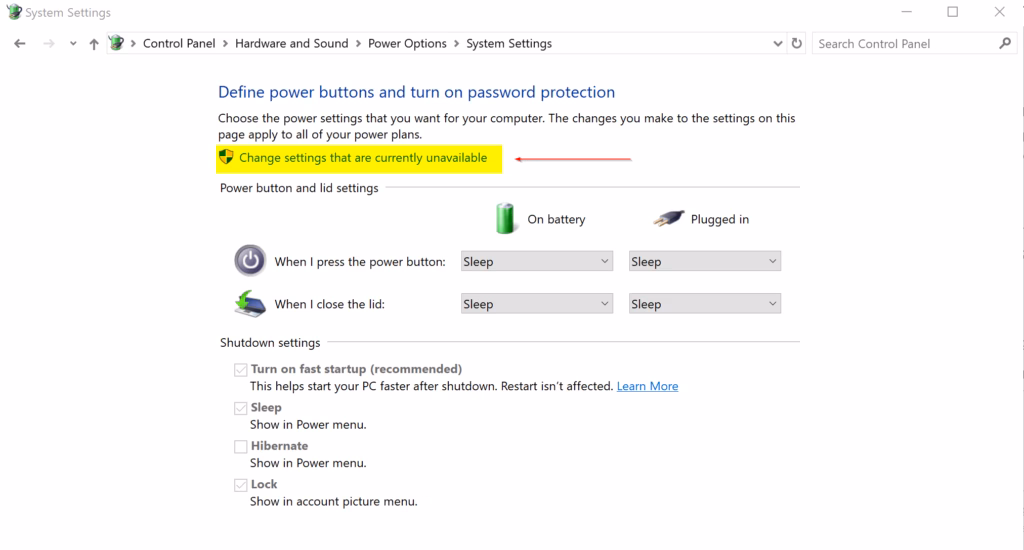
- Click/tap on the Change settings that are currently unavailable link.
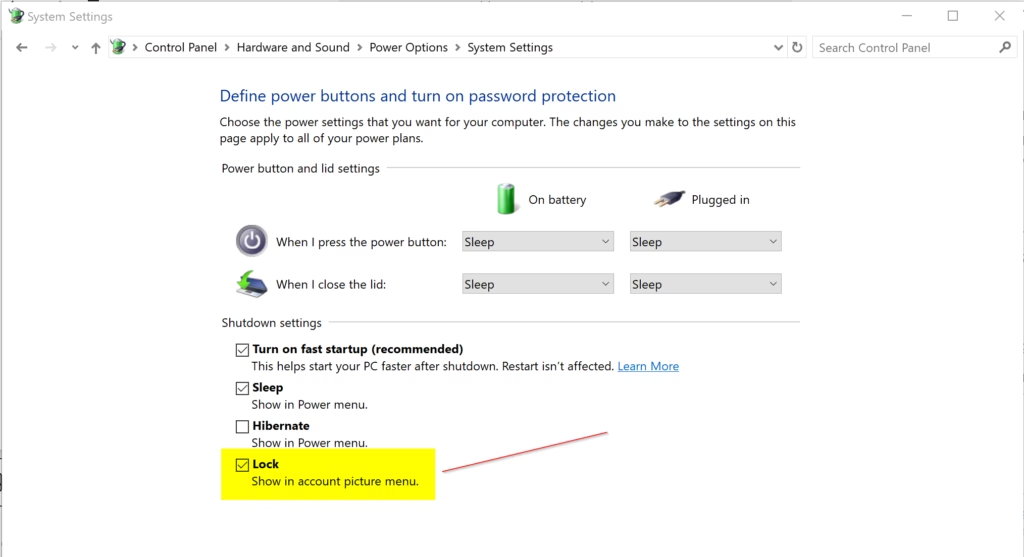
- Check (add – default) or uncheck (remove) Lock for what you want, and click/tap on Save changes.
- You can now close Control Panel if you like.
Option Two
For Windows 11 Pro, Enterprise, and Education users, the Local Group Policy Editor offers a way to manage the Lock option in the Start menu’s power menu. This tool allows you to control if the Lock choice appears when you click the power icon.
Heads up: The Local Group Policy Editor is only found in Windows 11 Pro, Enterprise, and Education editions. But don’t worry, all editions can use Option Three to achieve the same result.
⚠️ Admin Required: Open the Local Group Policy Editor (gpedit.msc).
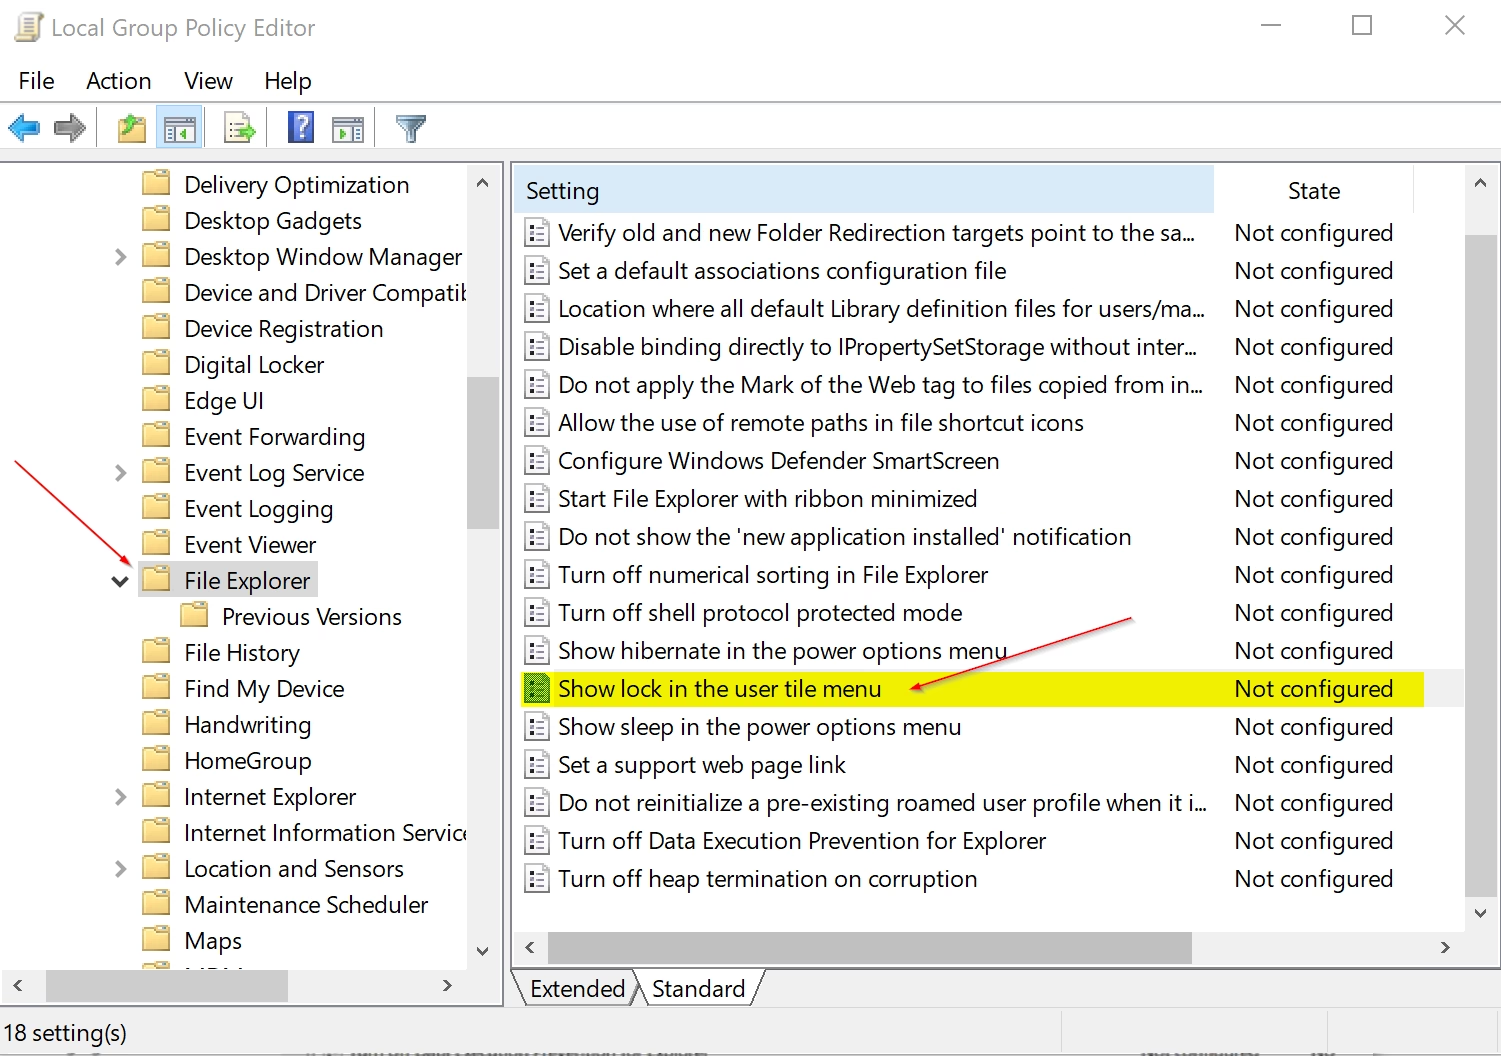
- Navigate to the policy location below in the left pane of the Local Group Policy Editor: Computer Configuration > Administrative Templates > Windows Components > File Explorer
- In the right pane of File Explorer in the Local Group Policy Editor, double click/tap on the Show lock in the user tile menu policy to edit it.
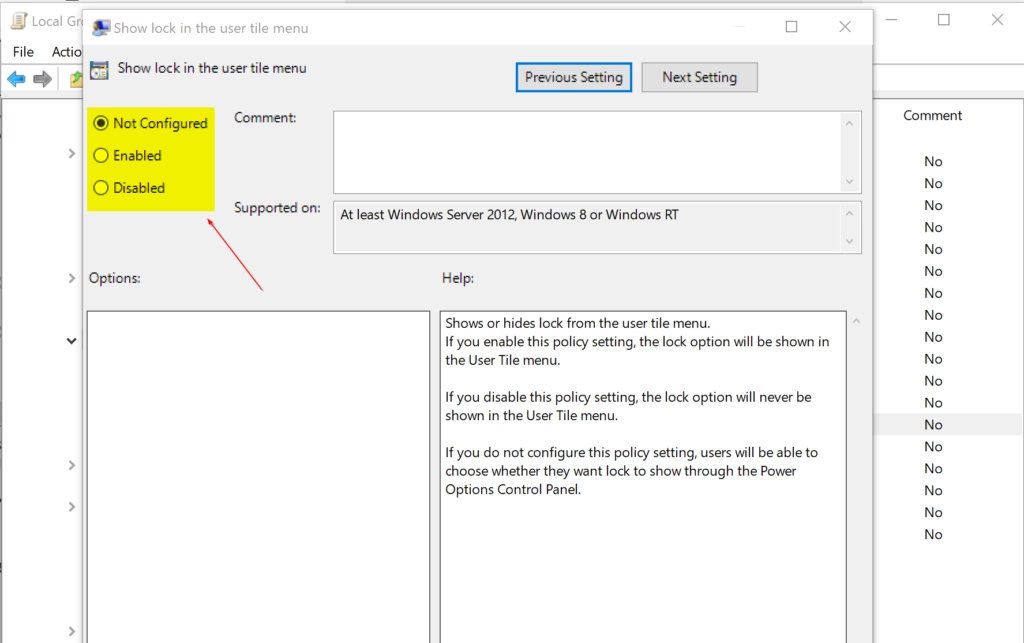
Enable Lock in Account Picture Menu
This setting defaults to allowing Option One. Choose ‘Not Configured’, then click OK and proceed to step 8.
- Select (dot) Not Configured.
- Click/tap on OK, and go to step 8.
Add Lock to Power Menu on Start Menu
This action prevents using Option One. Choose ‘Enabled’, then click OK and proceed to step 8.
- Select (dot) Enabled.
- Click/tap on OK, and go to step 8.
Remove Lock from Power Menu on Start Menu
- Select (dot) Disabled.
- Click/tap on OK, and go to step 8.
- Close the Local Group Policy Editor.
Option Three
Editing the Registry Editor allows you to add or remove the Lock option from the Start menu’s power menu in any Windows 11 version. This advanced method lets you directly change system settings to control the visibility of the Lock choice in your Start menu’s power options.
Add Lock to Power Menu on Start Menu
This is the default setting
reg add "HKLM\SOFTWARE\Microsoft\PolicyManager\default\Start\HideLock" /v value /t REG_DWORD /d 0 /f
reg add "HKLM\SOFTWARE\Microsoft\Windows\CurrentVersion\Explorer\FlyoutMenuSettings" /v ShowLockOption /t REG_DWORD /d 1 /f
reg delete "HKLM\SOFTWARE\Policies\Microsoft\Windows\Explorer" /v ShowLockOption /f
Remove Lock from Power Menu on Start Menu
reg add "HKLM\SOFTWARE\Microsoft\PolicyManager\default\Start\HideLock" /v value /t REG_DWORD /d 1 /f
reg add "HKLM\SOFTWARE\Microsoft\Windows\CurrentVersion\Explorer\FlyoutMenuSettings" /v ShowLockOption /t REG_DWORD /d 0 /f
reg add "HKLM\SOFTWARE\Policies\Microsoft\Windows\Explorer" /v ShowLockOption /t REG_DWORD /d 0 /f
That’s it!
Summary
Adding or removing the Windows 11 lock option from your Start menu’s power menu is achievable through three main methods. These include the Control Panel for simple changes, the Local Group Policy Editor for specific Windows editions, or the Registry Editor for all versions.
- Option One: Use Control Panel and Power Options (easiest method).
- Option Two: Use Local Group Policy Editor (available in Pro, Enterprise, and Education editions only).
- Option Three: Use Registry Editor (works on all editions).
How do I turn on the lock on 🪟 Windows 11?
From the user menu: Select Start, then select the user picture or Accounts icon. Choose Lock (in earlier Windows 11 versions, Lock appears under this menu instead of the power icon).
Was this guide helpful?

About the Author
Richard
Tech Writer, IT Professional
Richard, a writer for Geek Rewind, is a tech enthusiast who loves breaking down complex IT topics into simple, easy-to-understand ideas. With years of hands-on experience in system administration and enterprise IT operations, he’s developed a knack for offering practical tips and solutions. Richard aims to make technology more accessible and actionable. He's deeply committed to the Geek Rewind community, always ready to answer questions and engage in discussions.


No comments yet — be the first to share your thoughts!