How to Change Date in Windows 11
Ready to adjust your Windows 11 computer’s date? This guide walks you through it. Changing the date can be useful if it’s showing the wrong day or you want to set it manually.
⚠️ Admin Required: You’ll need administrator privileges for this. That means you need to be signed in as an administrator, the user account that can make system-wide changes on the computer.
Open Settings, go to Time & language, then Date & time. Turn off “Set time automatically” and click “Change” to manually set the date. Alternatively, use Control Panel or command-line tools like Command Prompt or PowerShell with administrator privileges.
What is a Calendar Date?
A calendar date is simply the specific day shown on a calendar, like today’s date. Windows usually shows the date in the format MM/DD/YYYY (for example, 06/19/2024 means June 19, 2024).
Option 1Change Date Using Windows Settings
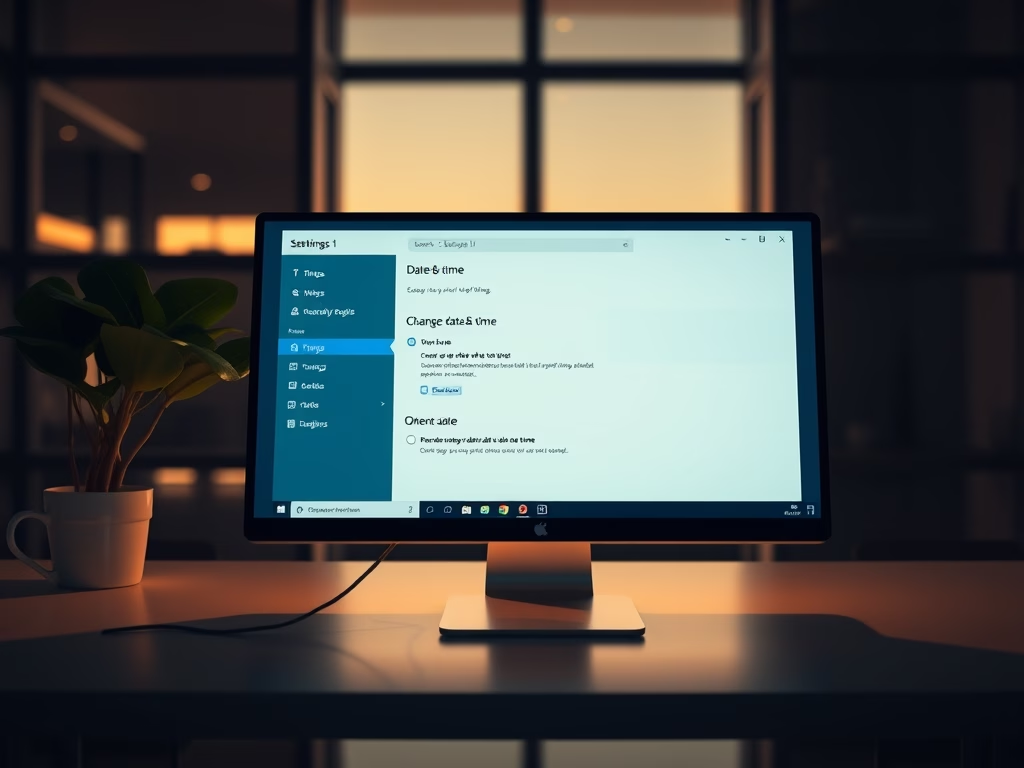
- Press the ⊞ Win+I keys on your keyboard to open Settings.
- On the left menu, click Time & language. Then click Date & time on the right side.
- Turn off Set time automatically by clicking the switch (so you can change the date manually).
- Click the Change button under Set the date and time manually.
- Pick the date you want and click Change to save it.
- You can close the Settings window now.
You can easily change the date in Windows 11 using the built-in Settings app. First, open Settings by pressing the Windows key and the ‘I’ key together. Then, go to the ‘Time & language’ section and select ‘Date & time’ from the right-hand menu.


Option 2Change Date Using Control Panel
- Open the Control Panel. You can do this by typing Control Panel in the search box on the taskbar, then clicking it.
- Make sure the view is set to Small icons or Large icons.
- Click on Date and Time.
- In the window that opens, click the Change date and time… button.
- Pick your new date and click OK.
- Click OK again to close the Date and Time window.
- You can now close the Control Panel.

Changing the date in Windows 11 is also possible through the classic Control Panel. To start, open the Control Panel by searching for it in the taskbar’s search box. Make sure your view is set to ‘Small icons’ or ‘Large icons’ before clicking on ‘Date and Time’.

Changing the date in Windows 11 is also possible through the classic Control Panel. To start, open the Control Panel by searching for it in the taskbar’s search box. Make sure your view is set to ‘Small icons’ or ‘Large icons’ before clicking on ‘Date and Time’.
Option 3Change Date Using Command Prompt
For those who prefer using commands, you can change the date in Windows 11 using the Command Prompt. You’ll need to open it as an administrator first. Then, type the ‘date’ command followed by the date in MM/DD/YYYY format and press Enter.
- ⚠️ Admin Required: Right-click the Start button and choose Windows Terminal (Admin). If it opens PowerShell by default, click the dropdown arrow (next to the + tab) and select Command Prompt.
- Type the command below and press Enter:
date MM/DD/YYYY - Replace MM with the month number (like 06 for June), DD with the day number, and YYYY with the year.
- For example, to set the date to June 19, 2024, type:
date 06/19/2024 - Close the terminal when done.
Option 4Change Date Using PowerShell
If you’re comfortable with PowerShell, it offers another quick way to change the date in Windows 11. Open Windows Terminal as an administrator and select PowerShell. You can then use the ‘Set-Date’ command with the date formatted as MM/DD/YYYY to update it.
- ⚠️ Admin Required: Right-click the Start button and open Windows Terminal (Admin). If it opens Command Prompt by default, click the dropdown arrow and pick Windows PowerShell.
- Type the command below and press Enter:
Set-Date -Date "MM/DD/YYYY" - Fill in MM, DD, and YYYY with the month, day, and year you want.
- Example for June 19, 2024:
Set-Date -Date "06/19/2024" - Close the terminal when finished.
Summary
You’ve learned four different ways to change the date on your Windows 11 computer. The easiest method for most people is using the Windows Settings app. The Control Panel offers a similar approach. If you like using commands, Command Prompt and PowerShell are faster options, but remember you need administrator rights for those.
Was this guide helpful?

About the Author
Richard
Tech Writer, IT Professional
Richard, a writer for Geek Rewind, is a tech enthusiast who loves breaking down complex IT topics into simple, easy-to-understand ideas. With years of hands-on experience in system administration and enterprise IT operations, he’s developed a knack for offering practical tips and solutions. Richard aims to make technology more accessible and actionable. He's deeply committed to the Geek Rewind community, always ready to answer questions and engage in discussions.


No comments yet — be the first to share your thoughts!