How to Add or Remove Notification Bell Icon on Your Windows 11 Taskbar

Want to clean up your Windows 11 taskbar? You can add or remove the notification bell icon to better manage your system alerts. This icon, typically found near the clock in the system tray, shows you any unread notifications.
Windows 11 brought this feature, giving you more control over your taskbar’s look and feel. Thankfully, you can change its visibility directly within the Settings app.
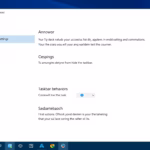
Open Settings, go to System, then Notifications. Toggle the “Show notification bell icon” option to add or remove it from your taskbar. This instantly updates your taskbar’s appearance.
Why Does This Matter?
The notification bell lets you know when new messages or alerts arrive. A lit-up bell indicates you have notifications waiting. An empty bell means everything is quiet. You might prefer to see it, or perhaps hide it. Choose what works best for your workflow.
Option 1Use Settings (Easiest Method)
- Press Windows key + I to open Settings.
- Click System on the left side.
- Click Notifications on the right side.
- Or use this link to go straight there: Open Notifications Settings

You can easily add or remove the notification bell icon on your Windows 11 taskbar using the Settings app, which is the simplest way to manage this feature.
- Click the arrow next to Notifications to see all options.
- Check the box for Show notification bell icon to add the bell.
- Uncheck the box to remove the bell.
You can easily add or remove the notification bell icon on your Windows 11 taskbar using the Settings app, which is the simplest way to manage this feature.
Click the arrow next to Notifications to reveal all the options. Check the box for ‘Show notification bell icon’ to add it, or uncheck it to remove it. Your changes take effect immediately. Then, close Settings.
Option 2Use Registry Commands (Advanced Users)
For advanced users, adding or removing the Windows 11 notification bell icon can be done quickly using specific registry commands, but you’ll need administrator rights to run them.
To add the notification bell:
reg add "HKEY_CURRENT_USER\Software\Microsoft\Windows\CurrentVersion\Explorer\Advanced" /v ShowNotificationIcon /t REG_DWORD /d 1 /fTo remove the notification bell:
reg add "HKEY_CURRENT_USER\Software\Microsoft\Windows\CurrentVersion\Explorer\Advanced" /v ShowNotificationIcon /t REG_DWORD /d 0 /fCopy the command you need. Then, open Command Prompt or PowerShell – these are Windows tools for running commands. Paste your copied command and press Enter.
Option 3Edit the Registry Manually (For Advanced Users)
Advanced users can manually edit the Windows 11 registry to add or remove the notification bell icon, but it’s important to be cautious and back up your registry first.
- Press Windows key + R.
- Type
regeditand press Enter. Registry Editor opens. - Find this location:
HKEY_CURRENT_USER\Software\Microsoft\Windows\CurrentVersion\Explorer\Advanced - In the right pane, double-click ShowNotificationIcon.
- Change the value to:
- 1 to show the bell
- 0 to hide the bell
- Click OK.
- Close Registry Editor.
Your change takes effect right away.
Summary
In summary, you’ve learned three distinct methods to add or remove the Windows 11 notification bell icon from your taskbar, ranging from the easy Settings option to more advanced registry edits.
- Settings Method: The easiest and fastest way. Just toggle one switch.
- Registry Commands: For advanced users. Requires admin rights. Fast and direct.
- Registry Editor: Manual control. Requires caution to avoid errors.
- Instant Results: All methods take effect immediately.
- Your Choice: Show or hide the bell based on what you prefer.
Pick the method that feels most comfortable for you. Your taskbar is now customized to match your style.
What is the notification bell icon in Windows?
When you have new notifications, the notification bell icon on the taskbar lights up. For notifications that display as banners, you can select the quick action buttons within the banner to perform specific tasks, such as dismissing a reminder or snoozing an alarm.
How to get rid of the bell icon?
To turn off the show and status bar, you just flip one switch. If you were wondering, that’s how you can manage the notification bell icon. Knowing these options should help you customize your taskbar just the way you like it.
Was this guide helpful?

About the Author
Richard
Tech Writer, IT Professional
Richard, a writer for Geek Rewind, is a tech enthusiast who loves breaking down complex IT topics into simple, easy-to-understand ideas. With years of hands-on experience in system administration and enterprise IT operations, he’s developed a knack for offering practical tips and solutions. Richard aims to make technology more accessible and actionable. He's deeply committed to the Geek Rewind community, always ready to answer questions and engage in discussions.


No comments yet — be the first to share your thoughts!