How to Uninstall Voice Access Languages in Windows 11
You can uninstall Voice Access languages in Windows 11 by going to its settings and removing the ones you don’t need.
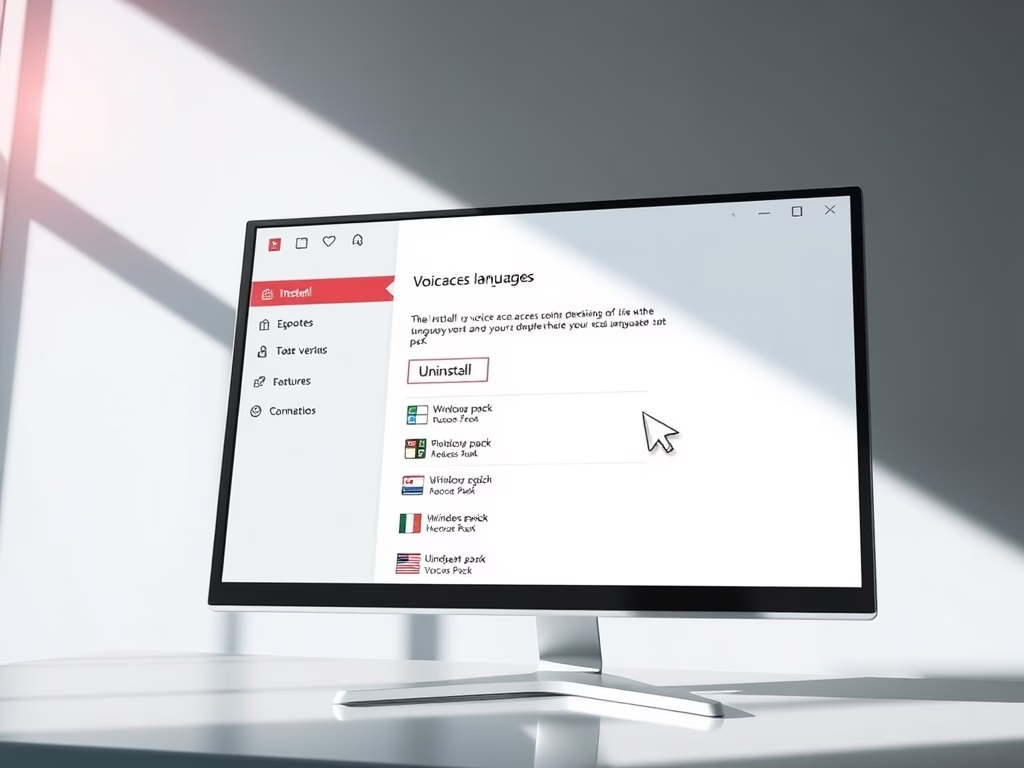
Voice Access lets you control your entire Windows 11 PC with your voice. You can launch apps, navigate your system, and type using spoken commands.
Maybe you’ve tried out Voice Access and added languages for different accents, like English (UK) or English (India). Now you might want to remove those extra languages.
Removing these languages frees up storage space and makes your Voice Access experience smoother, keeping only the languages you actually use on your PC.
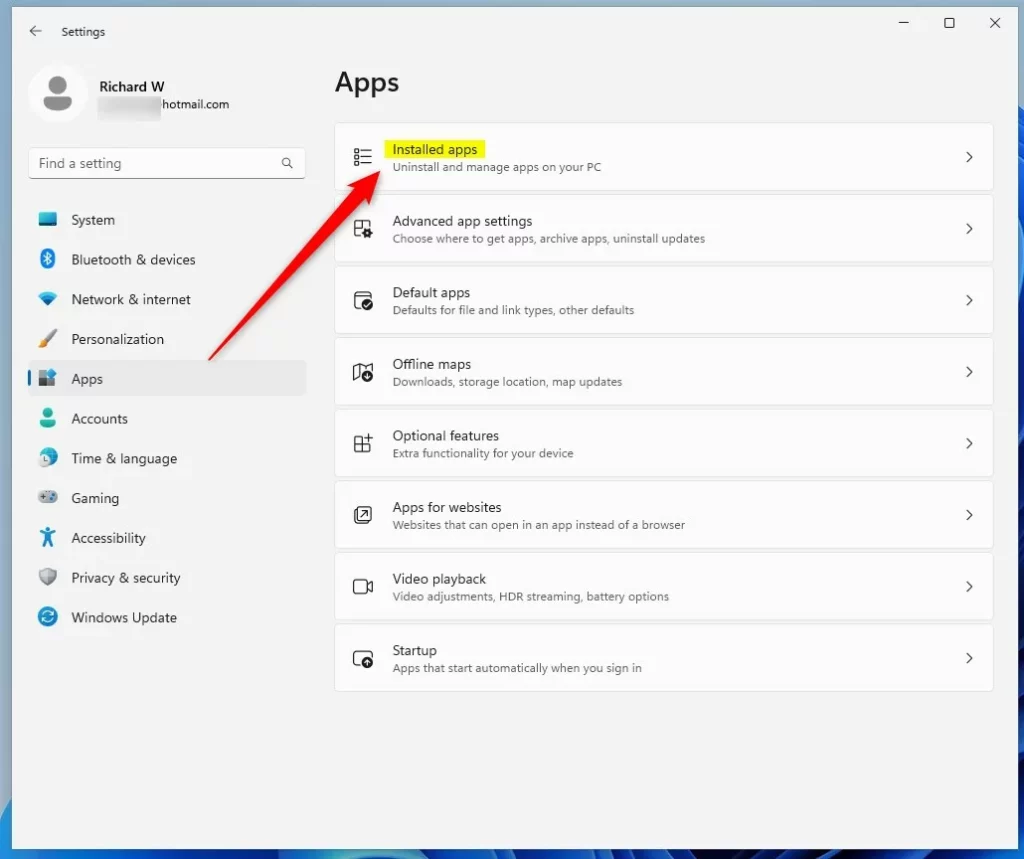
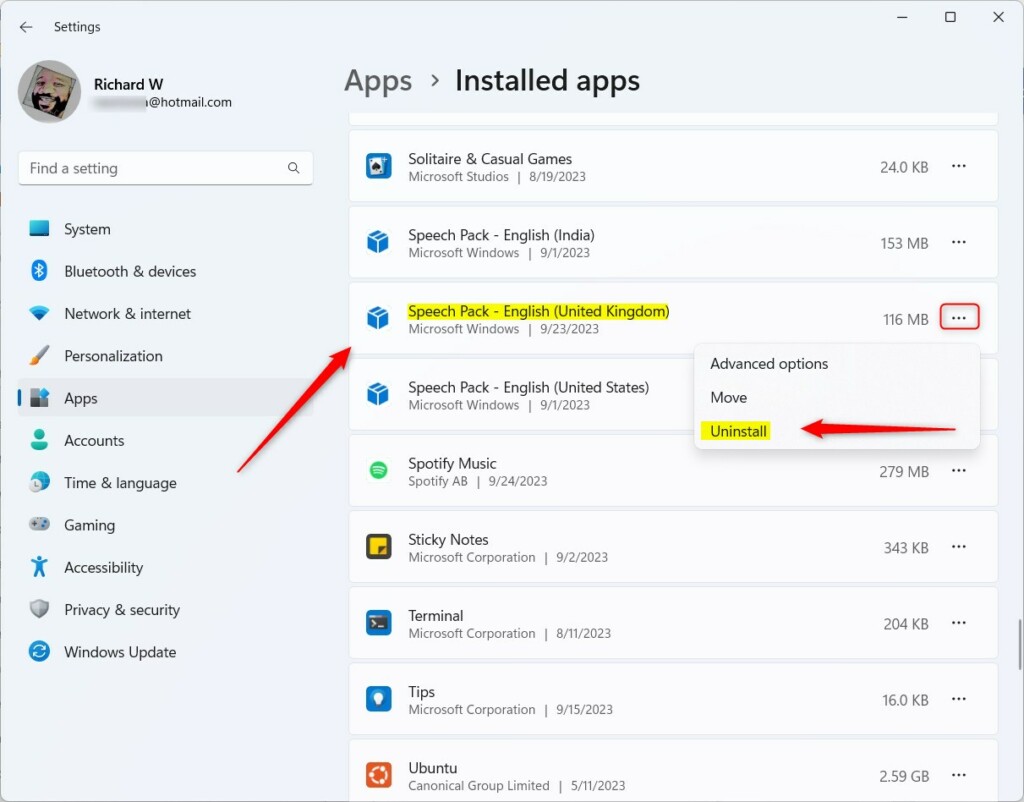
Go to Settings > Apps > Installed apps, find the speech pack by name, click the three dots, and select Uninstall. Alternatively, use Windows Terminal with the Remove-AppxPackage command. This removes unwanted language packs.
What is Voice Access?
Voice Access is a tool in Windows 11 that helps you control your PC by speaking. It supports several English language versions:
- English – US
- English – UK
- English – India
- English – New Zealand
- English – Canada
- English – Australia
You can add or switch between these languages in Voice Access Settings > Languages.
How to Uninstall Voice Access Languages
You can remove Voice Access languages in two ways: using the Windows Settings app or using the Windows Terminal app. Let’s go through both.
1Using Windows Settings
Follow these steps to uninstall a Voice Access language with the Settings app:
- Click the Start button (Windows icon) at the bottom-left corner.
- Select Settings (gear icon).
- From the left menu, click Apps.
- Click on Installed apps.
- Scroll through the list and find the language pack you want to remove. It will be named something like Speech Pack (English United Kingdom).
- Click the three dots (Settings option) next to it and choose Uninstall.
- When Windows asks, click Uninstall again to confirm.
2Using Windows Terminal
If you like using commands, you can remove Voice Access languages through Windows Terminal.
⚠️ Admin Required: This method requires administrator privileges.
Steps:
- Open Windows Terminal as an administrator. To do this:
- Click Start, type Terminal, right-click on Windows Terminal, and select Run as administrator.
- Type this command to see a list of installed Voice Access languages:
Get-AppxPackage *MicrosoftWindows.Speech* | Select Name, PackageFullName - You will see a list like this:
Name                            PackageFullName
----                            ---------------
MicrosoftWindows.Speech.en-US.1 MicrosoftWindows.Speech.en-US.1_1.0.16.0_x64__cw5n1h2txyewy
MicrosoftWindows.Speech.en-IN.1 MicrosoftWindows.Speech.en-IN.1_1.0.7.0_x64__cw5n1h2txyewy
MicrosoftWindows.Speech.en-GB.1 MicrosoftWindows.Speech.en-GB.1_1.0.7.0_x64__cw5n1h2txyewy - Find the PackageFullName of the language you want to uninstall.
- Then run this command, replacing the package name with the one you want to remove:
Remove-AppxPackage -Package 'MicrosoftWindows.Speech.en-GB.1_1.0.7.0_x64__cw5n1h2txyewy' - After running the command, the language pack will be removed from your PC.
Summary
You can uninstall Voice Access languages either through the Windows Settings or Windows Terminal.
- Using Settings is easier if you prefer clicking through menus.
- Using Terminal is faster if you’re comfortable with commands.
- Removing languages you don’t need helps keep your PC clean and organized.
If you want to learn more about turning Voice Access on or off or installing new Voice Access languages, check out these helpful guides.
If you have questions or tips, feel free to leave a comment below!
Was this guide helpful?

About the Author
Richard
Tech Writer, IT Professional
Richard, a writer for Geek Rewind, is a tech enthusiast who loves breaking down complex IT topics into simple, easy-to-understand ideas. With years of hands-on experience in system administration and enterprise IT operations, he’s developed a knack for offering practical tips and solutions. Richard aims to make technology more accessible and actionable. He's deeply committed to the Geek Rewind community, always ready to answer questions and engage in discussions.


No comments yet — be the first to share your thoughts!