How to Create New Files in Windows 11
Want to learn how to make new files on your Windows 11 computer? It’s simple and super useful! Whether you want to write notes, save pictures, or organize documents, creating files is one of the first things everyone should know.
In this guide, I’ll show you easy ways to create new files using different methods in Windows 11. Let’s get started!
1Create a New File Using File Explorer
File Explorer is the place where you see all your folders-in-windows-11/" class="sal-link" rel="noopener" target="_blank" data-sal-id="35100">files and folders. Here’s how to make a new file there:
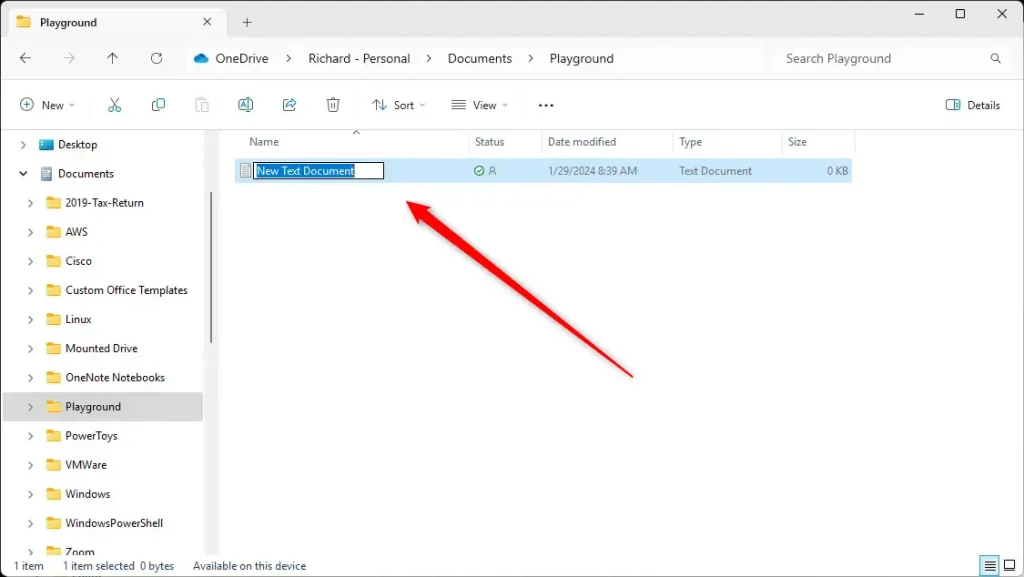
- Open File Explorer: Press ⊞ Win+E on your keyboard or click the folder icon on your taskbar.
- Go to the folder where you want to create the file. Use the left sidebar to pick a folder like Documents or Desktop.
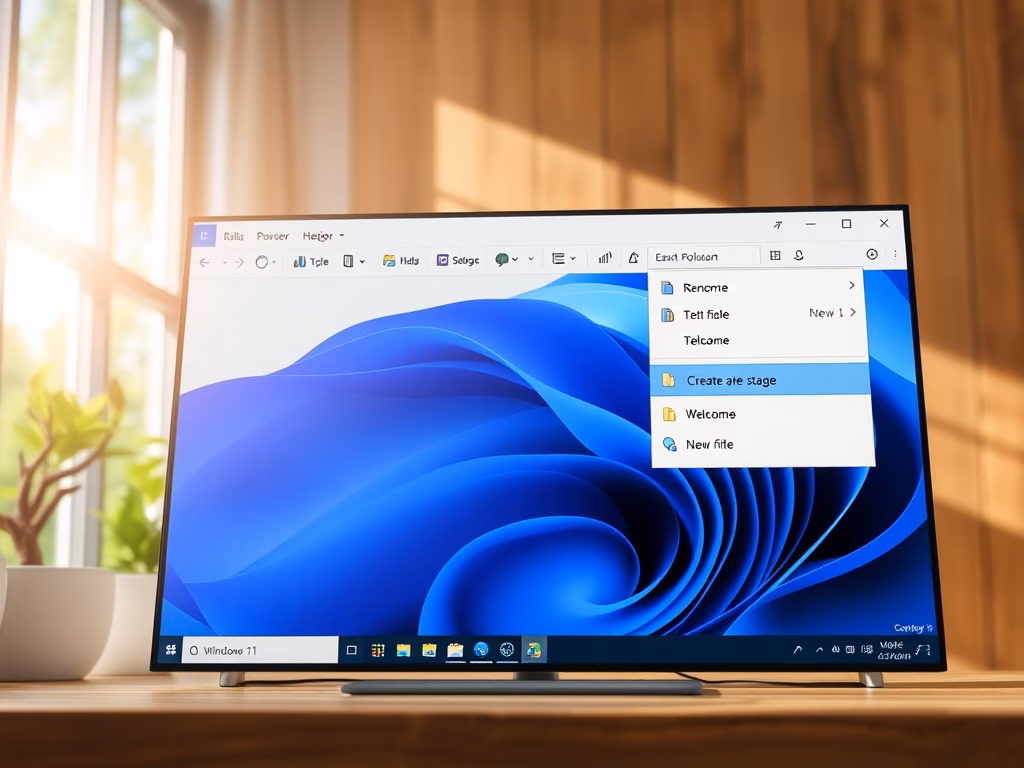
- Right-click on an empty space in the folder. A menu will pop up.
- Hover over New and then click the type of file you want, like Text Document (this makes a simple
.txtfile).

- Type a name for your new file and press Enter.
2Create a New File Using the File Explorer Command Bar
You can also create new files using the buttons at the top of File Explorer:
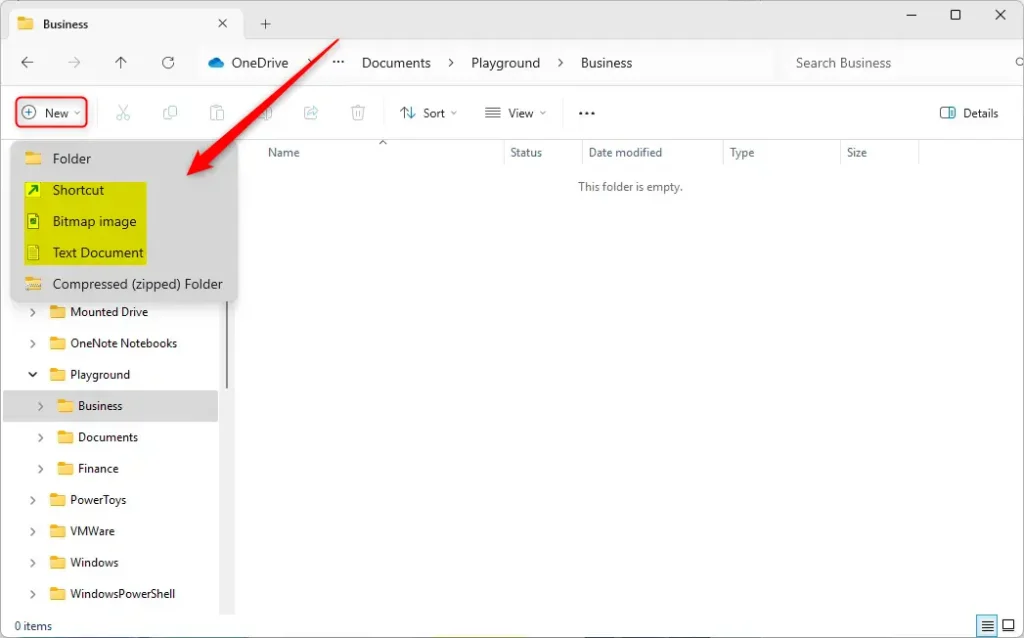
- Open File Explorer and go to the folder you want.
- Click the New button on the command bar at the top.
- Select the type of file you want to create.
- Give your file a name and press Enter.
3Create a New File Right on the Desktop
You don’t have to open File Explorer every time. You can make new files right on your Desktop:
- Go to your Desktop by pressing ⊞ Win+D or minimizing all windows.
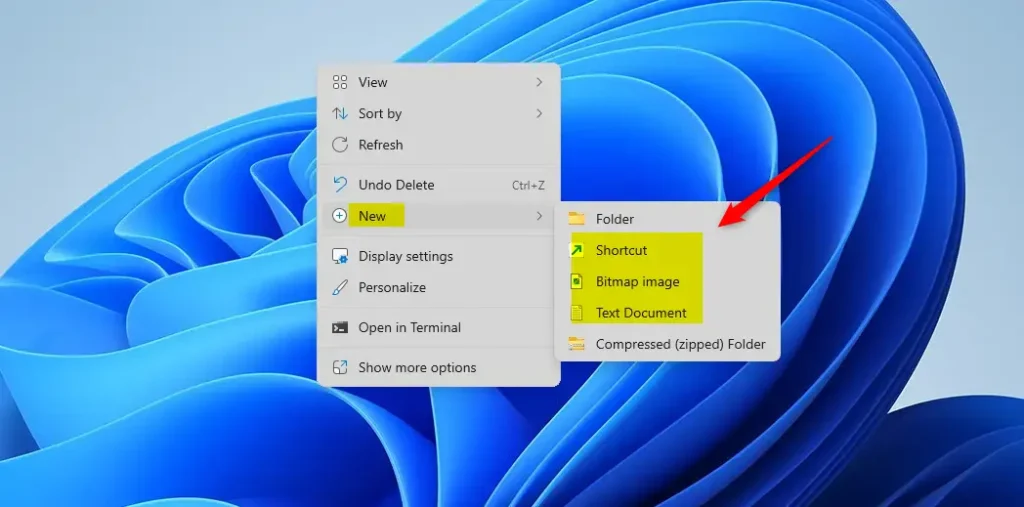
- Right-click on any empty space on the Desktop.
- Hover over New and choose the file type you want.
- Name your file and press Enter.
4Create a New File Using Windows Terminal (Command Prompt)
If you like using commands, you can create new files with Windows Terminal:
- Press ⊞ Win+S, type Windows Terminal or cmd, then open the app.
- Go to the folder where you want to create the file by typing, for example:
cd Documents - Create a new file by typing:
copy NUL "YourFileName.txt"
Replace YourFileName with the name you want.
5Create a New File Using Windows Terminal (PowerShell)
PowerShell is another command tool you can use:
- Open Windows Terminal with PowerShell (right-click Start button and pick Windows Terminal or press ⊞ Win+X and select Windows Terminal).
- Change folder with
cdjust like in Command Prompt. - Create a new file by typing:
New-Item -Name "YourFileName.txt" -ItemType "file"
6Use Keyboard Shortcuts to Create a New Text File
If you want to use your keyboard only, here’s a quick way:
- Open the folder in File Explorer where you want the new file.
- Press these keys one after the other: Alt+F, then W, and then T.
- A new text file will appear — just type a name and press Enter.
Want to learn how to change the file name or type? Check out this simple guide to renaming files in Windows 11.
Summary
Why create new files? Creating files helps you organize your work, save important information, and keep your computer neat and tidy.
What happens when you create a file? A new empty file appears in your chosen location, ready for you to add content like text, images, or other data.
You now know six easy ways to create new files in Windows 11:
- Using File Explorer and right-click menus
- Using the File Explorer command bar
- Creating files directly on your Desktop
- Using Windows Terminal with Command Prompt
- Using Windows Terminal with PowerShell
- Using keyboard shortcuts
Try the method that feels easiest for you and start organizing your files like a pro. Windows 11 gives you many options, so pick what works best for your tasks!
If you have questions or tips, feel free to leave a comment below!
Was this guide helpful?

About the Author
Richard
Tech Writer, IT Professional
Richard, a writer for Geek Rewind, is a tech enthusiast who loves breaking down complex IT topics into simple, easy-to-understand ideas. With years of hands-on experience in system administration and enterprise IT operations, he’s developed a knack for offering practical tips and solutions. Richard aims to make technology more accessible and actionable. He's deeply committed to the Geek Rewind community, always ready to answer questions and engage in discussions.


No comments yet — be the first to share your thoughts!