How to Use Windows 11 Disk Cleanup and Storage Sense
You can free up space on your Windows 11 PC using Disk Cleanup or Storage Sense.
Disk Cleanup is a built-in utility that scans your hard drive for temporary files, downloaded program files, and outdated Windows installations you can safely remove. Storage Sense is a more modern, automated feature that automatically frees up disk space by deleting unneeded files when your storage runs low.
Using these tools is crucial, especially if you have a smaller drive like a 128GB SSD, to maintain optimal performance.
You’ll typically find Disk Cleanup by searching for “Disk Cleanup” in the Windows search bar, while Storage Sense resides within the Settings app under System > Storage.
Search for “Disk Cleanup” to remove temporary files. Enable “Storage Sense” in Settings > System > Storage for automatic cleanup. These tools free up disk space to improve performance.
Why Free Up Disk Space?
Freeing up disk space on your Windows 11 computer is important because a full hard drive can make your PC run slowly, cause apps to take longer to open, and stop you from installing important updates or saving new files.
- Run slowly and take longer to open apps.
- Have trouble installing important updates or new programs.
- Make it harder to save new files or photos.
Keeping some free space on your hard drive helps your computer work faster and stay secure.
How to Use the Disk Cleanup Tool
Windows 11 Disk Cleanup is a simple tool that helps you get rid of unneeded temporary files, freeing up valuable space on your hard drive, and it’s easy to use.
Here’s how to use it:
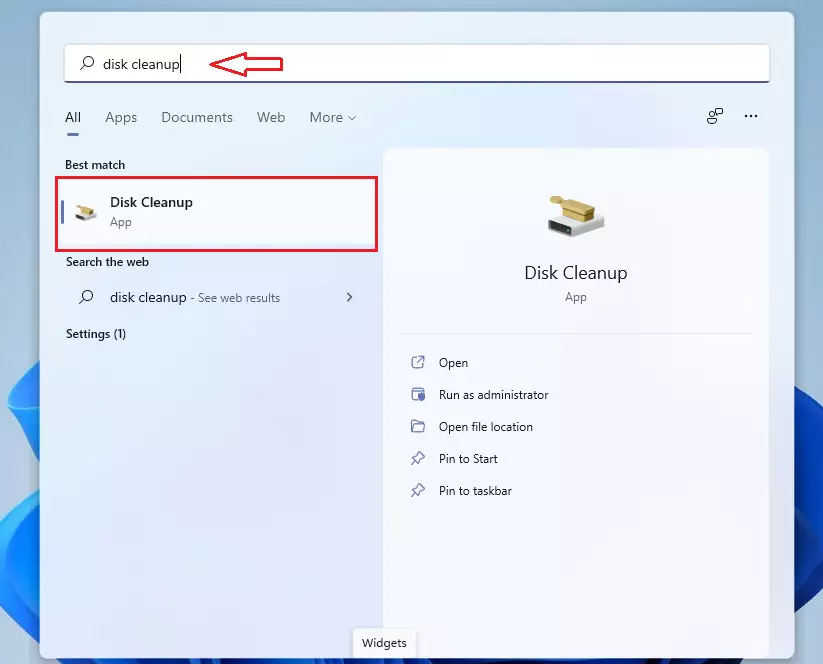
- Click the Start button. It’s the Windows logo at the bottom-left corner.
- Type
disk cleanupin the search box. - Click the Disk Cleanup app from the list.
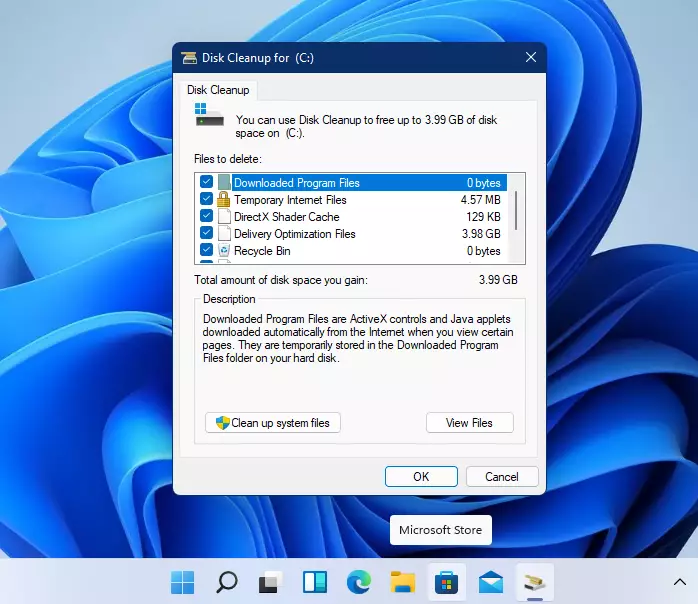
Now a window will open. It shows different types of files you can delete:
- Temporary Internet Files
- Downloaded Program Files
- Thumbnails (small pictures of your files)
Check the boxes next to the files you want to remove. To clean even more space, click Clean up system files and select extra system files to delete.
When ready, click OK. Then choose Delete files to start cleaning up.
This will free up some space on your computer.
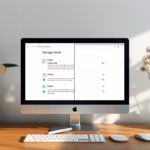
How to Use Storage Sense to Clean Up Automatically
Storage Sense in Windows 11 is a helpful feature that automatically cleans up temporary files and other unneeded items, so you don’t have to worry about doing it manually.
Here’s how to turn it on and set it up:
- Click the Start button. Then select Settings. It looks like a gear icon.
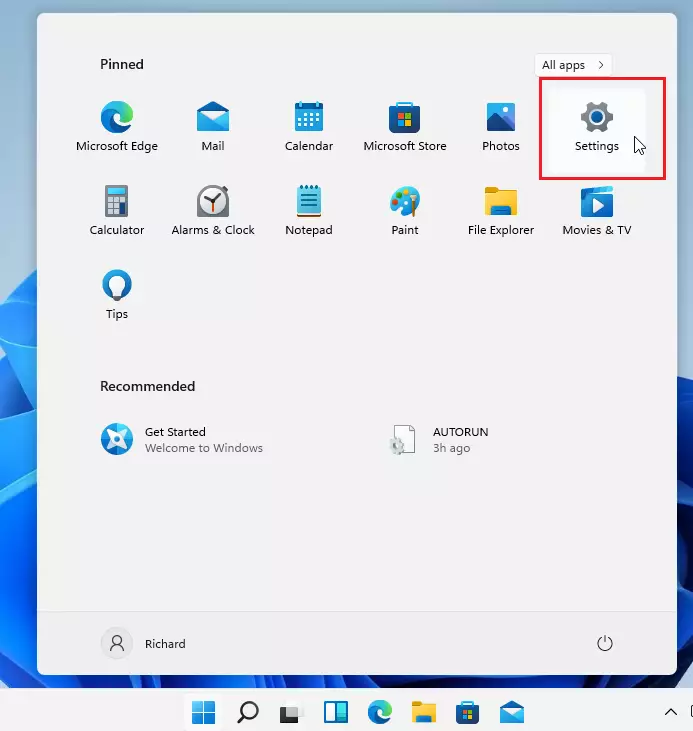
- Go to System > Storage.
- Turn on Storage Sense by clicking the switch.
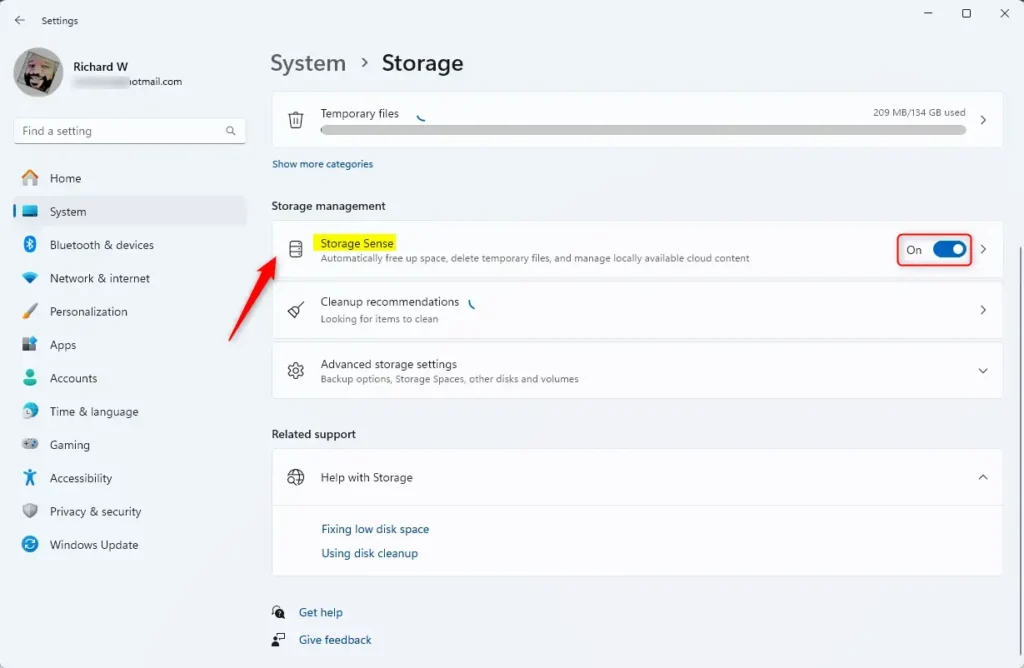
- Click on the Storage Sense tile to see more settings. You can choose how often you want Storage Sense to clean up. Options include daily or weekly. You can also decide what kind of files it should remove.
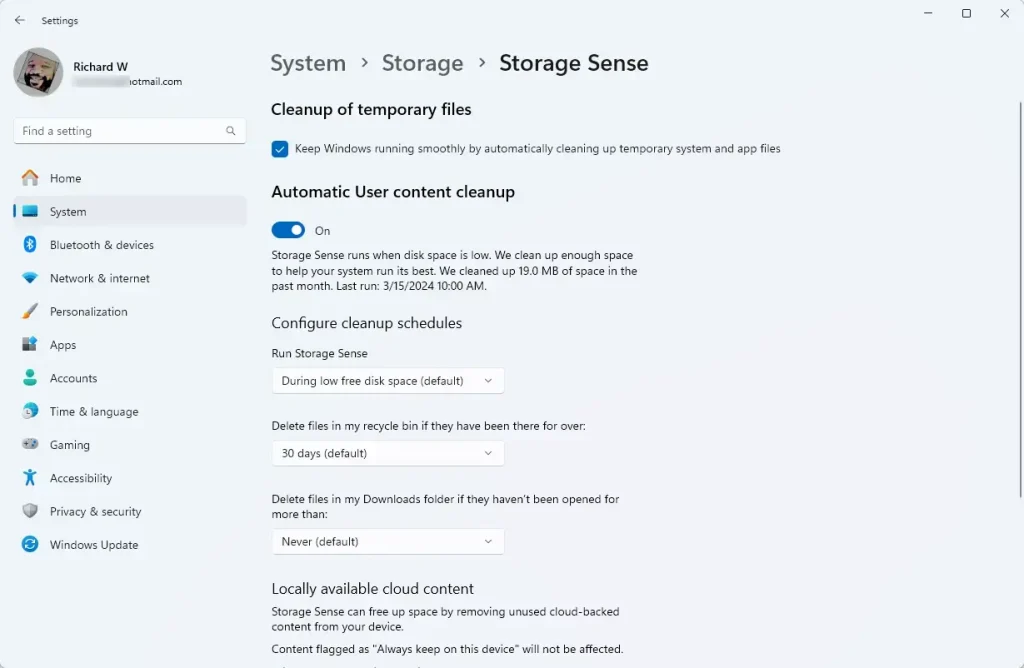
For most users, the default settings work great. Windows will handle the cleanup for you!
Summary
- Running low on disk space can slow your computer and cause update problems.
- Use Disk Cleanup to quickly remove old files you don’t need.
- Turn on Storage Sense to keep your disk clean automatically.
- Check your disk space regularly to keep your computer running fast and smooth.
Keeping your Windows 11 computer running fast means managing disk space, and you can do this easily using tools like Disk Cleanup and Storage Sense to remove old files and prevent slowdowns.
Was this guide helpful?

About the Author
Richard
Tech Writer, IT Professional
Richard, a writer for Geek Rewind, is a tech enthusiast who loves breaking down complex IT topics into simple, easy-to-understand ideas. With years of hands-on experience in system administration and enterprise IT operations, he’s developed a knack for offering practical tips and solutions. Richard aims to make technology more accessible and actionable. He's deeply committed to the Geek Rewind community, always ready to answer questions and engage in discussions.

No comments yet — be the first to share your thoughts!