Require Sign-In for Microsoft Store Purchases in Windows 11

Windows 11 has no single setting that makes every Microsoft Store purchase ask for your password. Instead, you combine up to three checks. Look for a purchase sign-in option in the Microsoft Store, remove the saved payment card from your Microsoft account, and turn on purchase approval in Microsoft Family Safety if children use the PC.
Microsoft has moved and renamed these options several times. Not every version of the Microsoft Store app has a purchase sign-in switch, and this guide cannot confirm one for every build. The steps below show you where to look and what to try if the option is missing.
Most of these steps do not need administrator rights. The one exception is creating a separate user account on the PC, which does.
To require sign-in for Microsoft Store purchases in Windows 11, open Microsoft Store, select your profile picture, and choose App settings to look for a purchase sign-in option. If your version has none, remove the saved payment method from your Microsoft account, or sign out of the Store so purchases are blocked until you sign in again.
What “Require Sign-In for Purchases” Actually Controls
Microsoft Store purchases are tied to your Microsoft account, not to the PC. That matters because there are three different places where a “sign-in” can be enforced:
- The Microsoft Store app on the PC. It decides whether you are signed in and whether it asks you to confirm a purchase.
- Your Microsoft account, which holds your payment methods and any balance. This applies on every device you sign in to.
- Microsoft Family Safety, which lets a parent approve or block purchases on a child’s account.
Windows also has its own sign-in setting. It controls when the PC asks for your password or PIN (a short number you type to sign in) after you step away. It does not check anything at the moment of purchase, but it stops someone from walking up to an unlocked PC and buying. The sections below cover each layer in the order that is most likely to help.
Check the Microsoft Store Settings First
This step looks for a purchase sign-in option in the Store app itself. It takes under a minute and tells you whether your Store version offers one.
Open the Store settings
- Select Start, type Microsoft Store, and press Enter. The Store window opens on the Home page.
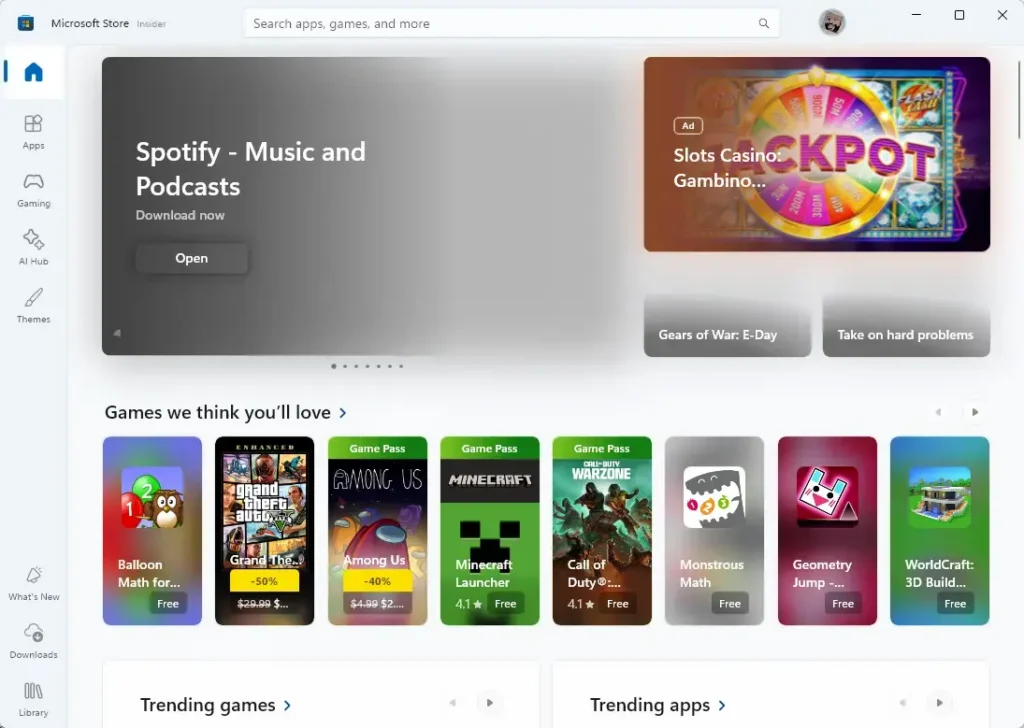
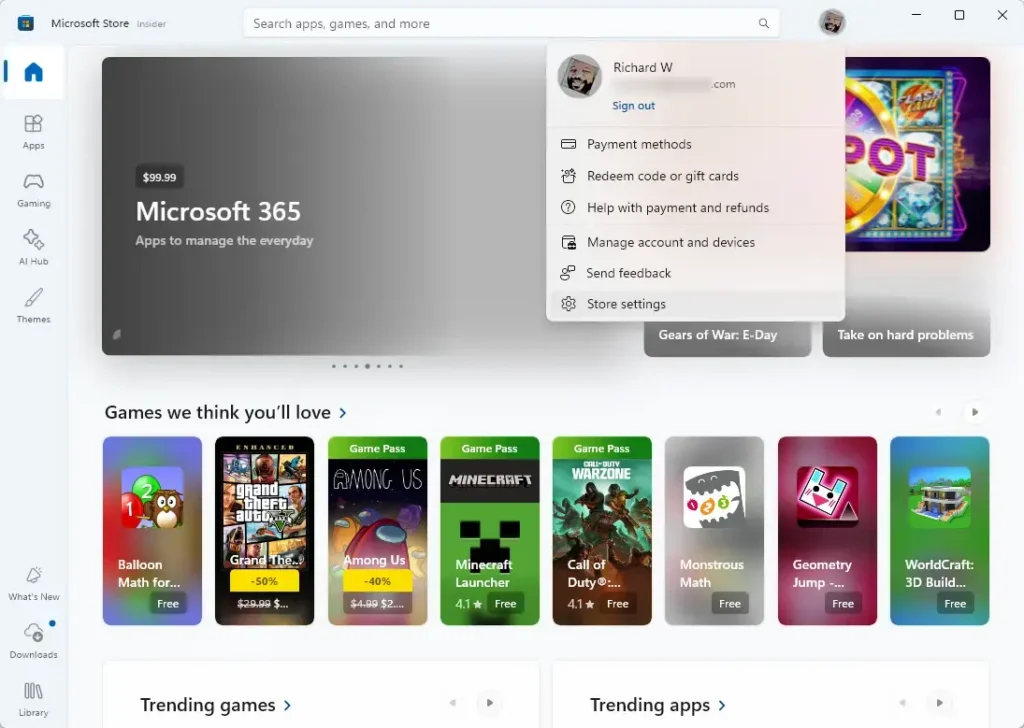
- Select your profile picture at the top of the window, next to the search box. A menu opens showing your account name.
- Select App settings (on some versions this is labelled Settings). The settings page opens.
- Read through the options on the page. Look for anything that mentions signing in, passwords, or PINs for purchases.
If you see a purchase sign-in option, set it so the Store asks you to confirm every purchase, then close the window. The change applies right away and no restart is needed. 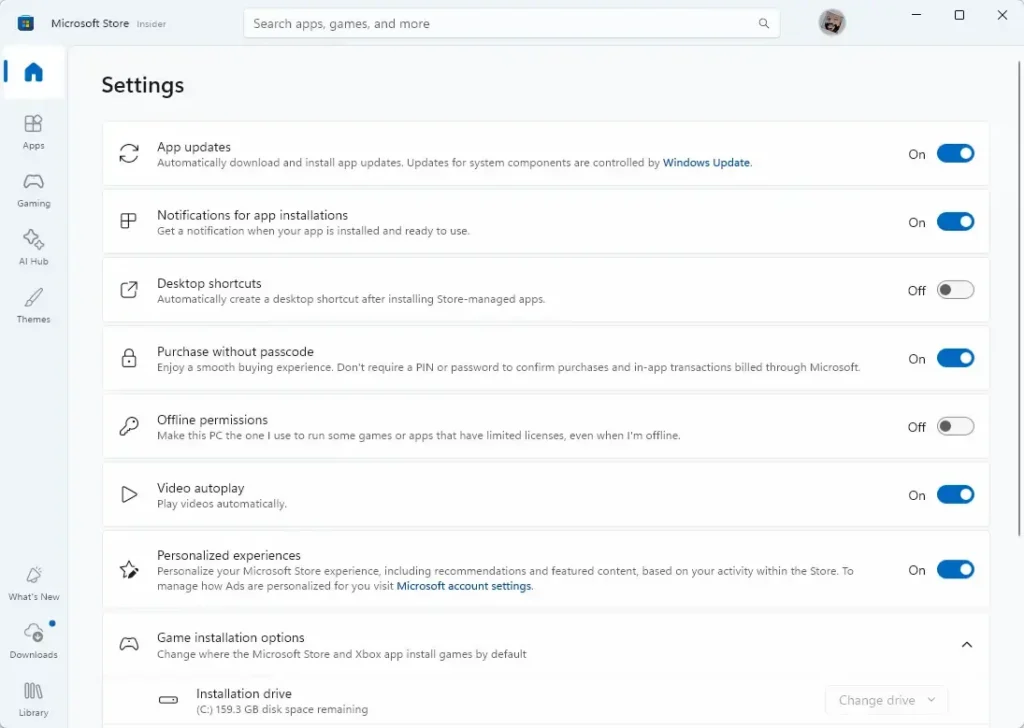
If you only see options such as App updates, Video autoplay, App installation preferences or Notifications, your version of the Store does not have a purchase sign-in switch. Do not look for a registry tweak to add one. No verified registry value for this setting is published on this site. [Registry method: to be verified]. Move on to the controls on your Microsoft account below, which work whatever the Store app shows.
If the profile menu says Sign in
You can browse and install free apps, but you cannot buy anything until you sign in with a Microsoft account. This is the simplest way to block purchases on a PC: leave the Store signed out, and sign in only when you want to buy.
- Select your profile picture in the Store.
- Select Sign out if it is shown. The menu changes to Sign in.
To reverse this, select Sign in from the same menu and pick your Microsoft account.
Remove the Saved Payment Method From Your Microsoft Account
If you remove it, the Store has to ask for payment details each time, so nobody can buy by accident or on your behalf. This is the most reliable way to force a deliberate step before a paid purchase. It works because the payment information is stored with your Microsoft account, not in the Store app.
- Open a web browser and go to
account.microsoft.com. - Select Sign in and use the same Microsoft account that the Store uses. Check the name in the Store profile menu if you are unsure which one that is.
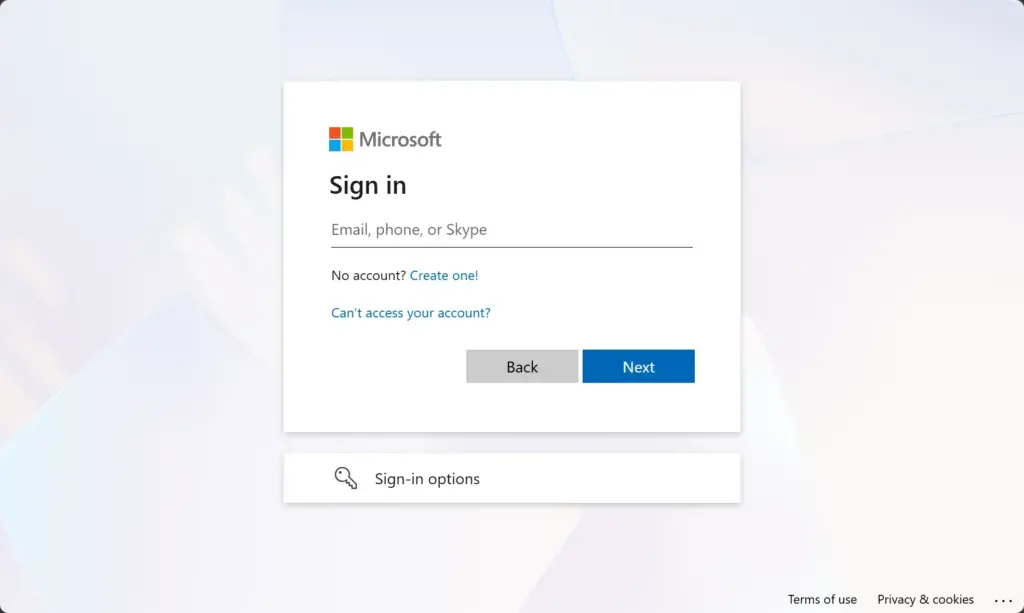
Microsoft account login page for signing in with email and password. - Open Payment & billing, then Payment options. A list of saved cards and other payment methods appears.
- Select the payment method you want to remove, then select Remove.
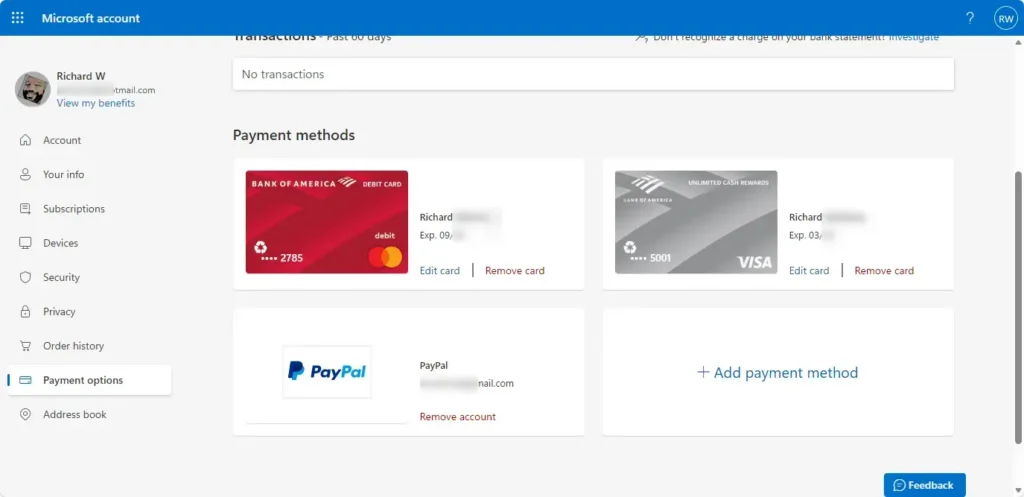
- Confirm the removal when asked. The method disappears from the list.
The next time you buy an app, game or movie in the Store, it asks you to add a payment method first. Microsoft account menu names change from time to time. If you can't find Payment options, look under the Payment & billing area for anything that lists your cards.
Check for balance and gift cards
Removing a card does not remove any money already on the account. A Microsoft account balance or redeemed gift card can still be applied to a purchase. If that is a concern, check the balance on the same Payment & billing page before you rely on this method.
Add the payment method back
To undo this, return to Payment & billing Payment options and select the option to add a payment method. You can also add one during a purchase in the Store, when it prompts you.
Require Approval for a Child's Purchases
If a child uses the PC, Microsoft Family Safety is the better control. It lets an adult approve purchases from their own device instead of relying on the child's password. The setting is stored in the family group, so it follows the child's account to every device.
- Sign in to
family.microsoft.comwith the adult (organizer) Microsoft account. - Select the child's name to open their profile.
- Open the section for spending or purchases and turn on the option that makes the child ask before buying. Microsoft has changed the layout and wording of this page more than once, so the exact label may differ on your screen. It is the option that sends an approval request to you instead of allowing the purchase.
- Check the child's content filter settings too, which set the age limits for apps and games. Microsoft Store age limits are managed on the same page, and they decide which apps and games the child can get at all.
The child must be signed in to Windows with their own Microsoft account for this to apply. If they use your account, or a local account outside the family group, Family Safety has nothing to enforce. If you do not already have a family group, create one from the Family Safety page before you try these steps.
To undo it, return to the child's profile and turn the approval option off.
Make Windows Ask for Your Password or PIN After You Step Away
This does not change how the Store handles purchases. It controls when Windows asks you to sign in again after sleep. That stops another person from using your open session to buy something in the Store while you are away. It is worth setting alongside the controls above.
- Open Settings Accounts Sign-in options
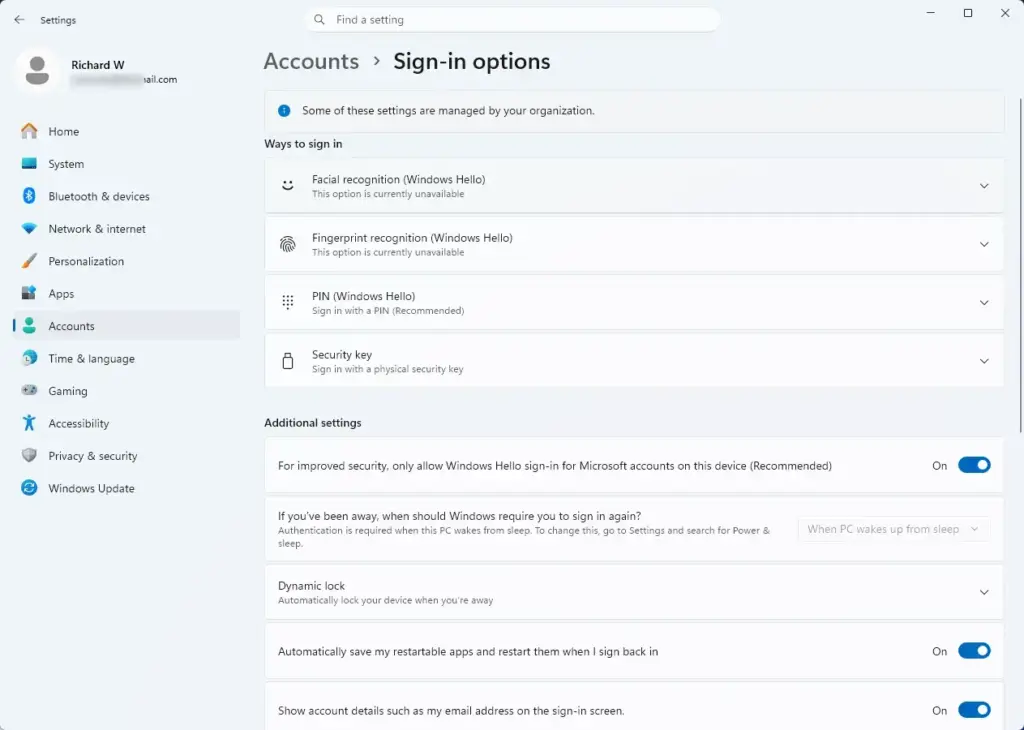
Settings › Accounts › Sign-in options - Find the setting that asks If you've been away, when should Windows require you to sign in again?
- Open the drop-down list and choose the shortest time available.
Windows 11 offers different choices depending on your hardware and sign-in method. If the setting is missing, your sign-in method, or a rule set by whoever manages the PC, may not offer it. You can also press Windows key + L at any time to lock the PC straight away.
To reverse it, return to the same drop-down and choose a longer time or Never, if it is offered.
Use a Separate Account for Other People
If several people share one PC, give each person their own account. That way the Store, payment details and purchase history are not shared. This step needs an administrator account.
- Open Settings Accounts Other users
- Next to Add other user, select Add account. The Microsoft account sign-in window opens.
- Follow the prompts to add the person's own Microsoft account, or create one for them.
The new user appears in the list under Other users. By default the new account is a standard user, which cannot change system-wide settings. Each person signs in to the Store with their own account, so they never see your payment method.
If the Option Is Missing or the Settings Don't Stick
These are the usual reasons a purchase sign-in setting is missing or seems to have no effect.
- Your Store version doesn't have the option. This is the most common cause. Update the Store first: open the Store, select Library, then select Get updates. Then check the settings page again. If the option is still missing, use the account-level controls above.
- You are signed in with a different account than you expect. Payment methods and Family Safety rules apply to a specific Microsoft account. Check the name in the Store profile menu and compare it with the account you edited on the website.
- The PC is managed by an organisation. On a work or school device, an administrator may control Store access and purchases. If the Store is blocked, restricted or shows a message that your organisation manages it, you can't override that yourself. Ask your IT team.
- A local account is in use. The Store needs a Microsoft account for purchases. A local Windows account has no payment method or Family Safety rules attached to it.
- The child is not covered by Family Safety. The child's account must be a member of your family group, and they must sign in to Windows or the Store with it.
Account-level changes take effect without a restart because they are stored online with your Microsoft account. A Windows feature update will not reset them. The Store app's own settings are stored on the PC and could differ after a reinstall or a new user profile, so check them again on a new setup.
What to do next
Make a test purchase attempt with a free app and check that the Store asks for what you set: a sign-in, a payment method, or parental approval. If something still goes through without a check, go back to the Microsoft account website and check which payment methods and balance are attached. If you manage a device for someone else, the next job is to review their Family Safety content filters so that age limits match the purchase rules you just set.
Have a question about this guide?
Answered by AI from this guide. Good questions may be added to this page — please don't include personal details.
Did this guide fix your problem?

About the Author
Richard
Tech Writer, IT Professional
Richard is a writer at Geek Rewind who turns complex IT tasks into clear, step-by-step guides. He draws on years of hands-on experience in system administration and enterprise IT operations, focusing on Windows, Linux and WordPress: the problems people actually run into, and the fixes that work. His server and WordPress guides come from systems he runs himself. Richard builds and maintains the platform behind Geek Rewind, from its Ubuntu servers and Nginx configuration to its custom WordPress plugins. Many new tutorials start with readers' questions, and he's always glad to answer them in the comments.
No comments yet — be the first to share your thoughts!