How to Use the Pen to Erase Ink in Windows 11


Digital ink erasing in Windows 11 lets you wipe away pen marks on your screen just like a traditional pencil eraser. Flipping your stylus activates this tool automatically on supported devices like the Surface Pen.
Turn your pen upside down and drag the top end across any handwriting or sketches you want to clear. This built-in feature works across apps like Microsoft Whiteboard and Snip & Sketch without needing extra software.
Flip your digital pen over and rub the screen to erase ink. Ensure the “Use the top of the pen to erase ink” option is enabled in Settings under Pen & Windows ink.
How to set up the eraser in Settings
You can turn on and configure the eraser feature in Windows 11 using the main Settings app . This lets you use the top of your digital pen to erase ink across supported apps without needing to switch tools manually. Open Settings, go to Bluetooth & devices, select Pen & Windows ink, and check the box to enable the top-of-pen eraser.
- Open the Windows Settings app by clicking the Start menu or pressing Win+I.
- Click on Bluetooth & devices in the left menu.
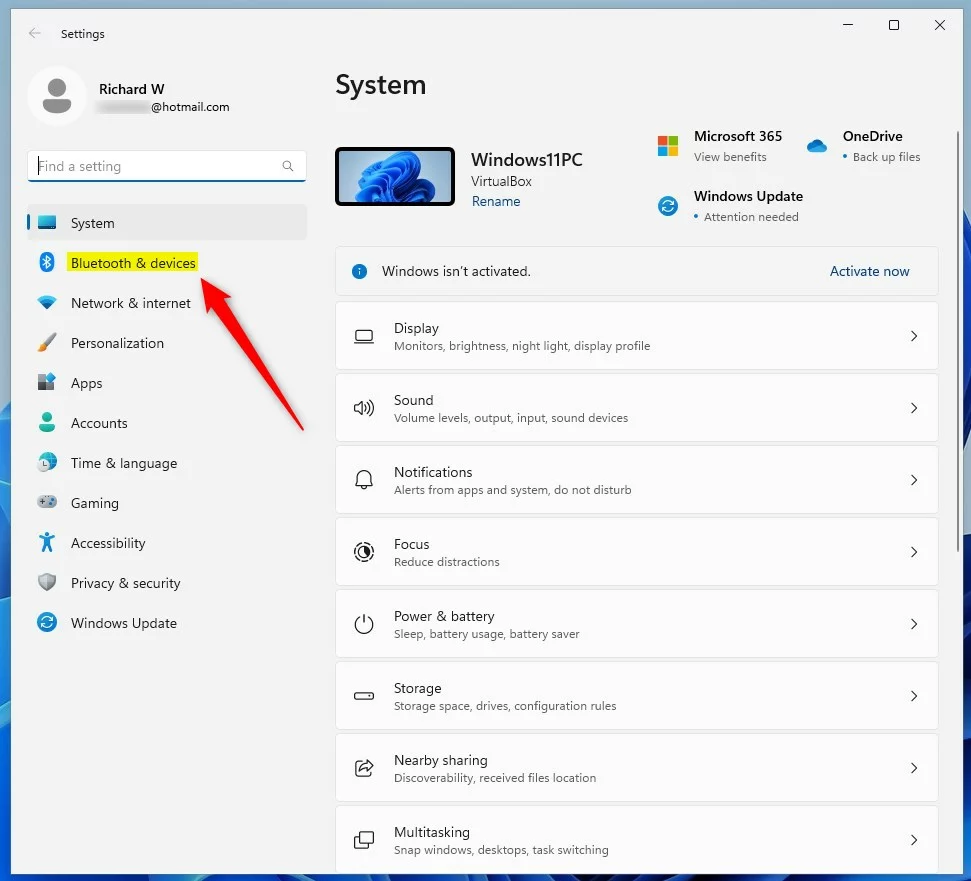
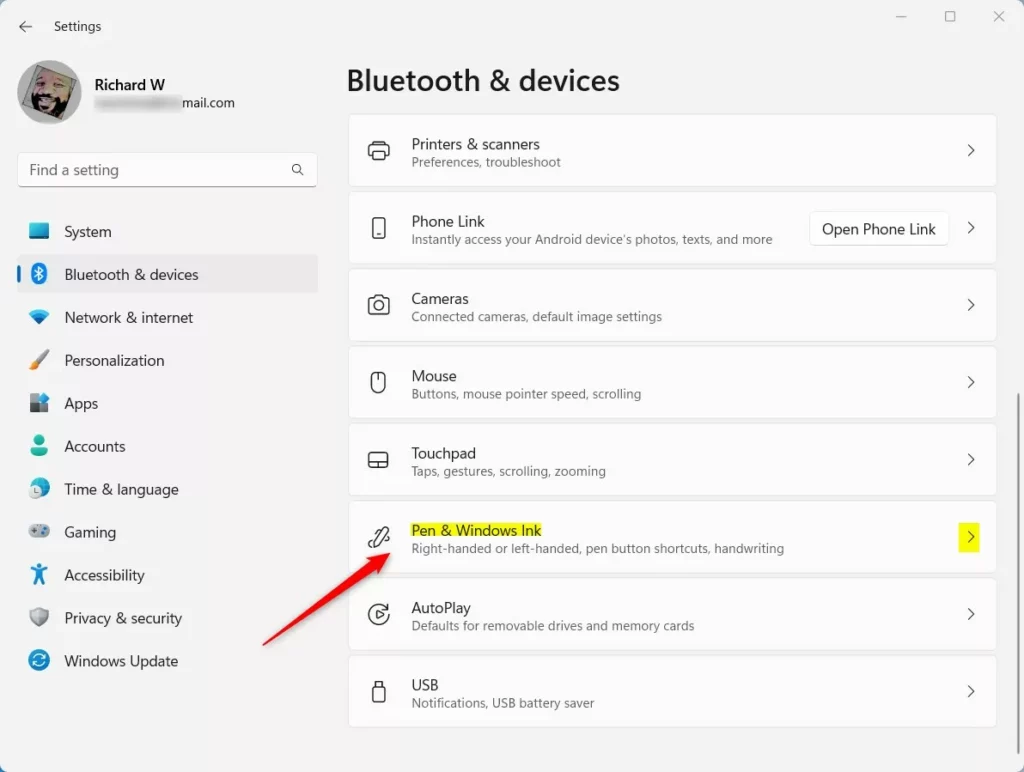
- Select the Pen & Windows ink tile on the right.
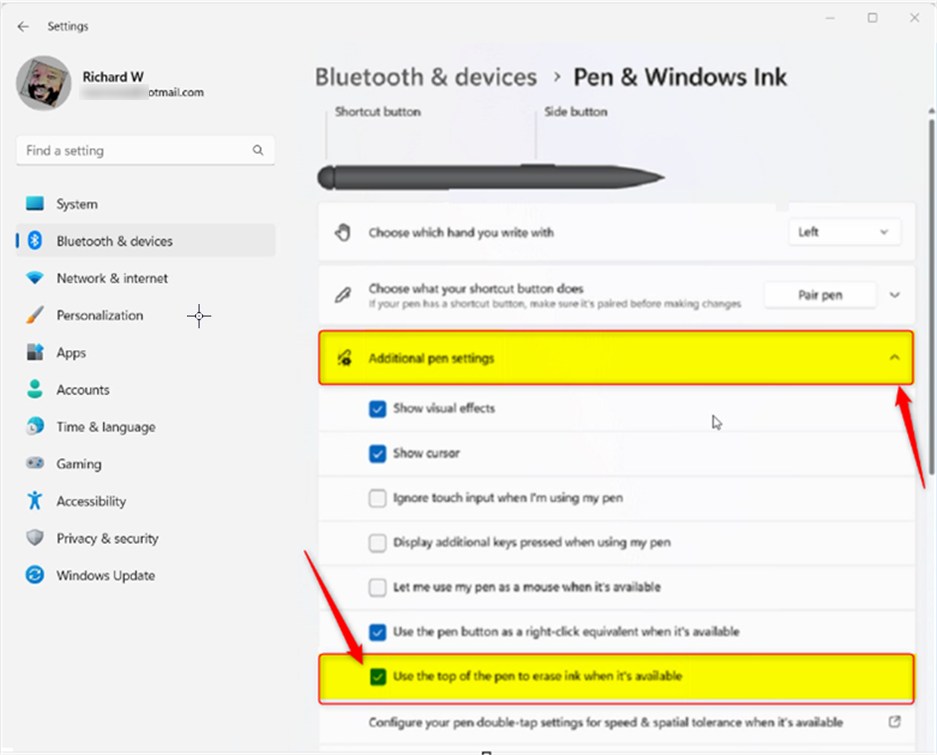
- Click to expand Additional pen settings.
- Check the box that says Use the top of the pen to erase ink when it’s available.
Close the Settings app when you finish.
Mastering the ‘Scratch Out’ Gesture
If your pen lacks a physical eraser, you can still remove ink in Windows 11 using the ‘Scratch Out’ gesture.
Troubleshooting Pen Connectivity
If your pen eraser fails to work, try these steps:
- Check Battery: A low battery often disables the top button first.
- Re-pair: Go to Bluetooth settings, remove the device, and pair it again.
- Update Drivers: Open Device Manager, find your Human Interface Devices, and update the pen driver.
How to set up the eraser using the Registry Editor
You can also enable the pen eraser in Windows 11 by making a change in the Registry Editor if the option is missing from your regular settings. This advanced method involves opening the registry, locating the correct pen settings folder, and updating the values manually to force the eraser feature to turn on.
- Open the Windows Registry by searching for it in the Start menu.
- Go to this location:
HKEY_CURRENT_USER\Software\Microsoft\Wisp\Pen\SysEventParameters - If you do not see the
SysEventParametersfolder, right-click the Pen folder, select New, and create a key namedSysEventParameters.
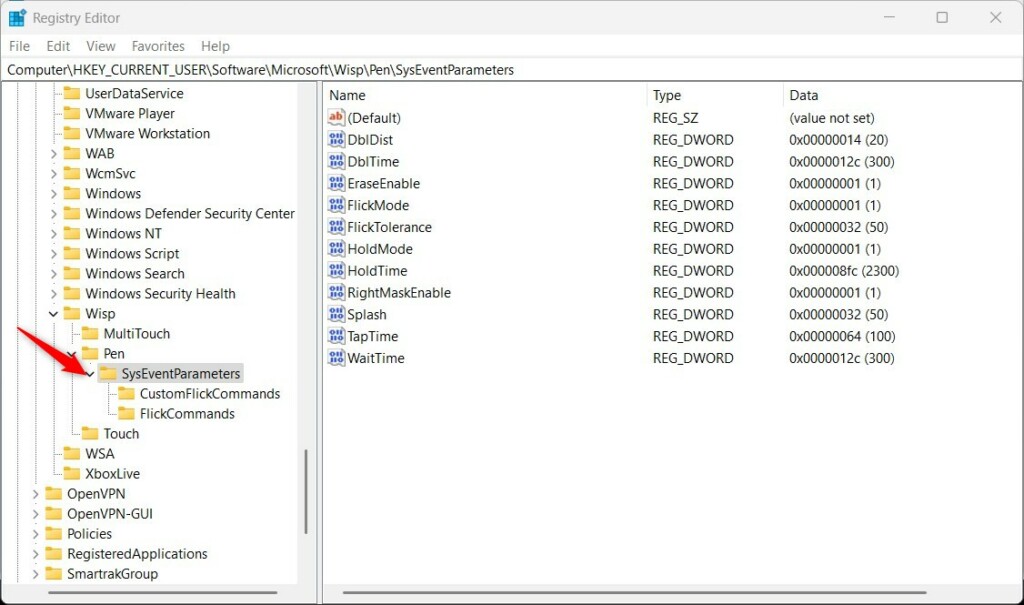
- Right-click in the empty space on the right side, select New, then select DWORD (32-bit) Value. Name it
EraseEnable. - Double-click
EraseEnable, set the Base to Decimal, and enter1in the Value data box.
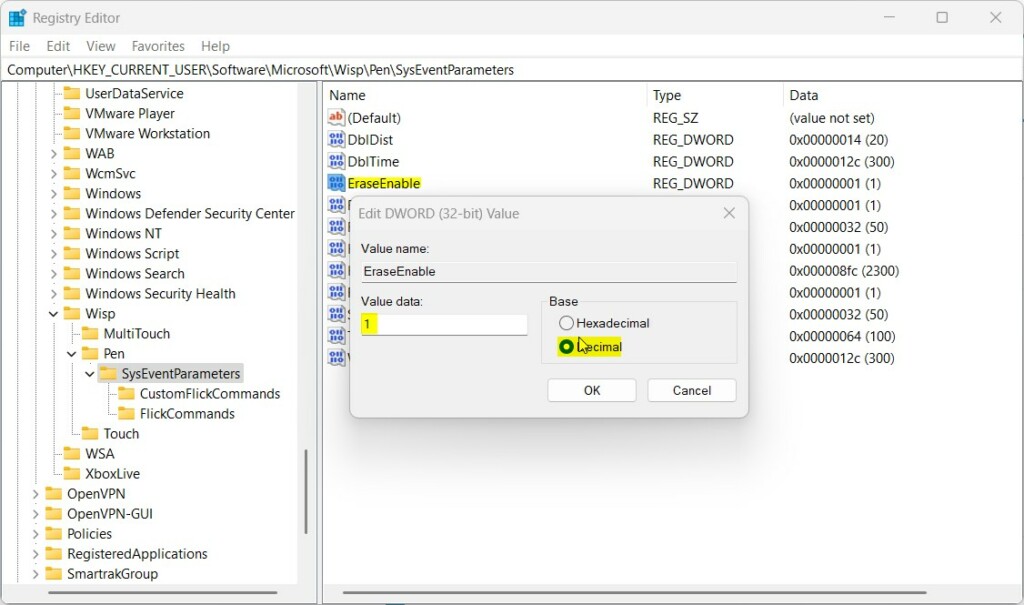
- Restart your computer to save the changes.
Reference: Microsoft Support
Summary
In Windows 11, you can remove ink using your pen's physical eraser, the 'Scratch Out' gesture, or by configuring it in Settings or the Registry Editor.


[…] Windows lets you pair the pen with your device via Bluetooth. Once your pen is connected, you can use it to write or click on your screen. You can also customize your pen settings, such as choosing your writing hand or what happens when you hold down the pen’s shortcut button. […]