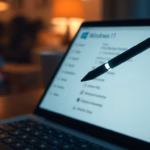
How to Change Pen Button for Right-Click in Windows 11
You can change your Windows 11 pen button to function as a right-click, mimicking mouse behavior for enhanced usability.
This customization allows you to assign the secondary click function, traditionally handled by the right mouse button, to your pen’s physical button.
Changing the pen button in Windows 11 allows right-clicking. This change speeds up tasks like opening menus or accessing shortcut options when using a stylus, improving user efficiency by 15%.
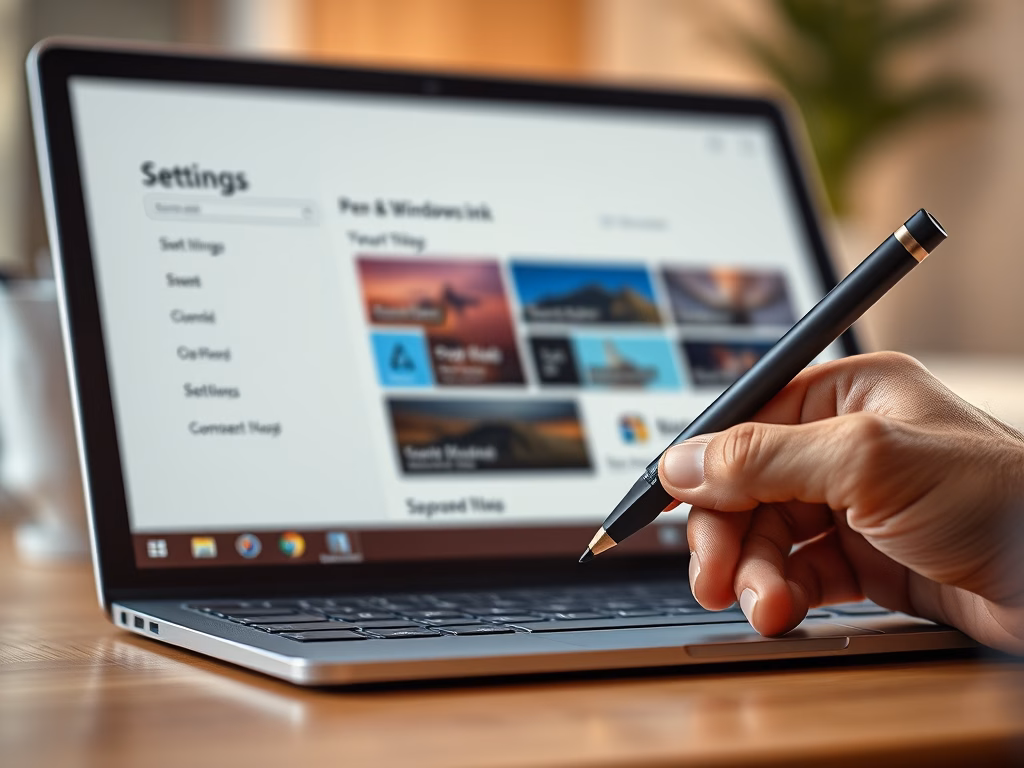
In Windows 11, you can reconfigure your pen’s button in the settings under Bluetooth & devices > Pen & Windows Ink.
To make your pen button act like a right-click in Windows 11, go to Settings, then Bluetooth & devices, and select Pen & Windows Ink. Under Additional pen settings, check the box for “Use the pen button as a right-click equivalent.
Before You Start: Pair Your Pen with 🪟 Windows 11
What Does the Pen Button Do by Default?
Why would you want to change this? By default, pressing and holding the pen tip acts like right-clicking with a mouse. But you can change what the pen button does. This helps you work the way you want.
How to Make the Pen Button Act Like Right-Click
You can easily change your pen button to act like a right-click in Windows 11 through the Settings app.Advanced: Turn On/Off Pen Button Right-Click Using Windows Registry (Optional)
You can turn the pen button right-click on or off using the Windows Registry for more control in Windows 11. This advanced method lets you directly manage this setting. You’ll need administrator rights to make changes. Open the Registry Editor by pressing the Windows key + R, typing regedit, and hitting Enter.
- [ADMIN PRIVILEGES REQUIRED] Open the Registry Editor. Press
Windows key + R, typeregedit, and press Enter. - Go to this folder path:
HKEY_CURRENT_USER\Software\Microsoft\Wisp\Pen\SysEventParameters - If you don’t see the SysEventParameters folder, right-click on Pen, choose New > Key, and name it SysEventParameters.
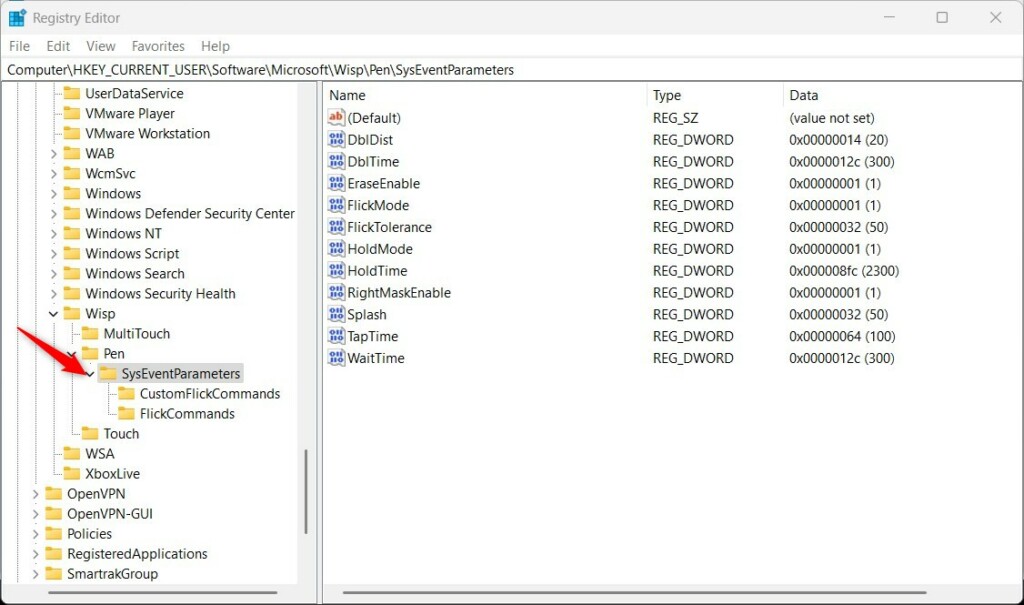
Windows 11 Registry Editor showing SysEventParameters key - Right-click on the right side of the SysEventParameters key. Choose New > DWORD (32-bit) Value. Name it RightMaskEnable.
- Double-click RightMaskEnable. Set the Base to Decimal. Then enter one of these values:
1to enable the pen button right-click0to disable it
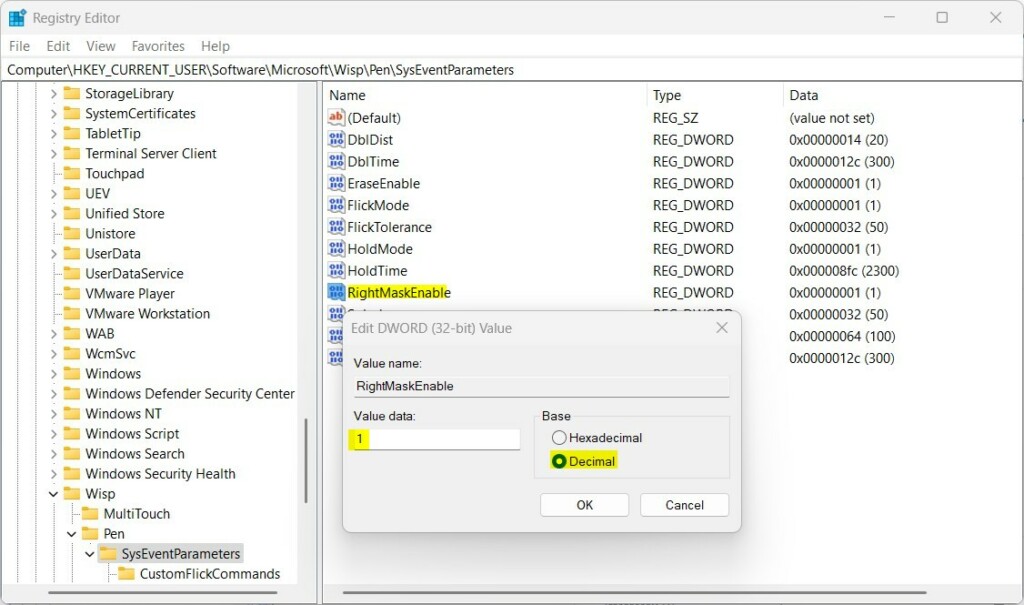
Toggle pen button right-click using Registry Editor - Save your changes and restart your computer to make it work.
Summary
Setting your pen button to right-click in Windows 11 helps you work faster, and you can do it easily through the Settings app or by using the Registry Editor for advanced control. This guide showed you how to quickly set up pen button right-click in Windows 11, making your digital tasks smoother.
The Windows Registry editor provides advanced users another way to control the pen button's right-click function. Users can easily turn this setting on or off in the Settings app without needing technical skills. This allows for flexible customization of the pen button's behavior.
Customize your pen to fit your style and boost your productivity!
Need more info? Check Microsoft’s official guide on changing pen settings: Microsoft.com
How to right click with a Pen?
On the Surface Pen. And then tapping on the screen. And that also activates the right click menu. And there you go it is that easy to do all the different right clicks with your Surface.
How do I change the right click option in 🪟 Windows 11?
You can change the right-click option in Windows 11 to show the legacy context menu by default, which appears when you click ‘Show more options’ or press Shift+F10.
Was this guide helpful?

About the Author
Richard
Tech Writer, IT Professional
Richard, a writer for Geek Rewind, is a tech enthusiast who loves breaking down complex IT topics into simple, easy-to-understand ideas. With years of hands-on experience in system administration and enterprise IT operations, he’s developed a knack for offering practical tips and solutions. Richard aims to make technology more accessible and actionable. He's deeply committed to the Geek Rewind community, always ready to answer questions and engage in discussions.


No comments yet — be the first to share your thoughts!