How to Turn On the On-Screen Touchpad in Windows 11

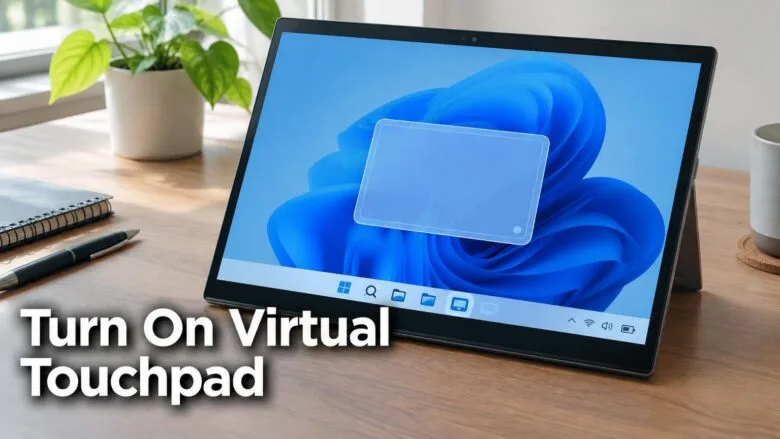
- 16 steps
- Needs administrator rights
Windows calls the on-screen touchpad the Virtual touchpad. To turn it on, go to Settings Personalization Taskbar and switch on Virtual touchpad under Taskbar corner icons. Switching on Virtual touchpad adds a touchpad icon to the taskbar, and selecting that icon opens the touchpad on screen.
The Virtual touchpad is a touchpad drawn on your display. Drag a finger across it to move the pointer, as you would on a physical touchpad. It is useful on a tablet or 2-in-1 PC when you want precise pointer control, and when the physical touchpad is broken or missing.
The setting is the same on Windows 11 Home and Pro. It needs no restart, no sign-out, and no administrator rights.
Open Settings Personalization Taskbar, expand Taskbar corner icons, and switch on Virtual touchpad. A touchpad icon appears in the system tray at the right end of the taskbar straight away. Select that icon to open the on-screen touchpad, then drag one finger across it to move the pointer. No restart or administrator rights are needed.
Before You Start
Check these points first, so the steps below match what you see on screen:
- You need Windows 11. The setting sits in the same place in every release, from version 21H2 onward.
- The Virtual touchpad is built for touchscreens. A tablet or 2-in-1 laptop is the typical device.
- You can switch it on with a mouse or a physical touchpad as well as by touch. On a touchscreen, “right-click” below means pressing and holding.
- The Virtual touchpad is separate from the Touch keyboard icon. Both sit on the same Settings page, but they do different things. The touchpad moves the pointer, and the Touch keyboard lets you type.
How to Turn On the On-Screen Touchpad in 🪟 Windows 11
These steps turn on the Virtual touchpad (Windows 11’s on-screen touchpad) and open it for the first time. When you finish, a touchpad panel is visible on your display and the pointer follows your finger.
- Open Settings from the Start menu, or press
Windows key + I. The Settings app opens, with a list of categories down the left side.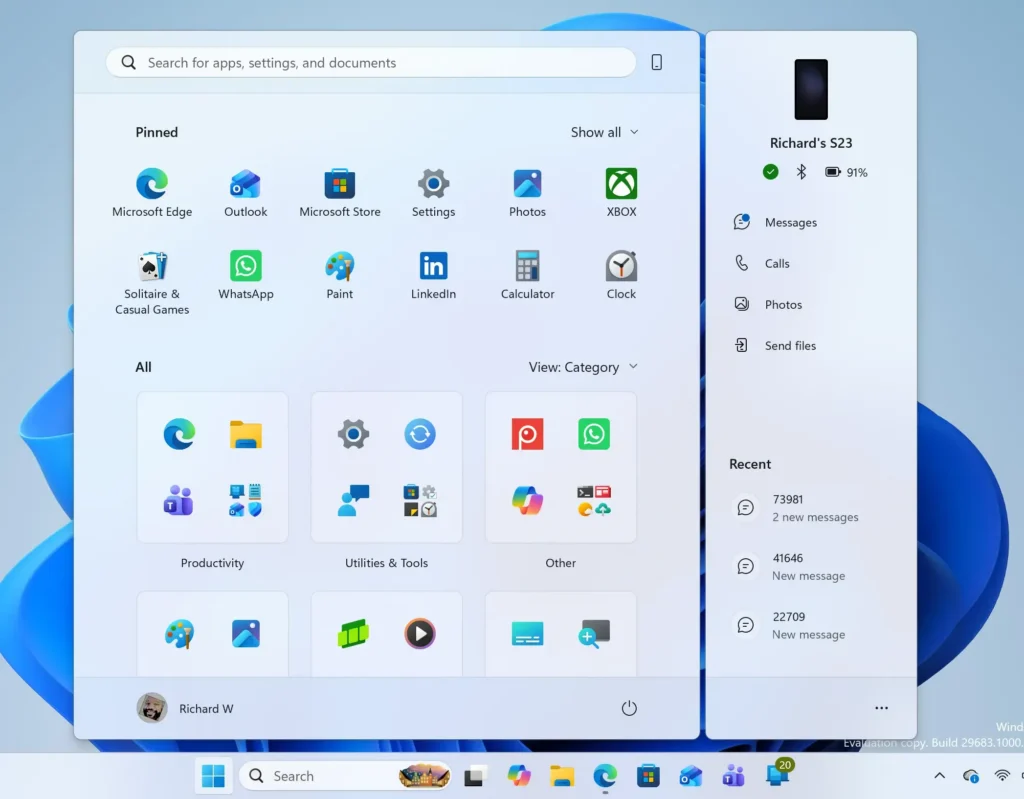
Windows 11 Start menu search panel for opening OpenSSH Client settings - Select Personalization in the left pane. The page lists options such as Background, Colors and Themes.
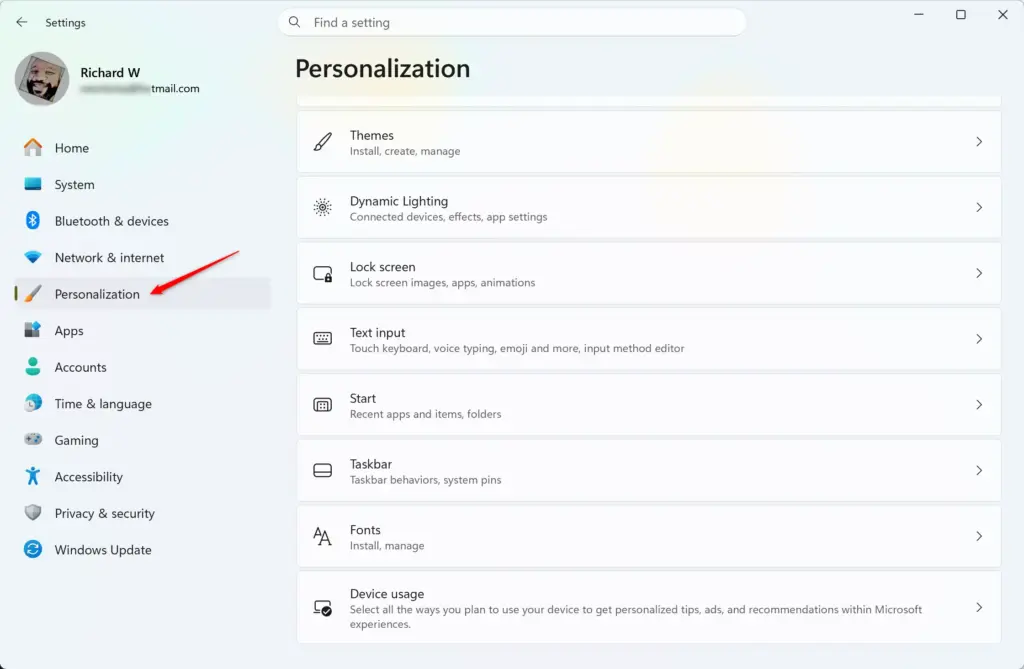
Settings › Personalization - Select Taskbar. You may need to scroll down the Personalization page to find it. The Taskbar page opens.
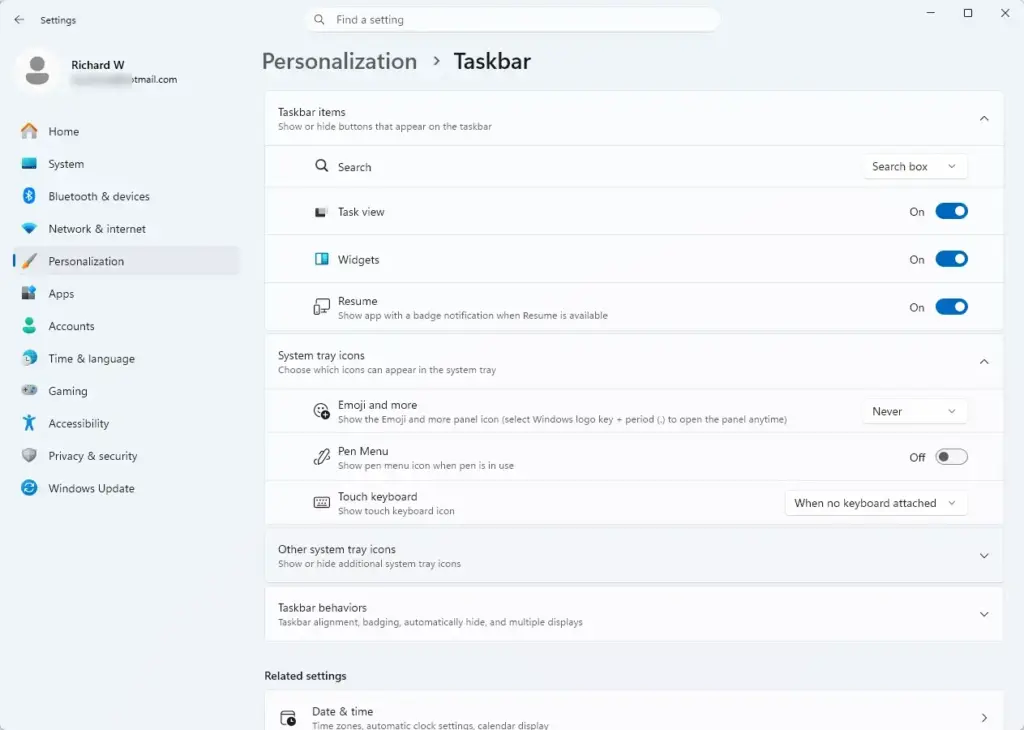
Windows 11 settings menu for managing optional diagnostic data sharing - Select Taskbar corner icons to expand the section. Windows lists up to three toggles here: Pen menu, Touch keyboard and Virtual touchpad.
- Switch the Virtual touchpad toggle to On. A touchpad icon appears at the right end of the taskbar, in the system tray (the area near the clock), straight away.
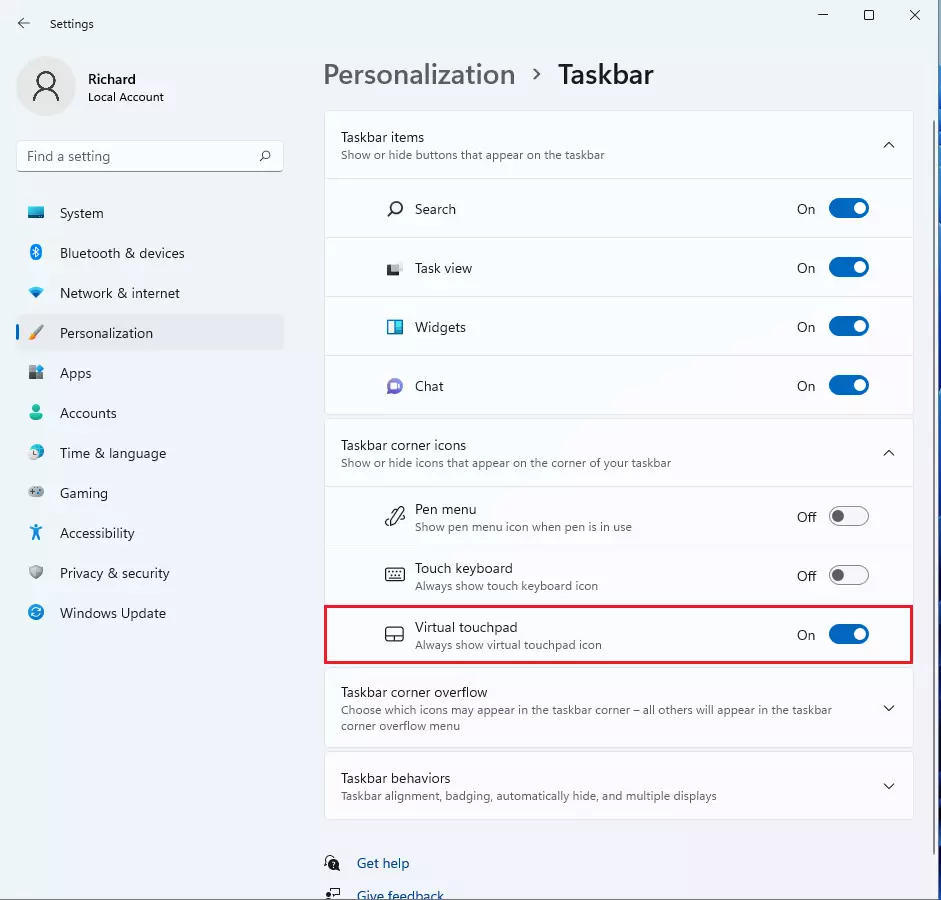
windows 11 taskbar virtual touchpad - Select the touchpad icon in the taskbar corner. The on-screen touchpad opens as a panel on your display.
- Drag one finger across the panel. The pointer moves in the same direction.
- Select the touchpad icon again to hide the panel. The icon stays in the taskbar, so you can bring the touchpad back at any time.
How to Use the On-Screen Touchpad
The Virtual touchpad behaves like a small physical touchpad. The panel is a rectangle where you drag to steer the pointer, and it has left and right button areas along the bottom edge.
- Move the pointerdrag one finger across the panel.
- Clickpress the left button area at the bottom of the panel. This selects whatever the pointer is over.
- Right-clickpress the right button area. A context menu (the menu of actions for the item under the pointer) opens.
- Hide itselect the touchpad icon in the taskbar corner.
The touchpad stays on screen until you hide it. It also stays above the app you are working in, so you can keep it open while you use other windows. If it covers part of an app, hide it with the taskbar icon and bring it back when you need it.
If you also want to type without a physical keyboard, turn on the Touch keyboard toggle in the same Taskbar corner icons section, or read how to open and use the On-Screen Keyboard in Windows 11.
If the Virtual Touchpad Option Is Missing
Most problems come down to one of four causes. Work through them in order, and stop when the toggle appears.
The Taskbar corner icons section is not there
If the section is missing, check that you opened Settings Personalization Taskbar and not another page. On the Taskbar page, the section header reads Taskbar corner icons. It is collapsed by default, so select the header to expand it.
If the section is there but lists no Virtual touchpad toggle, Windows may not detect touch hardware on that PC. I don’t know which hardware conditions make Windows hide this toggle. Compare against a device you know has a touchscreen.
The touchscreen driver is disabled
Windows treats the touchscreen as a device. Its driver (the software that lets Windows use the hardware) can be switched off, and a disabled device can hide touch features. Check it in Device Manager (the tool that lists the hardware in your PC).
- Right-click the Start button and select Device Manager.
- Expand Human Interface Devices.
- Look for an entry such as HID-compliant touch screen. If it has a down-arrow on its icon, right-click it and select Enable device.
- Return to Settings Personalization Taskbar and check for the toggle again.
If no touch screen entry exists at all, the PC does not report a touchscreen to Windows. In that case, Windows may not offer the Virtual touchpad.
The icon does not appear after you switch the toggle on
Look at the right end of the taskbar, next to the clock and system icons. The touchpad icon sits there, not in the Start menu or on the desktop. If the taskbar is crowded, check the up-arrow that shows hidden icons. The touchpad icon may be tucked behind it.
If the icon still does not show, switch the toggle Off, wait a moment, and switch it back On.
The panel opens but the pointer does not move
Drag with one finger inside the panel itself, not on the desktop behind it. If nothing responds, hide the panel with the taskbar icon and open it again. If the touchscreen itself is unresponsive in other apps, the fault lies with the touch hardware or its driver, not with the Virtual touchpad.
How to Turn Off the On-Screen Touchpad
Switch the feature off if you no longer want the icon in the taskbar. This removes the icon only. It does not uninstall anything, and your other settings stay as they are.
- Open Settings from the Start menu, or press
Windows key + I. - Select Personalization, then select Taskbar.
- Expand Taskbar corner icons.
- Switch the Virtual touchpad toggle to Off. The touchpad icon disappears from the taskbar.
Where the Setting Lives and What Can Change It
The Virtual touchpad toggle belongs to your user account, so each person who signs in to the PC chooses their own. If another account on the same PC shows no touchpad icon, switch the toggle on while signed in to that account.
A new Windows profile starts with default taskbar settings, so the icon may be absent there until you enable it. Because the setting lives in the Settings app, you do not need Registry Editor (the advanced tool for editing the Windows registry, the database of low-level settings) to change it.
What to Do Next
With the Virtual touchpad on, the next gap on a touch-only PC is usually typing. Learn how to change the layout of the On-Screen Keyboard in Windows 11 so it suits your hands. If the key clicks bother you, mute the Windows 11 On-Screen Keyboard sounds. If the touchpad icon does not return after a feature update, open Settings Personalization Taskbar and check the Virtual touchpad toggle again.
Have a question about this guide?
Answered by AI from this guide. Good questions may be added to this page — please don't include personal details.
Did this guide fix your problem?

About the Author
Richard
Tech Writer, IT Professional
Richard is a writer at Geek Rewind who turns complex IT tasks into clear, step-by-step guides. He draws on years of hands-on experience in system administration and enterprise IT operations, focusing on Windows, Linux and WordPress: the problems people actually run into, and the fixes that work. His server and WordPress guides come from systems he runs himself. Richard builds and maintains the platform behind Geek Rewind, from its Ubuntu servers and Nginx configuration to its custom WordPress plugins. Many new tutorials start with readers' questions, and he's always glad to answer them in the comments.
No comments yet — be the first to share your thoughts!