How to Set Data Limit on Your Wi-Fi in Windows 11

Setting a data limit on your Wi-Fi in Windows 11 helps you stay within the internet allowance on your plan. Windows tracks your network usage in the background. It shows your use over the last 30 days, and once you add a limit, it measures that usage against your plan. You set all of this in the main Settings app , so you don’t need extra monitoring software.
One thing to know first: the limit is a tracking tool. Windows 11 will not cut your connection when you reach it. You still need to watch the numbers, or stop heavy downloads yourself.
Open Settings , go to Network & internet Wi-Fi , click your network name, select Set a data limit, click Enter limit, choose your limit type (Monthly, One-time, or Unlimited), enter your data amount in GB or MB, set your reset date, then click Save. Windows now tracks your usage against this limit.
Setting a Data Limit for Your Wi-Fi
Windows can notify you when you get close to your limit and when you’ve used it all. This works on both Home and Pro editions of Windows 11, and the steps are the same.
How to Set Up the Data Limit
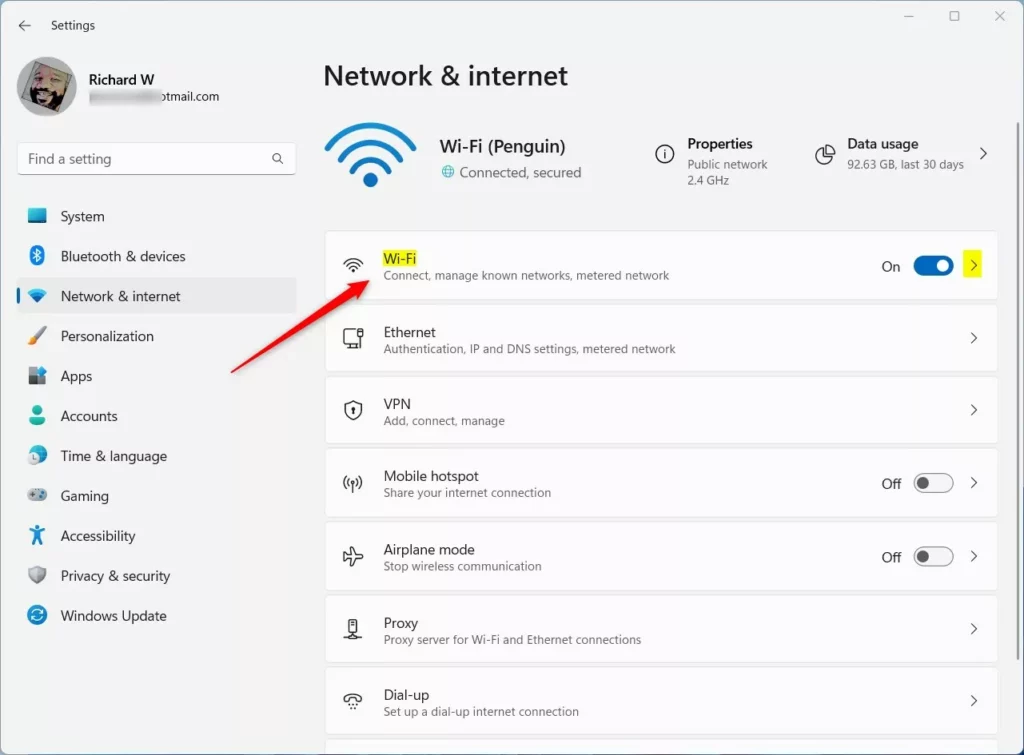
- Open Settings . Click the Start button (the Windows icon on the taskbar ), then click the Settings gear icon. Or right-click the network icon (the Wi-Fi symbol, or a computer with a cable) in the taskbar and choose Network & internet settings. Either way, the Settings window opens.
- Go to your network connection. Click Network & internet in the left menu. Then click Wi-Fi if you use wireless internet, or Ethernet if you use a cable. This tutorial uses Wi-Fi . If Wi-Fi is missing from the list, your PC has no wireless adapter or the adapter is turned off. Check that Airplane mode is off and that the adapter is enabled.
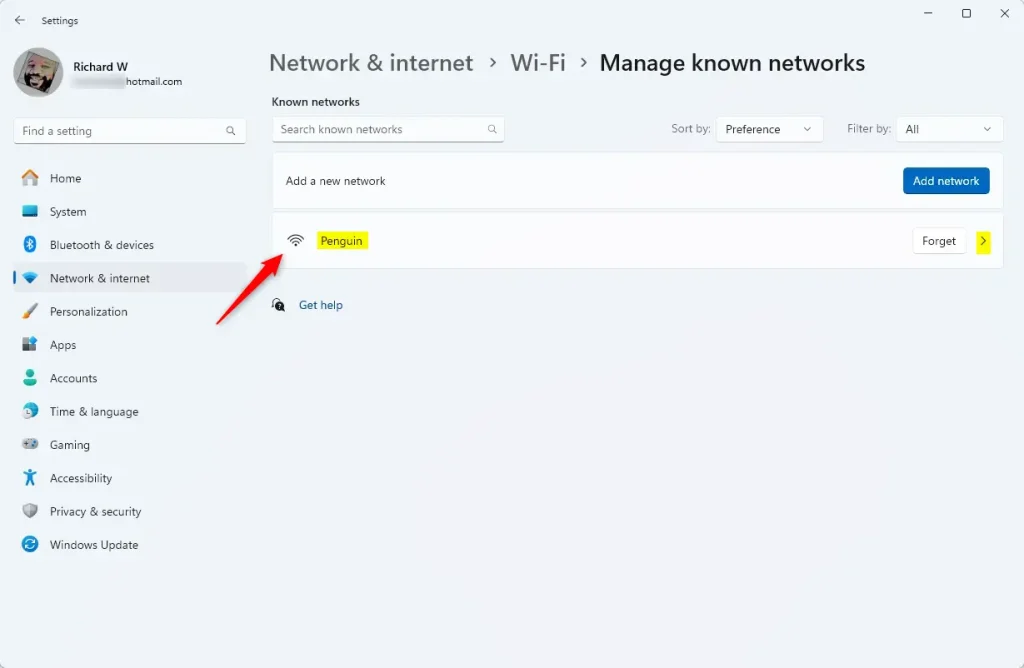
- Select your Wi-Fi network. Click the name of the Wi-Fi network you are connected to. It is usually at the top of the list. You should now see that network’s properties page. You can only set a limit for the network you are connected to, so if you see no network name, connect first and come back.
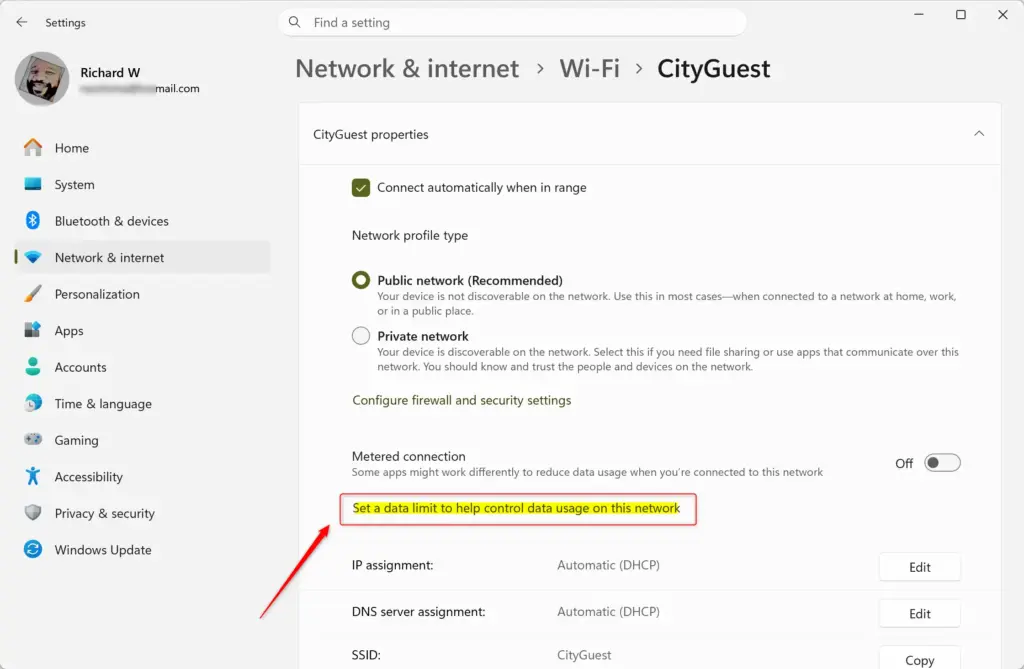
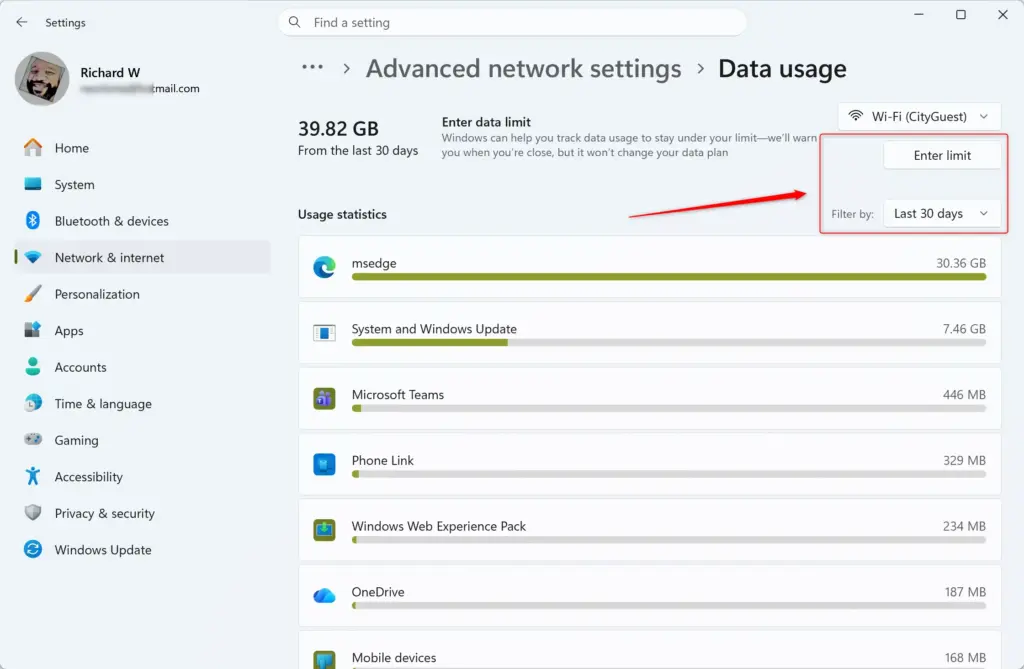
- Find the data limit option. Scroll down the page until you see Set a data limit, then click it. The exact layout can differ slightly between Windows 11 builds, but the option sits in the data usage part of the network’s page.
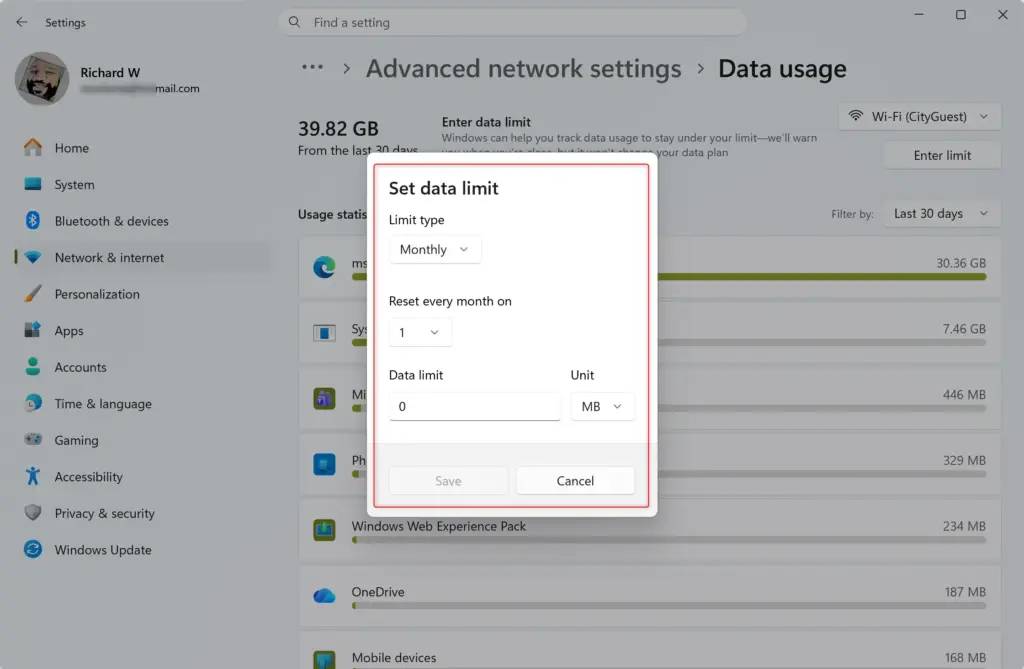
- Enter your data limit details. Click Enter limit. A small window opens with these settings:
- Limit type: Choose how your data plan works. The options are usually Monthly, One-time or Unlimited. Most people use Monthly for home Wi-Fi or mobile hotspots. One-time suits a prepaid pack that does not renew.
- Data amount: Type how much data you are allowed. You can choose units such as Gigabytes (GB) or Megabytes (MB). For example, if your plan is 50 GB per month, enter 50 and select GB.
- Data reset date: If you picked Monthly or One-time, tell Windows when your data resets, so it can start counting your new allowance. For a monthly plan, this is usually the day your billing cycle starts over. Check your provider’s bill for the exact date.
- Save your settings. Click Save. Windows now tracks data use for this network against your limit and shows how much you have used. Open the same page later to check your usage. If your plan changes, go back to the same place to edit the limit or remove it. No restart is needed at any point.
You can set a monthly cap or a one-time limit, which is handy on a limited mobile hotspot or a home broadband connection with a cap. Each network has its own limit, so if you use more than one, repeat the steps for each. If you also want Windows to hold back background downloads such as some updates, turn on Metered connection on the same network page.
References:
Summary
Setting a data limit in Windows 11 is a practical way to manage your internet usage and avoid extra charges. Once you enter your plan details, Windows keeps count and tells you when you are nearing your cap, so you can slow down before it costs you.
Have a question about this guide?
Answered by AI from this guide. Good questions may be added to this page — please don't include personal details.
Did this guide fix your problem?

About the Author
Richard
Tech Writer, IT Professional
Richard is a writer at Geek Rewind who turns complex IT tasks into clear, step-by-step guides. He draws on years of hands-on experience in system administration and enterprise IT operations, focusing on Windows, Linux and WordPress: the problems people actually run into, and the fixes that work. His server and WordPress guides come from systems he runs himself. Richard builds and maintains the platform behind Geek Rewind, from its Ubuntu servers and Nginx configuration to its custom WordPress plugins. Many new tutorials start with readers' questions, and he's always glad to answer them in the comments.
No comments yet — be the first to share your thoughts!