How to Remove Mobile Devices from Microsoft Account on Windows 11
Removing mobile devices from your Microsoft account on Windows 11 disconnects phones and tablets from your PC profile.
This stops them from appearing in your list of linked devices, which is helpful when you give away or sell a device.
Microsoft updated this process in early 2024, making it simpler to unlink your gadgets.
You can usually finish this in about two minutes by visiting your Microsoft account page online.
Open Settings and go to Bluetooth & devices, then select Mobile devices. Click Manage devices, expand your mobile device, and select Remove from account to unlink it.
Remove a Mobile Device from 🪟 Windows 11
As mentioned, a recent update to Microsoft lets you remove your mobile devices from your Microsoft account directly from Windows 11.
Here’s how to do that.
Step 1Open the Settings App
First, open the Windows Settings app.
Click on the Start menu and select Settings. Alternatively, press the keyboard shortcut Windows key + I to launch the Settings app.
Step 2Navigate to Bluetooth & Devices
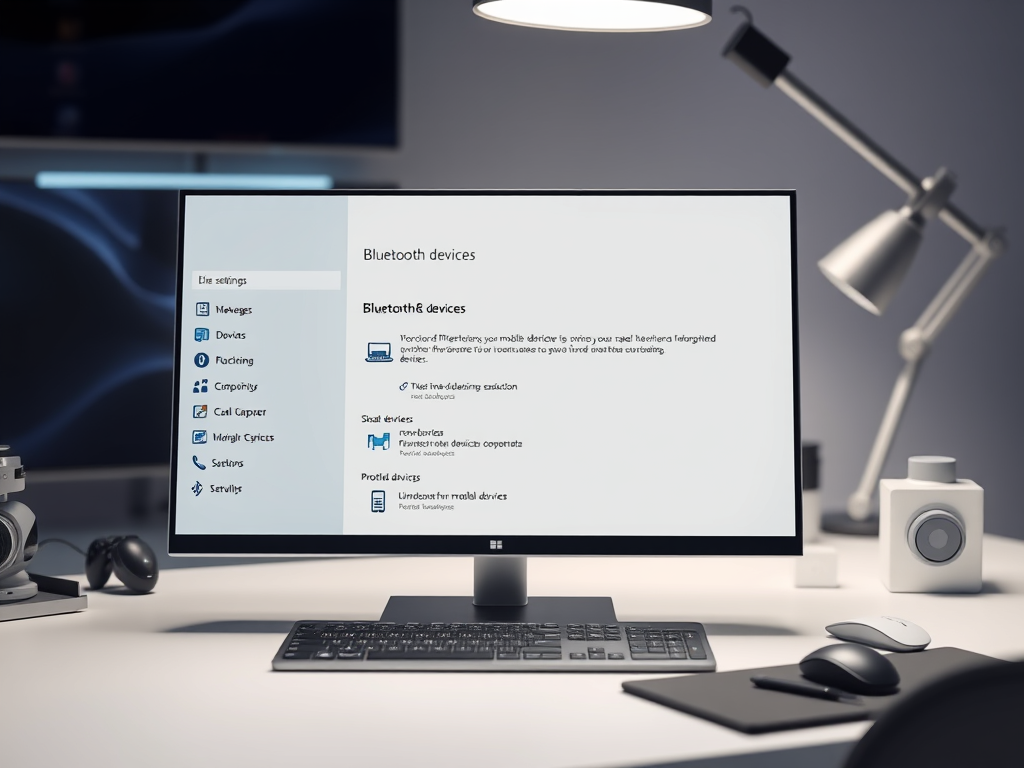
When the Settings app opens, click the Bluetooth & devices button on the left.

Step 3Select Mobile Devices
The Mobile devices tile, found in the 'Bluetooth & devices' section on the right side of the settings window, expands to show connected devices when you click it.

Step 4Open Manage Devices
Select the "Manage devices" button. It appears under the "Allow this PC to access your mobile device" setting. This action opens a list of all devices linked to your Microsoft account. You can review and remove any you no longer use, which is important for account security.

Step 5Remove the Device
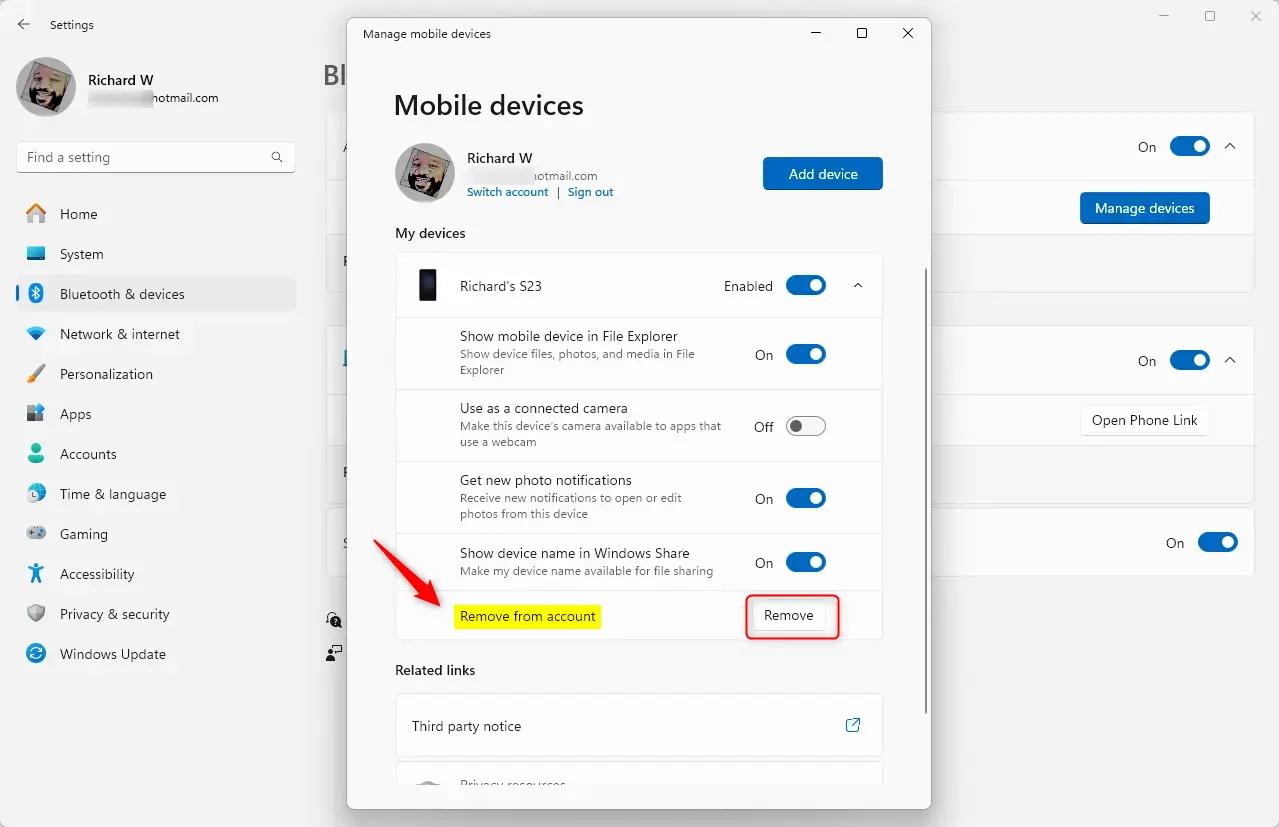
You've successfully removed the device.
Summary
Removing a mobile device from your Microsoft account on Windows 11 is done through the Settings app. This helps you keep track of which phones and tablets are connected to your account, benefiting your privacy and security. Follow these steps to disconnect a device.
- Make sure you have the latest Windows update to access the "Manage mobile devices" feature.
- Use the Settings app to navigate to Bluetooth & devices.
- Select Mobile devices to manage your linked devices.
- Expand your device list to remove any unwanted mobile devices quickly.
- This feature gives you better control over your devices and improves your experience with Windows 11.
Was this guide helpful?

About the Author
Richard
Tech Writer, IT Professional
Richard, a writer for Geek Rewind, is a tech enthusiast who loves breaking down complex IT topics into simple, easy-to-understand ideas. With years of hands-on experience in system administration and enterprise IT operations, he’s developed a knack for offering practical tips and solutions. Richard aims to make technology more accessible and actionable. He's deeply committed to the Geek Rewind community, always ready to answer questions and engage in discussions.

No comments yet — be the first to share your thoughts!