How to Remove Fingerprint Sign-in from Your Windows 11 Account

Removing fingerprint sign-in takes about a minute and is done from the Settings app. It deletes the stored fingerprint data for your account on this PC. Your PIN and password are not affected.
Open Settings Accounts Sign-in options, find Fingerprint recognition, and click Remove. Enter your PIN or password to confirm. The fingerprint option is deleted immediately and no restart is needed.
What is Windows Hello?
Windows Hello is the sign-in system built into Windows 11. It covers face, fingerprint and PIN sign-in, so you can skip typing a standard password. A fingerprint scan, with a PIN as the fallback, makes everyday logins faster. It also keeps other people away from the data stored on the PC.
If you use a Microsoft account, that account is also how you recover access if you forget the PIN. Because of this, removing your fingerprint does not lock you out. You can still sign in with your PIN or password.
When Can You Use Fingerprint Sign-in?
That is usually a capacitive sensor built into a laptop, or one on an external keyboard or USB device. If your PC has no reader, or the driver is missing, the fingerprint option may not appear at all. If it is greyed out, check Device Manager and Windows Update for a driver first.
You can register several fingerprints on the same account. This is handy when more than one person uses a workstation, or when you want to enroll more than one of your own fingers. Each person should still use their own Windows account for their own fingerprints.
How to Remove Fingerprint Sign-in in 🪟 Windows 11
- Open Settings : Press Win+I to open the Settings app. A window with a list of categories on the left should appear.
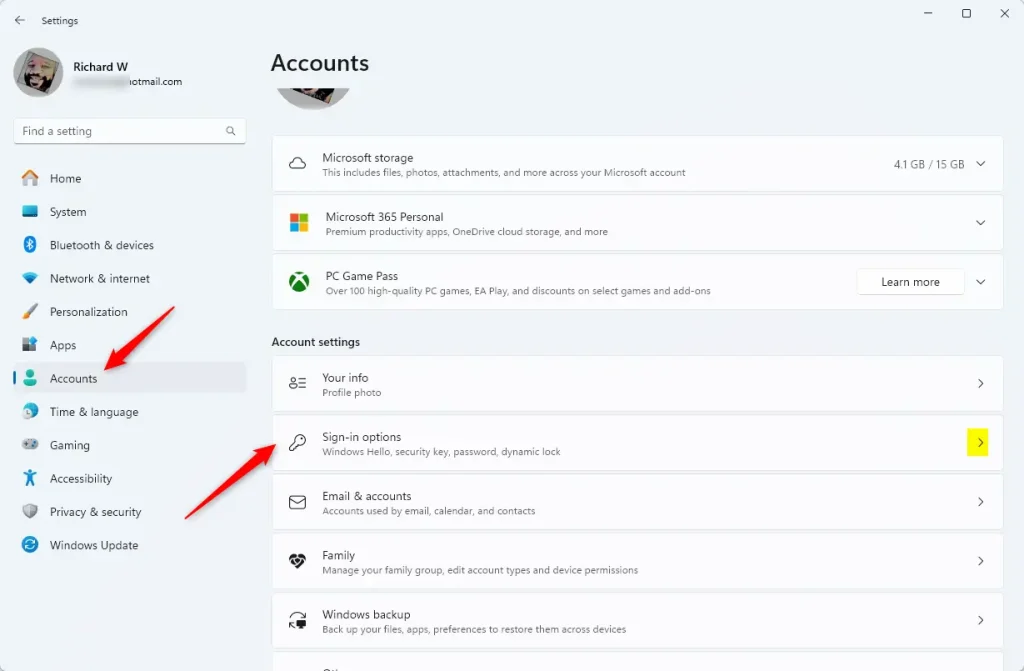
- Go to Accounts: In the left menu, click Accounts. The account options for your user appear on the right.
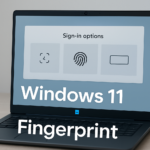
- Select Sign-in options: On the right, click Sign-in options. The full path is Settings Accounts Sign-in options You should see a list of ways to sign in.
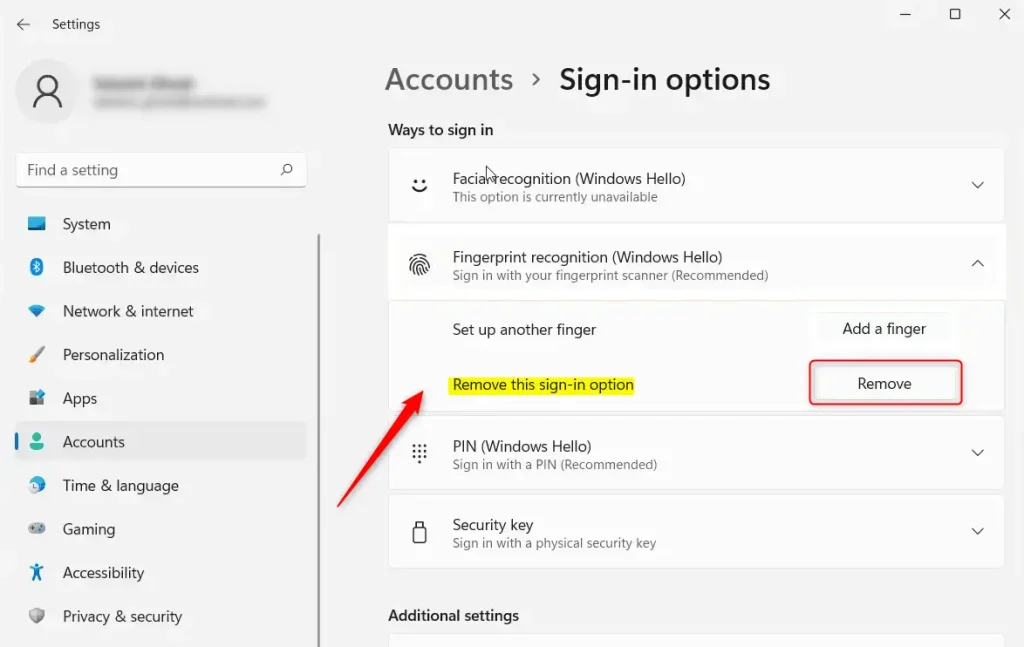
- Find Fingerprint recognition: Under Ways to sign in, click Fingerprint recognition (Windows Hello) to expand it. If the entry is missing or greyed out, Windows does not detect a working reader. That usually means a driver problem, or the PC has no reader.
- Remove Fingerprint: Click the Remove button. If Windows asks you to confirm who you are, enter your PIN or password. The fingerprint option then goes back to its set-up state, and the Remove button is replaced by a Set up button.
- Close Settings: Close the Settings window. Your fingerprint sign-in is removed. No restart is needed.
To check it worked, lock the PC with Win+L. The sign-in screen should now ask for your PIN or password and no longer show the fingerprint prompt. If you change your mind, go back to the same screen and use the Set up button to scan your finger again. This works the same on Home and Pro.
Step-by-step Images
Helpful Links
- More about Windows Hello fingerprint authentication
- Windows Hello biometric requirements
- Windows Hello biometrics in business environments
- Troubleshoot Windows Hello problems
Your fingerprint sign-in is now removed.
Was this guide helpful?
0% of readers found this helpful (1 votes)

About the Author
Richard
Tech Writer, IT Professional
Richard is a writer at Geek Rewind who turns complex IT tasks into clear, step-by-step guides. He draws on years of hands-on experience in system administration and enterprise IT operations, focusing on Windows, Linux and WordPress: the problems people actually run into, and the fixes that work. His server and WordPress guides come from systems he runs himself. Richard builds and maintains the platform behind Geek Rewind, from its Ubuntu servers and Nginx configuration to its custom WordPress plugins. Many new tutorials start with readers' questions, and he's always glad to answer them in the comments.

No comments yet — be the first to share your thoughts!