How to install Odoo 17 on Ubuntu 24.04

Installing Odoo 17 on Ubuntu 24.04 involves running commands in the terminal to set up PostgreSQL and the Odoo software.
Odoo 17 is a set of free business tools for things like sales, accounting, and project management. Ubuntu 24.04, codenamed Noble Numbat, is a good operating system for running Odoo.
This guide walks you through preparing Ubuntu, installing and setting up the PostgreSQL database that Odoo needs, and then getting the Odoo 17 application running.
Install Odoo 17 on Ubuntu 24.04 by installing prerequisites, creating an Odoo system user, installing PostgreSQL, and then downloading, configuring, and installing Odoo itself via command line. Update your system with `sudo apt update` and install dependencies, then create the user with `sudo /usr/sbin/adduser –system –shell /bin/bash –gecos ‘Odoo user’ –group –home /opt/odoo17 odoo17`.
Install Odoo prerequisites
Install the necessary supporting software before you install Odoo 17 on Ubuntu 24.04. This includes tools like Git, Node.js, and Pip that Odoo needs to run correctly. Using the right commands will add these important programs to your system.
Run the commands below to install supporting dependencies for Odoo.
sudo apt update
sudo apt install build-essential wget git python3.11-dev python3.11-venv libfreetype-dev libxml2-dev libzip-dev libsasl2-dev node-less libjpeg-dev zlib1g-dev libpq-dev libxslt1-dev libldap2-dev libtiff5-dev libopenjp2-7-dev libcap-dev
If you run into problems and can’t install python3.11, run the command below and try again.
sudo apt-get install software-properties-common
sudo add-apt-repository ppa:deadsnakes/ppa
Create an Odoo system user on Ubuntu
Create a special user account named ‘odoo’ to run Odoo 17 on Ubuntu 24.04 securely. This keeps Odoo from using your main administrator rights. The command to make this user and set its home folder to /opt/odoo17 is below.
To create a system account for Odoo, run the command below to create a system account called odoo.
The account home directory will be /opt/odoo17
sudo /usr/sbin/adduser --system --shell /bin/bash --gecos 'Odoo user' --group --home /opt/odoo17 odoo17
Install PostgreSQL on Ubuntu
Install PostgreSQL on Ubuntu because Odoo 17 uses it to store all its information. After installing, you must start the PostgreSQL service and confirm it’s working. The commands to get PostgreSQL running are provided here.
sudo apt install postgresql
After installing the database server, enable and start it by running the commands below.
sudo systemctl enable --now postgresql.service
Next, create a PostgreSQL database account for Odoo. Run the commands below to create a new database account called odoo17.
sudo su - postgres -c "createuser -s odoo17"
Additional PostgreSQL help at the link below.
Install Wkhtmltopdf on Ubuntu
Check this link to ensure you always get the latest version.
To install the package, run the commands below.
sudo apt install wkhtmltopdf
Install and configure Odoo17 on Ubuntu
Now that the basic setup is done, you can install Odoo 17 on Ubuntu 24.04. The first step is to switch to the ‘odoo’ user account you created earlier. Running the commands below lets you move to the Odoo system account before continuing the installation.
The first thing you’ll want to do is switch to the Odoo system account we created above by running the commands below:
sudo su - odoo17
Odoo’s latest version is 17 at the time of this post. If a newer version is available, you should clone that instead. To clone Odoo version 17, run the commands below.
Check this link to ensure you always get the latest version.
git clone https://www.github.com/odoo/odoo --depth 1 --branch 17.0 odoo17
When the download is complete, change it into Odoo’s directory and run the commands below to configure and install all Odoo17 requirements.
cd /opt/odoo17
python3.11 -m venv odoo17-venv
source odoo17-venv/bin/activate
pip3 install wheel setuptools pip --upgrade
pip3 install -r odoo17/requirements.txt
deactivate
After that, create a new directory for Odoo custom addons.
mkdir /opt/odoo17/odoo17/custom-addons
Exit:
exit
When done, add the Odoo admin password, database name, and database account name to its configuration file.
Run the commands below to open Odoo’s configuration file.
sudo nano /etc/odoo17.conf
Then copy and paste the lines below into the file, save, and exit.
[options]
admin_passwd = Type_strong_password_here
db_host = False
db_port = False
db_user = odoo17
db_password = False
addons_path = /opt/odoo17/odoo17/addons,/opt/odoo17/odoo17/custom-addons
Replace Type_strong_password_here with something more complex and more robust. This password is the master password you’ll need when setting up Odoo.
Save your changes and exit.
Create a Systemd unit file on Ubuntu
Create a systemd unit file named ‘odoo17.service’ to manage Odoo 17 on Ubuntu 24.04 like a service. This file goes in the systemd directory and makes it easy to start, stop, and restart Odoo. Use the command below to open this file for editing.
sudo nano /etc/systemd/system/odoo17.service
Then copy and paste the lines below into the file, save, and exit
[Unit]
Description=Odoo17
Requires=postgresql.service
After=network.target postgresql.service

[Service]
Type=simple
SyslogIdentifier=odoo17
PermissionsStartOnly=true
User=odoo17
Group=odoo17
ExecStart=/opt/odoo17/odoo17-venv/bin/python3 /opt/odoo17/odoo17/odoo-bin -c /etc/odoo17.conf
StandardOutput=journal+console

[Install]
WantedBy=multi-user.target
When you’re done, reload the systemd daemon and start the Odoo service.
sudo systemctl daemon-reload
sudo systemctl enable --now odoo17
To check Odoo status and verify it’s installed and running, run the commands below:
sudo systemctl status odoo17
You should see similar messages below:
odoo17.service - odoo17
     Loaded: loaded (/etc/systemd/system/odoo17.service; enabled; preset: enabl>
     Active: active (running) since Wed 2024-06-05 07:07:56 CDT; 7s ago
   Main PID: 10898 (python3)
      Tasks: 2 (limit: 4561)
     Memory: 92.8M (peak: 93.2M)
        CPU: 1.436s
     CGroup: /system.slice/odoo17.service
             └─10898 /opt/odoo17/odoo17-venv/bin/python3 /opt/odoo17/odoo17/odo>

Jun 05 07:07:58 Ubuntu2404 odoo17[10898]:   File "/opt/odoo17/odoo17/odoo/tools>
Jun 05 07:07:58 Ubuntu2404 odoo17[10898]:     return func(inst, *args, **kwargs)
That should be done if you follow and complete all the steps above.
Access Odoo web UI
Once you finish setting up Odoo 17 on Ubuntu 24.04, open your web browser to access its main page. Go to your server’s address and add port 8069, like http://localhost:8069. This will bring up the Odoo setup page where you can create your database.
http://localhost:8069
You should then see the Odoo setup page. Use the master password you created in the/etc/odoo.conf file. Then, type a new database name, admin email address, and password.
Then, click Create Database.
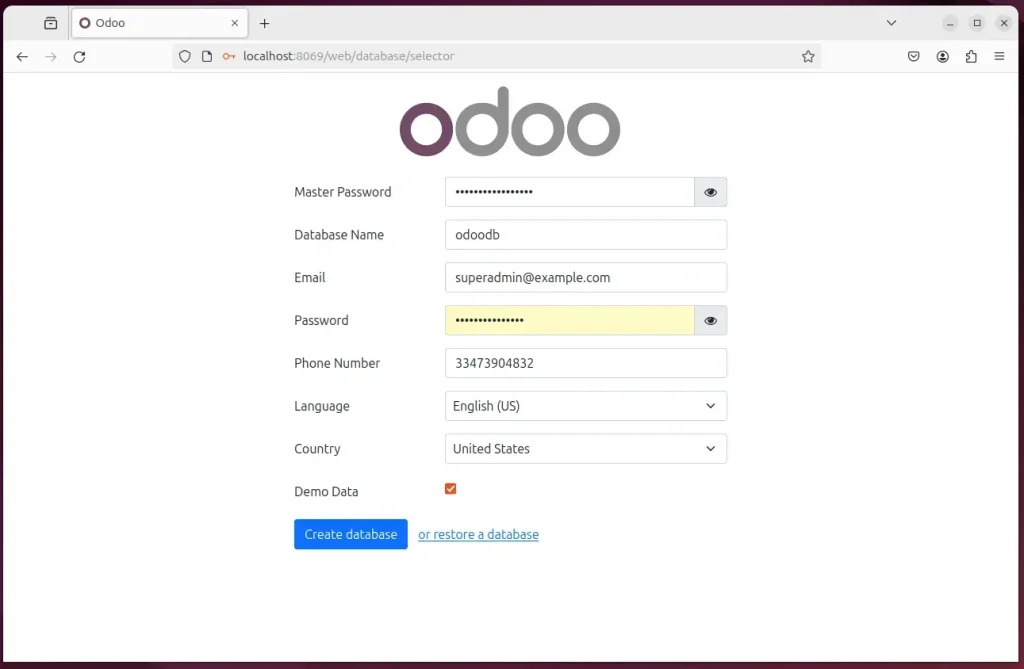
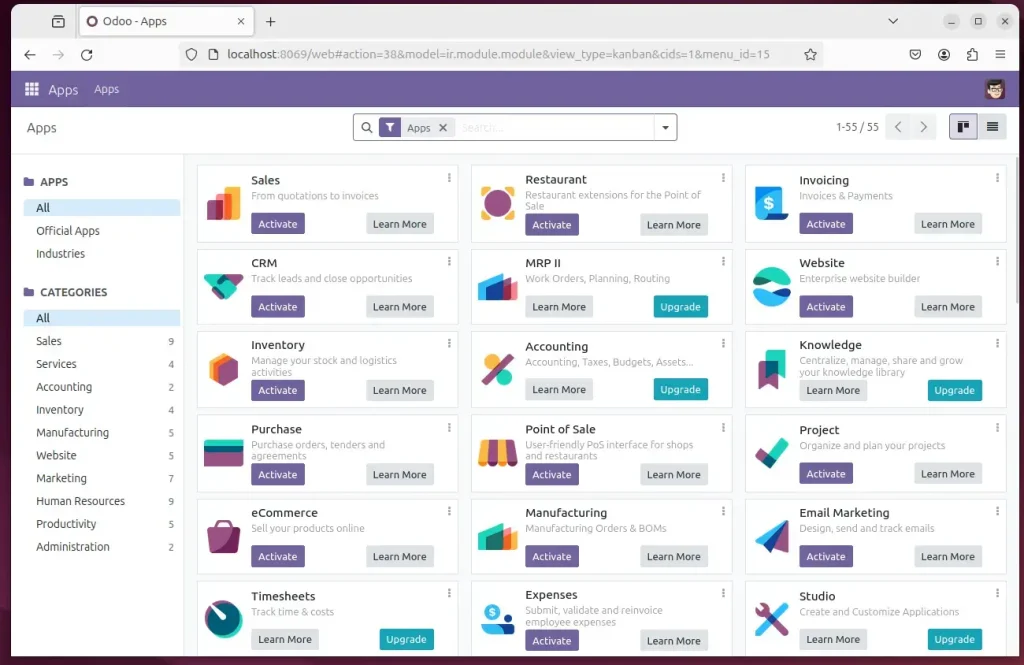
Once everything is entered correctly, you can complete the setup and start using Odoo.
For those who run into issues such as Internal server errors or errors when opening the Odoo setup wizard, they should configure PostgreSQL to trust all local connections.
Run the commands below to open the PostgreSQL configuration file.
sudo nano /etc/postgresql/12/main/pg_hba.conf
Replace the version number with the version installed on your system.
Then, change the highlighted line in the file and save it.
# "local" is for Unix domain socket connections only
local   all             all                    trust
sudo service postgresql restart
If you want to use a reverse proxy with Odoo, click either link below to set up a reverse proxy with Nginx or Apache.
How to setup reverse proxy with Nginx
How to setup reverse proxy with Apache
That should do it!
Conclusion:
- Ease of Installation: Setting up Odoo 17 on Ubuntu 24.04 is straightforward, thanks to the comprehensive step-by-step guide provided.
- Robust Platform: Ubuntu’s reliability, support, and security features make it an ideal environment for deploying and running Odoo.
- Community Support: The well-supported Ubuntu platform, combined with the extensive support from the Odoo community, ensures a smooth installation and ongoing usage.
- Further Assistance: If any errors or additional details need to be included, please utilize the comments section below the post for support and further clarification.
Was this guide helpful?

About the Author
Richard
Tech Writer, IT Professional
Richard, a writer for Geek Rewind, is a tech enthusiast who loves breaking down complex IT topics into simple, easy-to-understand ideas. With years of hands-on experience in system administration and enterprise IT operations, he’s developed a knack for offering practical tips and solutions. Richard aims to make technology more accessible and actionable. He's deeply committed to the Geek Rewind community, always ready to answer questions and engage in discussions.


No comments yet — be the first to share your thoughts!