You install Moodle on Windows via the Windows Subsystem for Linux (WSL) to build your own local learning management system.
Moodle is a free, open-source platform that empowers you to create and manage online courses. Using WSL, you can host Moodle directly on your Windows 10 or Windows 11 PC without needing a separate server.
Installing Moodle on Windows Subsystem for Linux (WSL) 2 is perfect for developers and educators testing Moodle configurations or building course content locally. WSL 2 offers excellent performance for Linux applications, making it a robust solution for your Moodle installation.
Enable WSL and Virtual Machine Platform via PowerShell, then install Ubuntu from the Microsoft Store. Set WSL 2 as default and install the Apache web server and MariaDB database within Ubuntu.
Enable WSL in Windows
Enabling the Windows Subsystem for Linux (WSL) is the first step to install Moodle WSL Windows. This feature lets your Windows computer run Linux programs directly, setting up the foundation for your Moodle environment.
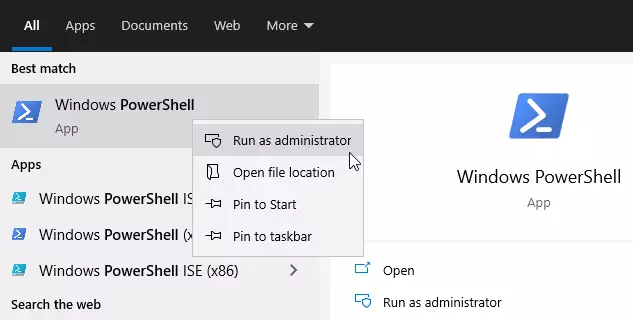
What to do: Open PowerShell as an administrator. Click Start, then type PowerShell. Right-click Windows PowerShell and select “Run as administrator.”
Now run this command:
dism.exe /online /enable-feature /featurename:Microsoft-Windows-Subsystem-Linux /all /norestart
You should see a success message like this:
Deployment Image Servicing and Management tool

Version: 10.0.19041.844
Image Version: 10.0.19042.844
Enabling feature(s)

[==========================100.0%==========================]

The operation completed successfully.
Enable Virtual Machine Platform
The Virtual Machine Platform must be enabled for WSL 2 to run Moodle on Windows. This essential feature allows WSL 2 to manage the virtual environment needed for Linux applications, ensuring Moodle functions correctly.
Run this command from the same PowerShell window:
dism.exe /online /enable-feature /featurename:VirtualMachinePlatform /all /norestart
If you’re using Windows 10 version 2004 or older, use this command instead:
Enable-WindowsOptionalFeature -Online -FeatureName VirtualMachinePlatform -NoRestart
After running these commands, restart your computer. This lets all the changes take effect. If you don’t restart, the next command won’t work.
After restarting your computer, open PowerShell as administrator again. Run the command `wsl –set-default-version 2` to set the Windows Subsystem for Linux (WSL) 2 as the default version. This step ensures that Moodle installations utilize the newer, more capable WSL 2 architecture, which offers better performance and compatibility for Linux environments.
wsl --set-default-version 2
Install Ubuntu on 🪟 Windows 10
Installing Ubuntu on your Windows 10 computer creates the Linux environment required to install Moodle WSL Windows. Ubuntu provides the necessary Linux terminal and command-line tools for running Moodle and its associated software.
Open this link to download Ubuntu 20.04 from the Windows Store:
Get Ubuntu 20.04 LTS – Microsoft Store
Ubuntu gives you a Linux terminal and command-line tools like bash, ssh, git, apt, and many more.
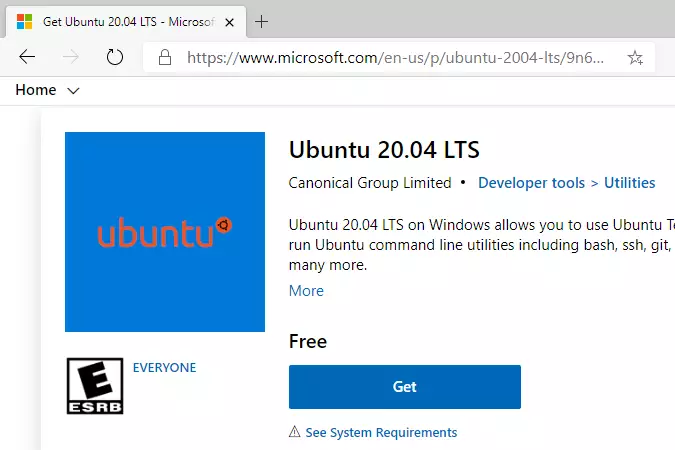
Click the Get button and install it. After installing, launch Ubuntu from WSL.
Ubuntu will ask you to create an account. Follow the prompts:
Installing, this may take a few minutes.
Please create a default UNIX user account. The username does not need to match your Windows username.
For more information visit: https://aka.ms/wslusers
Enter new UNIX username: user
New password:
Retype new password:
passwd: password updated successfully
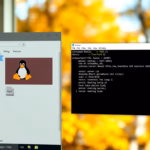
Installation successful!
To run a command as administrator (user "root"), use "sudo <command>".
See "man sudo_root" for details.
Welcome to Ubuntu 20.04.2 LTS (GNU/Linux 4.4.0-19041-Microsoft x86_64)
 * Documentation:  https://help.ubuntu.com

 * Management:     https://landscape.canonical.com

 * Support:        https://ubuntu.com/advantage
  System information as of Mon Apr 12 17:57:37 CDT 2021
  System load:    0.52      Processes:             7

  Usage of /home: unknown   Users logged in:       0

  Memory usage:   26%       IPv4 address for eth0: 192.168.1.100

  Swap usage:     0%
1 update can be installed immediately.

0 of these updates are security updates.

To see these additional updates run: apt list --upgradable
Great! Ubuntu is now installed.
If you run into problems, try these commands:
wsl --set-default-version 1

bcdedit /set hypervisorlaunchtype auto start
Install Apache HTTP Server
The Apache HTTP Server is installed on your Ubuntu WSL to make Moodle function. Apache handles requests from web browsers, allowing them to display your Moodle site and access its content properly.
Run these commands:
sudo apt update

sudo apt install apache2
You can use these commands to control Apache:
sudo service apache2 stop

sudo service apache2 start

sudo service apache2 restart
To check if Apache is working, open your browser and go to:
http://localhost
You should see an Apache test page.

Install MariaDB Database Server
Moodle stores all its important data, like course details and user accounts, in a database, making it necessary to install MariaDB Server on WSL. MariaDB is a fast and secure database system commonly used for Moodle to manage its information effectively.
MariaDB is open-source, fast, and secure. Most Linux systems use it.
Run this command:
sudo apt install mariadb-server mariadb-client
You can use these commands to control MariaDB:
sudo service mysql stop

sudo service mysql start

sudo service mysql restart
sudo mysql_secure_installation
Answer the questions like this:
Enter current password for root (enter for none): Just press Enter
Set root password? [Y/n]: Y
New password: Enter a password
Re-enter new password: Repeat the password
Remove anonymous users? [Y/n]: Y
Disallow root login remotely? [Y/n]: Y
Remove test database and access to it? [Y/n]: Y
Reload privilege tables now? [Y/n]: Y
To verify MariaDB is working, log in with this command:
sudo mysql -u root -p
Type your root password when asked. You should see:
Welcome to the MariaDB monitor.  Commands end with ; or g.

Your MariaDB connection id is 46

Server version: 10.3.29-MariaDB-0ubuntu0.20.04.1 Ubuntu 20.04

Copyright (c) 2000, 2018, Oracle, MariaDB Corporation Ab and others.

Type 'help;' or 'h' for help. Type 'c' to clear the current input statement.

MariaDB [(none)]>
Great! MariaDB is installed.
Install PHP and Related Modules
Moodle is built using PHP, so installing PHP and all its required modules on your WSL system is essential. These tools are crucial for Moodle to run correctly and process its web pages and functions.
Run this command to install PHP and all required modules:
sudo apt install php libapache2-mod-php php-imagick php-imap php-json php-ldap php-common php-pgsql php-ssh2 php-sqlite3 php-xml php-soap php-mysql php-gmp php-curl php-intl php7.4-mbstring php-xmlrpc php-gd php-xml php-cli php-zip
To check if PHP is installed correctly, run:
php -v
You should see something like:
PHP 7.4.3 (cli) (built: Oct  6 2020 15:47:56) ( NTS )

Copyright (c) The PHP Group

Zend Engine v3.4.0, Copyright (c) Zend Technologies

with Zend OPcache v7.4.3, Copyright (c), by Zend Technologies
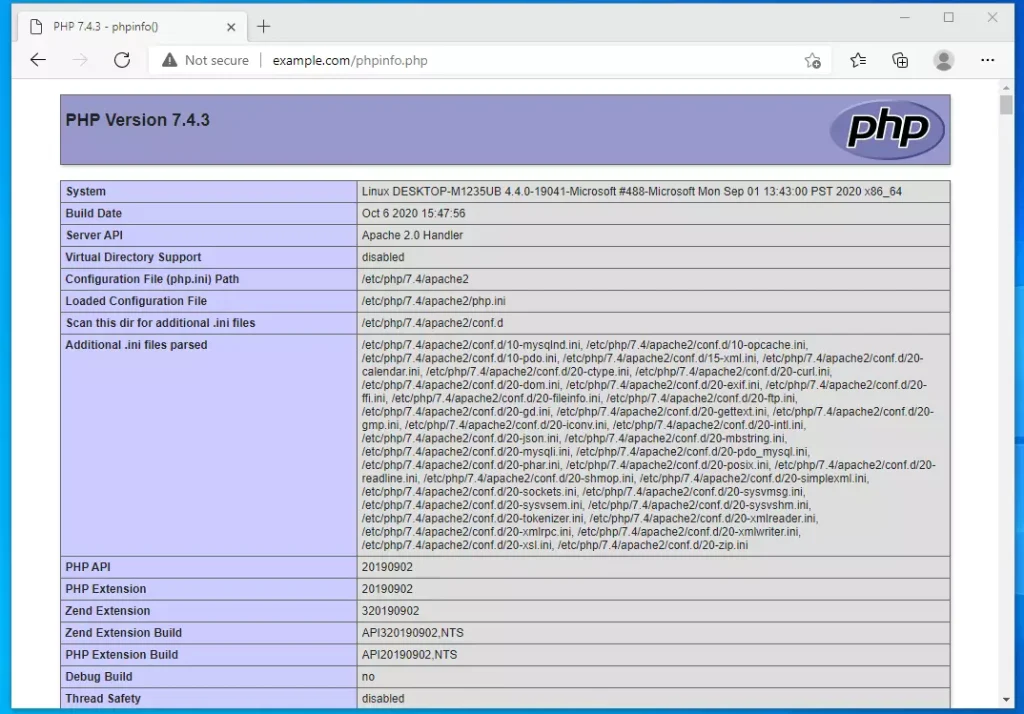
You can also test PHP by creating a test file. Run this command:
sudo nano /var/www/html/phpinfo.php
Type this content:
<?php phpinfo( ); ?>
Save the file. Restart Apache, then open your browser and go to:
http://example.com/phpinfo.php
You should see a PHP information page.
Create Moodle Database
Moodle needs its own dedicated database to securely store all your course and user information, so you will create one within MariaDB on WSL. This specific database will hold all your Moodle content and settings.
Log into MariaDB with this command:
sudo mysql -u root -p
Create a database called moodle:
CREATE DATABASE moodle;
Create a database user called moodleuser:
CREATE USER 'moodleuser'@'localhost' IDENTIFIED BY 'new_password_here';
Give the user full access to the moodle database:
GRANT ALL ON moodle.* TO 'moodleuser'@'localhost' WITH GRANT OPTION;
Save your changes and exit:
FLUSH PRIVILEGES;

EXIT;
Download Moodle
Downloading the latest Moodle files using Git is how you get Moodle running on your Windows WSL setup. This method fetches the files directly from Moodle’s official source to ensure you have the most current version for your installation.
First, install git and curl:
sudo apt install git curl
Go to the Apache directory and download the latest Moodle version:
cd /var/www/

sudo git clone -b MOODLE_39_STABLE git://git.moodle.org/moodle.git moodle
To see the latest Moodle versions, check this link:
Now set the correct permissions so Moodle can work:
sudo mkdir -p /var/www/moodledata

sudo chown -R www-data:www-data /var/www/

sudo chmod -R 755 /var/www/

sudo chown www-data:www-data /var/www/moodledata
Configure Apache
Telling Apache how to handle requests for Moodle involves creating a special configuration file on your WSL server. This file directs Apache to find Moodle’s files and serve your website correctly.
Create a new Apache configuration file:
sudo nano /etc/apache2/sites-available/moodle.conf
Copy and paste this configuration:
<VirtualHost *:80>

  ServerName example.com

  ServerAlias www.example.com

  ServerAdmin admin@example.com

  DocumentRoot /var/www/moodle
  <Directory /var/www/moodle/>

       Options FollowSymlinks

       AllowOverride All

       Require all granted

  </Directory>
     ErrorLog ${APACHE_LOG_DIR}/error.log

     CustomLog ${APACHE_LOG_DIR}/access.log combined
</VirtualHost>
Save the file. Then enable the new site and restart Apache:
sudo a2ensite moodle.conf

sudo a2enmod rewrite

sudo service apache2 restart
Launch Moodle
Launching Moodle on your Windows WSL installation is done by visiting a specific web address in your browser after setup is complete. This action starts the Moodle setup wizard, guiding you through the final steps.
Open your browser and go to:
http://example.com
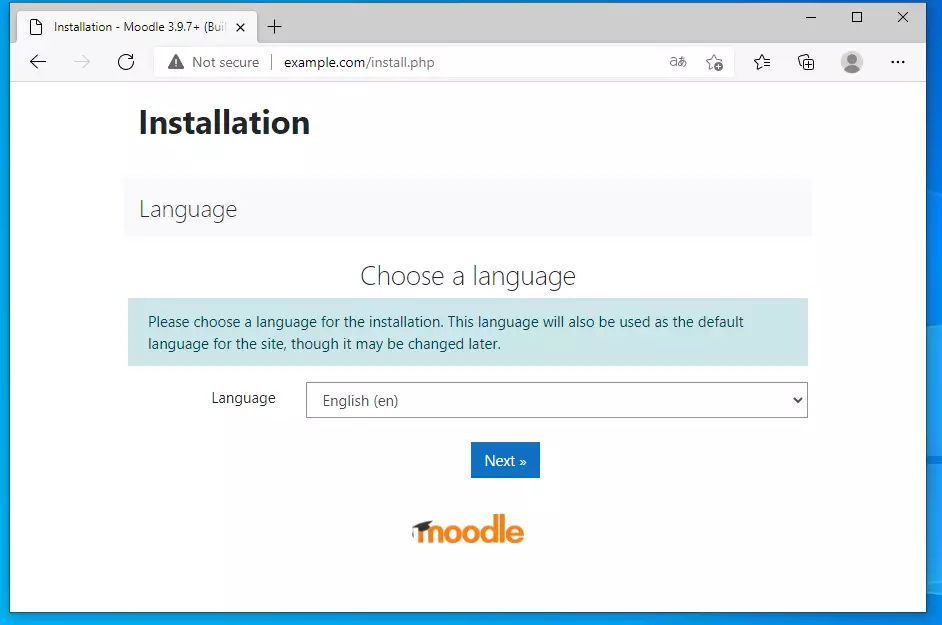
The Moodle installation wizard should open.
First, choose your language:
Next, confirm the Moodle directories:
- Moodle directory: The folder with Moodle’s code
- Data directory: Where Moodle stores files users upload

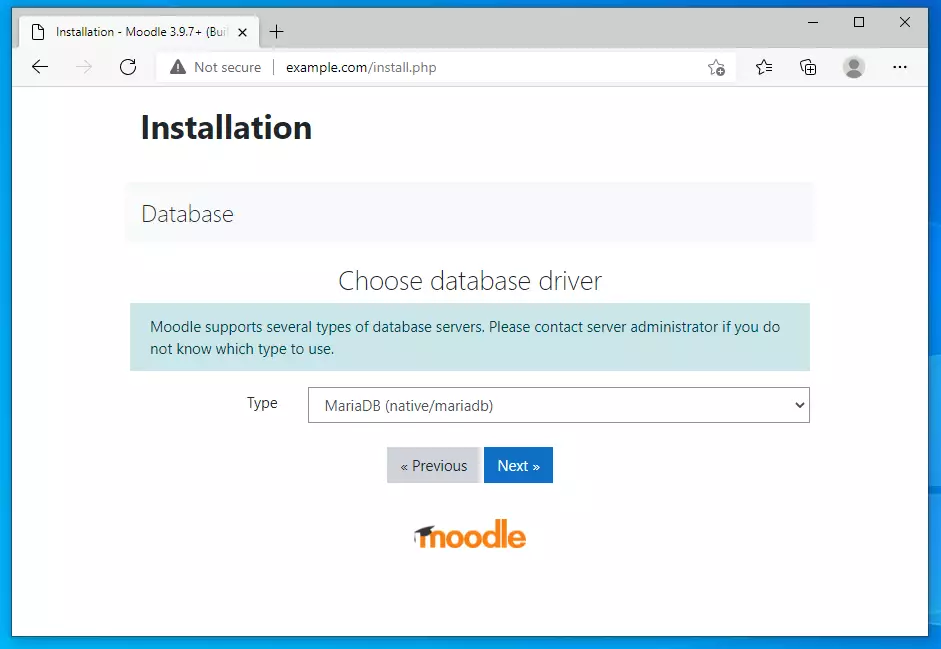
Choose your database type. MariaDB is what we installed:
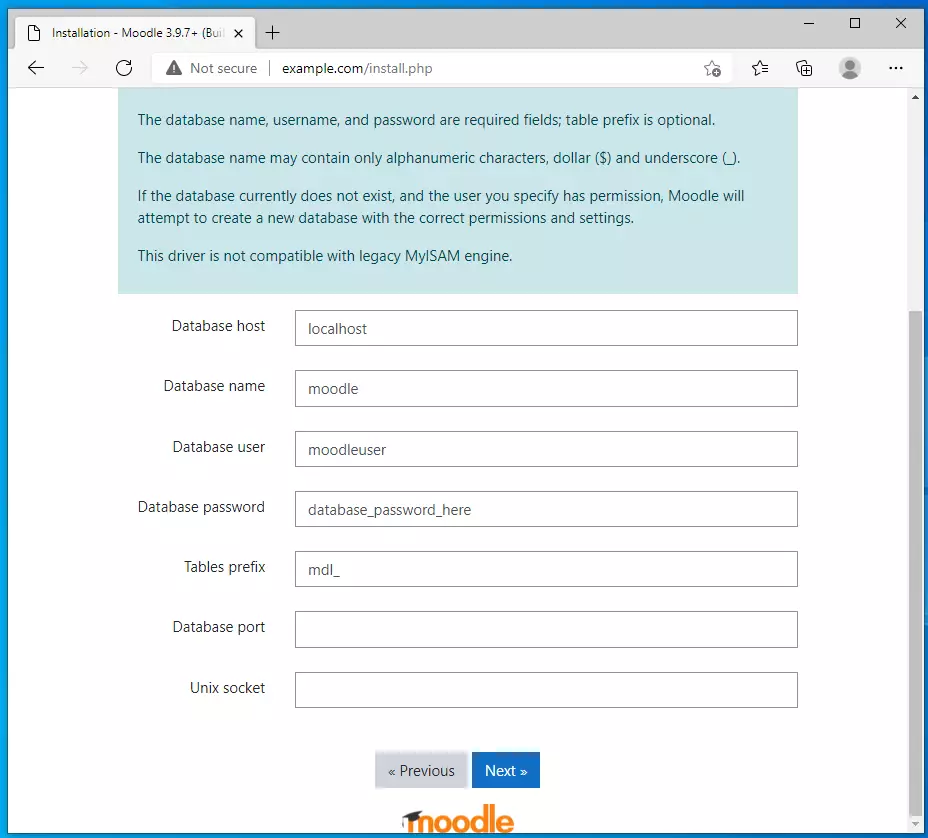
Enter your database details:
- Database name: moodle
- Username: moodleuser
- Password: The password you created
Continue through the installer. Check that everything meets the requirements.
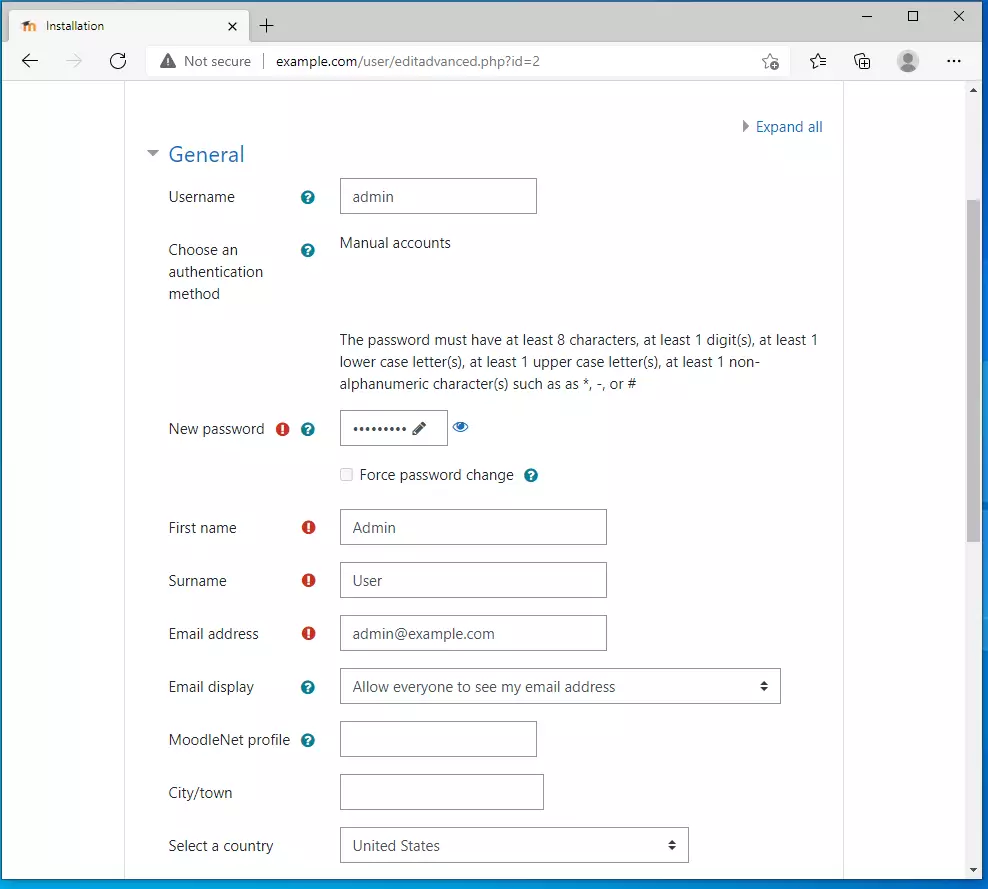
Create your main admin account. This person will control the entire site. Use a strong password and a real email address:
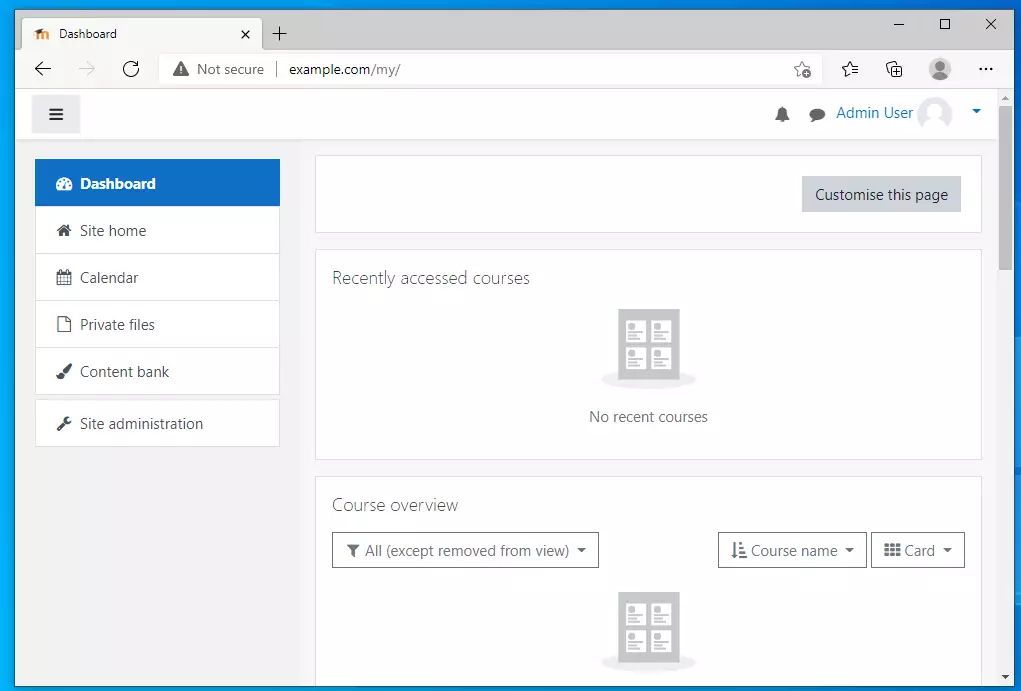
Once done, Moodle is ready to use:
Summary
You have now successfully completed the install Moodle WSL Windows process. This guide covered enabling WSL, installing Ubuntu, Apache, MariaDB, PHP, and finally setting up Moodle, getting it ready for use on your machine.
- Enabled WSL 2 on Windows
- Installed Ubuntu Linux on your Windows machine
- Installed Apache web server
- Installed MariaDB database
- Installed PHP and required modules
- Created a Moodle database and user
- Downloaded Moodle from GitHub
- Configured Apache for Moodle
- Ran the Moodle installation wizard
Moodle is now running on your Windows computer. You can use it to create courses, manage students, and deliver online education.
Was this guide helpful?

About the Author
Richard
Tech Writer, IT Professional
Richard, a writer for Geek Rewind, is a tech enthusiast who loves breaking down complex IT topics into simple, easy-to-understand ideas. With years of hands-on experience in system administration and enterprise IT operations, he’s developed a knack for offering practical tips and solutions. Richard aims to make technology more accessible and actionable. He's deeply committed to the Geek Rewind community, always ready to answer questions and engage in discussions.


This is a great article. Are there any differences when doing this on Windows 11? If so, please can you upgrade or create a new article for Windows 11.