How to Enable or Disable Virtual Machine Platform in Windows 11
You enable or disable the Virtual Machine Platform in Windows 11 to manage hardware virtualization access for applications like Docker Desktop and WSL 2.
The Virtual Machine Platform is a core Windows component that provides the hypervisor necessary for running virtual machines and other containerized environments efficiently on your hardware.
This feature is essential for leveraging hardware virtualization, a requirement for modern development tools and operating systems. For instance, Windows Subsystem for Linux 2 (WSL 2), now a default in Windows 11 build 22000, specifically depends on it.
The Virtual Machine Platform, a Windows 11 feature, enables users to run WSL 2 and certain virtual machine programs. Disabling the Virtual Machine Platform can free up system resources when these capabilities are not required, such as on a system with 8GB of RAM.
You can enable or disable the Virtual Machine Platform in Windows 11 through Settings, Control Panel, Command Prompt, or PowerShell. Navigate to Settings > System > Advanced > Virtual Workspaces and toggle the switch, or use the “Turn Windows features on or off” Control Panel option.
Enable Virtual Machine Platform Using Settings
You can enable the Virtual Machine Platform in Windows 11 using the Settings app. This is a simple way to turn the feature on or off without needing to use older system tools. Just open Settings, then go to System, then Advanced, and look for Virtual Workspaces to find the option.
- Open the Windows Settings app. Click the Start menu and select Settings. Or press Windows key + I.
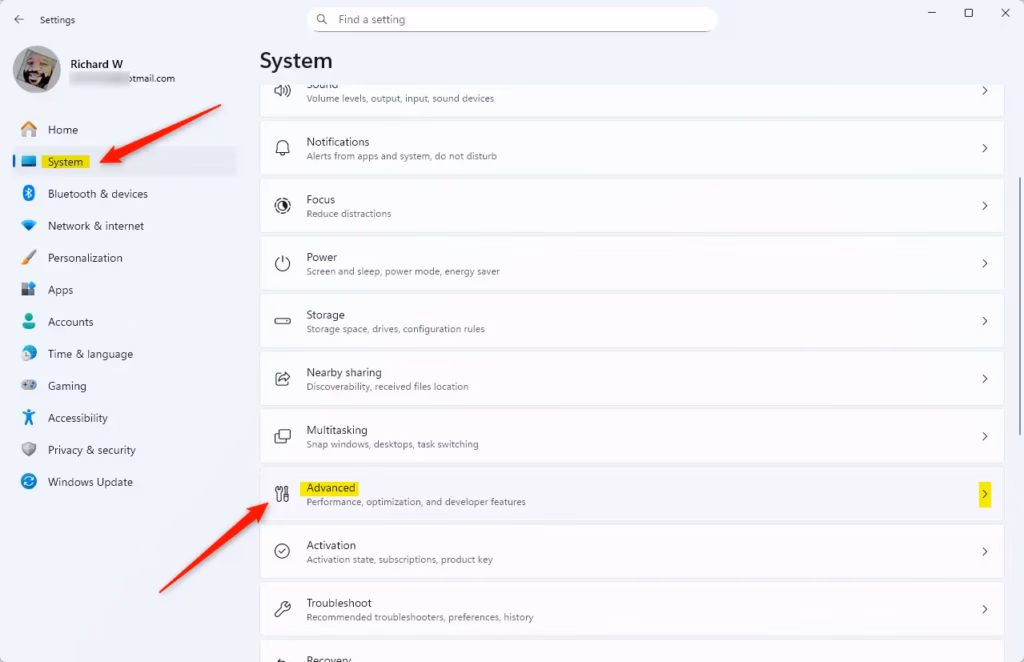
- Click System on the left side.
- Select Advanced on the right to expand it.
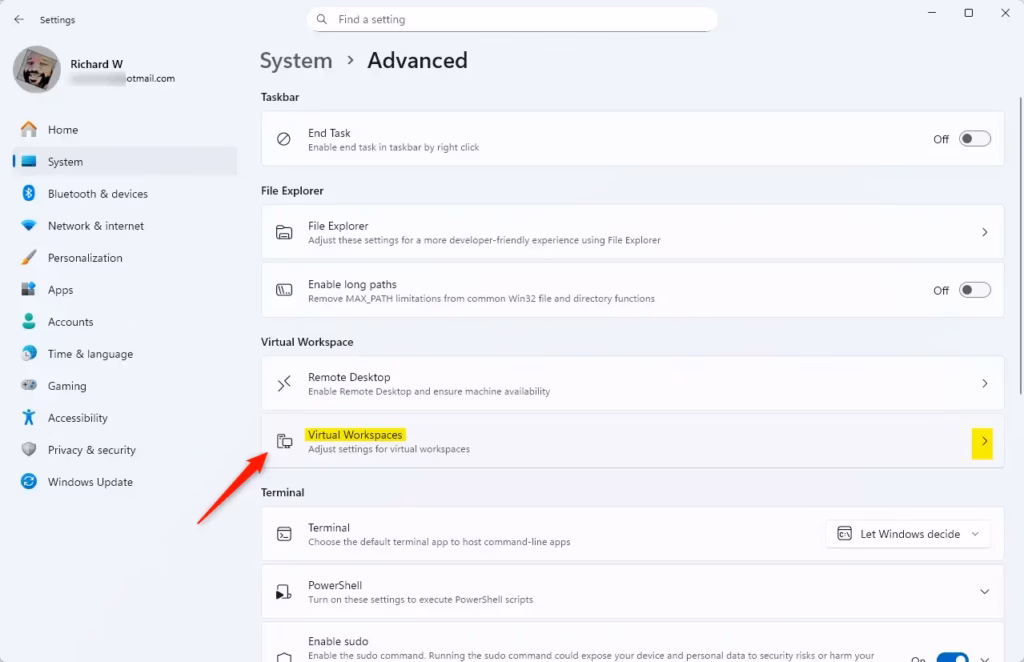
- Click on Virtual Workspaces to expand it.
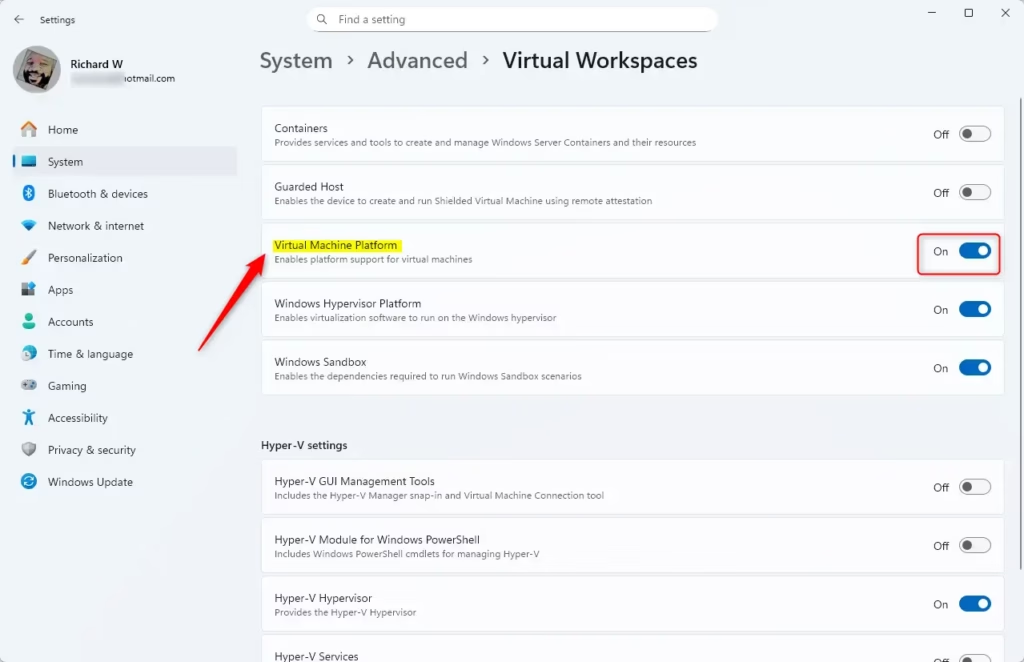
- Toggle the Virtual Machine Platform button on or off.
- Close the Settings app.
Enable Virtual Machine Platform Using Control Panel
You can enable the Virtual Machine Platform in Windows 11 through the Control Panel. This method involves searching for ‘Turn Windows features on or off,’ which brings up a list where you can select the Virtual Machine Platform. It’s a straightforward way to manage this and other Windows features.
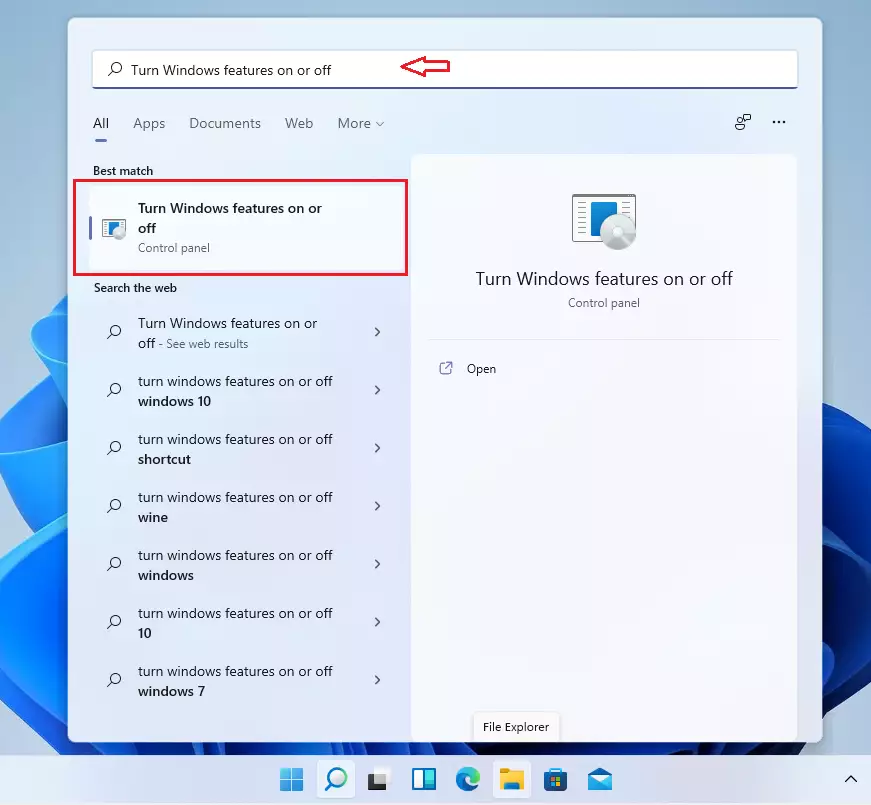
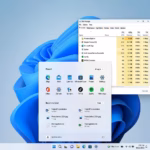
- Click Start and type “Turn Windows features on or off” in the search bar.
- Select the result to open the Windows Features pane.
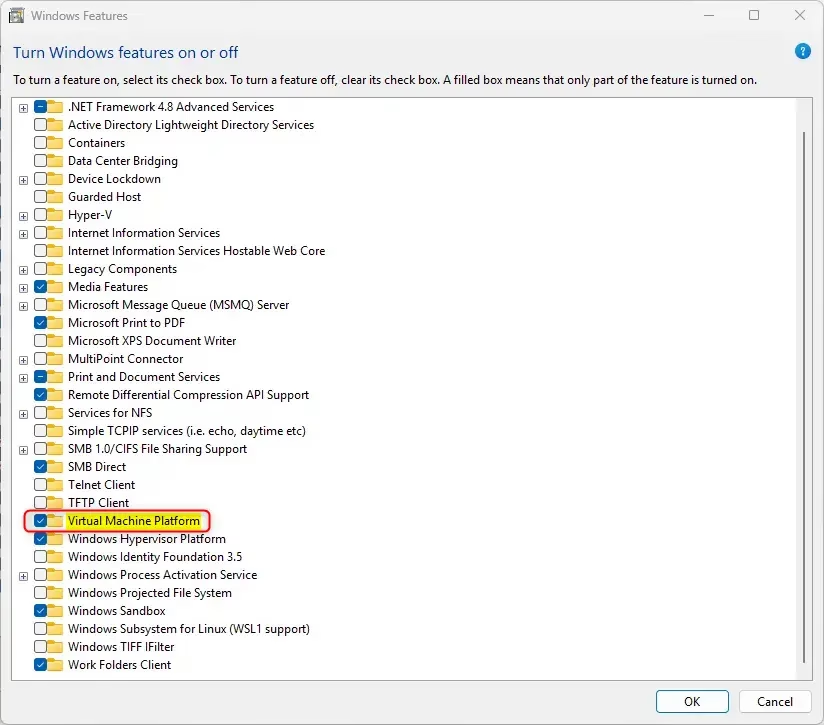
- Scroll down and check the box next to Virtual Machine Platform to turn it on.
- To turn it off, uncheck the box .
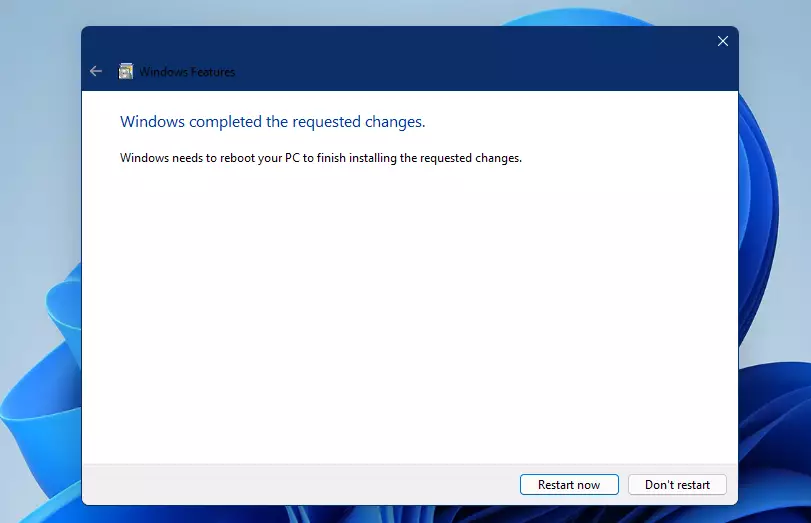
What happens next? You’ll see a message asking you to restart your computer to complete the process.
- Restart your computer.
After restarting, Virtual Machine Platform will be active. You can now create virtual machines and run different operating systems.
Enable Virtual Machine Platform Using Command Prompt
If you’re comfortable with the Command Prompt, you can enable the Virtual Machine Platform in Windows 11 using a quick command. Open Command Prompt with administrator rights and use the DISM tool to turn on this feature by typing or pasting the correct command. This is a fast way to activate the Virtual Machine Platform.
- [REQUIRES ADMIN PRIVILEGES] Click Start, search for Command Prompt, right-click on it, and select Run as administrator.

- Copy and paste this command, then press Enter:
DISM /Online /Enable-Feature /FeatureName:"VirtualMachinePlatform"To turn it off, run this command instead:
DISM /Online /Disable-Feature /FeatureName:"VirtualMachinePlatform"- Restart your computer.
Virtual Machine Platform should now be installed and enabled.
Enable Virtual Machine Platform Using PowerShell
You can easily enable or disable the Virtual Machine Platform in Windows 11 using PowerShell. Just open PowerShell as an administrator and type the specific command to turn the feature on. This is an efficient option for those who are used to using command-line tools.
- [REQUIRES ADMIN PRIVILEGES] Open the Start menu and search for PowerShell.
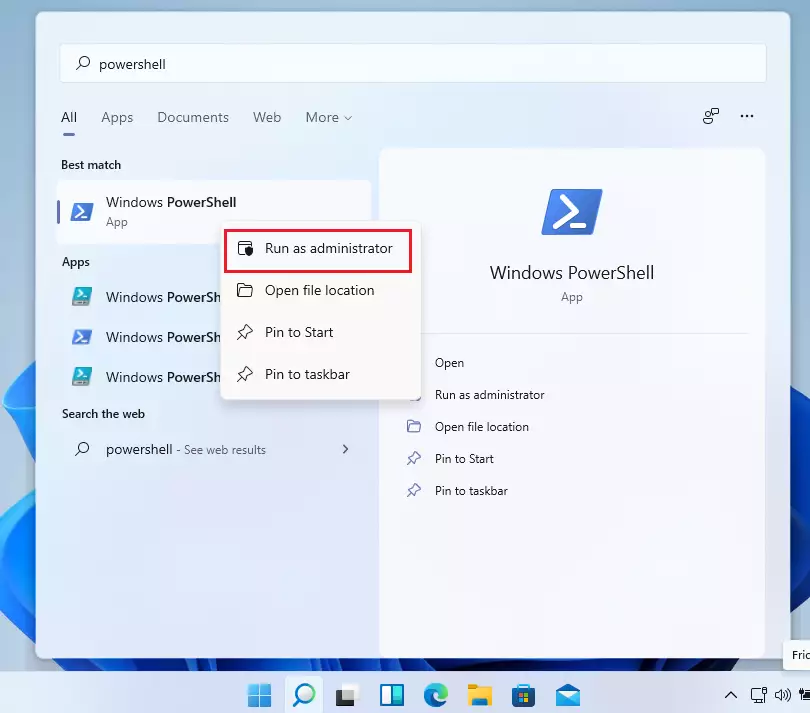
- Type this command to enable Virtual Machine Platform:
Enable-WindowsOptionalFeature -Online -FeatureName "VirtualMachinePlatform"To disable it, run this command instead:
Disable-WindowsOptionalFeature -Online -FeatureName "VirtualMachinePlatform"- Restart your computer for the changes to take effect.
Summary
The Virtual Machine Platform in Windows 11 lets you run virtual machines, and you can easily turn it on or off. The simplest way for most people is using the Settings app. You can also use the Control Panel, Command Prompt (which needs admin rights), or PowerShell (also needing admin rights) to manage this feature.
- Settings app — The easiest method for most users
- Control Panel — Uses the older Windows features panel
- Command Prompt — Requires admin privileges; use the DISM command
- PowerShell — Requires admin privileges; use the Enable-WindowsOptionalFeature command
What happens if you enable the virtual machine platform?
Virtualization lets your Windows device emulate a different operating system, like Android or Linux. Enabling virtualization gives you access to a larger library of apps to use and install on your device. If you upgraded your device from Windows 10 to Windows 11, these steps help you enable virtualization.
How long does it take to enable the virtual machine platform?
Enabling features like the Hypervisor Platform or Windows Subsystem for Linux completes in just a few seconds, but enabling the Virtual Machine Platform takes more than 10 minutes.
Was this guide helpful?

About the Author
Richard
Tech Writer, IT Professional
Richard, a writer for Geek Rewind, is a tech enthusiast who loves breaking down complex IT topics into simple, easy-to-understand ideas. With years of hands-on experience in system administration and enterprise IT operations, he’s developed a knack for offering practical tips and solutions. Richard aims to make technology more accessible and actionable. He's deeply committed to the Geek Rewind community, always ready to answer questions and engage in discussions.


No comments yet — be the first to share your thoughts!