How to Install Display Languages in Ubuntu Linux
Installing display languages in Ubuntu Linux adds new language packs to change your desktop’s language and application text.
Your Ubuntu system lets you switch between different languages for menus, messages, and programs. Ubuntu 23.10, for example, supports more than 100 languages.
You can add new languages to your Ubuntu desktop if the one you want isn’t already there. This lets you change the display language whenever you need to.
When you choose a new language, Ubuntu automatically downloads and installs the necessary language packs. If French isn’t available, you’d install something like the “french-support” package.
Open Settings, navigate to Region & Language, and click Manage Installed Languages. Select Install/Remove Languages, check the desired languages, and click Apply. Log out and back in for the changes to take effect.
How to add display language in Ubuntu Linux
Adding a new display language in Ubuntu Linux lets you change how menus, messages, and apps show up on your screen. To install a new language, you’ll use the main System Settings panel, where Ubuntu keeps most of its options for easy access and management. This is the best way to add more display languages in Ubuntu Linux.
Here’s how to add more display languages in Ubuntu Linux:
Ubuntu Linux keeps most system settings in the System Settings panel. You can manage system configurations, user accounts, and updates from this single location.
To find it, open the Activities overview and type ‘Settings’ into the search bar.
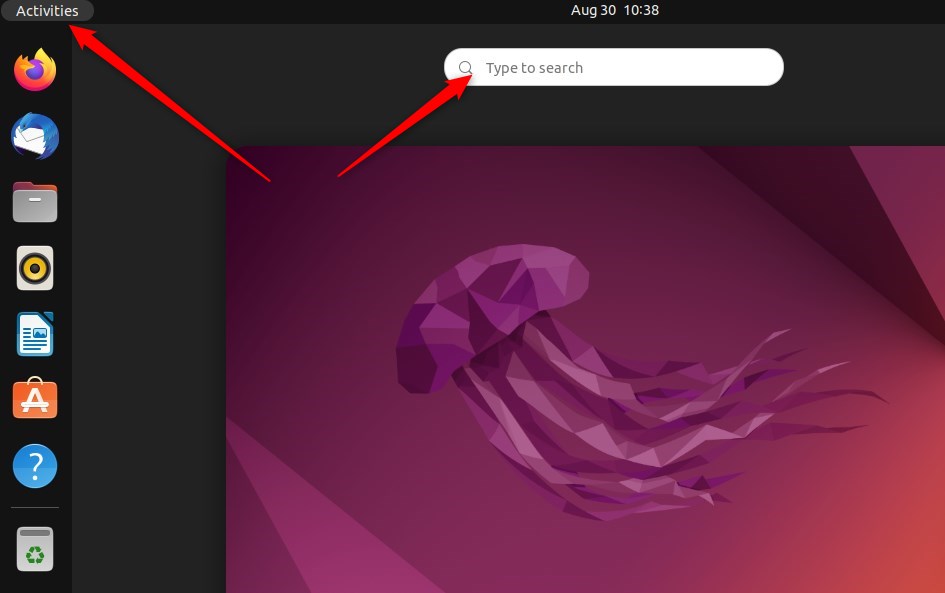
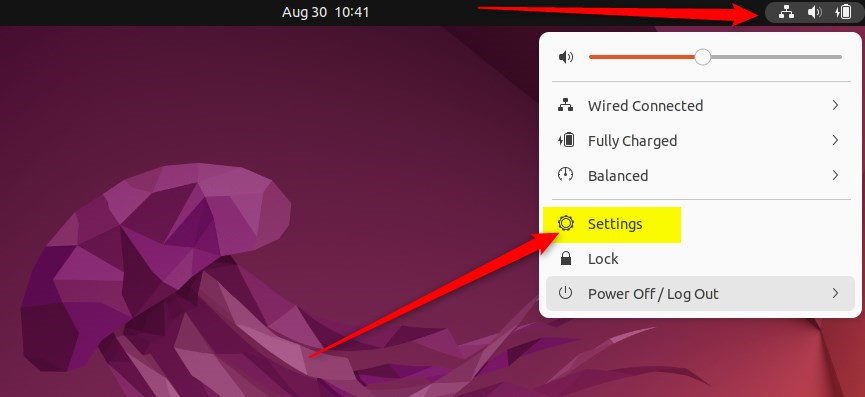
Alternatively, click the System menu in the top-right corner of your desktop’s top bar.
From there, select Settings, as highlighted below.
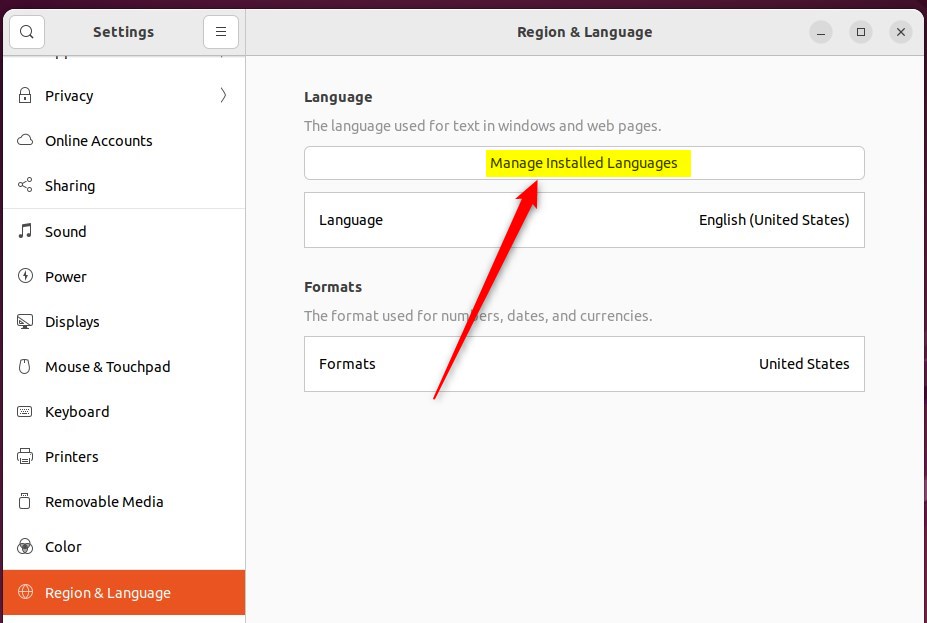
In the Settings app, click on the Region & Language tile.
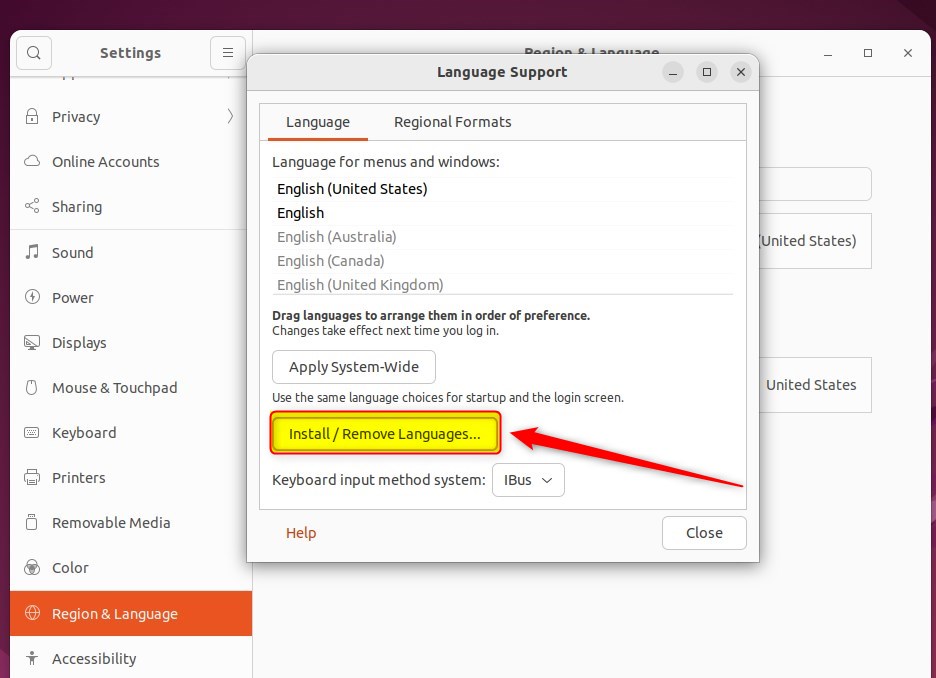
Select the Manage Installed Languages button. This opens Language Support within the System Settings -> Region & Language settings pane.
When prompted to install language support that isn’t installed, click Install.
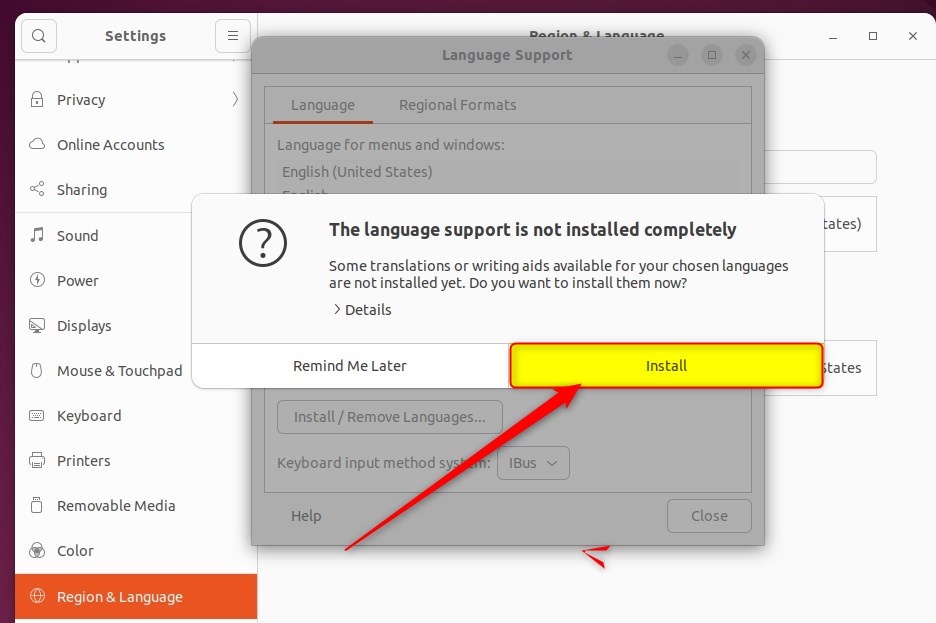
After installing the language support, click Install / Remove Languages…
The Installed Languages window lists all the available languages. Currently installed languages are marked with a checkmark.
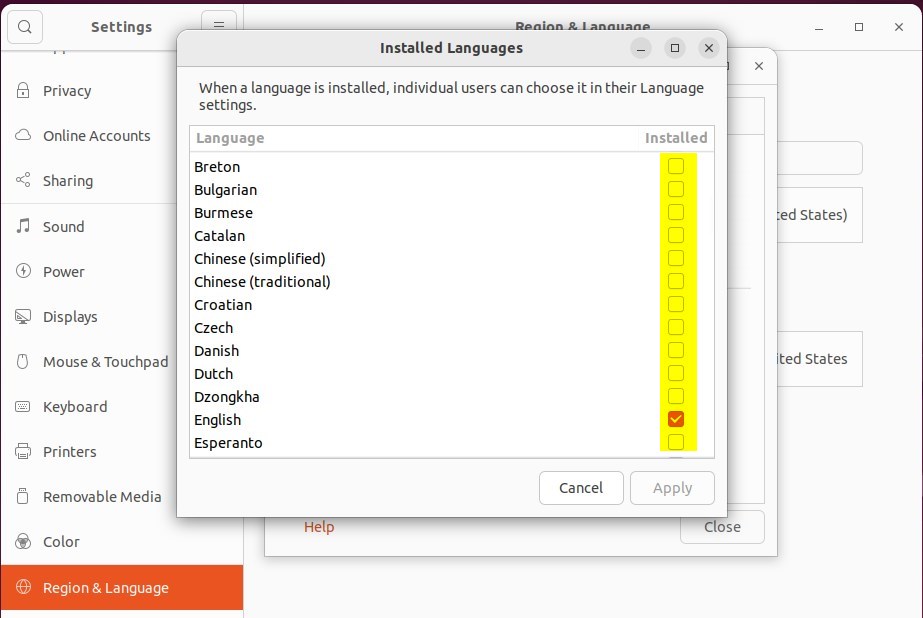
When you’re done, click Apply to Changes.
After the language(s) you’ve selected are installed, you’ll need to log out or restart your computer for the changes to take effect.
Once you log back in, you’ll see your new display language options.
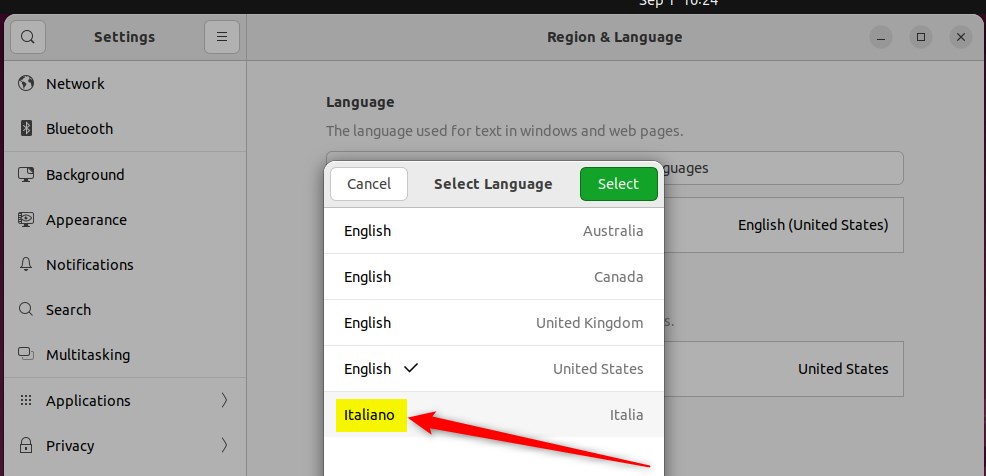
Changing your display language in Ubuntu Linux requires installing the new language pack first. After installing a display language, you can then switch to it using the system settings. This guide details the steps to perform the display language switch.
How to change display language in Ubuntu Linux
That should do it! You can now close the settings app.
Conclusion:
- Adding a display language in Ubuntu Linux is a straightforward process, allowing you to easily switch between multiple languages.
- The System Settings panel provides a centralized location for managing installed languages, making it convenient for users to customize their language preferences.
- It’s important to note that although Ubuntu Linux supports various display languages, some translations may be incomplete and certain applications may not fully support non-English languages.
- Following the outlined steps, users can seamlessly install additional display languages, providing a more tailored and user-friendly experience within Ubuntu Linux.
How to change Ubuntu display language?
In the Ubuntu Desktop, click System Settings. Click Language Support. The Language Support window is displayed. Use the down arrow key to scroll through the Language for menus and windows list.
How do I add display language?
To add a display language, go to Settings > Time & language > Language. Then, under ‘Windows display language,’ choose your preferred language from the dropdown.
Was this guide helpful?

About the Author
Richard
Tech Writer, IT Professional
Richard, a writer for Geek Rewind, is a tech enthusiast who loves breaking down complex IT topics into simple, easy-to-understand ideas. With years of hands-on experience in system administration and enterprise IT operations, he’s developed a knack for offering practical tips and solutions. Richard aims to make technology more accessible and actionable. He's deeply committed to the Geek Rewind community, always ready to answer questions and engage in discussions.


[…] How to change display language in Ubuntu Linux […]
[…] Linux also allows users to install additional languages and keyboards to support these languages for language-specific key layouts and input options. For […]