Change Keyboard Layout in Ubuntu Linux: A Quick Guide


Changing the keyboard layout in Ubuntu Linux lets you type in other languages or enter special symbols. A layout is a software map that tells the computer which character to show when you press a key. Ubuntu 22.04 LTS and newer versions support over 100 layouts, so you can match almost any physical keyboard. Ubuntu calls each layout an “input source”, and you will see that term in Settings.
Once you have saved two or more layouts, you can switch between them in seconds with the Super + Space shortcut. With only one layout saved, the shortcut has nothing to switch to.
To change keyboard layout in Ubuntu, add a second input source first: open Settings , click Keyboard, then press the + button under Input Sources and choose your layout. Once two or more are saved, press Super+Space to switch to the next layout, or Shift+Super+Space to cycle through all of them. Super is the Win on most keyboards.
How to switch keyboard layout in Ubuntu Linux
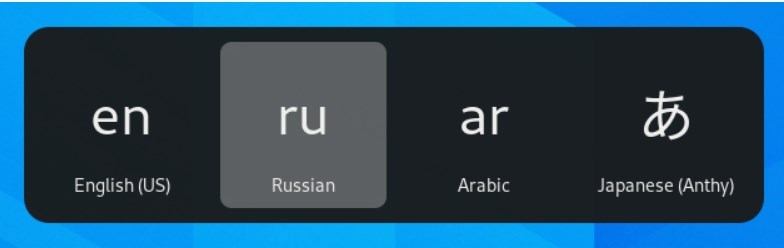
Hold down the Super key (the Win on most keyboards) and press the Spacebar. Each press moves to the next layout you have set up, so you can switch languages without opening any menu. A small pop-up appears briefly on screen to show which layout is now active.
If nothing happens, you most likely have only one input source. Add a second one using the steps further down, then try the shortcut again.
The shortcuts and the steps for adding layouts in Ubuntu Linux are below.
By default, pressing Super+Space moves to the next keyboard layout, and Shift+Super+Space cycles through all installed keyboards.
Install alternative keyboard layouts:
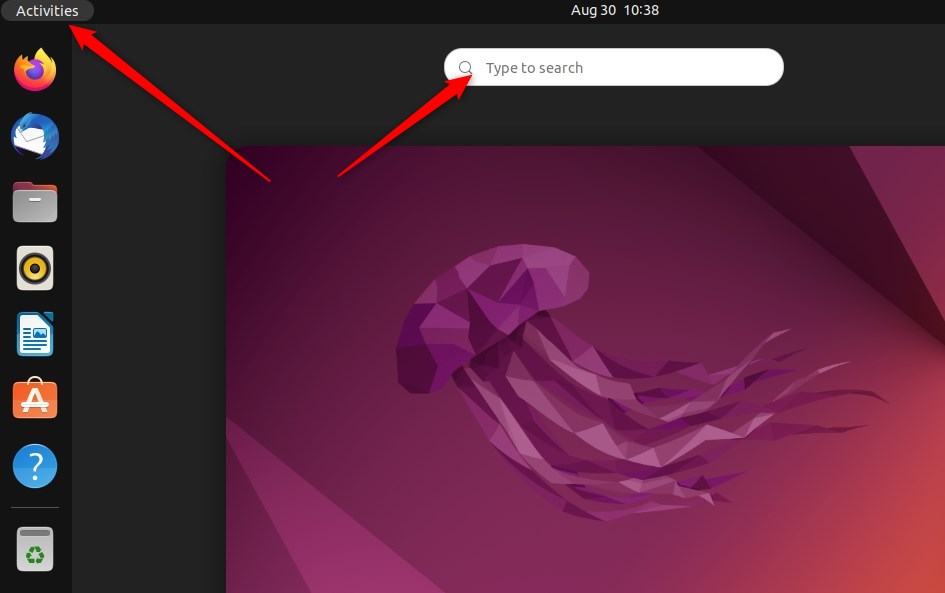
You add new layouts in the main Settings app. Open the Activities overview at the top-left of your screen, type Settings into the search bar, and open the Keyboard section. That is where you add and remove typing layouts.
Labels can differ slightly between releases, and the notes below point out where. You do not need to restart or log out, because a new layout is available as soon as you add it.
Before you start, check that your keyboard is connected and working. Layouts only change what each key types, not the physical keys, so choose the one that matches the letters printed on your keyboard.
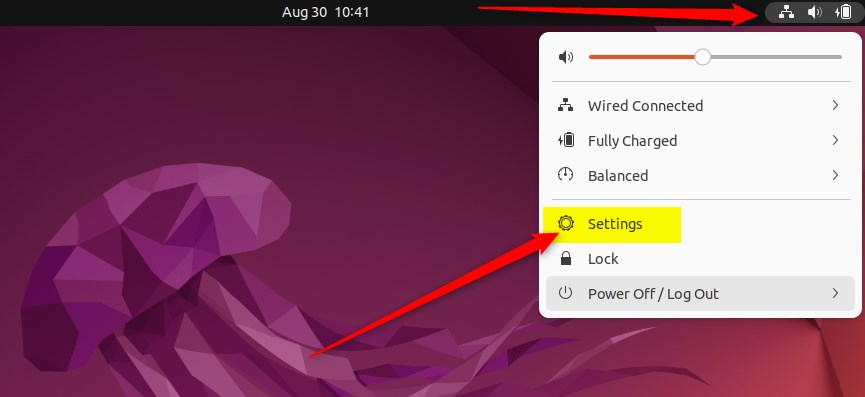
- Click the System menu in the top-right corner of the screen, where the network, volume and power icons sit, and select Settings, as highlighted below.
The Settings window opens. You can also reach it by searching for Settings in the Activities overview.
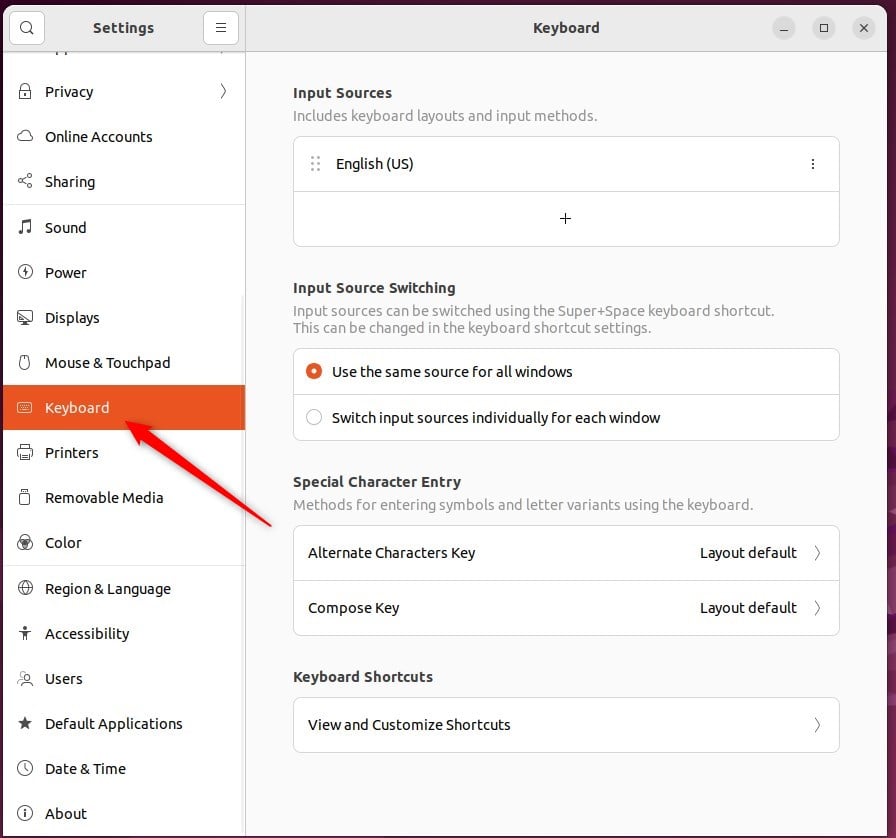
- In the Settings app, click the Keyboard tile. On newer releases it is an entry in the left sidebar instead of a tile.
The Keyboard page opens, with an Input Sources section at the top.
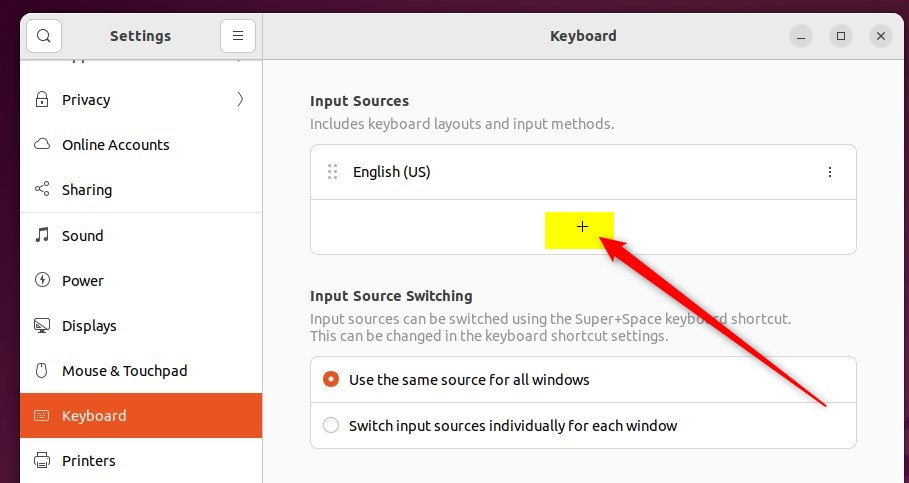
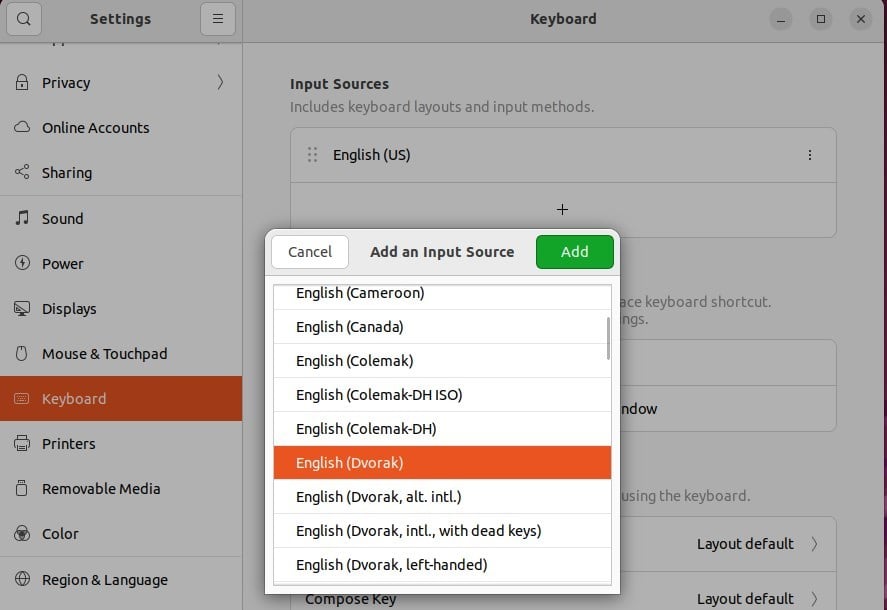
- In the System Settings -> Keyboard settings pane, click the + button in the Input Sources section.
A dialog opens with a list of languages. The layout you already use stays in the list, and the first source in the list is your default.
- Select the language associated with the layout.
- Select the layout you want from the list that appears.
- Press Add.
The dialog closes and the new layout appears in the Input Sources list.
If the layout you need is not in the short list, click the vertical ellipsis (three dots) highlighted below. This shows the full list of available input sources, which is where the less common layouts are.
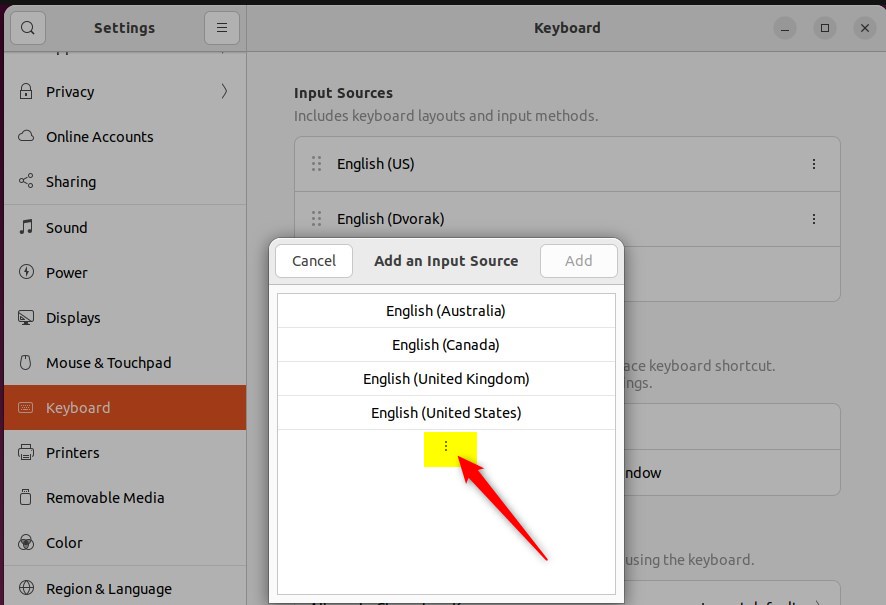
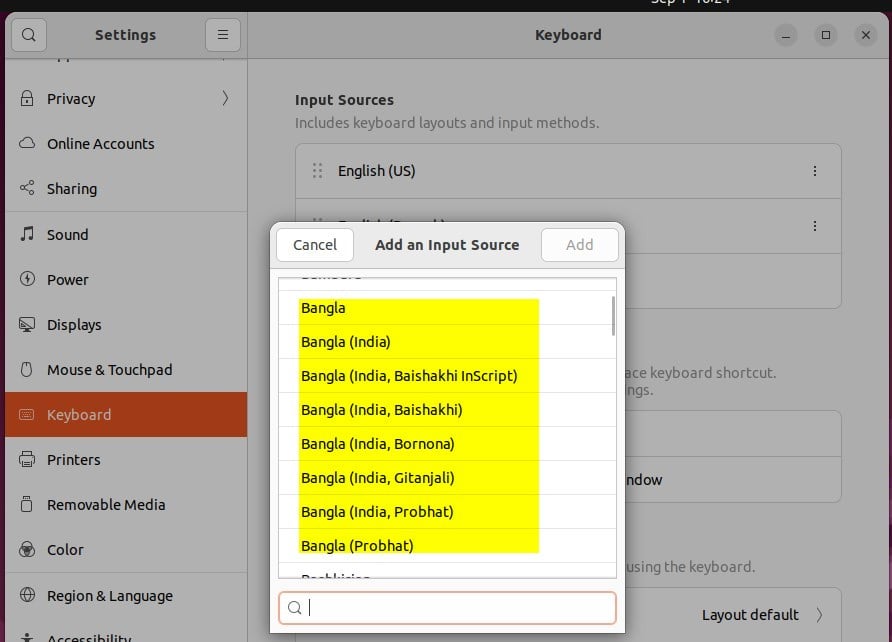
- Choose the keyboard layout you intend to use, then press Add if the dialog asks you to confirm.
Variants of the same language, such as different regional or dialect layouts, are listed separately. Pick the one that matches your keyboard.
- Look at the top bar and click the language indicator, which shows a short code such as "en", to switch between your input layouts.
A menu lists every layout you added. Click one to make it active. The indicator only appears once you have two or more input sources.
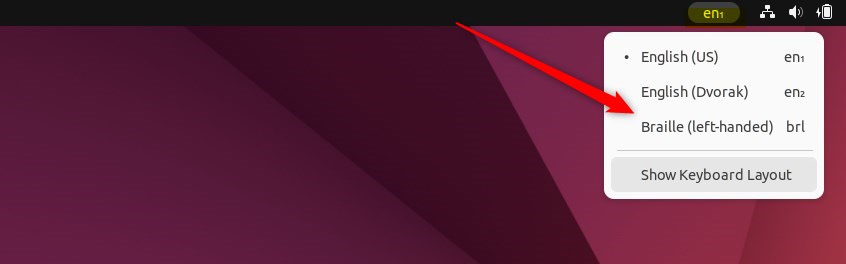
- Press the Super+Space keys to go to the next keyboard layout.
- Press Shift+Super+Space to cycle through all installed keyboards.
The indicator in the top bar changes each time, so you always know which layout is active. Type a few characters in any text field to confirm the keys produce what you expect.
Configuration is complete. To undo it, go back to Settings Keyboard, find the layout in the Input Sources list, open its menu (the three dots) and choose Remove. Removing a layout does not affect your files or the other layouts you added.
Conclusion: Switching your keyboard layout allows for efficient multi-language input and accommodates diverse language preferences. Add the layouts you need once, then switch with the top-bar indicator or the keyboard shortcut.
- Switching the keyboard layout in Ubuntu Linux is a simple process allowing efficient multi-language input.
- Users can easily add, select, and cycle through different keyboard layouts to accommodate diverse language preferences.
- The centralized System Settings in Ubuntu Linux provides easy access to configuring and adding keyboard layouts.
- Switching between input language layouts using the language bar on the top of the screen ensures convenient and flexible keyboard usage.
Have a question about this guide?
Answered by AI from this guide. Good questions may be added to this page — please don't include personal details.
Did this guide fix your problem?

About the Author
Richard
Tech Writer, IT Professional
Richard is a writer at Geek Rewind who turns complex IT tasks into clear, step-by-step guides. He draws on years of hands-on experience in system administration and enterprise IT operations, focusing on Windows, Linux and WordPress: the problems people actually run into, and the fixes that work. His server and WordPress guides come from systems he runs himself. Richard builds and maintains the platform behind Geek Rewind, from its Ubuntu servers and Nginx configuration to its custom WordPress plugins. Many new tutorials start with readers' questions, and he's always glad to answer them in the comments.
No comments yet — be the first to share your thoughts!