How to Hide the Account Protection Section in the Windows Security Apps on Windows 11


Declutter the Windows Security app or prevent accidental changes with a quick tweak.
Open gpedit.msc to access Local Group Policy Editor. Navigate to Computer Configuration Administrative Templates Windows Components Windows Security Account protection, then double-click “Hide the Account protection area” and select “Enabled” to hide it.
Applies to
This guide covers hiding the Account Protection section in Windows 10 and Windows 11 Pro, Enterprise, and Education editions.
Why hide the Account Protection section?
The Account Protection section in Windows Security prevents others from altering crucial settings like your Windows Hello sign-in or PC lock settings when you’re away. Hiding it helps safeguard these security options from unintended or unwelcome modifications.
What happens when done: The Account Protection section will disappear from the Windows Security app interface, preventing users from modifying those specific security configurations.
Prerequisites and Limitations
Administrative privileges and a registry backup are required before making any changes. Changes made here are not easily reversible.
Hide or Show Account Protection via Group Policy
Hide or show the Account Protection section using the Local Group Policy Editor (a built-in tool for managing system settings). Follow these steps to find and adjust the Account Protection setting.
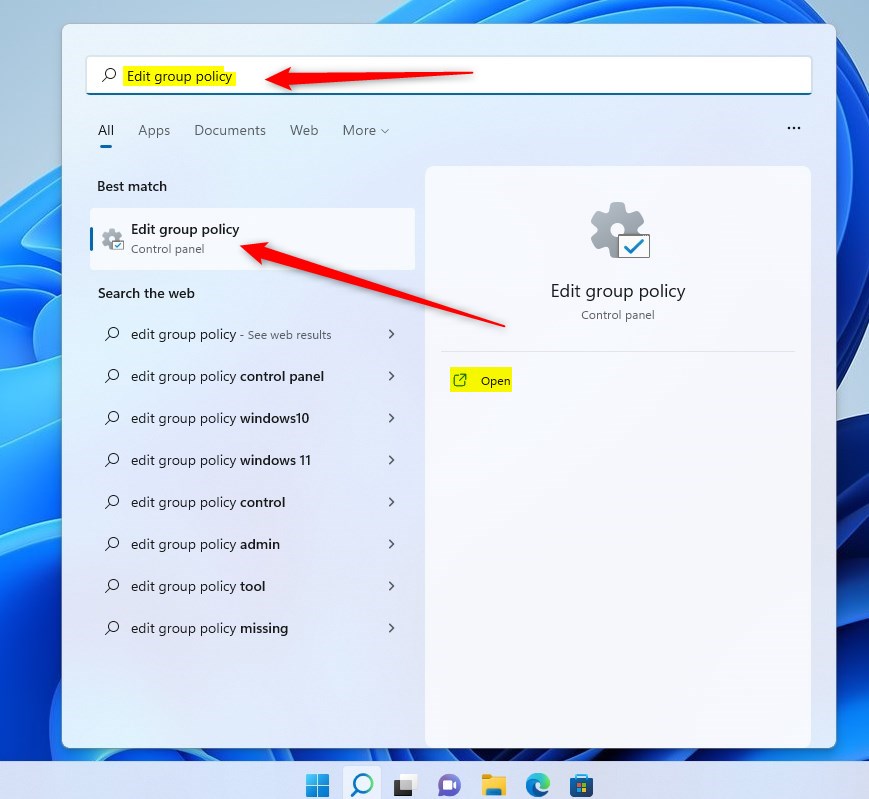
1. Open the Local Group Policy Editor by pressing the Windows key, typing gpedit.msc, and pressing Enter.
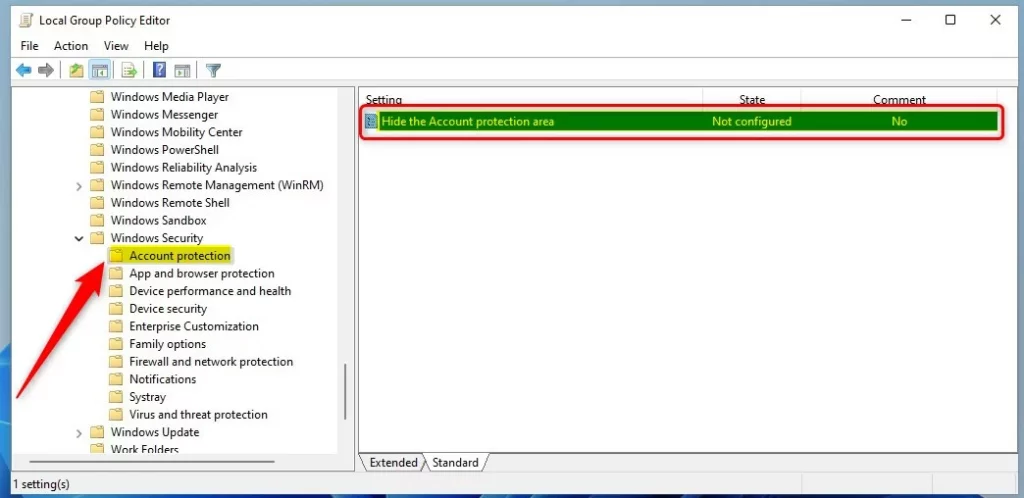
2. In the left-hand menu, navigate to: Computer Configuration Administrative Templates Windows Components Windows Security Account protection
3. On the right side, double-click the setting named "Hide the Account protection area."
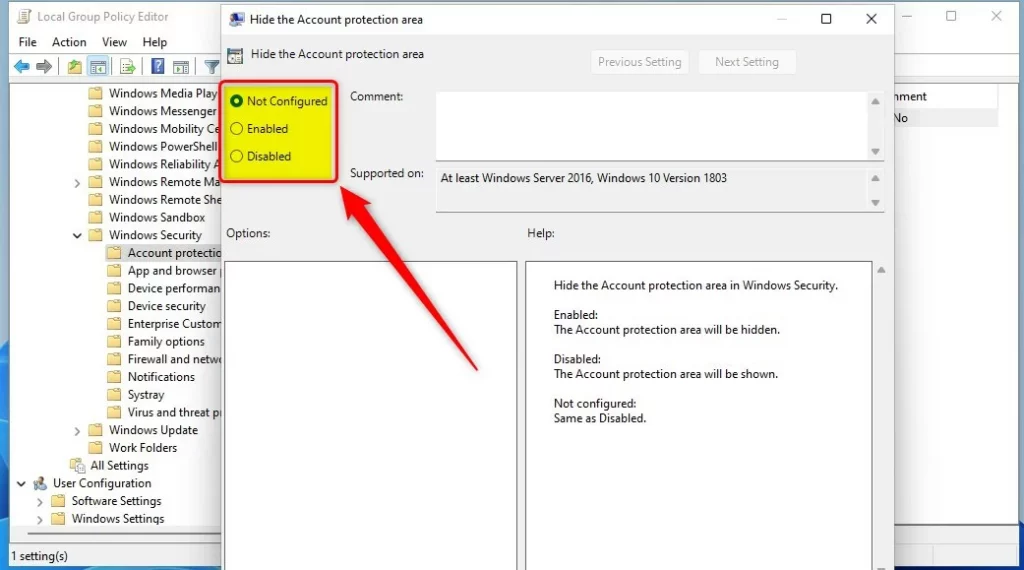
4. Choose your setting:
- Not Configured: This is the default setting.
- Enabled: This hides the Account protection area.
- Disabled: This shows the Account protection area.
Hide or Show Account Protection via Registry
The Windows Registry (a hierarchical database storing system settings) offers an alternative path if the Group Policy Editor is unavailable. Backing up the registry before proceeding prevents unintended issues.
1. Open the Registry Editor by pressing the Windows key, typing regedit, and pressing Enter.
2. Navigate to this path in the Registry Editor:
If the specific folders for configuring Windows Security settings are missing, you can create them. Right-click on the "Windows" folder in the Registry Editor. Then, choose "New" and then "Key" twice to create the "System" and "Defender" keys.
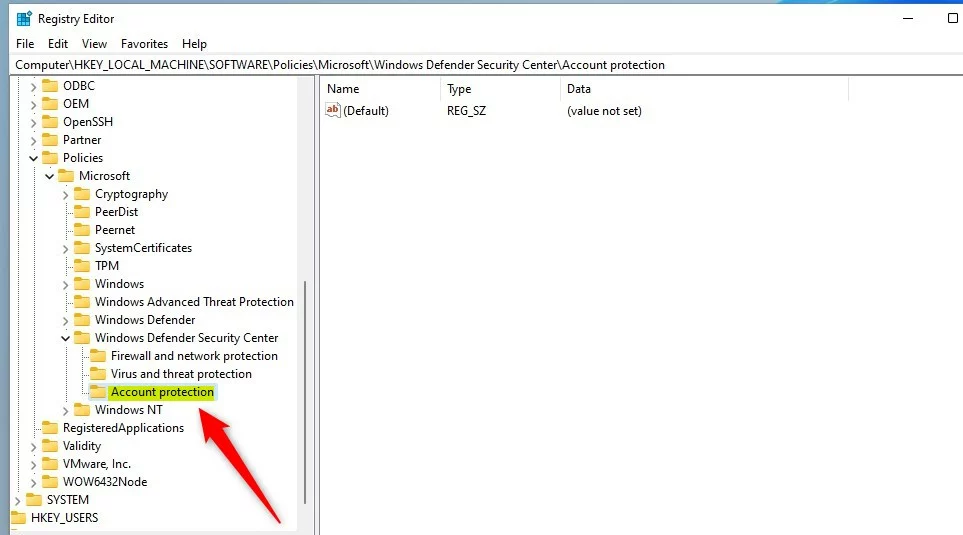
3. Right-click in the empty space on the right. Select New, then DWORD (32-bit) Value.
4. Name this new file UILockdown.
5. Double-click UILockdown and change the Value data. Type 1 into the field to show the section, or 0 to hide it.
- Enter
0to show the section in the Windows Security app. - Enter
1to hide the section.
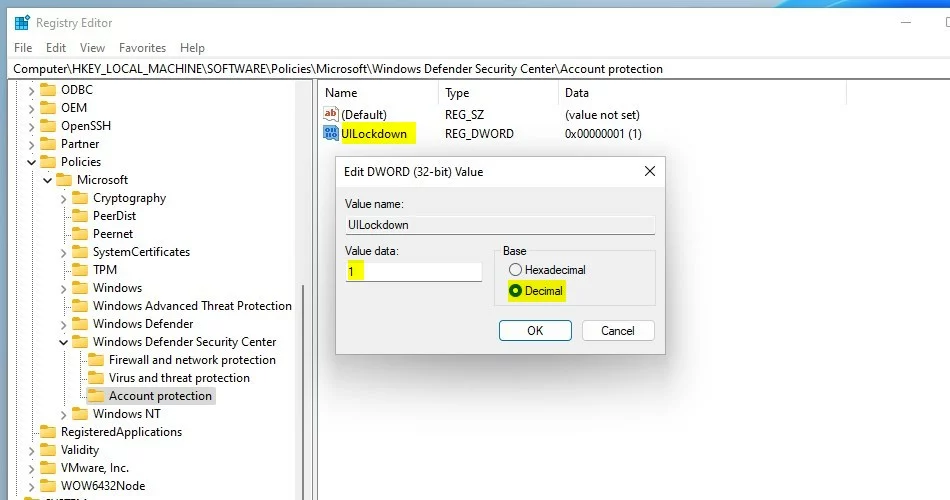
6. Restart your computer to apply the changes.
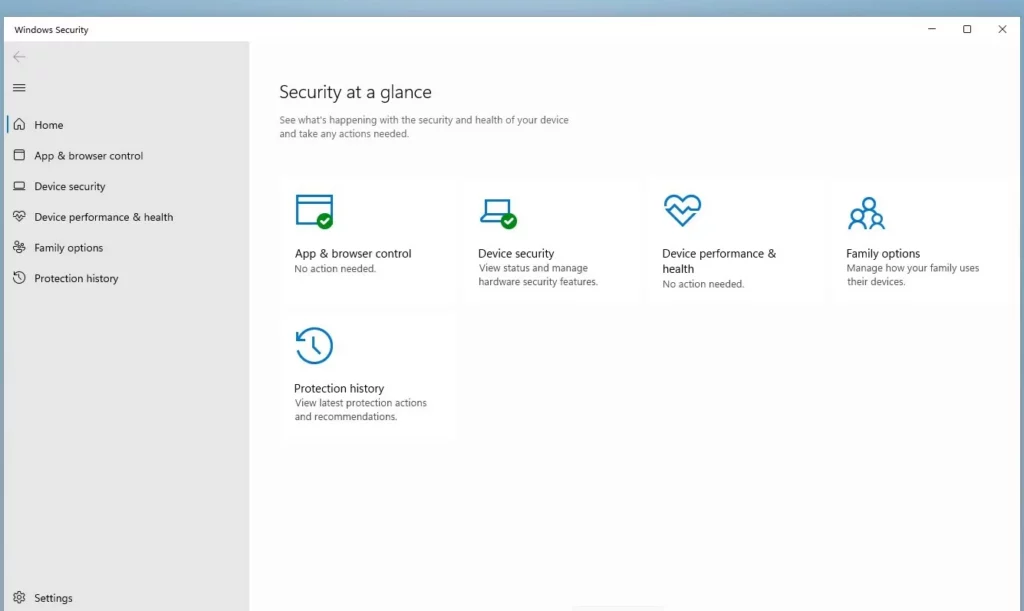
Summary
Hide or show the Account Protection section using either the Local Group Policy Editor or the Registry Editor. A restart may be necessary for changes to take effect.
Was this guide helpful?

About the Author
Richard
Tech Writer, IT Professional
Richard is a writer at Geek Rewind who turns complex IT tasks into clear, step-by-step guides. He draws on years of hands-on experience in system administration and enterprise IT operations, focusing on Windows, Linux and WordPress: the problems people actually run into, and the fixes that work. His server and WordPress guides come from systems he runs himself. Richard builds and maintains the platform behind Geek Rewind, from its Ubuntu servers and Nginx configuration to its custom WordPress plugins. Many new tutorials start with readers' questions, and he's always glad to answer them in the comments.



[…] you to quickly see the status of your virus and threat protection, firewall and network security, Account protection, App and Browser Control, and […]
[…] security status. It covers areas like virus and threat protection, firewall and network security, Account protection, App and Browser Control, and Device […]