How to Enable or Disable Show Recommended Section in File Explorer Home in Windows 11

The Recommended section in Windows 11 File Explorer Home (available in build 22000 and later) shows a list of your recent files and folders the moment you open the file manager. You can turn it off to hide those suggestions, keep your screen private, and get a clean view that shows only your pinned folders.
Switching off the suggestions brings back the classic File Explorer layout. You can turn the recommendations back on at any time. This is a per-user setting, so it affects only the account you change it in. The same setting also works on Windows 11 Home and Pro.
Open File Explorer , select the three dots button and choose Options, go to the General tab, then check or uncheck Show recommended section under Privacy. Click OK and reopen File Explorer Home. The Recommended section appears or disappears based on the setting.
Why Use the Recommended Section?
The Recommended section lists the files you recently opened and saved as soon as you open File Explorer Home. It lets you get back into active projects and school assignments quickly, without hunting through your drives.
Work and school accounts also show people icons in the Activity column. Hovering over an icon opens a Microsoft 365 Live Persona Card, which shows who worked on the document and how they are connected to it.
Clicking or hovering over one opens a Windows People Card, which lets you contact that person through integrated apps such as chat or calls. These people features depend on your account type and Windows build, so you may not see them on every PC.
What Happens When You Enable the Recommended Section?
When the Recommended section is on, it replaces the Quick access layout with a personalized collection of recent files and folders. If you see the old Quick access layout instead, the section is probably switched off or not available in your build.
Method 1Use Folder Options
To Turn On the Recommended Section
Windows enables this setting by default. Use these steps if you turned it off earlier and want it back.
- Open Folder Options. In File Explorer, select the See more (three dots) button on the toolbar, then select Options. The Folder Options window opens.
- Go to the General tab. You should see the Privacy section near the bottom.
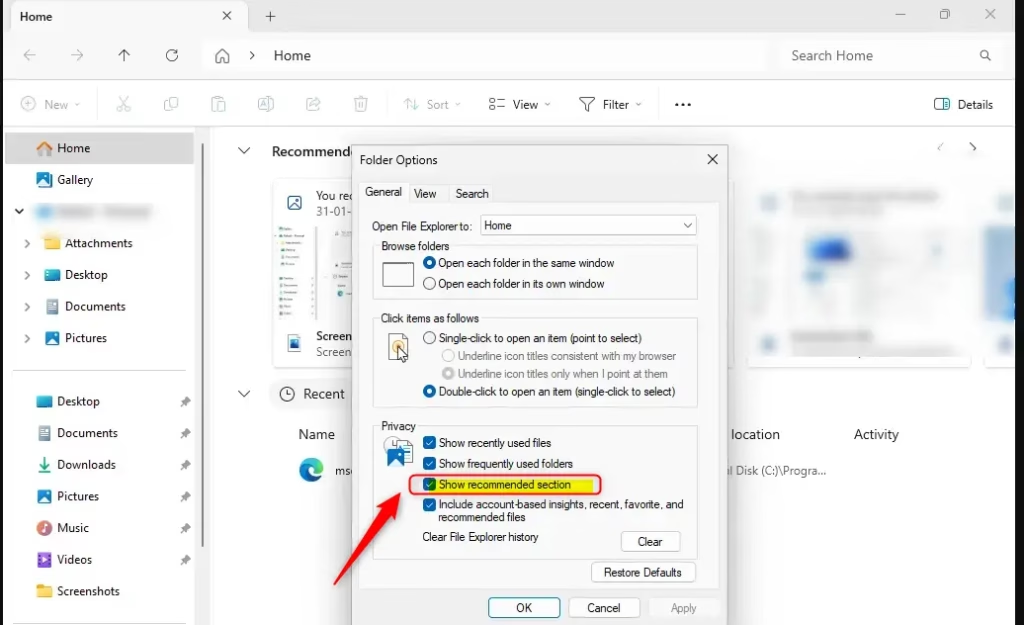
- Under Privacy, check the box for Include account-based insights, recent, favorite, and recommended files. This box appears only on builds and account types that support it. If you don't see it, move on to the next step.
- Under Privacy, check the box for Show recommended section. If the box is greyed out, check that the account-based insights box above it is ticked first. Also check whether your organization controls the setting through policy.
- Click OK. Open a new File Explorer window and go to Home. The Recommended section should now appear.
To undo this, follow the disable steps in the next section.
To Turn Off the Recommended Section
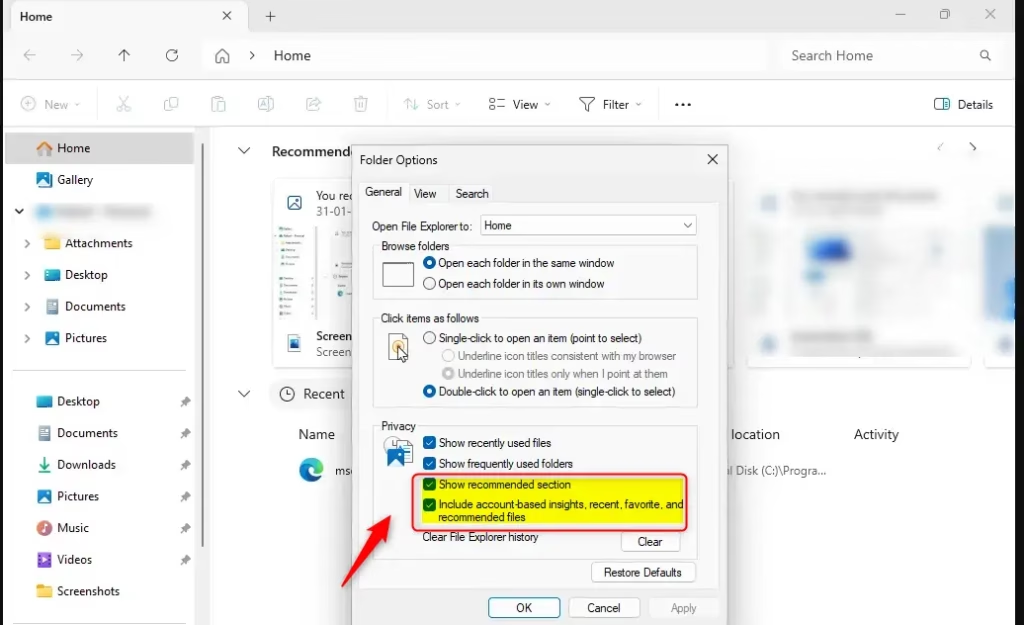
- Open Folder Options. In File Explorer, select the See more (three dots) button on the toolbar, then select Options.
- Go to the General tab.
- Under Privacy, uncheck the box for Show recommended section.
- Click OK. Open File Explorer Home again. The recent file suggestions should be gone and only your pinned folders remain.
If the list is still there, close all File Explorer windows and open a new one. To bring the section back, tick the same box again.
Method 2Use Windows Terminal
You must be signed in with an administrator account, or be able to enter an administrator's credentials when prompted.
- Right-click the Start button and select Terminal (Admin). On some builds the entry is named Windows Terminal (Admin).
- Select Yes if User Account Control asks for permission. An elevated Windows Terminal window opens.
- Run the commands below that match what you want to do: enable or disable the Recommended section.
- Close all File Explorer windows and open a new one to check the result. If nothing changes, sign out and sign back in.
To Turn On the Recommended Section
Windows enables this setting by default. To undo a change, run the commands for the opposite option.
reg add "HKEY_CURRENT_USER\Software\Microsoft\Windows\CurrentVersion\Explorer" /v ShowCloudFilesInQuickAccess /t REG_DWORD /d 1 /f
reg add "HKEY_CURRENT_USER\Software\Microsoft\Windows\CurrentVersion\Explorer" /v ShowRecommendations /t REG_DWORD /d 1 /f
To Turn Off the Recommended Section
reg add "HKEY_CURRENT_USER\Software\Microsoft\Windows\CurrentVersion\Explorer" /v ShowRecommendations /t REG_DWORD /d 0 /f
Summary
When the Recommended section is active, File Explorer Home shows your frequently used and recently downloaded documents there instead of the Quick access view. When it is off, you get the classic layout with just your pinned folders.
Have a question about this guide?
Answered by AI from this guide. Good questions may be added to this page — please don't include personal details.
Did this guide fix your problem?

About the Author
Richard
Tech Writer, IT Professional
Richard is a writer at Geek Rewind who turns complex IT tasks into clear, step-by-step guides. He draws on years of hands-on experience in system administration and enterprise IT operations, focusing on Windows, Linux and WordPress: the problems people actually run into, and the fixes that work. His server and WordPress guides come from systems he runs himself. Richard builds and maintains the platform behind Geek Rewind, from its Ubuntu servers and Nginx configuration to its custom WordPress plugins. Many new tutorials start with readers' questions, and he's always glad to answer them in the comments.
No comments yet — be the first to share your thoughts!