How to Disable Bing Search Suggestions in Windows 11


Bing search suggestions in Windows 11 are online search tips, web results and ads that appear when you type in the Start menu . Turning them off keeps web results out of your search panel, so you see only local files, apps and settings on your PC.
Both methods below change one setting. The Local Group Policy Editor does it through a normal window. The Registry Editor (a tool for changing low-level system settings) does it by creating one value by hand. Either way, Windows stops sending what you type in the search box to Microsoft’s servers, and local results usually come up faster.
Open Settings , go to Local Group Policy Editor (Windows 11 Pro, Enterprise or Education), or use the Registry Editor on any edition. Set User Configuration Administrative Templates Windows Components File Explorer > “Turn off display of recent search entries in the File Explorer search box ” to Enabled, then restart. Start menu searches will show only local apps, files and settings.
Understanding Search Suggestions vs. Browser Settings
Turning off Bing suggestions in the Windows 11 Start menu does not change Microsoft Edge or any other browser. Your browser’s own address bar suggestions, search engine and history stay as they are.
Both methods change the setting for the user account you are signed in with. If other people use the PC under their own accounts, repeat the steps while signed in to each one. A restart is recommended at the end so the change takes effect cleanly.
Using Local Group Policy Editor
The Local Group Policy Editor lets you switch off Bing search suggestions through a normal window, with no command lines. It is included in Windows 11 Pro, Enterprise and Education.
It is not available in Windows 11 Home. If you run Home, skip to the registry method further down. To check your edition, go to Settings System About and look under Windows specifications.
The policy you need is called "Turn off display of recent search entries in the File Explorer search box." It sits under User Configuration, which is why the steps below use that branch of the left-hand tree.
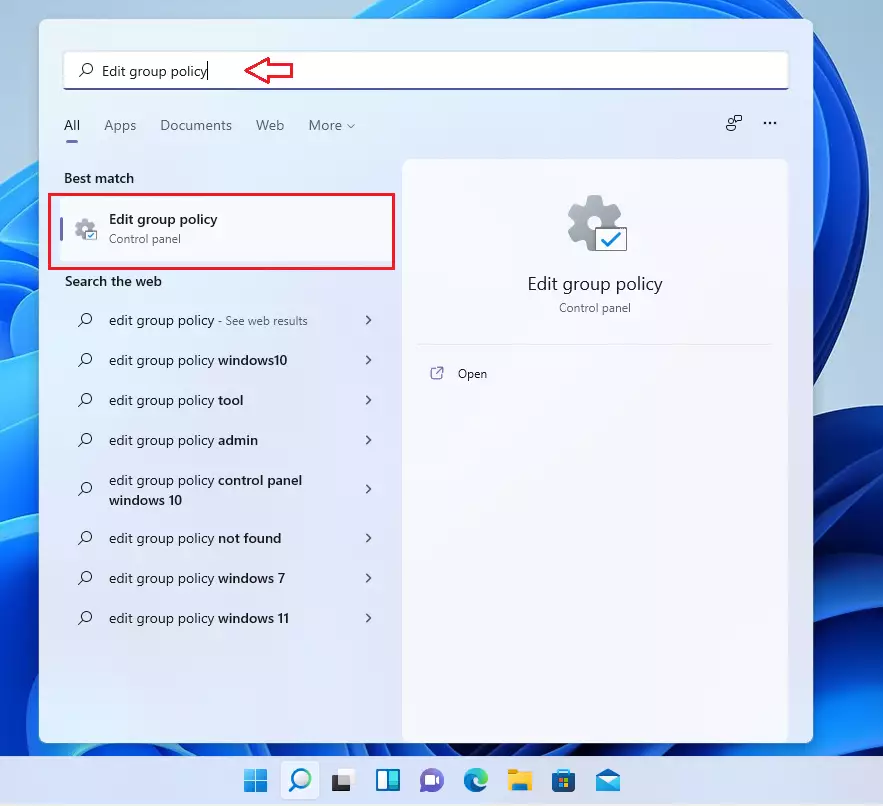
- Open the Start menu, search for "Edit group policy," and select it. Start menu A window titled Local Group Policy Editor should open, with a folder tree on the left and a details pane on the right. If the search finds nothing, you are most likely on Windows 11 Home.
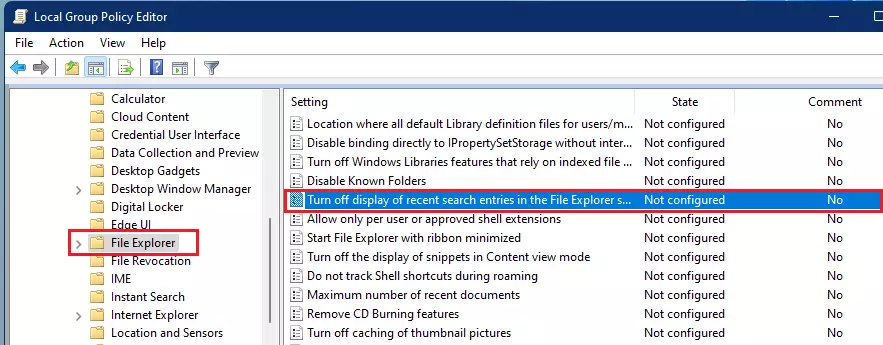
- In the window that opens, follow this path on the left: User Configuration Administrative Templates Windows Components File Explorer. Click the small arrow next to each folder to expand it, then click File Explorer itself. Its policies should now be listed on the right.
- On the right side, find the item named "Turn off display of recent search entries in the File Explorer search box." The list is long, so click the Setting column header to sort it alphabetically if you can't spot it. Its state should currently read Not configured.
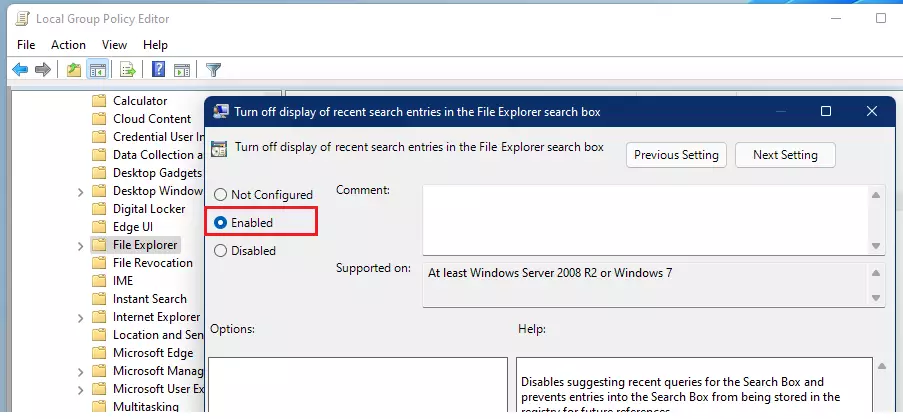
- Double-click it to open. A settings window opens with the options Not Configured, Enabled and Disabled.
- Select the Enabled option. This stops the web suggestions. The option can sound backwards, but "Enabled" here means the policy is switched on, and the policy is the one that turns the suggestions off.
- Click OK, then restart your computer to finish. After you sign back in, open the Start menu and type a word. You should see only local apps, files and settings. To undo this later, open the same policy, choose Not Configured, click OK and restart.
Using Windows Registry (Admin Privileges Required)
The Registry Editor works on every edition of Windows 11, including Home, which has no Group Policy Editor. You create one value that does the same job as the policy above.
Before you start, back up the registry: in the Registry Editor, click File Export and save a copy. You need an administrator account, and Windows may ask you to confirm with Yes when the editor opens.
In short, you press the Windows key + R, type regedit and press Enter. You go to HKEY_CURRENT_USER\SOFTWARE\Policies\Microsoft\Windows\Explorer. There you create a 32-bit DWORD value named DisableSearchBoxSuggestions and set it to 1 to stop web results from appearing. The detailed steps follow.
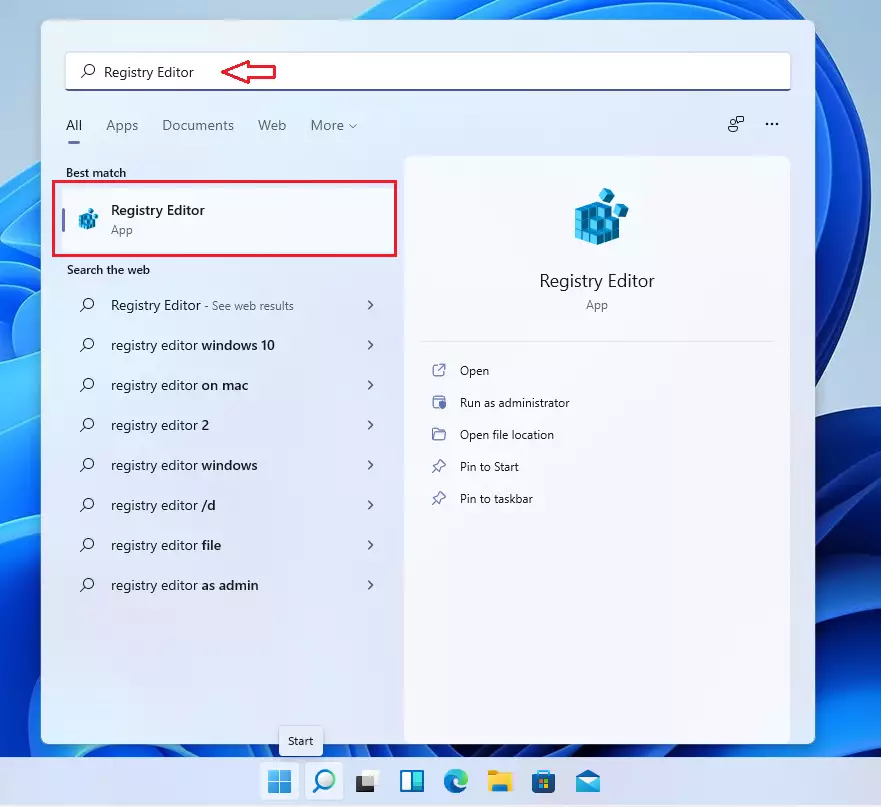
- Press the Windows key + R, type
regedit, and press Enter to open the Registry Editor. open the Registry If a User Account Control prompt appears, click Yes. The Registry Editor window should open with a folder tree on the left.
- In the address bar at the top, paste this path:
HKEY_CURRENT_USER\SOFTWARE\Policies\Microsoft\WindowsThen press Enter. The left pane should jump to the Windows key and highlight it.
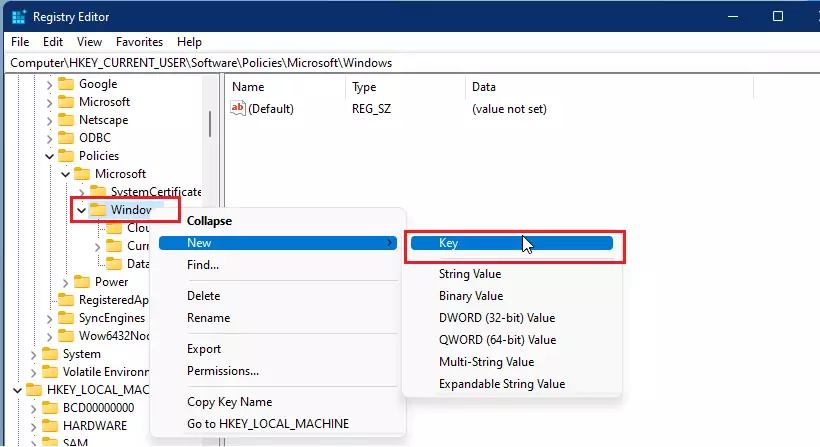
- Right-click the Windows folder on the left, select New, and click Key. A new folder appears under Windows with its name highlighted for editing. If an Explorer folder is already there, you can skip this step and the next, and click that folder instead.
- Name this new key
Explorerand press Enter. Spelling and capitals matter, because Windows only reads the key if the name is exact.
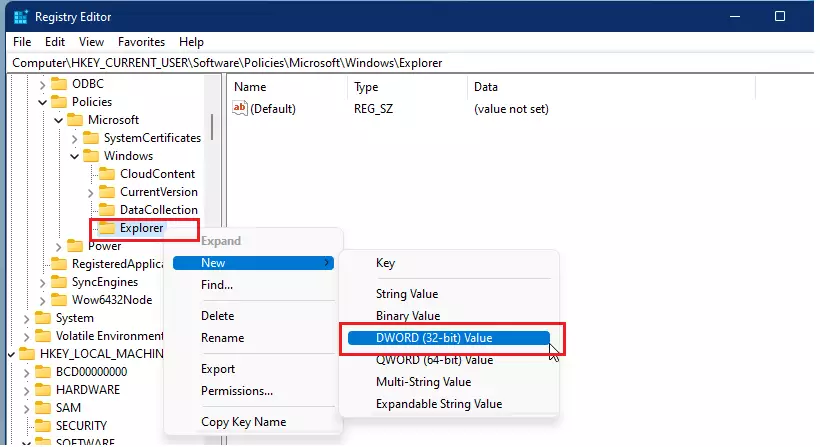
- Right-click your new Explorer key, select New, and choose DWORD (32-bit) Value. A new value appears in the right pane, with its name highlighted for editing. Choose the 32-bit type even if your PC is 64-bit.
- Name the new value
DisableSearchBoxSuggestionsand press Enter. - Double-click
DisableSearchBoxSuggestionsand change the "Value data" from0to1. Leave the Base set to Hexadecimal. It makes no difference for a value of 1.
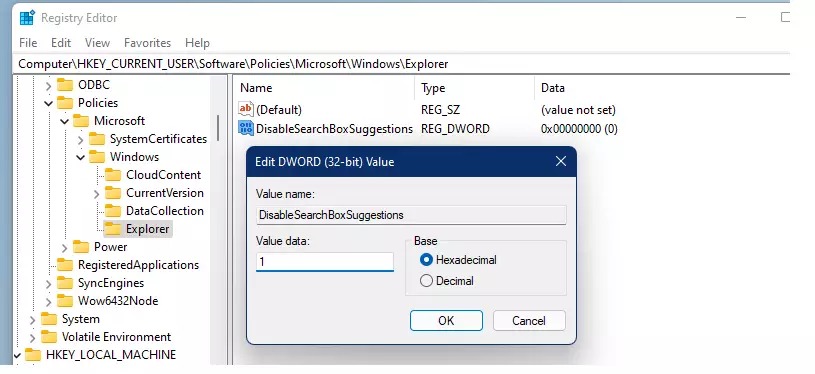
- Click OK and restart your computer to apply the changes. When you sign back in, type a word in the Start menu. Only local results should show up. To undo the change, go back to the same value and either set its data to 0 or right-click it and choose Delete, then restart.
Summary Comparison
| Method | Best For | Difficulty |
|---|---|---|
| Group Policy | Pro/Enterprise Users | Easy |
| Registry Editor | Home Users | Moderate |
Summary
You can remove Bing search suggestions from the Windows 11 Start menu with either the Local Group Policy Editor (Pro, Enterprise and Education) or the Windows Registry (every edition, including Home). Both methods stop web search results from appearing when you search, so the Start menu shows only what is on your computer. If the web results come back after a major Windows update, check that the policy or registry value is still set, and repeat the steps if it is not.
- Goal: Remove distracting Bing search suggestions from your Windows 11 Start menu.
- Methods: You can use the Group Policy Editor (Pro, Enterprise and Education) or the Windows Registry (all editions, including Home).
- Result: Your computer will only display local file results, making searches faster and cleaner. Your web browser is not affected.
- Final Step: Always restart your computer after applying these settings to ensure they take effect. To reverse the change, set the policy back to Not Configured or set the registry value to 0 (or delete it), then restart.
Have a question about this guide?
Answered by AI from this guide. Good questions may be added to this page — please don't include personal details.
Did this guide fix your problem?

About the Author
Richard
Tech Writer, IT Professional
Richard is a writer at Geek Rewind who turns complex IT tasks into clear, step-by-step guides. He draws on years of hands-on experience in system administration and enterprise IT operations, focusing on Windows, Linux and WordPress: the problems people actually run into, and the fixes that work. His server and WordPress guides come from systems he runs himself. Richard builds and maintains the platform behind Geek Rewind, from its Ubuntu servers and Nginx configuration to its custom WordPress plugins. Many new tutorials start with readers' questions, and he's always glad to answer them in the comments.
No comments yet — be the first to share your thoughts!