How to Delete Your Activity Data in Microsoft Teams

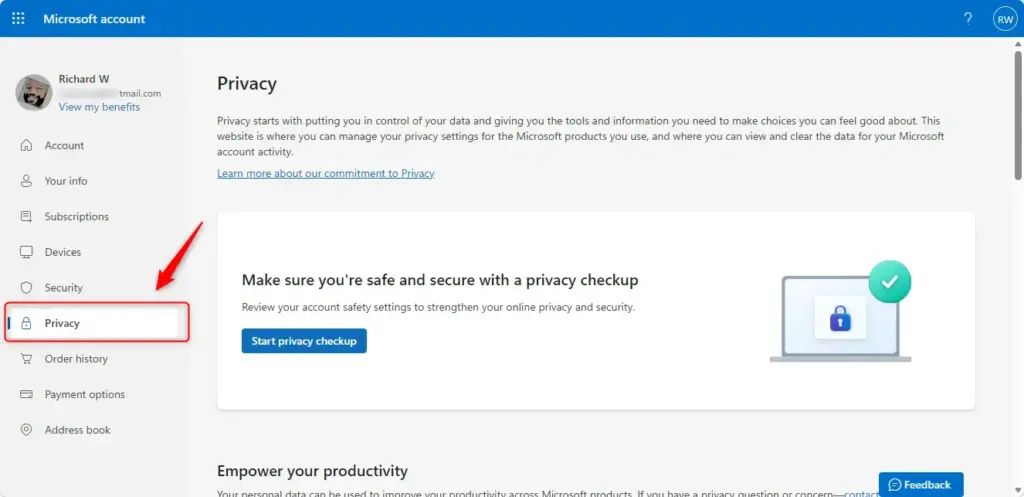
Deleting your activity data in Microsoft Teams (a workspace app for team chat and meetings) clears out old chat messages, call logs, and shared files to protect your privacy. Microsoft Teams keeps this information stored in your account until you manually remove it through your Microsoft account privacy settings.
The deletion permanently removes your old history so other people can no longer see it. You can clear your personal records whenever you want a fresh start on the platform.
This guide covers Microsoft Teams Free, the version tied to a personal Microsoft account. If you sign in to Teams with a work or school account, your organization’s administrator controls that data, and this method will not clear it.
Open https://account.microsoft.com/privacy/ in your web browser, sign in with your Microsoft account, select Apps and services, find Microsoft Teams Free, and click the option to clear your activity data. Your chat history, call logs, and usage information are permanently deleted and cannot be recovered.
Why Delete Your Activity Data?
Several good reasons exist to consider removing your activity data:
- To have a clean slate in Teams.
- If you are no longer using Teams Free and don’t want old records sitting in your account.
- To manage your personal information and decide what Microsoft keeps about you.
What Happens When You Delete Your Data?
This action cannot be undone. Your personal messages and past meeting records are gone for good once the process finishes. Check that you don’t need any old files or conversations before you start, and copy out anything you want to keep.
- Your chat history will be removed.
- Your call logs will be gone.
- Other usage information tied to your account in Teams Free will be deleted.
Confirm the deletion only when you are certain, because there is no way to recover the data afterward.
Steps to Delete Your Activity Data
Step 1Go to the Microsoft Account Privacy Page
Clearing Teams activity starts at the official Microsoft account privacy dashboard. You can do this from any computer with a web browser. You don't need the Teams app open.
- Open your preferred web browser.
- Go to the Microsoft account privacy page. Search for it online or use this direct link:
https://account.microsoft.com/privacy/
You should see the Microsoft privacy page, or a sign-in prompt if you are not already signed in.
Step 2Sign In to Your Microsoft Account
Sign in with the email address and password tied to your Microsoft Teams Free account. This verifies your identity before you delete anything from your profile. If you have more than one Microsoft account, make sure it is the one you use for Teams Free. Signing in with the wrong one will show the wrong data.
- Click the sign-in button on the page. It is labeled Sign in with Microsoft or something similar.
- Type the email address and password associated with your Microsoft Teams Free account.
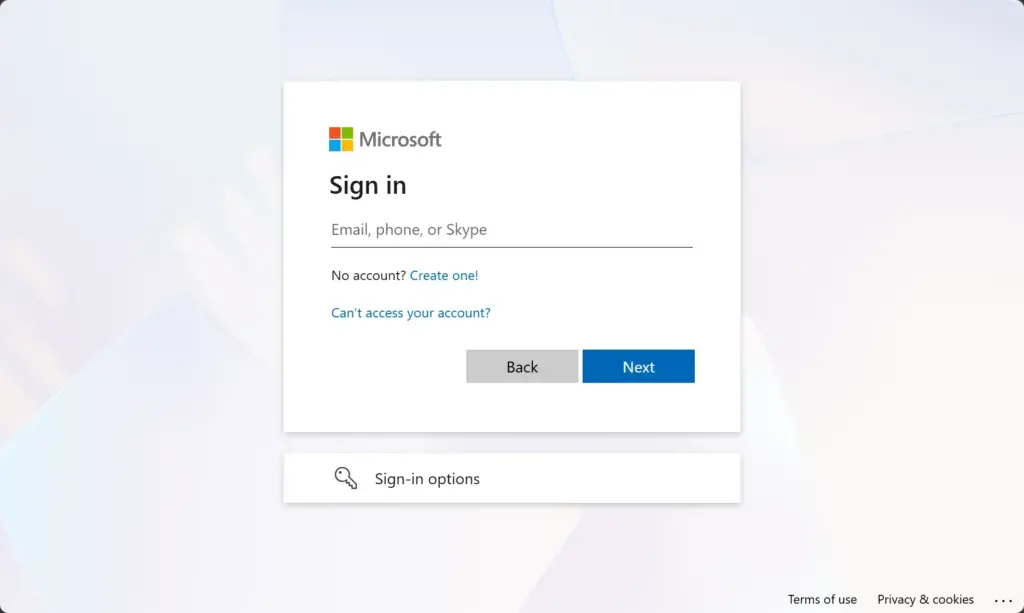
Finish any extra security prompts, such as two-factor authentication (a verification method requiring a second device or code). Microsoft may ask for a code sent by text or email, or for approval in an authenticator app. This protects your account from unauthorized access during data removal. Once you pass the check, you should land on your account's privacy page.
Step 3Find Apps and Services
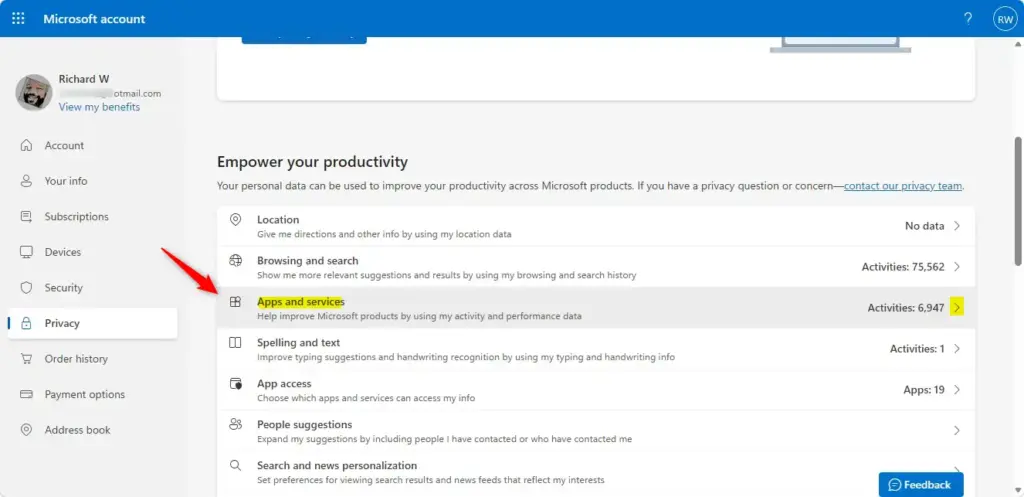
The apps and services section lets you manage connected programs and the data they hold. After signing in, look along the side or across the top of your browser window. Microsoft lists the tools linked to your login in this area.
- Look for a section or tab labeled Apps and services or Connected apps. Check the side and the top of the page.
- Click it to open the list.
You should now see a list of applications that access your account data. Reviewing it shows you where your information goes, which is useful even if you only came to clear Teams.
Website layouts change from time to time. If you can't find Apps and services, try labels like Permissions or Connected services instead.
Step 4Find Microsoft Teams Free and Clear Your Data
Next, find Microsoft Teams Free in your list. This is the entry that holds the records you want to wipe.
- Scan through the installed applications and services until Microsoft Teams Free appears. If you can't see it right away, check under a broader Microsoft heading, since it may be grouped there.
- Find the button next to the entry. It may be labeled Clear, Delete, or Manage.
- Click that button.
A confirmation message should appear. It lists which Microsoft Teams Free activity data will be permanently removed. Read it carefully so nothing important disappears by accident. If the entry doesn't appear at all, you may have signed in with a different account, or there may be no Teams Free data stored for this one.
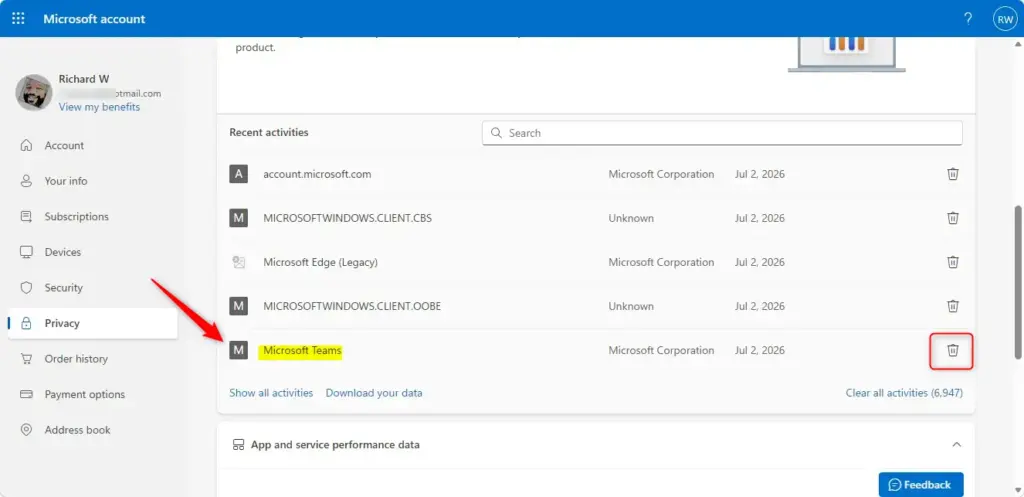
- Click the final confirmation button to run the deletion.
Clearing Microsoft Teams Free activity data is permanent. Your chat history, call logs, and usage information cannot be recovered afterward, so don't confirm until you are sure.
Reference:
Summary
To start fresh, sign in to the Microsoft privacy website, open the Apps and services section, find Teams Free, and clear your data.
Have a question about this guide?
Answered by AI from this guide. Good questions may be added to this page — please don't include personal details.
Did this guide fix your problem?

About the Author
Richard
Tech Writer, IT Professional
Richard is a writer at Geek Rewind who turns complex IT tasks into clear, step-by-step guides. He draws on years of hands-on experience in system administration and enterprise IT operations, focusing on Windows, Linux and WordPress: the problems people actually run into, and the fixes that work. His server and WordPress guides come from systems he runs himself. Richard builds and maintains the platform behind Geek Rewind, from its Ubuntu servers and Nginx configuration to its custom WordPress plugins. Many new tutorials start with readers' questions, and he's always glad to answer them in the comments.
No comments yet — be the first to share your thoughts!