How to Uninstall Microsoft Teams from Windows 11

Uninstalling Microsoft Teams from Windows 11 removes the application and its associated data.
Microsoft Teams is a communication and collaboration platform that includes chat, video meetings, and file storage.
Microsoft Teams removal becomes necessary for many Windows 11 users when they switch to different communication tools or when their workplace mandates another service.
Some versions of Teams, particularly the personal app found in Windows 11 builds like 22621.1848, can leave residual files behind after a standard uninstall.
This guide details the steps to ensure Teams is completely removed from your PC.
To uninstall Microsoft Teams, first close it completely by right-clicking its taskbar icon and selecting “Quit.” Then, go to Windows Settings > Apps > Apps & features, search for “Microsoft Teams” and uninstall it, followed by “Teams Machine-Wide Installer.” Finally, restart your PC.
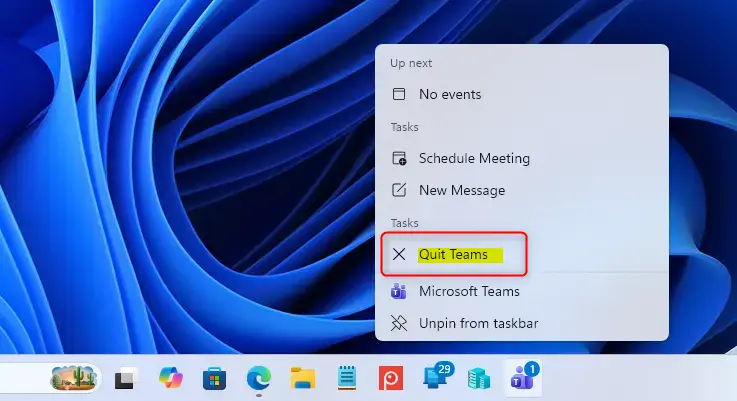
Step 1Close Teams Completely
To properly uninstall Microsoft Teams from Windows 11, you must first close the application completely. Just clicking the ‘X’ or minimizing it to the taskbar doesn’t fully stop it from running in the background. You need to make sure all Teams processes are stopped before you begin the uninstall process.
- Find the Teams icon: Look in the area near your clock on the taskbar. This is usually on the right side. You might need to click a small arrow pointing up to see all the icons.
- Right-click the Teams icon: When you find it, right-click on it.
- Choose “Quit” or “Close window”: A small menu will appear. Select the option that closes the app completely.
Step 2Use Windows Settings to Remove the Main App
You can uninstall the main Microsoft Teams app right from Windows 11’s Settings menu. Press the Windows key and ‘I’ on your keyboard together to open Settings, then go to ‘Apps’ and choose ‘Apps & features’. Look for Microsoft Teams in the list and select the option to remove it.
- Open Windows Settings: The fastest way is to press the Windows key + I on your keyboard. You can also click the Start button and then click the gear icon for Settings.
- Go to “Apps”: In the Settings window, click on the Apps section.
- Click “Apps & features”: This is usually the first option under Apps. You will see a list of everything installed on your computer here.
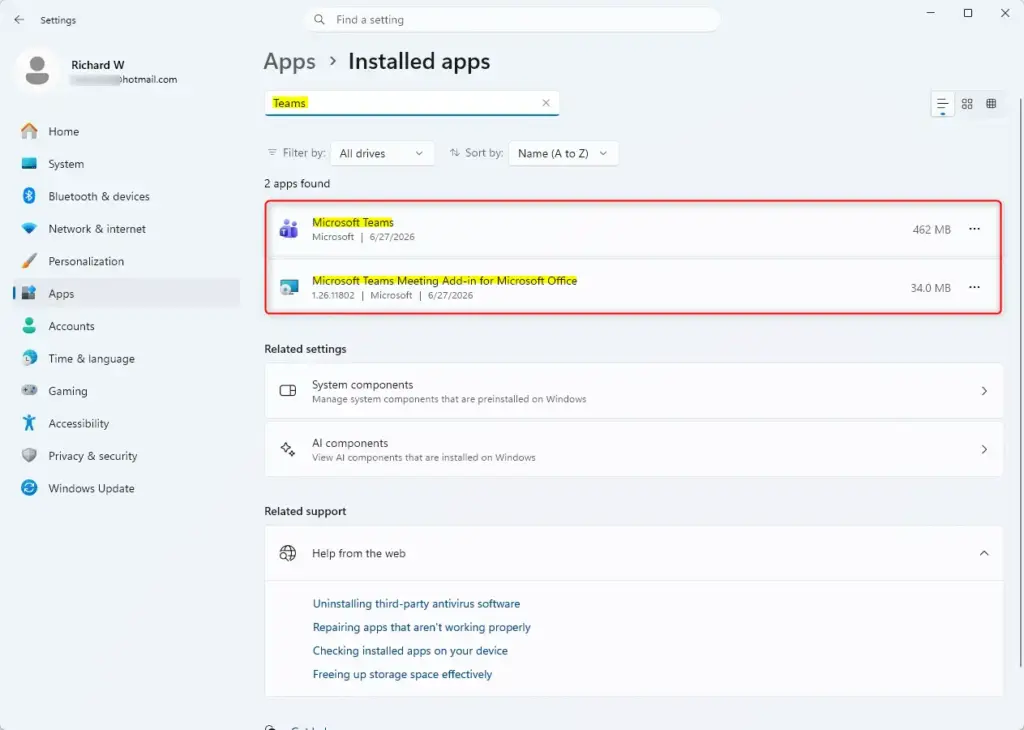
- Search for “Teams”: In the search box under “Apps & features,” type Teams. This will show you only the apps related to Teams.
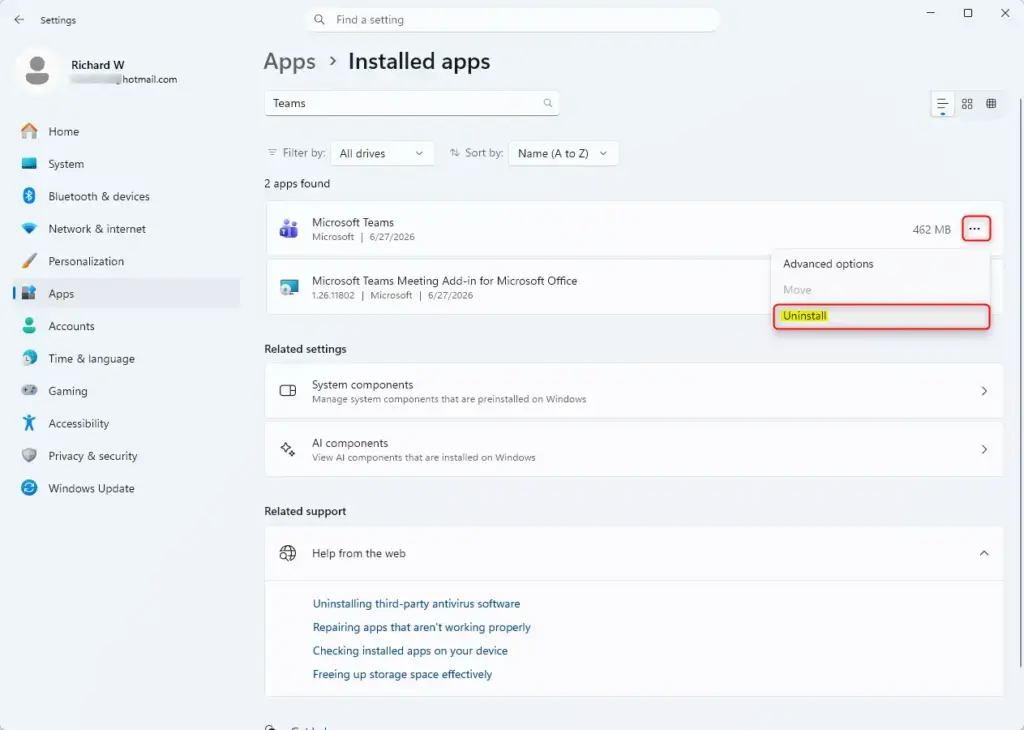
- Select “Microsoft Teams”: You should see “Microsoft Teams” in the results. Click on it.
- Click “Uninstall”: A button that says Uninstall will show up. Click it.
- Confirm the uninstall: A window will ask if you are sure you want to uninstall Microsoft Teams. Click Uninstall again.
- Grant permission: Windows will ask, “Do you want to allow this app to make changes to your device?” This is a normal security question. Click Yes.

Step 3Find and Remove the “Machine-Wide Installer”
After removing the main Teams app, you also need to uninstall the ‘Microsoft Teams Machine-Wide Installer’ for a complete cleanup. Stay in the same ‘Apps & features’ section of Windows Settings where you just were. Search for ‘Teams’ again in the list of installed apps and remove this second component.
- Stay in “Apps & features”: You should still be in the same “Apps & features” area in Windows Settings where you just uninstalled the main Teams app.
- Search for “Teams” again: If you closed Settings, open it again and go back to Apps & features. Type Teams in the search box.
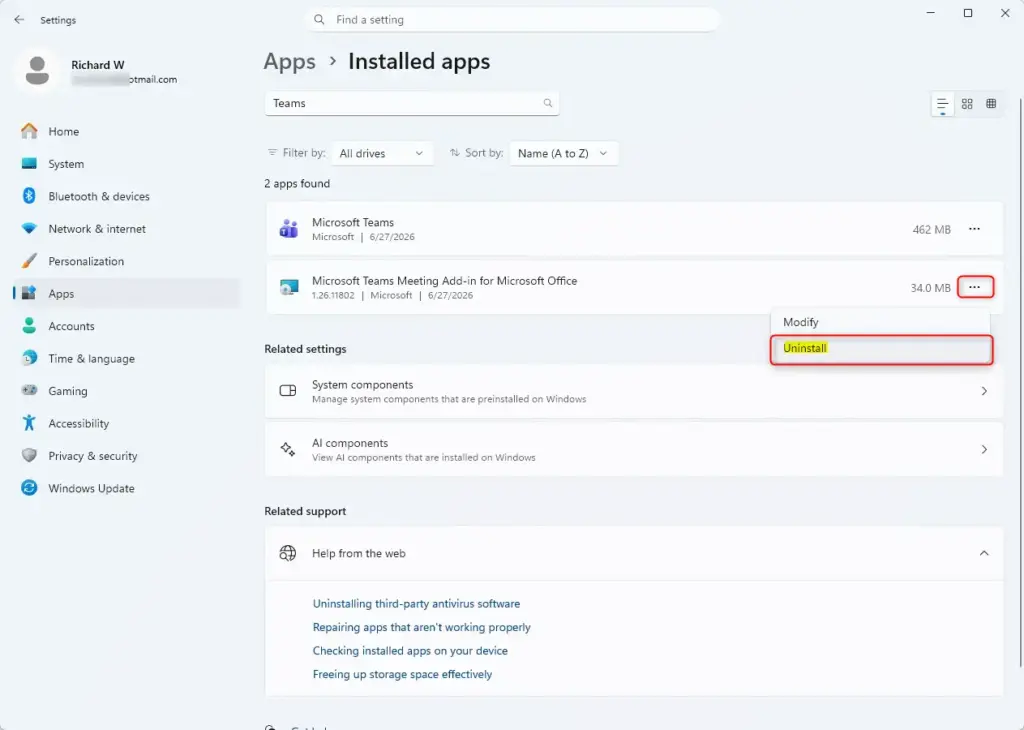
- Look for “Teams Machine-Wide Installer”: You should see another item in the list, probably called Teams Machine-Wide Installer.
- Select and Uninstall: Click on “Teams Machine-Wide Installer” to choose it, then click the Uninstall button.
- Confirm and Grant Permissions: Just like with the main Teams app, you will likely see a message asking if you want to uninstall. Click Uninstall again. Then, click Yes when Windows asks for permission to make changes.
Step 4 Restart Your PC to Finish
Restarting your computer is the final step to fully finish uninstalling Microsoft Teams from Windows 11. Before you restart, make sure to save any important work you have open in other programs. Then, click the Start button, select the Power icon, and choose ‘Restart’ to complete the process.
- Save your work: Before you restart, save any files you have open in other programs.
- Restart Windows: Click the Start button, then click the Power icon, and choose Restart.
Reference:
https://support.microsoft.com/en-US/teams/troubleshooting/uninstall-microsoft-teams
Summary
Uninstalling Microsoft Teams from Windows 11 frees up storage space and can make your PC run faster. This guide showed you how to remove the main Teams app and its Machine-Wide Installer. Following these steps ensures no leftover files remain on your computer after removing Microsoft Teams.
Uninstalling Microsoft Teams from Windows 11 removes the main Teams application and the Teams Machine-Wide Installer. This removal process prevents leftover files or running processes from causing computer problems. Restarting the Windows 11 computer finalizes the uninstallation of Microsoft Teams.
Was this guide helpful?

About the Author
Richard
Tech Writer, IT Professional
Richard, a writer for Geek Rewind, is a tech enthusiast who loves breaking down complex IT topics into simple, easy-to-understand ideas. With years of hands-on experience in system administration and enterprise IT operations, he’s developed a knack for offering practical tips and solutions. Richard aims to make technology more accessible and actionable. He's deeply committed to the Geek Rewind community, always ready to answer questions and engage in discussions.


No comments yet — be the first to share your thoughts!