How to Delete Bing Search History in the Cloud


Bing search history in the cloud is the log of every term you type into Microsoft’s search engine. It is stored on your online Microsoft account, so it follows you across every device where you are signed in. Clearing it stops Microsoft from tying your past searches to your personal profile.
You can delete your entire search history in under 2 minutes through your online Microsoft privacy dashboard. Removing these saved searches also stops anyone else who uses your account from seeing what you looked up.
Open Settings Privacy & security Search, click the Privacy dashboard link under Search history in the cloud, sign in with your Microsoft account, expand Search history, and click Clear all search history. Your entire Bing search history is removed from Microsoft’s servers with no undo option.
Why should you do this?
Clearing your search history helps protect your privacy. It removes the list of things you have searched for on Bing and through your Windows search bar.
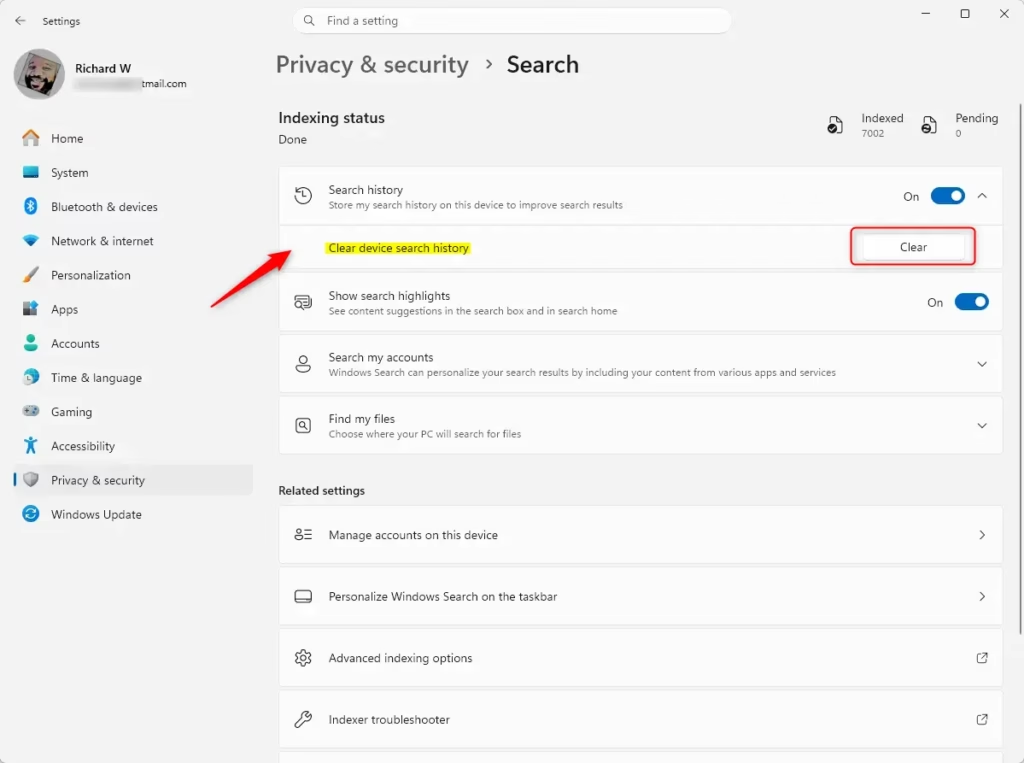
It is not the same as the history kept on the PC itself. Deleting the cloud copy does not wipe the local record on this computer, and the reverse is also true. If you want both gone, clear each one separately.
What happens when you are done?
Personalized suggestions based on your past searches will be reset. There is no undo. Deleted entries cannot be restored, so be sure before you confirm.
You need an internet connection and a Microsoft account for this. The steps are written for Windows 11 and work the same on Home and Pro. If you sign in to Windows with a local account, the cloud history section may not appear in Settings. In that case, open the privacy dashboard in a browser and sign in with your Microsoft account there.
Follow these steps to manage your data.
How to Clear Your Search History
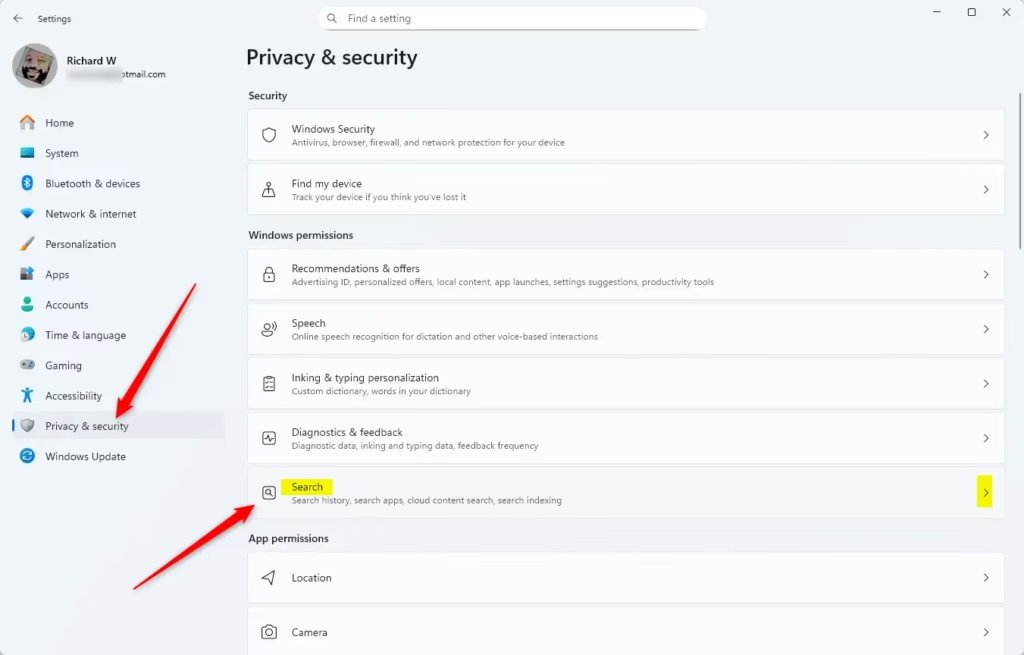
- Press the Windows key + I on your keyboard to open Settings. You should see the Settings window with a list of categories on the left.
- Click Privacy & security on the left side of the screen.
- Scroll down and select Search on the right side. The search settings page opens.
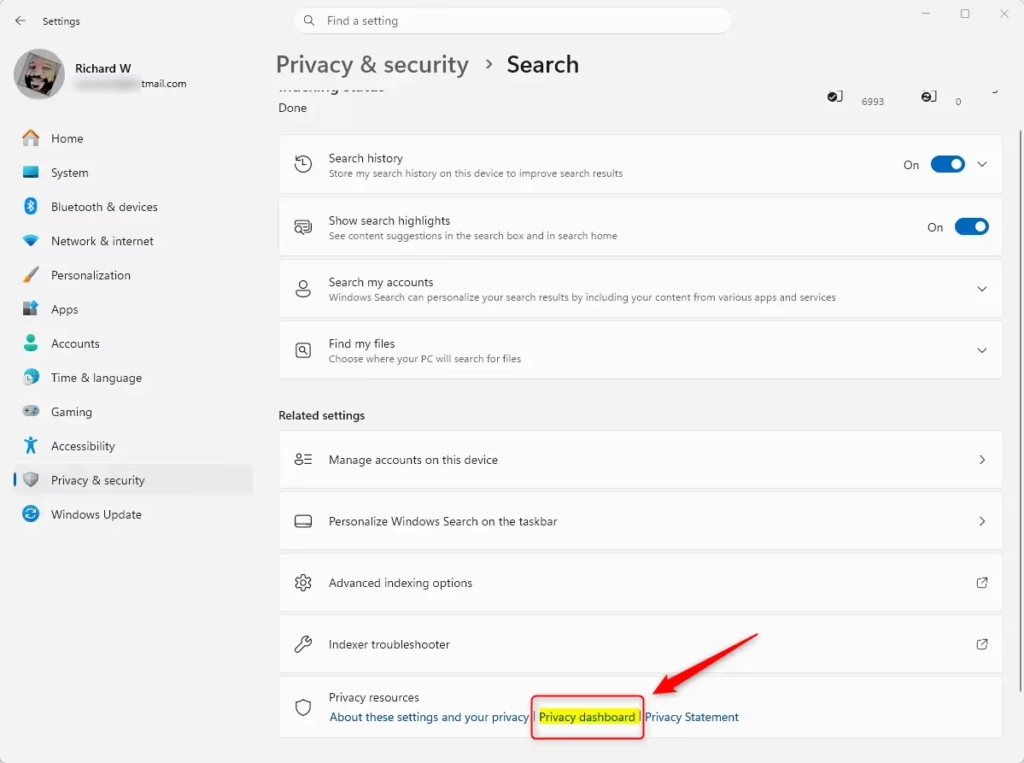
- Find the Search history in the cloud section and click the Privacy dashboard link under it. Your default web browser opens and loads a Microsoft page.
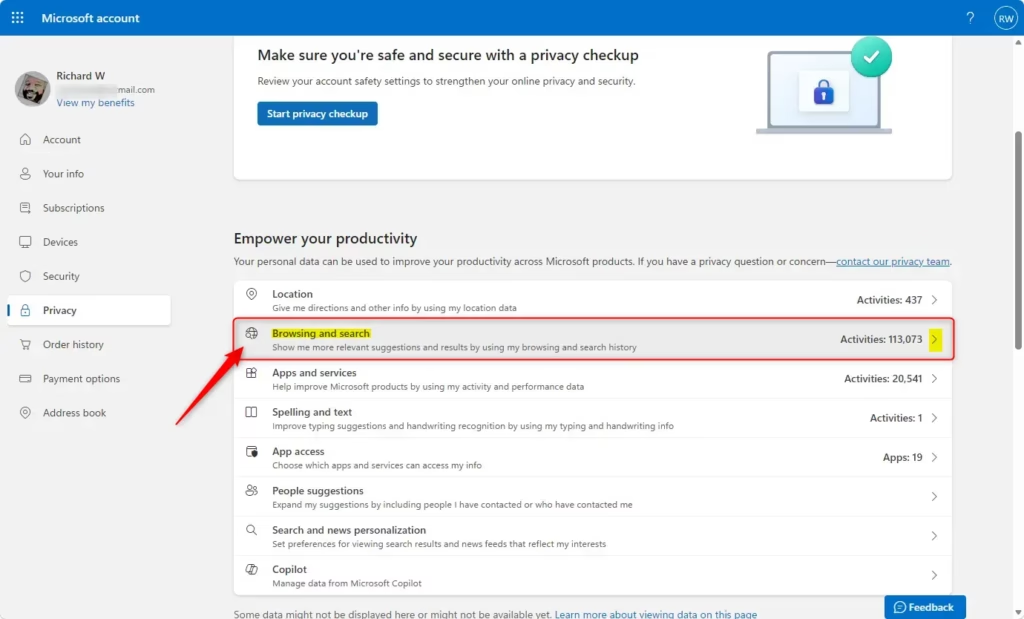
- Sign in to your privacy dashboard with your Microsoft account email and password. If you already have an active session, you may go straight through. Once you are in, you should see the privacy dashboard with sections for your activity data.
In short, you reach your saved web searches through Settings Privacy & security Search, and then the dashboard link. Use the account you normally use with Bing. If you have more than one Microsoft account, signing in with the wrong one shows you a different, possibly empty, history.
Clear Recent Searches
Use this method when you only want to remove a few recent searches and keep the rest.
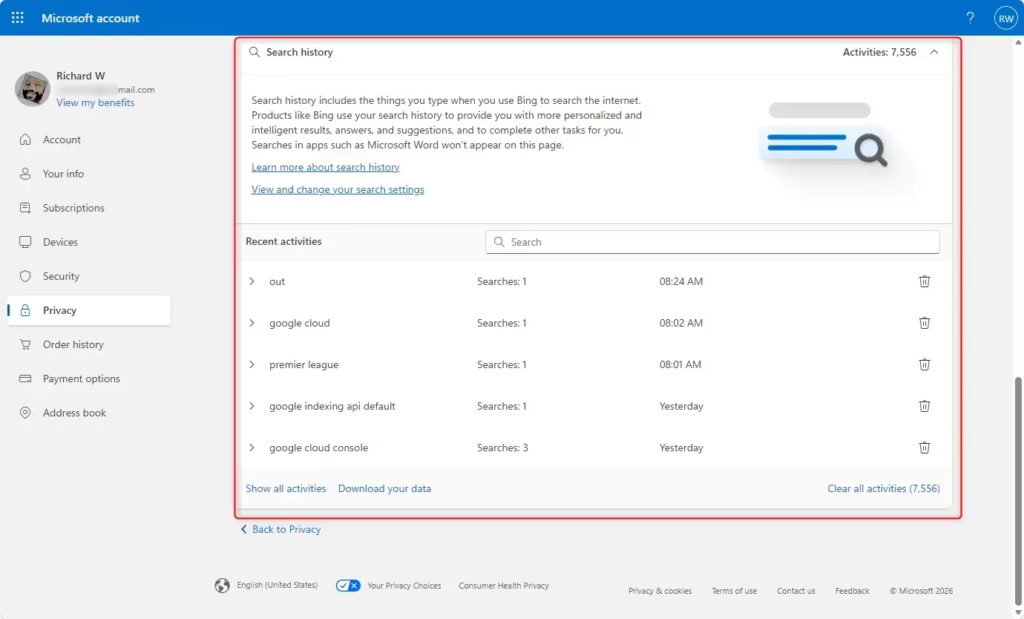
- On your privacy dashboard, click to expand the Search history section. A list of your most recent searches appears.
- Click the Recycle Bin icon next to any recent item to delete it. The entry should disappear from the list. Repeat for each item you want to remove.
Clear Specific Searches
The dashboard only shows a handful of recent items at first. Use this method when the search you want to remove is older and not in that short list.
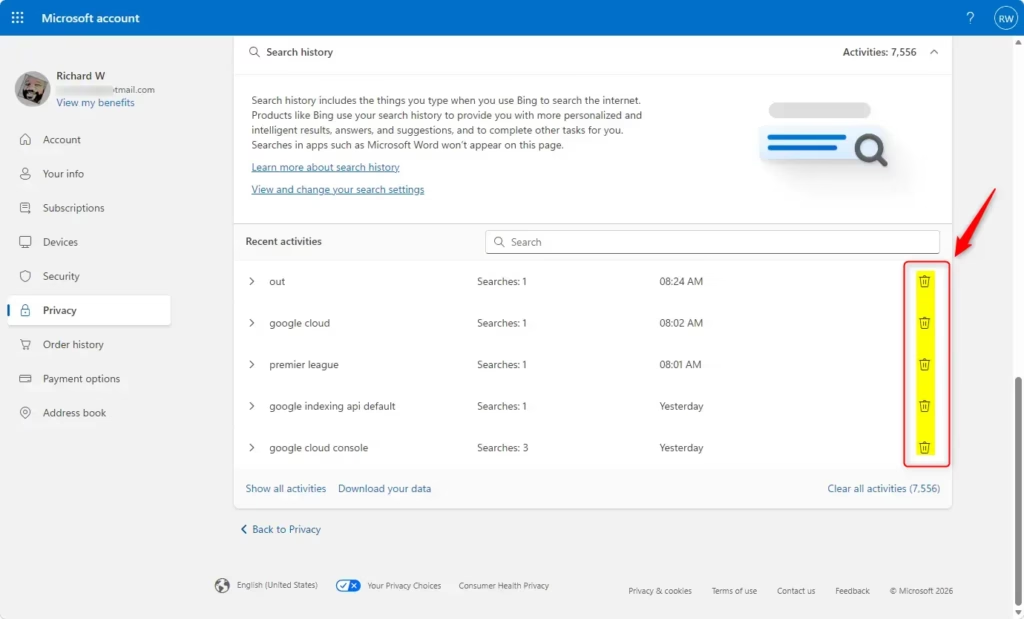
- Expand the Search history section on your dashboard.
- Click the Show more link under your recent history. A longer list of past searches opens.
- Click the Recycle Bin icon next to the specific items you want to remove. Each deleted item should drop out of the list.
- Click Close when you are finished.
Clear All Search History
Use this method to wipe everything in one go. It is the quickest option if you do not need to keep any of your history.
- Expand the Search history section on your dashboard.
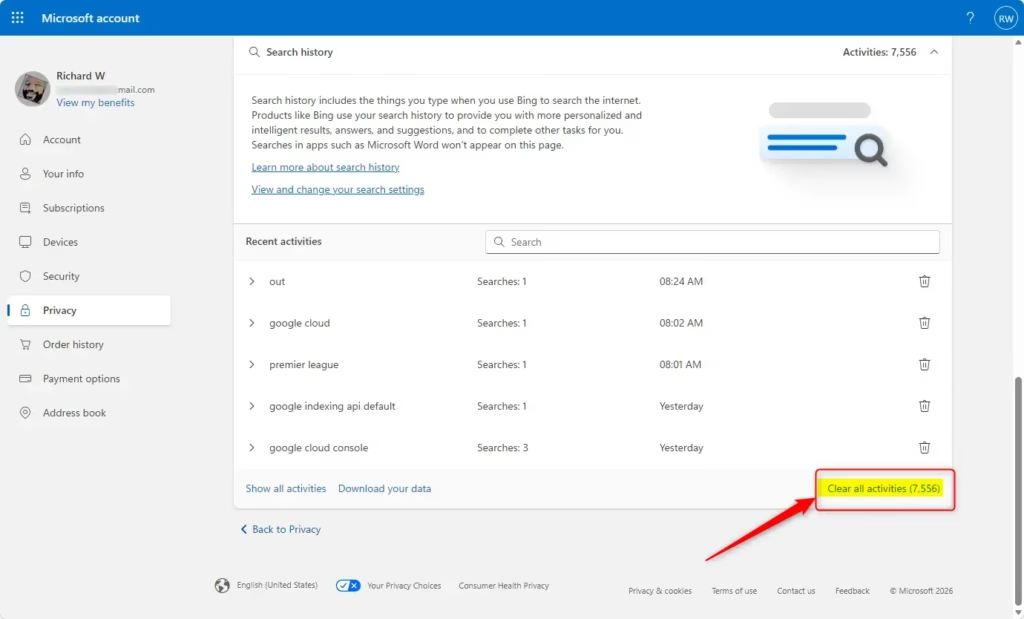
- Click the Clear all search history link. A confirmation prompt appears asking if you are sure.
- Click Clear to confirm your choice. The search history list should now be empty. If old entries still show, refresh the page after a minute or two.
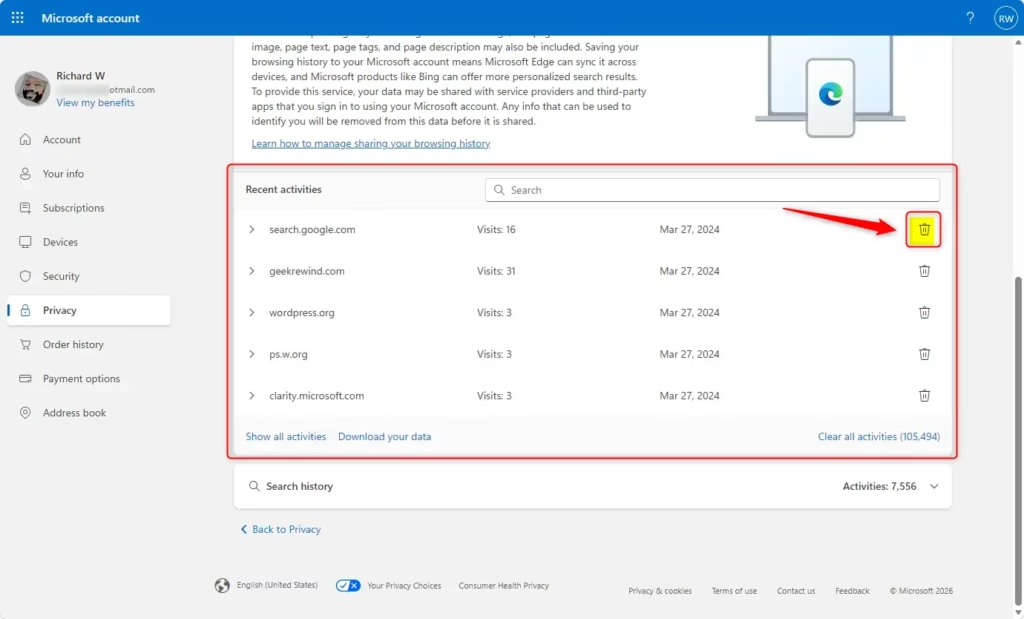
You can delete Bing history completely by visiting your Microsoft privacy dashboard and wiping your saved data in bulk. Expand the Search history section, click the link to clear all search history, and confirm your choice when prompted. This removes all past web searches tied to your account across your devices. You do not need to restart your PC. The change takes effect on the account right away.
Summary
Managing and learning how to delete Bing history is straightforward when you use the Microsoft privacy dashboard. You can clear specific items or wipe your entire search history to keep your browsing data private and prevent Microsoft from using your past web activity to personalize your search results and recommendations. New searches you make while signed in will be saved again, so repeat the process from time to time if you want to keep the history clean.
References:
Windows Search and privacy - Microsoft Support
Have a question about this guide?
Answered by AI from this guide. Good questions may be added to this page — please don't include personal details.
Did this guide fix your problem?

About the Author
Richard
Tech Writer, IT Professional
Richard is a writer at Geek Rewind who turns complex IT tasks into clear, step-by-step guides. He draws on years of hands-on experience in system administration and enterprise IT operations, focusing on Windows, Linux and WordPress: the problems people actually run into, and the fixes that work. His server and WordPress guides come from systems he runs himself. Richard builds and maintains the platform behind Geek Rewind, from its Ubuntu servers and Nginx configuration to its custom WordPress plugins. Many new tutorials start with readers' questions, and he's always glad to answer them in the comments.
No comments yet — be the first to share your thoughts!