How to Customize Pointer Appearance and Cursor Thickness in Windows 11

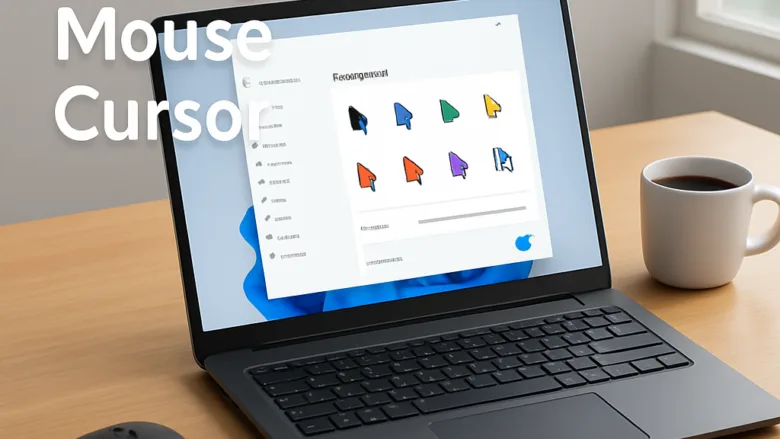
Pointer and cursor settings in Windows 11 let you enlarge the mouse pointer, change its color, and thicken the text cursor, the blinking line that shows where typing will appear. The default cursors often vanish against bright white backgrounds or busy web pages, and hunting for them slows you down.
Windows 11 has built-in settings for all of this, with no extra software. You can set the pointer size from level 1 to 15, pick a custom color, and adjust the text cursor indicator and its thickness. Open Settings , then go to Accessibility Mouse pointer and touch for the pointer, or Accessibility Text cursor for the typing line. The older Mouse Properties window covers schemes, trails and the Ctrl-key locator.
Open Settings , select Accessibility Mouse pointer and touch, then drag the Size slider (1 to 15) and choose a pointer style. For the typing line, go to Accessibility Text cursor, turn on the Text cursor indicator, and drag the Text cursor thickness slider. Changes apply immediately, with no restart needed.
How to open mouse settings in Windows
The Mouse settings page controls pointer speed and button assignments. It also links to the older Mouse Properties window. Most of the other methods in this guide start from here or from the Run dialog.
- Press the Windows key, type Settings, and press Enter. The Settings app opens.
- Select Bluetooth & devices from the left sidebar. The list of connected devices appears on the right.
- Click Mouse. The page shows pointer speed, button and scrolling settings.
- Scroll down to the related settings and click Additional mouse settings. The classic Mouse Properties window opens.
Any section below that says to open Mouse Properties can start here.
You can also press Win+R to open the Run dialog, type control mouse, and press Enter. This opens Mouse Properties directly, which is quicker if you already know you need the classic window.
Changing pointer size and color
A bigger or brighter pointer is the fastest fix when you lose the cursor on a large or high-resolution screen. Everything here is in the modern Settings app . Changes apply immediately, so there is no Apply button and no restart.
- Open Settings.
- Select Accessibility from the left sidebar.
- Click Mouse pointer and touch. The pointer style choices and a size slider appear.
- Under Mouse pointer style, choose White, Black, Inverted, or Custom. Inverted flips its color against whatever is behind it, so it stays visible on both light and dark areas. With Custom, you pick a color of your own, and a bright one works well on a dark desktop.
- Drag the Size slider to the right to enlarge the pointer. The scale runs from 1 to 15, and the pointer on screen resizes as you drag, so stop when it is comfortable to follow.
To work on the typing line instead, go back one level and open the text cursor settings. This page has two separate features. The Text cursor indicator adds a colored marker to the cursor, with its own size and color options. The Text cursor thickness slider only widens the blinking line itself.
- Go to Settings Accessibility Text cursor
- Turn on the Text cursor indicator toggle. Size and color options appear beneath it.
- Drag the indicator's size slider and choose a color. Pick one that contrasts with your usual window background.
- Drag the Text cursor thickness slider to the right to widen the blinking line in text boxes. A preview shows the new width.
You can use the indicator, the thickness slider, or both. To undo the changes, turn the Text cursor indicator toggle off and drag the thickness slider back to the left. For the pointer, set the style back to White and drag the size slider all the way to the left.
Selecting custom pointer schemes
A pointer scheme is a full set of cursors, one for each action such as normal select, busy and text select. Swapping schemes changes them all at once. This is done in the classic Mouse Properties window, which still works in Windows 11.
- Open the classic Control Panel by pressing Windows key + R, typing
control, and pressing Enter. If you prefer, use Additional mouse settings from the Mouse page and skip to step 3. - Click Hardware and Sound, then select Mouse. The Mouse Properties window opens.
- Switch to the Pointers tab. The Customize list shows each pointer state and its current image.
- Click the Scheme drop-down menu and select a different preset, such as Windows Black (system scheme) or Windows Aero (extra large). The images in the list change so you can preview them.
- Click Apply to save your changes.
To go back, return to the same drop-down, choose the default scheme, and click Apply again.
Installing custom mouse cursors
Download packs only from sites you trust, since the archive may contain more than cursor files. Then assign each file to a pointer state in Mouse Properties.
- Download your preferred cursor pack and extract the compressed archive to a permanent folder on your drive, such as C:\Users\<your name>\Documents\Cursors. Windows reads the files from that location, so if you move or delete the folder later, the custom pointers may stop working.
- Open the Mouse Properties window, either through the classic Control Panel route from the previous section or with Additional mouse settings on the Mouse page.
- Go to the Pointers tab.
- Click an individual state in the Customize list, such as Normal Select, and click Browse. A file picker opens, usually in the Cursors folder.
- Go to the folder containing your extracted cursor files, select the replacement file, and click Open. The new image appears next to that state in the list.
- Repeat for any other states you want to change.
- Click Save As under the Scheme section, give your configuration a name to store it, then click OK.
Because you saved the set as a scheme, you can switch back to it later from the Scheme drop-down. To drop a single custom image, select that state and click Use Default.
Advanced pointer visibility options
Pointer trails and the Ctrl-key locator help when the cursor moves fast or you work across several monitors. A trail is a faint path that follows the pointer. Both options live on the Pointer Options tab of Mouse Properties.
- Open the Mouse Properties window through the classic Control Panel or the Additional mouse settings link.
- Switch to the Pointer Options tab.
- Check the box next to Display pointer trails and adjust the slider so the cursor leaves a visible path as it moves. Moving the slider toward Long gives a longer trail.
- Check the box next to Show location of pointer when I press the CTRL key. An expanding ring then draws attention to the cursor whenever you tap Ctrl.
- Click Apply to commit the changes.
To turn either feature off, clear its checkbox and click Apply again.
What to do next
You should now be able to find and follow your cursor in any application or window. If you still lose it, try a larger size or the Inverted style first. Then add the text cursor indicator, pointer trails or the Ctrl-key ring. Next, you could look at adjusting your keyboard layout or setting up custom display scaling to tune your desktop further.
Frequently asked questions
How can I change the appearance of my mouse pointer?
Open Settings and go to Accessibility Mouse pointer and touch. Adjust the pointer size slider from level 1 to 15 to make it larger. Choose White, Black, Inverted or Custom under Mouse pointer style to make it stand out against your background. Apply your changes and the pointer updates immediately.
How do I change the display cursor?
Go to Settings Accessibility Text cursor. Use the thickness slider to make the text cursor line thicker so it's easier to spot while typing. You can also turn on the Text cursor indicator and choose its color. Changes apply right away to all text fields on your screen.
How to change cursor style in 🪟 Windows 11?
Open Settings and navigate to Accessibility Mouse pointer and touch. Use the size slider to change pointer size from 1 to 15. Select a different Mouse pointer style (White, Black, Inverted or Custom) to change how the pointer looks. These settings control both the pointer appearance and behavior across Windows 11.
How do I change my custom cursor back to normal?
Go to Settings Accessibility Mouse pointer and touch. Reset the size slider to level 1 (the default). Set Mouse pointer style back to White. For text cursor, return to Settings Accessibility Text cursor and reset thickness to default, then toggle color off if you turned it on.
Still have a question?
Answered by AI from this guide. Good questions may be added to this page — please don't include personal details.
Did this guide fix your problem?

About the Author
Richard
Tech Writer, IT Professional
Richard is a writer at Geek Rewind who turns complex IT tasks into clear, step-by-step guides. He draws on years of hands-on experience in system administration and enterprise IT operations, focusing on Windows, Linux and WordPress: the problems people actually run into, and the fixes that work. His server and WordPress guides come from systems he runs himself. Richard builds and maintains the platform behind Geek Rewind, from its Ubuntu servers and Nginx configuration to its custom WordPress plugins. Many new tutorials start with readers' questions, and he's always glad to answer them in the comments.
No comments yet — be the first to share your thoughts!