How to Configure Multitasking Snap Layouts for Multiple Windows in Windows 11

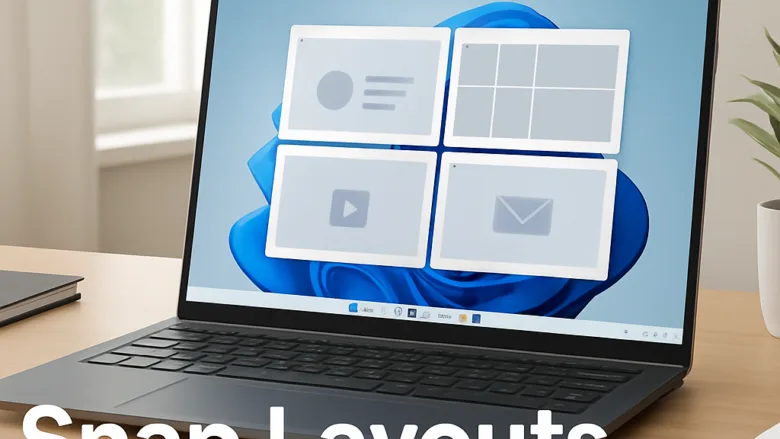
Snap Layouts in Windows 11 organizes open windows into pre-configured grid positions on your screen so you can view multiple applications at once. Hovering your mouse over any window’s maximize button triggers visual placement grids that let you arrange up to four apps side-by-side or in quadrants. On larger or higher-resolution displays, Windows may offer more layout choices than on a small laptop screen.
Arranging your workspace this way helps you reference information quickly without constantly clicking back and forth between full-screen apps. You can set up these layouts using your mouse, fast keyboard shortcuts, or deeper system settings to match how you work. Everything here works the same on Windows 11 Home and Pro.
Hover your mouse over the maximize button in the top-right corner of any window to reveal snap layout grids, then click where you want that app positioned. Use Win+← or Right Arrow to snap to screen halves, then Up or Down Arrow for quadrants. Drag the dividing border between snapped windows to resize them simultaneously.
How to Access Snap Layouts with a Mouse
Accessing snap layouts with a mouse takes just a second when you use the maximize button hover menu. Hover your mouse pointer over the square maximize icon in the top-right corner of any open window to reveal the grid layout options, then click the exact spot where you want that app to sit on your screen.
- Open the first application you want to arrange.
- Move your mouse pointer over the Maximize button. It is the square icon in the top-right corner of the window frame, next to the close and minimize icons.
- Wait a moment. A pop-up menu of grid layouts should appear below the button. If nothing shows up after a second or two, move the pointer off the button and back on again.
- Click the zone within the layout where you want your current window to sit. The window jumps into that zone right away.
- Click another open application from the Snap Assist grid to fill the remaining empty zones. Snap Assist is the feature that shows thumbnail previews of your other open apps. Repeat this until every zone has a window.
If the hover menu never appears, the option is probably switched off. See the settings section at the end of this guide. You can also press the Win+Z to open the same layout menu from the keyboard.
How to Use Snap Layouts with Keyboard Shortcuts
Using snap layouts with keyboard shortcuts lets you arrange windows instantly without touching your mouse. Press the Win along with your left or right arrow keys to snap the active window to either side of your screen, then use the up or down arrows to tuck it into a corner.
- Click the window you want to move to make it active.
- Press the Windows logo key + Left Arrow or Right Arrow to snap the window to either half of your screen. The window fills that half, and Snap Assist may show thumbnails on the other side.
- Press the Windows logo key + Up Arrow or Down Arrow to move the window into a screen quadrant after it is already snapped to a side. Up sends it to the top corner of that side, and Down sends it to the bottom corner.
- Release the keys once the window occupies your desired zone.
If you press them on a window that is not snapped, Windows maximizes or minimizes it instead. To undo a snap, drag the window by its title bar and it returns to its earlier size.
How to Resize Snapped Windows Simultaneously
Resizing snapped windows simultaneously happens by dragging the dividing border that separates them on your desktop. Move your mouse pointer directly over the line between your snapped apps until the cursor turns into a double-sided arrow, then click and drag to adjust how much space each window takes up.
- Move your mouse pointer directly over the dividing line or border separating your snapped windows.
- Click and hold the left mouse button when the cursor changes into a double-sided arrow.
- Drag the border to the left or right to resize both adjacent windows simultaneously. For windows stacked top and bottom, drag up or down.
- Release the mouse button once you reach your preferred layout proportions.
It is one of the checkboxes in the Multitasking settings covered below.
Using Snap Assist to Fill Remaining Screen Space
Using Snap Assist to fill remaining screen space automatically populates your leftover desktop area with your other open apps right after you snap your first window. Once you dock an app to one side of your display, Windows shows thumbnail previews of your running programs on the opposite side so you can click one to fill the gap.
- Snap your primary window to one side of the screen using either the mouse hover method or keyboard shortcuts.
- Look at the opposite side of your display, where Windows shows thumbnail previews of all your other running apps.
- Click any thumbnail in the grid to automatically fill the remaining blank zone on your screen. The chosen app snaps into place and the thumbnails disappear.
If you do not see the thumbnails, or you want to skip them, press Esc to dismiss the panel. Snap Assist suggestions can also be turned on or off in the Multitasking settings. Apps that are minimized still appear in the thumbnail list, but a few apps with fixed window sizes may not snap the way you expect.
Working with Snap Groups
Working with Snap Groups lets you minimize or restore an entire multi-window layout at the same time without rearranging individual applications. Snap Groups are collections of snapped apps bundled together in your Taskbar, the horizontal bar containing your pinned apps. They let you bring back a whole set of windows with a single click.
- Set up a multi-window layout using Snap Layouts.
- Move your mouse pointer over any of the open app icons from that layout in your Taskbar, usually at the bottom of the screen.
- Hover over the combined preview showing your active Snap Group. It appears as a set of thumbnails arranged the way your windows were laid out.
- Click the thumbnail preview of the group to restore all windows in that specific layout together.
This only works if Windows is allowed to show snapped windows when you hover over taskbar apps. If the group preview never appears, check the Multitasking settings in the next section. Snap Groups also show up in Task View and when you press Alt + Tab.
Configure Snap Settings
Configuring snap settings lets you customize how window layouts behave when you drag items around your desktop. Open Settings, click System, and select Multitasking to find the Snap windows section where you can check or uncheck boxes to turn specific layout features on or off.
- Open Settings, the central application containing your Windows system configurations. Pressing the Windows logo key + I is the quickest way.
- Click System in the left sidebar menu.
- Click Multitasking on the right side of the window. You should see a Snap windows toggle near the top of the page.
- Make sure the Snap windows toggle is set to On. If it is off, none of the snap features work and the options below stay hidden.
- Click the dropdown arrow next to the Snap windows heading to reveal more options.
- Check or uncheck boxes to enable or disable features. These include showing snap layouts when you hover over a window's maximize button, showing snap layouts when you drag a window to the top of the screen, suggesting what you can snap next to a window, and showing snapped windows when you hover over taskbar apps.
Changes apply immediately and you do not need to restart. If a feature is not working, this is the first place to check. To undo any change, return to this page and flip the same box back.
What to do next
Now that your screen space is organized with custom multitasking grids, you can explore setting up virtual desktops to separate your work and personal applications. Test out different layouts to see which grid configuration matches your daily workflow best.
Have a question about this guide?
Answered by AI from this guide. Good questions may be added to this page — please don't include personal details.
Did this guide fix your problem?

About the Author
Richard
Tech Writer, IT Professional
Richard is a writer at Geek Rewind who turns complex IT tasks into clear, step-by-step guides. He draws on years of hands-on experience in system administration and enterprise IT operations, focusing on Windows, Linux and WordPress: the problems people actually run into, and the fixes that work. His server and WordPress guides come from systems he runs himself. Richard builds and maintains the platform behind Geek Rewind, from its Ubuntu servers and Nginx configuration to its custom WordPress plugins. Many new tutorials start with readers' questions, and he's always glad to answer them in the comments.
No comments yet — be the first to share your thoughts!