How to Configure Advanced File Sharing Settings in Windows 11 Network Discovery

Advanced file sharing settings in Windows 11 control network discovery, password protection, and encryption levels. Together they decide how safely you can share files with other devices on your local network. Network discovery is the core setting: it lets your computer see other machines on the network and lets them see you in return.
Windows 11 sorts connections into two main profiles. Private is for trusted spaces like your home. Public is for places like coffee shops and hotels, where Windows locks down sharing by default to keep your data safe. Most sharing problems come down to a connection sitting on the wrong profile, so start there.
Open Settings Network & internet, click your connection name, and set Network profile type to Private. Then open Control Panel Network and Sharing Center Change advanced sharing settings, expand Private, turn on network discovery and file and printer sharing, and click Save changes. These settings control how your PC appears on the network and who can access shared files.
Checking Your Current Network Profile Status
Your PC needs a Private network profile before other devices can find it and share files with it. Windows often sets a new connection to Public, so check this first, even if you think you already did. The steps below work on both Home and Pro editions of Windows 11.
- Press Win+I to open Settings.

Windows 11 Start menu with Settings gear icon highlighted. - Select Network & internet from the left-hand sidebar.
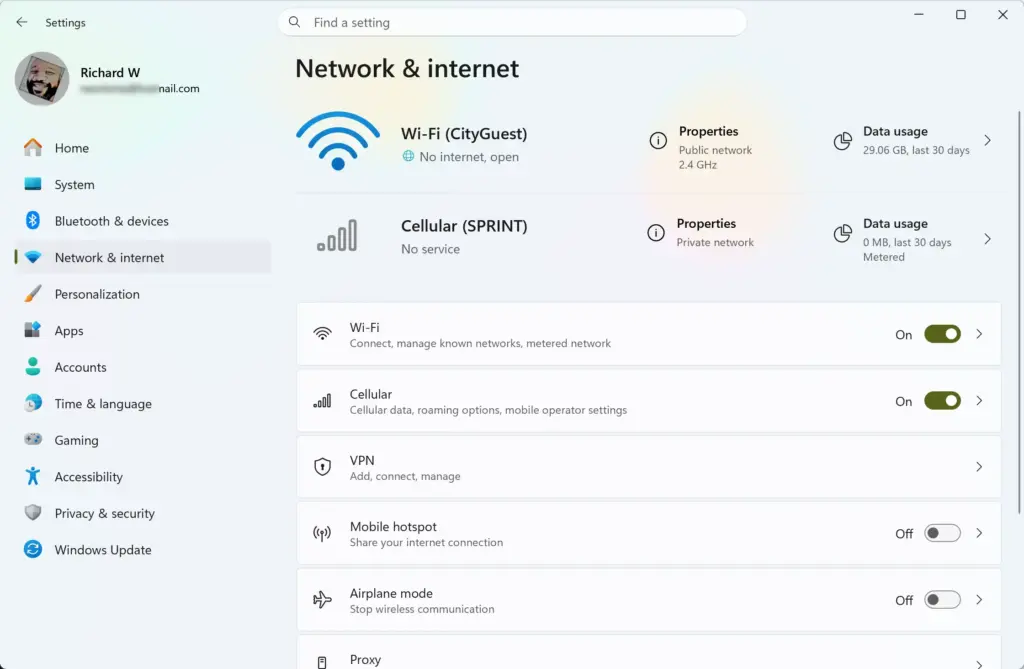
Settings › Network & internet - Click Wi-Fi or Ethernet, depending on which connection you are using right now. You should see the connection listed with its status.
- Click the name of your connected network (for Wi-Fi ) or the adapter’s properties link (for Ethernet). The properties page for that connection opens.
- Find Network profile type and select Private.
The change takes effect straight away and you do not need to restart. To undo it, come back to the same page and select Public. Do that whenever you connect to a network you do not control. If you have both Wi-Fi and Ethernet connected, check the profile on each one.
Enabling Network Discovery and File Sharing via Control Panel
The master switches for network discovery and file sharing live in the classic Control Panel , in the Network and Sharing Center. Turn them on for the Private profile so that other computers on your home network can see your PC and open the files you share. These settings apply per profile, so turning them on under Private does not change anything on a Public network.
- Open the Start menu, type Control Panel , and press Enter.
- Click Network and Internet, then open Network and Sharing Center.
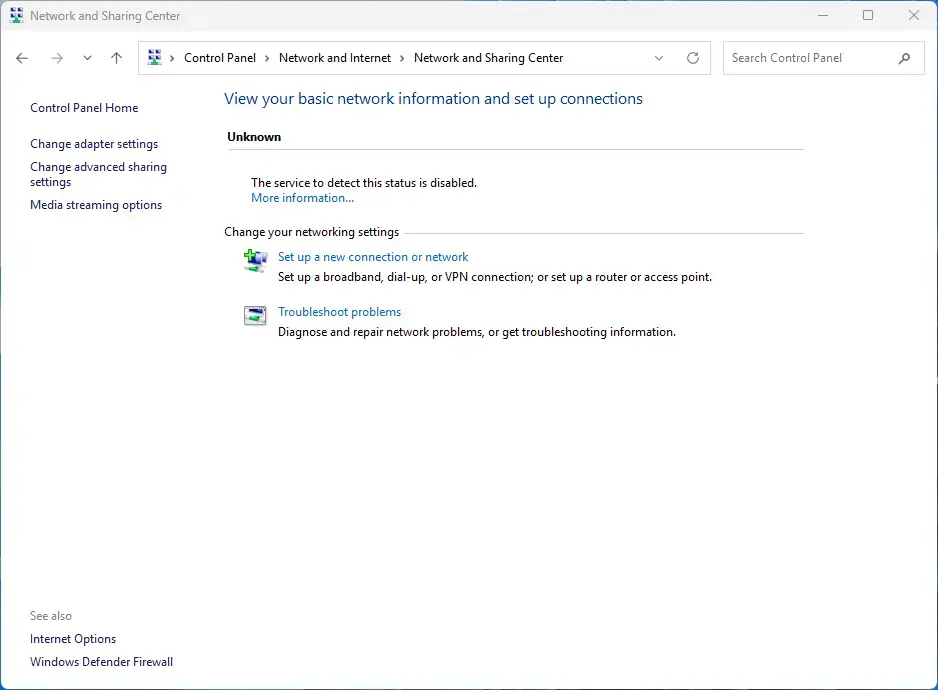
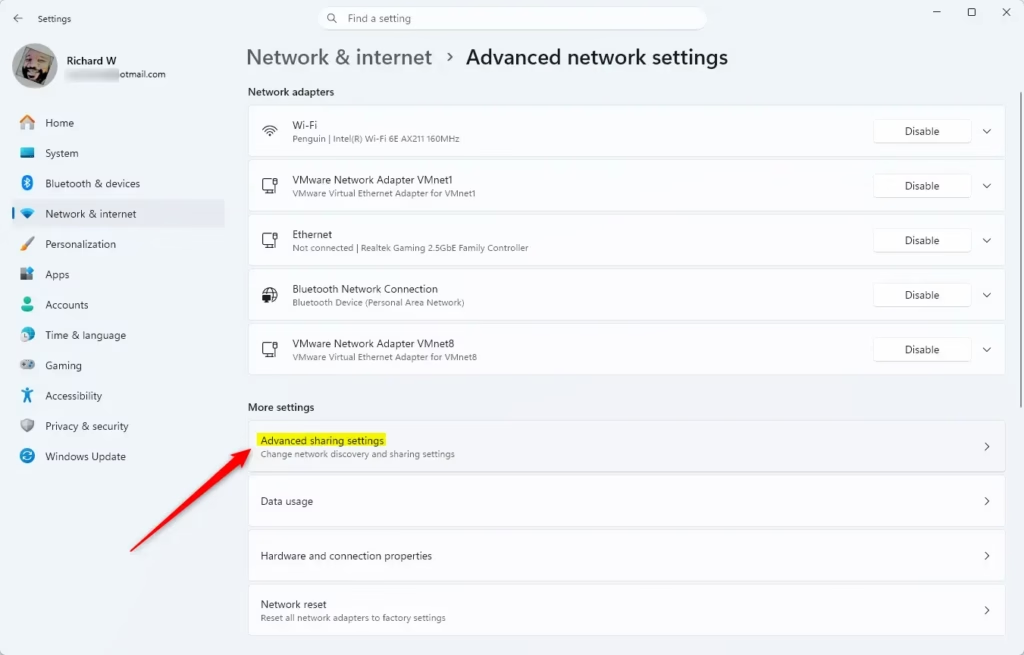
Control Panel › Network and Internet › Network and Sharing Center - Click Change advanced sharing settings in the left-hand column. You should see the profiles listed, such as Private, Guest or Public, and All Networks.
- Expand the Private profile section by clicking the arrow icon next to it.
- Select Turn on network discovery.
- Check the box for Turn on automatic setup of network connected devices.
- Select Turn on file and printer sharing.
- Click Save changes at the bottom of the window if prompted. You may also see a prompt asking for administrator approval.
You do not need to restart. If your PC still does not show up on the network, or network discovery switches itself back off, check that these services are running in the Services app: Function Discovery Resource Publication, SSDP Discovery, and UPnP Device Host. Also check that a third-party firewall is not blocking discovery. To undo the change, return to this page and choose Turn off network discovery and Turn off file and printer sharing.
Configuring All Networks and Public Folder Sharing
The All Networks section holds the global settings: public folder sharing, file sharing encryption, and password protection. These apply no matter which profile you are on, so take a moment to set them deliberately. The safe defaults are right for most home setups.
- Return to the Advanced sharing settings window in the Control Panel.
- Expand the All Networks section at the bottom of the page.
- Under Public folder sharing, select Turn on sharing so anyone with network access can read and write files in the Public folders. Or leave it turned off for stricter security. Leaving it off is the better choice unless you specifically want an open drop-off folder.
- Under File sharing connections, select Use 128-bit encryption to help protect file sharing connections (recommended). Select Enable file sharing for devices that use 40- or 56-bit encryption only if you are connecting to older Network Attached Storage (NAS) devices or legacy printers that cannot use 128-bit.
- Under Password protected sharing, select Turn on password protected sharing to require a user account and password on this PC for shared items. Or select Turn off password protected sharing to allow guest access without credentials. Leave password protection on if the network is shared or untrusted.
- Click Save changes at the bottom of the window.
With password protected sharing on, people connecting from another PC must sign in with an account that exists on your PC. Make sure that account has a password, or the connection will be refused. You do not need to restart after these changes.
Managing Advanced Sharing Permissions for Specific Folders
Turning on network discovery makes your PC visible, but it does not share anything by itself. You still have to share each folder you want others to open, and you decide who gets in and what they can do. The steps below use the classic Advanced Sharing dialog, which gives you the most control.
- Press Windows Key + E to open File Explorer.
- Right-click the folder you want to share and select Properties. If you do not see Properties straight away, choose Show more options first.
- Click the Sharing tab at the top of the properties window.
- Click the Advanced Sharing... button. This step requires administrator privileges, so approve the prompt if one appears.
Windows 11 advanced sharing settings screen showing network profiles. - Check the box labeled Share this folder. The share name field becomes active. This name is what other users will see on the network.
- Click the Permissions button to specify which network users or groups can access the folder.
- Select Everyone or a specific user account from the list, then check Allow for Full Control, Change, or Read according to your preference. Read is the safest choice for most shares. Add Change only for people who need to edit or delete files.
- Click Apply and then OK to close the permissions window.
- Click OK again to close the advanced sharing window.
Share permissions are only half the picture. If the folder is on an NTFS drive, the NTFS permissions on the Security tab apply as well, and the stricter of the two wins. To stop sharing later, reopen Advanced Sharing... and clear Share this folder.
Enabling SMB 1.0 Support for Legacy Network Devices
SMB 1.0 support lets your computer connect to older network drives, media servers, and printers. Windows 11 turns this outdated protocol off by default for security reasons. Only switch it on if your older hardware stops working after everything else has been set up correctly. Your first choice should be a firmware update for the device, or a setting on the device that enables SMB 2 or later.
Only enable this feature if you rely on legacy hardware that cannot be updated.
- Open the Start menu, type Turn Windows features on or off, and press Enter. This step requires administrator privileges. The Windows Features window opens.
- Scroll down the list and locate SMB 1.0/CIFS File Sharing Support.
- Click the plus sign next to SMB 1.0/CIFS File Sharing Support to expand it, then check the box. Make sure SMB 1.0/CIFS Client is checked, because the client is the part that lets your PC connect out to older devices. Leave SMB 1.0/CIFS Server off unless old devices need to connect to your PC.
- Click OK. Windows searches for the required files and applies the changes. This can take a minute or two.
- Click Restart now to reboot your computer and finish the installation.
To undo this, open the same window, clear the SMB 1.0/CIFS File Sharing Support checkbox, click OK, and restart. Do this as soon as you no longer need the old device.
Using the Registry Editor to Force Network Discovery and Sharing Defaults
Use the Registry Editor only when the normal settings fail to give you the sharing behavior you need, for example when local accounts cannot authenticate over the network. This method edits the system database directly, so work slowly and change only the values listed below.
Back up your registry before proceeding with these steps. In Registry Editor you can do this with File Export, choosing All as the export range.
- Press Windows Key + R to open the Run dialog box.
- Type regedit and press Enter to open the Registry Editor. This step requires administrator privileges, so approve the prompt if one appears.
- Navigate to the following registry path in the address bar: HKEY_LOCAL_MACHINE\SYSTEM\CurrentControlSet\Services\LanmanServer\Parameters
- Right-click an empty space in the right pane, select New, and click DWORD (32-bit) Value. A new value appears with its name ready to edit.
- Name the new value AutoShareWks and press Enter.
- Double-click AutoShareWks, make sure the Value data is set to 1, and click OK.
- Navigate to the following registry path: HKEY_LOCAL_MACHINE\SOFTWARE\Microsoft\Windows\CurrentVersion\Policies\System
- Create or modify a DWORD (32-bit) Value named LocalAccountTokenFilterPolicy and set its Value data to 1. This allows local accounts to authenticate over the network with administrative tokens.
- Close the Registry Editor and restart your computer. The changes do not take effect until you do.
Be aware that LocalAccountTokenFilterPolicy weakens a built-in remote access protection, so only use it on a trusted home network. To undo it, set the value to 0 or delete it, then restart. If anything goes wrong, double-click the exported backup file to restore it.
Was this guide helpful?

About the Author
Richard
Tech Writer, IT Professional
Richard is a writer at Geek Rewind who turns complex IT tasks into clear, step-by-step guides. He draws on years of hands-on experience in system administration and enterprise IT operations, focusing on Windows, Linux and WordPress: the problems people actually run into, and the fixes that work. His server and WordPress guides come from systems he runs himself. Richard builds and maintains the platform behind Geek Rewind, from its Ubuntu servers and Nginx configuration to its custom WordPress plugins. Many new tutorials start with readers' questions, and he's always glad to answer them in the comments.
No comments yet — be the first to share your thoughts!