How to Auto Clear Edge Browsing Data in Windows 11

You can automatically clear your Microsoft Edge browsing data every time you close the browser on Windows 11.
This feature allows Microsoft Edge, the default browser for Windows 11, to delete your browsing history, cookies, cache, and other stored data as soon as you exit the application.
Setting this up protects your privacy by ensuring sensitive information like login credentials and website visits are removed automatically, without you needing to remember to do it manually.
This is particularly useful for users concerned about disk space or who frequently use public computers, as it prevents persistent storage of your online activity.
Open Edge Settings, go to Privacy, search, and services, and enable the toggles for desired data types under “Choose what to clear every time you close the browser.” This will automatically delete selected browsing data when you exit the application.
How to Auto-Clear Browsing Data in Microsoft Edge
You can easily set Microsoft Edge to auto clear your browsing data every time you close the browser, keeping your online activity private.
- Open Microsoft Edge.
- Click the three dots (…) in the upper right corner. This opens the menu.
- Select Settings from the menu.

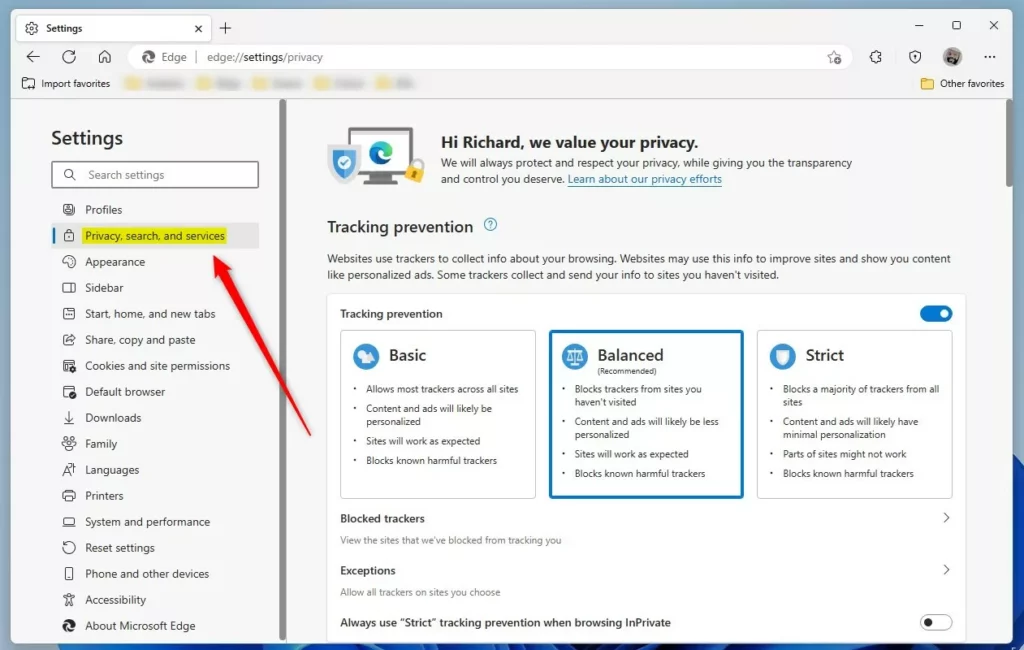
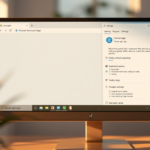
micrsoft edge browser more option and settings - On the left side, click Privacy, search, and services.
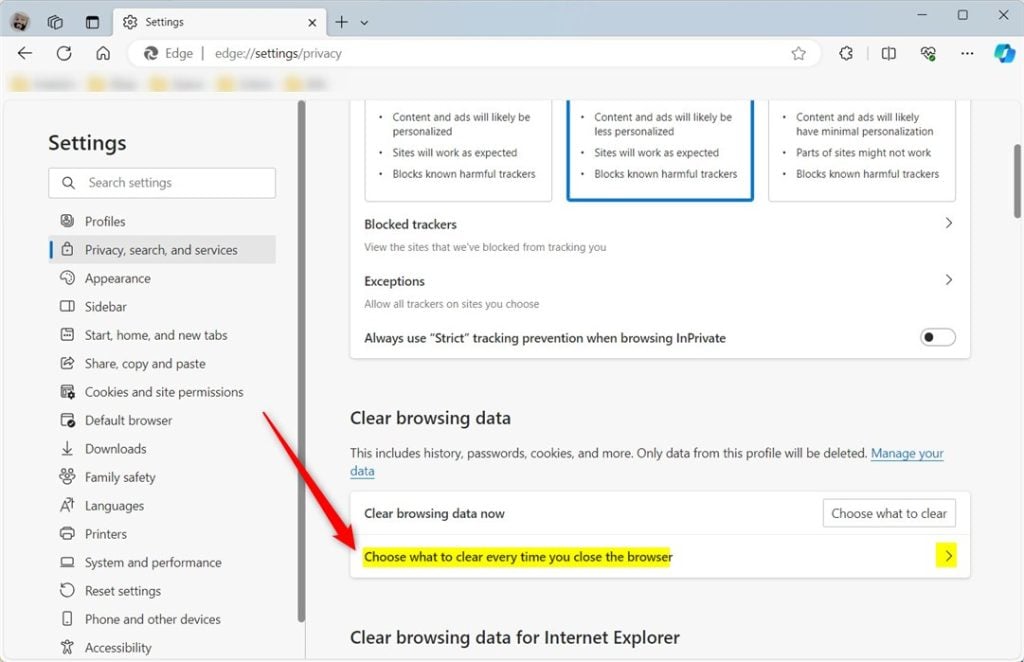
microsoft edge browser privacy search and services page - Look for the box that says “Choose what to clear every time you close the browser.” Click it to expand the options.
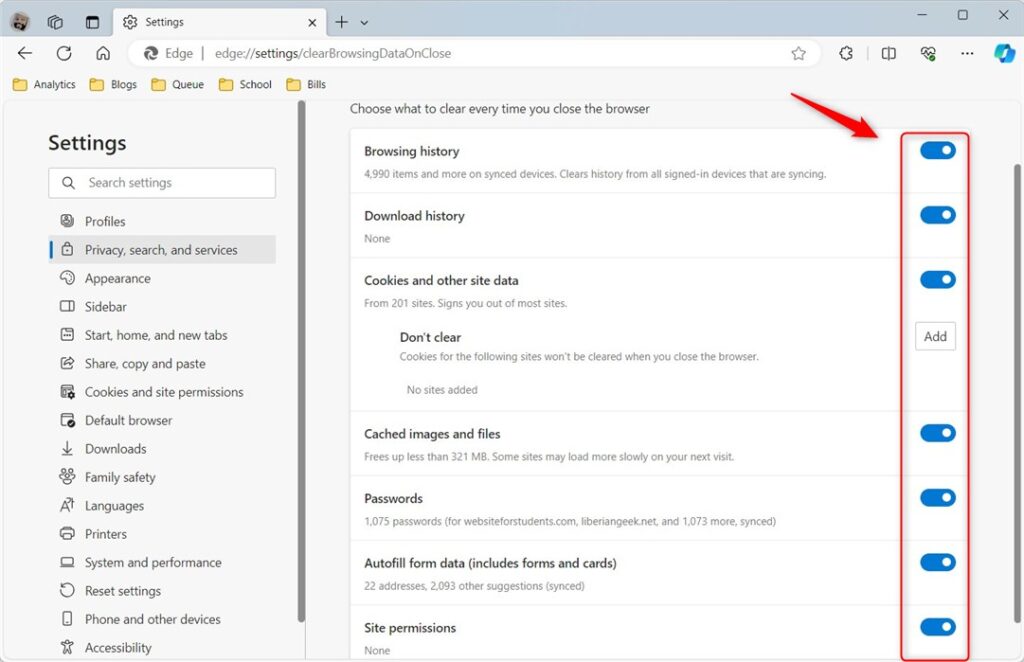
Microsoft Edge choose what to clear every time you close the browser - Turn on the toggle switches next to each type of data you want to delete. For example, turn on the switch for browsing history, cookies, and cached files.
Microsoft Edge choose what to clear every time you close the browser options - Close the Settings tab. You’re done!
What Happens Next? Every time you close Microsoft Edge, it will automatically delete all the data types you selected. You won’t see any messages or notifications. It just happens in the background.
Clear Browsing Data for All Users Using Registry Editor
If you’re an administrator, you can use the Windows Registry Editor to set up auto clear Edge browsing data for all users on your computer, ensuring consistent privacy.
⚠️ Admin privileges required for this section.
- Open the Registry Editor. Press the Windows key and type “regedit,” then press Enter. Windows Registry Editor
- Navigate to this location:
Computer\HKEY_LOCAL_MACHINE\SOFTWARE\Policies\Microsoft\Edge - Look for ClearBrowsingDataOnExit in the right panel. Double-click it to open it.
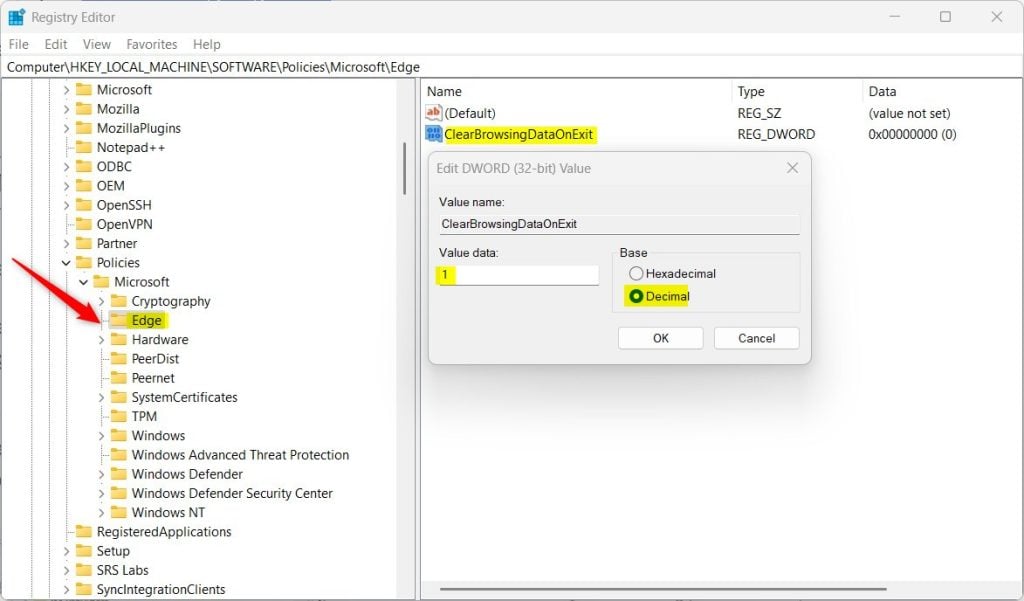
Microsoft Edge choose what to clear every time you close the browser registry editor - Change the value to 1. This tells Edge to clear all browsing data when it closes for every user.
- Click OK to save the change.
- If you don’t see ClearBrowsingDataOnExit, right-click in the empty space and select New > DWORD (32-bit) Value. Name it ClearBrowsingDataOnExit. Then set the value to 1.
- Restart your computer to apply the changes.
Want to Turn It Off? Delete the ClearBrowsingDataOnExit item to restore the default behavior. Edge will stop clearing data automatically.
Summary
Automatically clearing your Edge browsing data regularly helps protect your privacy, frees up storage space, and can even improve your browser’s speed and security.Was this guide helpful?

About the Author
Richard
Tech Writer, IT Professional
Richard, a writer for Geek Rewind, is a tech enthusiast who loves breaking down complex IT topics into simple, easy-to-understand ideas. With years of hands-on experience in system administration and enterprise IT operations, he’s developed a knack for offering practical tips and solutions. Richard aims to make technology more accessible and actionable. He's deeply committed to the Geek Rewind community, always ready to answer questions and engage in discussions.


[…] window. You do not need to sign in to any accounts to use it. When you use Guest mode, your browsing history, cookies, or other site information will not be saved. Everything is wiped clean as soon as you […]
[…] How to Auto Clear Edge Browsing Data in Windows 11 […]