How to Change SafeSearch Settings in Windows 11

You change SafeSearch settings in Windows 11 to filter explicit content from your web searches, ensuring a safer browsing experience.
SafeSearch is a built-in privacy feature that blocks inappropriate or adult material from search engine results. It’s especially helpful for protecting children from potentially harmful content.
Windows 11 allows you to set SafeSearch to one of three distinct levels: Strict, Moderate, or Off. The Strict setting provides the most comprehensive filtering of explicit results.
To change SafeSearch settings, open Settings, go to Privacy & security, then Search permissions. Scroll down to the SafeSearch section and choose Strict, Moderate, or Off. Your selections are saved automatically.
How to Change SafeSearch Settings in 🪟 Windows 11
Changing your Windows 11 SafeSearch settings is simple and can be done directly through the Settings app to manage the content you see in web searches.
- Open Windows Settings. Click the Start button and then the gear icon. Or press
Windows + Ion your keyboard. More about opening Settings - On the left side, click Privacy & security.
- On the right side, find and click Search permissions.
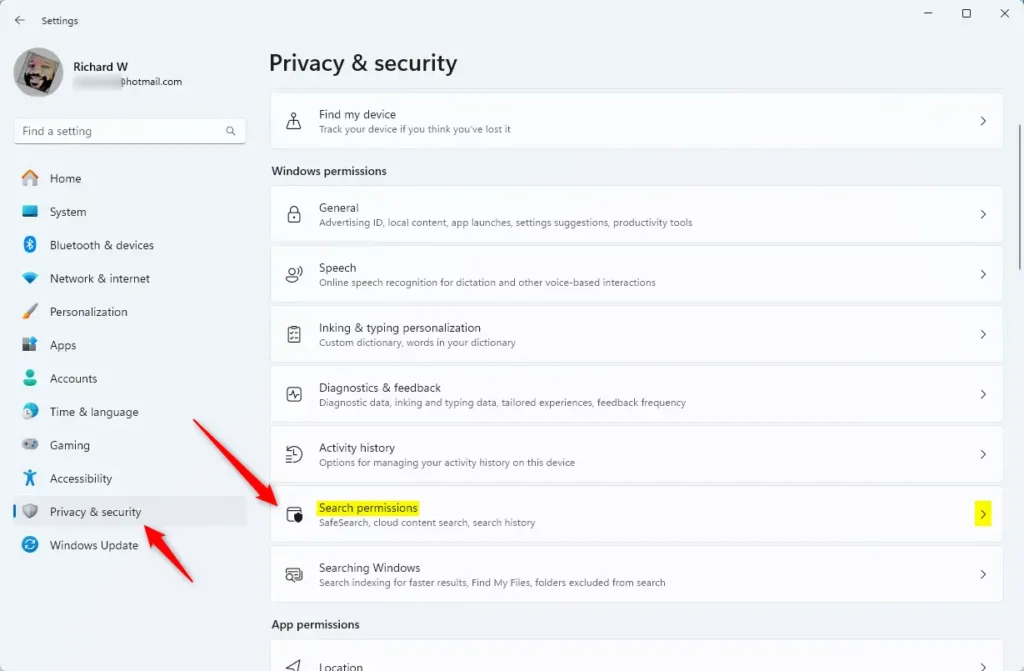
Windows 11 Search permissions tile - Now, scroll down until you see the SafeSearch section.
- Choose your SafeSearch setting:
- Strict: Blocks most adult content.
- Moderate: Blocks some adult content (this is the default setting).
- Off: No filtering. You see all results.
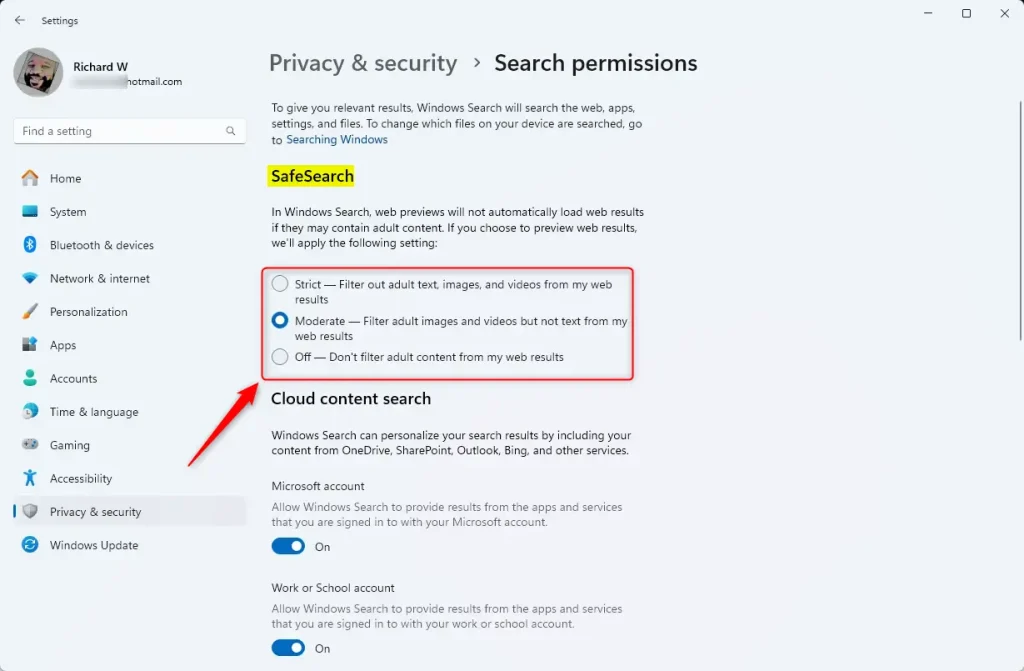
SafeSearch filter options in Settings - Close the Settings app when you’re done. Your changes are saved automatically.
Another Way: Change SafeSearch Using the Registry Editor (For Advanced Users)
If you’re comfortable with advanced steps, you can change SafeSearch using the Registry Editor in Windows 11, but be careful as mistakes can cause problems.
⚠️ Admin privileges required for this method.
- Open the Registry Editor. Press
Windows + R. Typeregeditand hit Enter. Learn how to open Registry Editor - Navigate to this folder path:
Computer\HKEY_CURRENT_USER\SOFTWARE\Microsoft\Windows\CurrentVersion\Search\Settings - Look for an entry named
SafeSearchModein the right pane. - If it’s there, double-click it. If not, right-click in the empty space. Choose New > DWORD (32-bit) Value. Name it
SafeSearchMode. - Set its value according to how you want SafeSearch:
0= SafeSearch Off (no filter)1= Moderate filter2= Strict filter
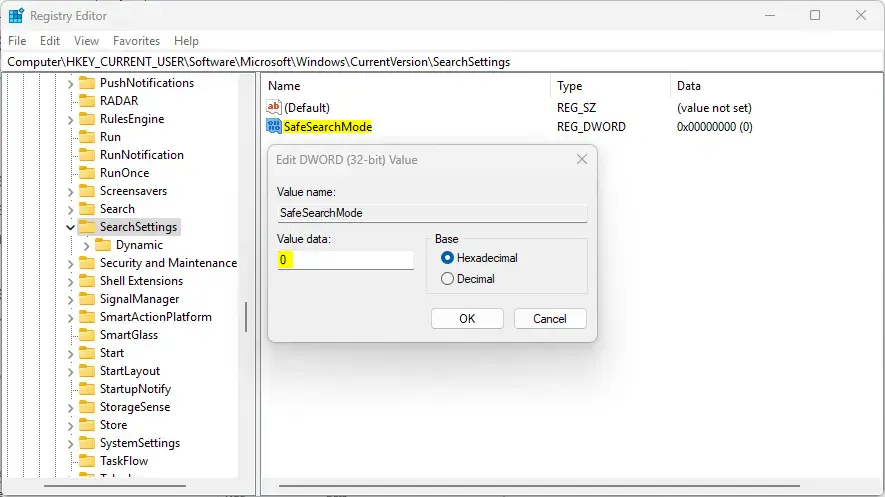
SafeSearch registry setting - Click OK and close the Registry Editor.
- Restart your computer to apply the changes.
Summary
SafeSearch in Windows 11 helps keep web searches cleaner by blocking inappropriate content, offering options from Strict filtering to Off, and is easily managed through the Settings app for most users.Was this guide helpful?

About the Author
Richard
Tech Writer, IT Professional
Richard, a writer for Geek Rewind, is a tech enthusiast who loves breaking down complex IT topics into simple, easy-to-understand ideas. With years of hands-on experience in system administration and enterprise IT operations, he’s developed a knack for offering practical tips and solutions. Richard aims to make technology more accessible and actionable. He's deeply committed to the Geek Rewind community, always ready to answer questions and engage in discussions.


No comments yet — be the first to share your thoughts!