How to Change Downloads Location in Windows 11
Windows 11 lets you change where your downloaded files are saved, moving them from the default location to a folder you choose.
This change puts you in control of your downloads, making it easier to keep your files organized. For example, you might want to save them to a different hard drive to free up space on your main C: drive.
By default, Windows 11 saves everything to 📁C:\Users\[YourUsername]\Downloads. Moving this folder can help keep your computer running smoothly, especially if you download many files.
Once you make this change, all new downloads will automatically go to your new chosen location.
Right-click the Downloads folder in File Explorer, select Properties, then click the Location tab and Move to choose a new folder. Confirm moving existing files to complete the change.
How to Change the Default Downloads Folder in File Explorer
You can change where Windows 11 saves your downloads by adjusting the default Downloads folder location right in File Explorer. This is a simple way to pick a new spot for all your downloaded files, like moving them to a different drive if you need more space. Just follow a few easy steps to update where your downloads go.
- Click the File Explorer folder icon on your taskbar .

windows 11 file explorer icon on taskbar - When File Explorer opens, right-click on the Downloads folder in the sidebar. Select Properties from the menu.
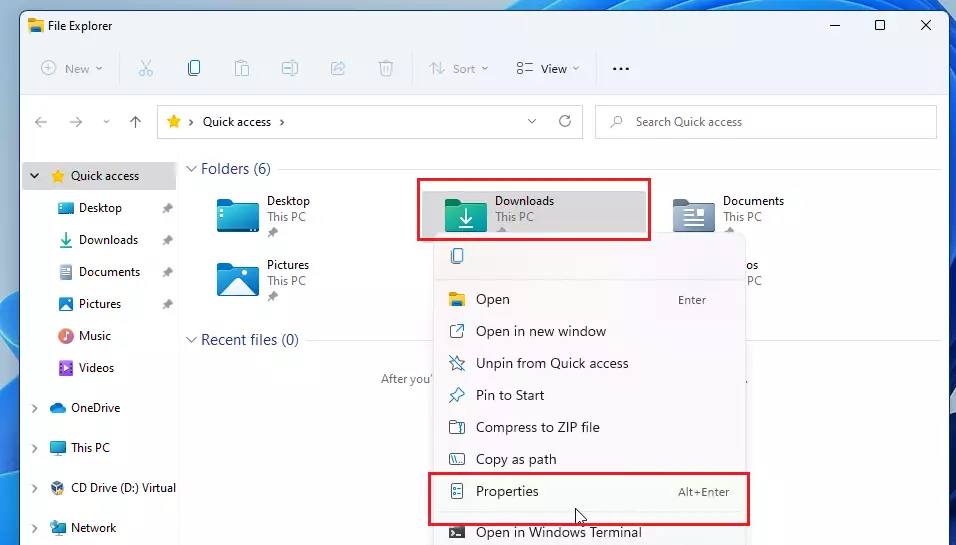
windows 11 move download folder - In the window that appears, click the Location tab. Click the Move button.
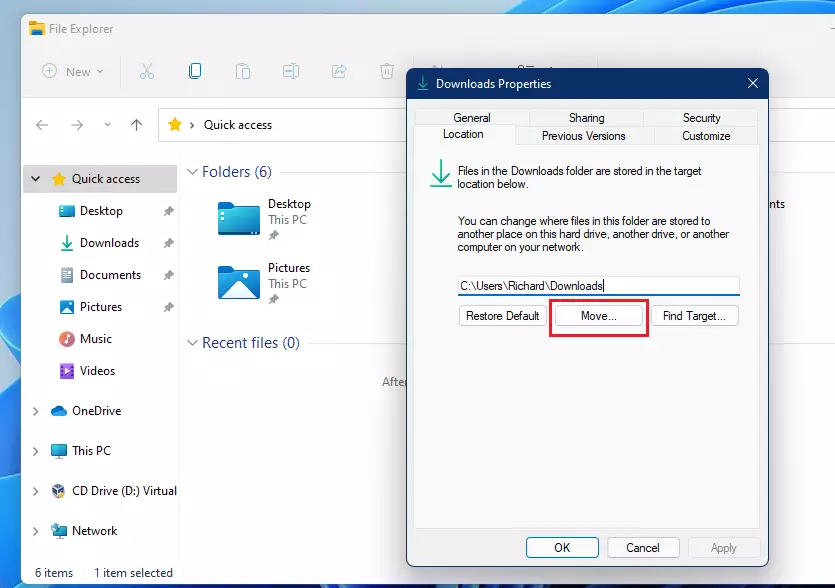
windows 11 move download folder to desktop - Find your new folder using File Explorer , click it, and then click Select Folder.
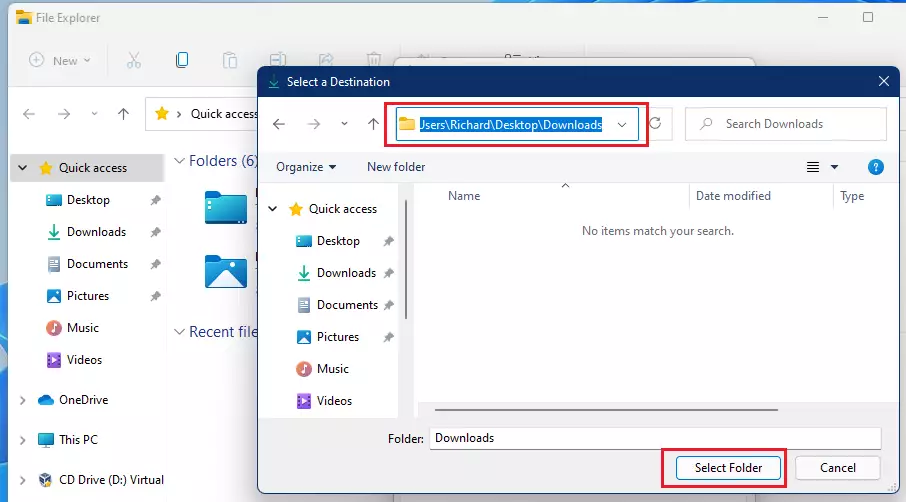
windows 11 select new download folder - Click OK. You will see a message asking if you want to move all your existing files to the new spot. Click Yes to finish.
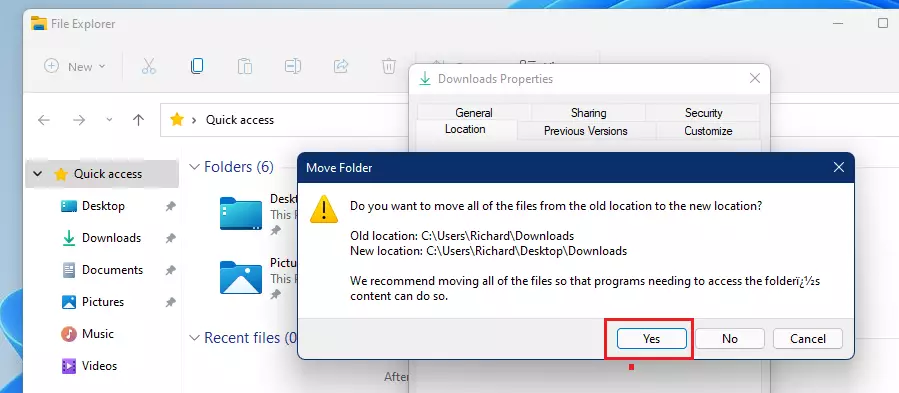
windows 11 desktop downlaods folder
Browser-Specific Download Settings
Sometimes you only want to change the download path for a specific browser rather than the whole system.
Google Chrome
Open Chrome, click the three dots in the top right, and go to Settings > Downloads. Click Change to pick a new folder.
Microsoft Edge
Open Edge, click the three dots, and go to Settings > Downloads. Click Change to select your preferred path.
Comparison: External Drive vs. Secondary Partition
| Option | Pros | Cons |
|---|---|---|
| External Drive | Easy to swap between PCs | Can be disconnected by accident |
| Secondary Partition | Always available | Uses space on the same physical drive |


I am on Active Directory and the MOVE button is not there. I am an admin on the domain. The choice is not available. I’m guessing some GPO is preventing me from changing this. Do you have any ideas on how to override this?