How to Adjust Full Screen Optimization Settings in Windows 11 Advanced App Properties

Full screen optimizations is a built-in Windows 11 feature that runs games and apps in a borderless window instead of traditional exclusive full screen mode. Because the app is really a window, you can switch away with Alt+Tab instantly, without the screen going black or the game crashing.
Most games run fine with it turned on. In some games it causes input lag, stuttering, or locked frame rates. Turning it off in the app’s advanced properties gives the game more direct control of your display. This guide covers Windows 11 version 22H2 and newer. Two things are covered here: the per-app checkbox and the global graphics setting. Both are explained below, along with how to undo each one.
Right-click the app’s.exe file or desktop shortcut, select Properties, click the Compatibility tab, tick the box next to Disable fullscreen optimizations, then click Apply and OK. The app now runs in traditional exclusive full-screen mode instead of borderless windowed mode.
How to Access App Properties in 🪟 Windows 11
You open an app’s properties by right-clicking its shortcut or executable file and choosing Properties. The Compatibility tab in that window holds the full-screen optimization option for that one program.
Most desktop programs have a main file ending in .exe. Apps installed from the Microsoft Store are different. They live in protected system folders, so you can’t reach their files the normal way. Here is how to open the properties window for a standard desktop app:
- Find the shortcut for your game or app on the desktop, or open File Explorer and browse to the install folder.
- Right-click the shortcut or the main .exe file.
- Select Properties from the menu. On Windows 11 you may need to click Show more options first if you only see the short menu. The properties window opens.
- Click the Compatibility tab at the top of the window.
You should now see a list of checkboxes and drop-down options that control how Windows runs this app. If there is no Compatibility tab, you probably opened a shortcut that doesn’t point to an .exe file, or the app is a Store app. For a shortcut, go back to the game’s install folder and right-click the .exe itself.
Step-by-Step: Disabling Full-Screen Optimizations for Specific Apps
To turn off full screen optimizations for one app, open its properties, go to the Compatibility tab, and tick the box that disables the feature. The game then runs in traditional exclusive full-screen mode. That often cures stuttering, input lag, and frame drops. Follow these steps:
- Open the folder where the game or app is installed, or right-click its desktop shortcut.
- Click Properties.
- Go to the Compatibility tab.
- Look at the Settings section, which holds the checkboxes.
- Tick the box next to Disable fullscreen optimizations.
- Click Apply at the bottom right. The setting is saved for this program.
- Click OK to close the window.
Close the game completely if it is running, then start it again. Windows will now skip its modern display handling for that program and use the older exclusive mode. No restart of Windows is needed. If the stuttering or lag is gone, leave the box ticked.
If the box is greyed out, you may be using a standard account without permission to change the file's settings. Try again as an administrator. The Home and Pro editions behave the same here.
Handling Microsoft Store Apps
Microsoft Store apps can't be handled through the properties window, because their files sit in secure system folders and the right-click menu doesn't give you a Compatibility tab. For these apps, start with the game's own video settings. Look for a display mode option such as fullscreen, windowed, or borderless, and try a different one.
If the problem remains, rely on the global system settings described in the next section, or use a specialized tool to locate the hidden program files. Changing the global display setting is the safest route for Store app problems. It doesn't require you to touch protected folders, so it doesn't weaken system security.
Managing Global Windowed Game Optimizations
The global setting lives in the main Settings app, under System, Display, Graphics. It applies to every app and game on the computer at once. One note: the global option is named Optimizations for windowed games. It is related to the per-app checkbox above but is a separate switch, so you may need to try both when chasing a problem.
Full screen optimizations let games run more directly on your screen with fewer extra steps. You can turn the feature off if you notice stuttering or lag. Here is how to reach the global setting:
- Click the Start button and open Settings.
- Click System in the left-hand menu.
- Click Display.
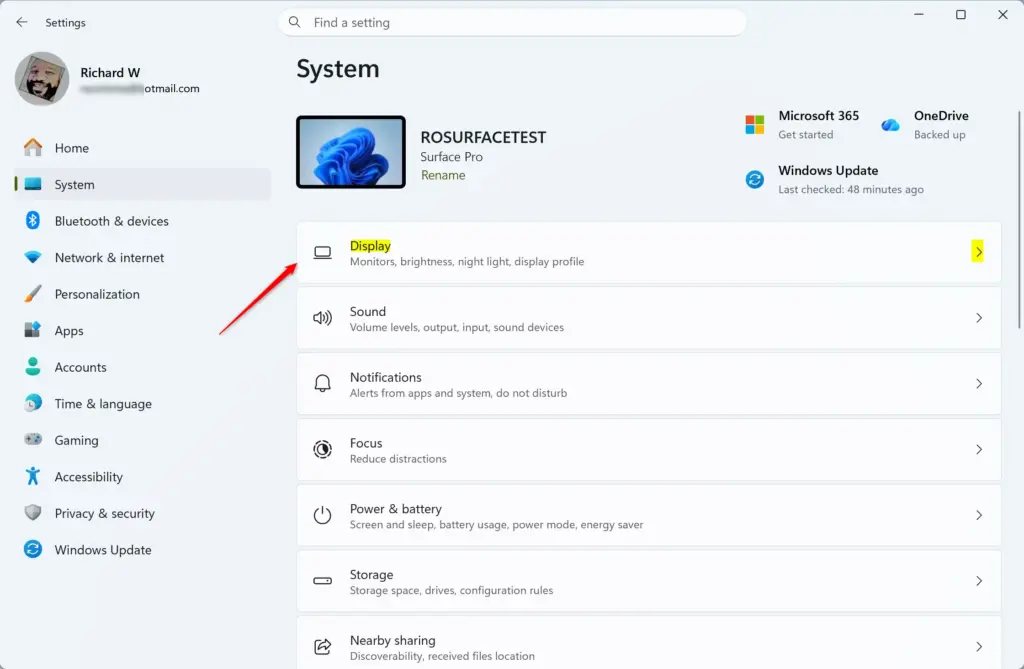
- Scroll down and click Graphics.
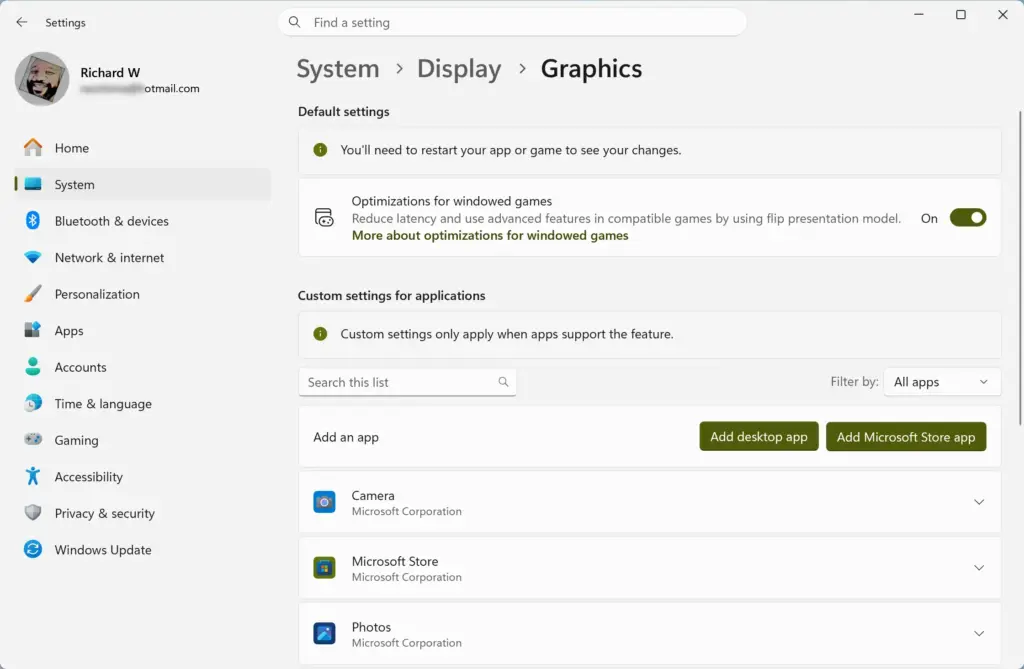
- At the top of the graphics page, click Change default graphics settings.
- Find the option labeled Optimizations for windowed games.
- Set the toggle to On or Off, depending on your setup.
Run Windows Update and check again. You don't need to restart, but closing and reopening any running games makes sure they pick up the change.
Turning the setting off helps if you see display problems across several games. Leaving it on generally gives smoother Alt + Tab switching and better power efficiency on laptops. To undo your change, flip the toggle back.
Expert Tips for Better Gaming Performance in 🪟 Windows 11
Display tweaks work best alongside a few other basics: Game Mode and up-to-date graphics drivers. Game Mode tells Windows to favor your game over background tasks, which gives smoother play and fewer frame drops. Updated drivers from your graphics card maker fix many stutter and compatibility bugs on their own.
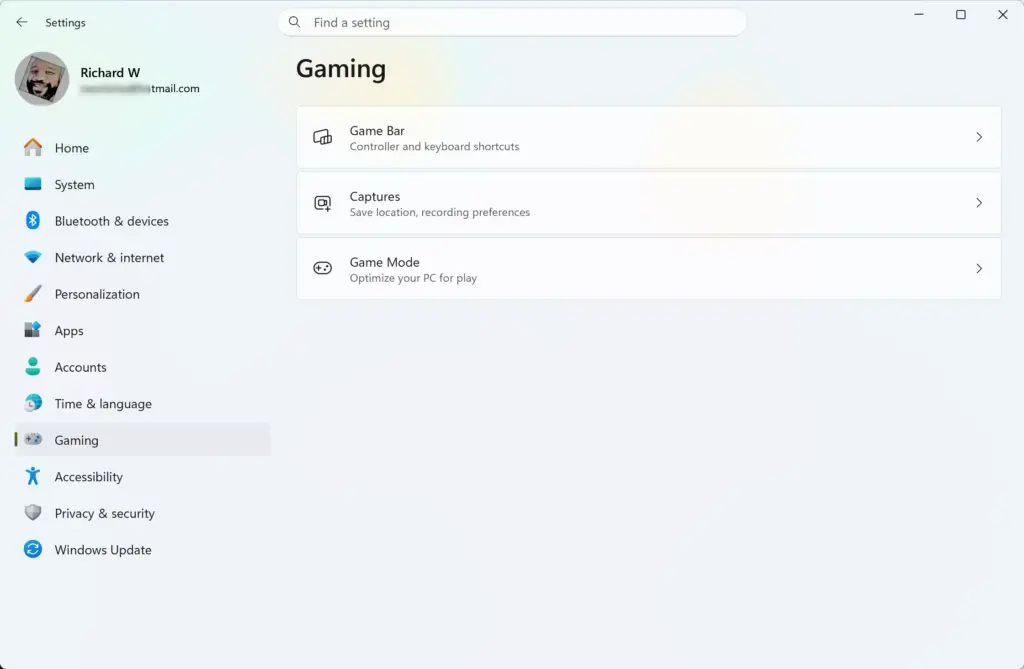
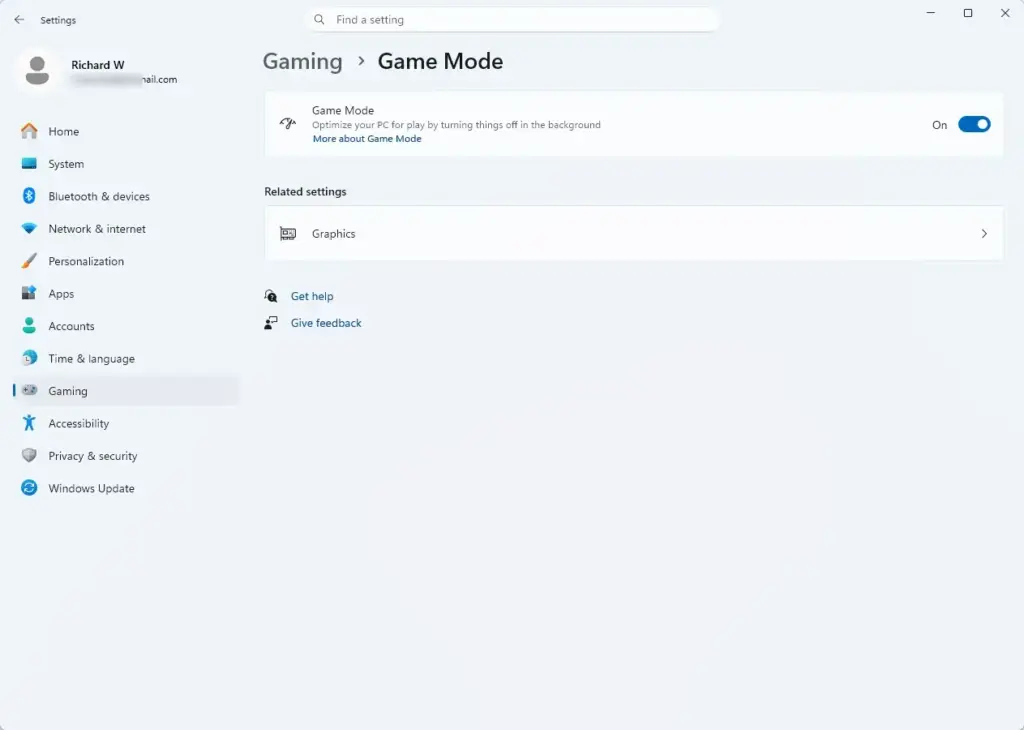
Leave Game Mode on. To check it, follow these steps:
- Open Settings.
- Click Gaming in the left-hand menu.
- Click Game Mode.
- Set the toggle to On.
With Game Mode on, Windows gives your game priority over background apps and tasks. If a particular game misbehaves, you can switch the toggle off and compare.
It also helps to clean up background apps before you play. Press Ctrl + Shift + Esc to open Task Manager, then look at the Processes list to see what is running silently while you game. Sort by Memory or CPU to find the heavy ones.
Close web browsers, chat apps, and utility programs you don't need. To close one, select it and click End task. That frees memory and processing power for the game. Don't end items you don't recognize, because some are part of Windows.
Summary
Full-screen optimizations are display features that let games switch quickly between windowed and full-screen modes. They help with multitasking, but in some games they cause lag or stuttering. If that happens, turn them off for that game through the Compatibility tab in its properties. If many games are affected, try the global Optimizations for windowed games toggle instead. Either change is easy to reverse.
Have a question about this guide?
Answered by AI from this guide. Good questions may be added to this page — please don't include personal details.
Did this guide fix your problem?

About the Author
Richard
Tech Writer, IT Professional
Richard is a writer at Geek Rewind who turns complex IT tasks into clear, step-by-step guides. He draws on years of hands-on experience in system administration and enterprise IT operations, focusing on Windows, Linux and WordPress: the problems people actually run into, and the fixes that work. His server and WordPress guides come from systems he runs himself. Richard builds and maintains the platform behind Geek Rewind, from its Ubuntu servers and Nginx configuration to its custom WordPress plugins. Many new tutorials start with readers' questions, and he's always glad to answer them in the comments.
No comments yet — be the first to share your thoughts!