How to Enable or Disable System Time in Windows 11 Notification Center

Run ViVeTool with the command ViVeTool /enable /id:40953693 /variant:2 in an elevated Command Prompt, restart your computer, then go to Settings Time & language Date & time and turn on Show time in Notification Center. The clock appears in the Notification Center panel.
Show System Clock in the Notification Center
The clock in the Notification Center is a hidden feature, so you switch it on with ViVeTool, a small command-line tool that turns on hidden Windows features. Once it is on, the time appears next to your notifications in the bottom right corner of the screen. You can check it there without looking for the main taskbar clock.
If your build is older, the command will run but nothing will change. Check your build with Settings System About before you start.
If you haven’t used ViVeTool before, download it and extract it first. It is a portable tool, so there is nothing to install. Extract the zip to a folder you can find easily, because you will need to run the command from there.
Run ViVeTool from an elevated Command Prompt. It needs administrator rights to change feature flags, and the command fails without them.
- Click Start, type cmd, then choose Run as administrator under Command Prompt.
- Click Yes if User Account Control asks for permission. You should now see a Command Prompt window with “Administrator” in the title bar.
- Change to the folder where you extracted ViVeTool.
- Run this command: ViVeTool /enable /id:40953693 /variant:2
- Check for a confirmation message that the feature configuration was set. If you see an error, the most likely cause is a Command Prompt that is not running as administrator.
- Restart your computer to apply the change.
vivetool /enable /id:42651849,48433719
After the restart, check the setting in the Settings app. The toggle only appears once the hidden feature is active.
- Press Windows key + I to open Settings. You can also click Start and select Settings.
- Go to Time & language Date & time This is where Windows 11 keeps the clock options.
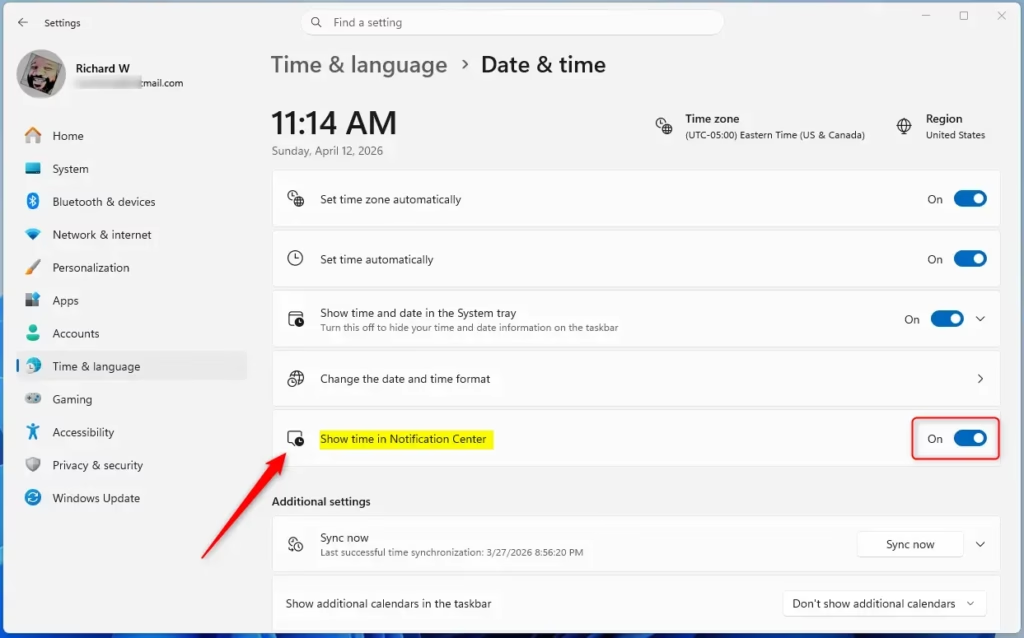
- Look for the Show time in Notification Center setting in the list. If it is missing, the ViVeTool command has not taken effect. Confirm that you restarted and that you are on build 22635.5240 or later.
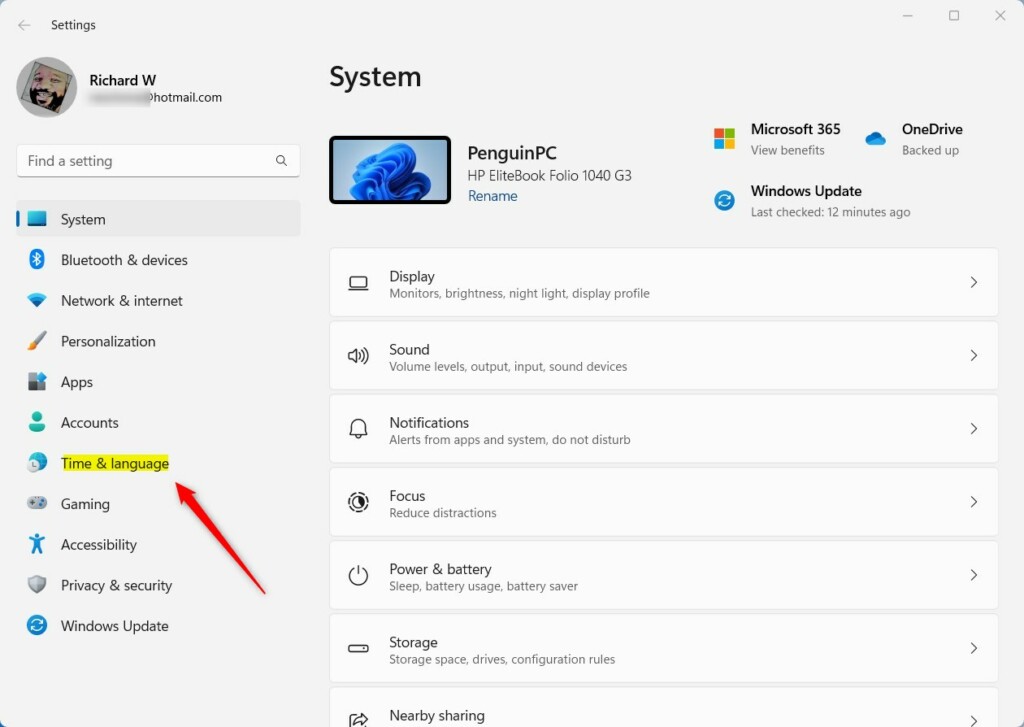
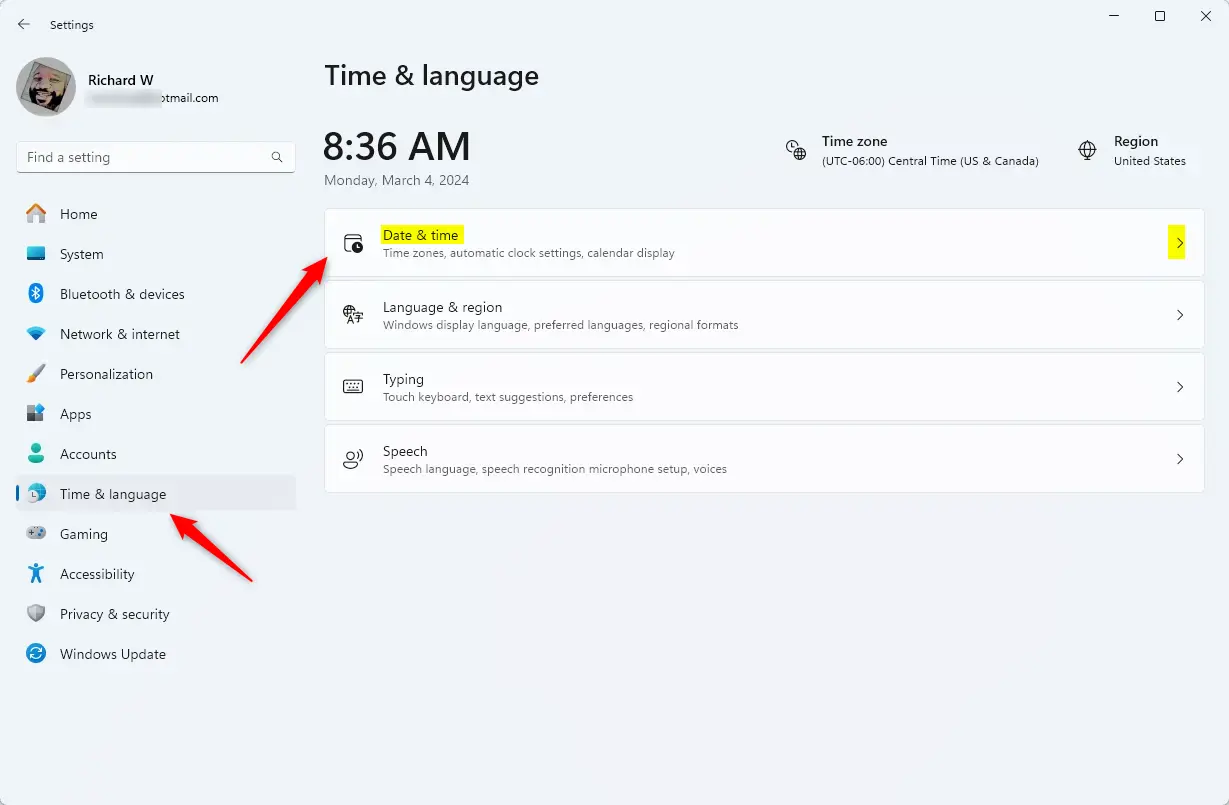
The Show time in Notification Center setting decides whether the current time appears when you open the Notification Center. It starts in the off position by default.
- Find Show time in Notification Center on the Date & time page.
- Turn the toggle On to show the clock. Open the Notification Center by clicking the date and time on the taskbar, or press Windows key + N. The time should now appear in the panel.
- Turn the toggle Off to hide the clock again. The change takes effect straight away, with no restart needed.
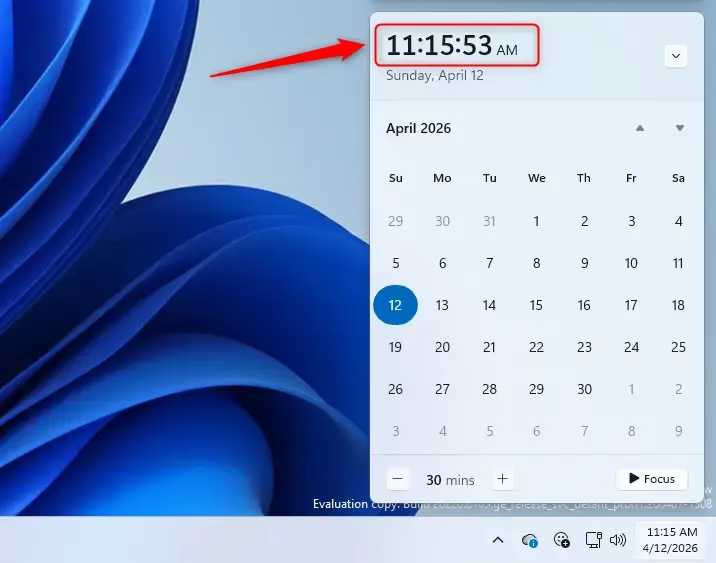
Close the Settings app when you finish. Nothing else needs saving, because the toggle applies as soon as you change it.
Add or Remove Time in the Notification Center Using the Registry Editor
You can also add or remove the clock in the Registry Editor, the database where Windows stores its configuration settings. You change a single numeric value by hand, and you don't need to download any extra tools. This works on both Windows 11 Home and Pro.
A wrong edit can cause problems that are hard to trace, and a backup lets you restore the previous state in seconds. In the Registry Editor, use File Export to save a copy, or create a system restore point first.
Open the Registry Editor and go to the key path below. Press Windows key + R, type regedit and press Enter to open it. You can paste the path into the address bar at the top of the window.
Computer\HKEY_CURRENT_USER\Software\Microsoft\Windows\CurrentVersion\Explorer\AdvancedCreate the new value inside the Advanced key.
- Right-click Advanced in the left pane.
- Select New DWORD (32-bit) Value.
- Name the new value ShowTimeInNotificationCenter. Spell it exactly, because Windows ignores a value with a different name.
To show the clock, double-click the new value and set Value data to 1. Leave the base on Hexadecimal, then click OK.
To hide the clock, double-click the same value and set Value data to 0, then click OK. You can also delete the value to go back to the default behavior.
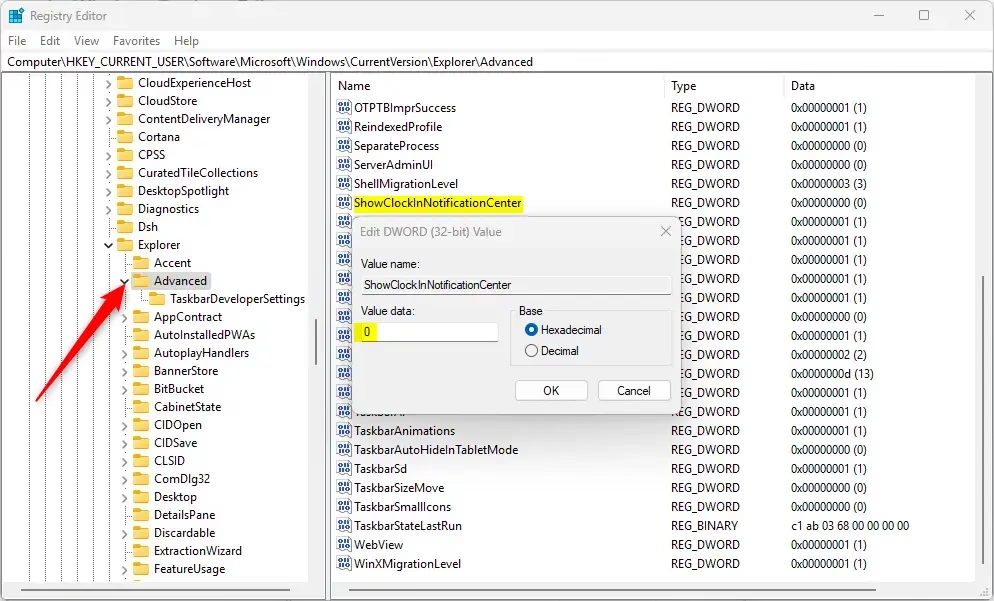
Close the Registry Editor when you are done. You may need to restart your computer for the change to apply. If the clock doesn't change after you sign back in, restart and check again.
That completes the process. If the clock doesn't show up, check three things: your Windows build, whether you restarted, and the spelling of the value name.
Summary
You can show or hide the clock in the Windows 11 Notification Center with either ViVeTool or the Registry Editor. Both methods need a restart. Once the feature is active, you can switch the clock on or off at any time in Settings Time & language Date & time
Was this guide helpful?

About the Author
Richard
Tech Writer, IT Professional
Richard is a writer at Geek Rewind who turns complex IT tasks into clear, step-by-step guides. He draws on years of hands-on experience in system administration and enterprise IT operations, focusing on Windows, Linux and WordPress: the problems people actually run into, and the fixes that work. His server and WordPress guides come from systems he runs himself. Richard builds and maintains the platform behind Geek Rewind, from its Ubuntu servers and Nginx configuration to its custom WordPress plugins. Many new tutorials start with readers' questions, and he's always glad to answer them in the comments.




After trying everything,… staging,… VIVE enable,.. regedit to HKCU, HKLM, HKCU adding ShowClockInNotificationCenter, didn’t work on 26100-6584 newest build as of 9-8-26.
Someone said to add it to classes root, but my sid account is missing so couldn’t add it there.
But after running – KB5054156 Enablement package, now have clock just above date, and needed it, because clock is too small in taskbar, and micro has date above calendar which doesn’t make sense when you can see it already, it should have been clock.
The other thing micorofool needs to do is stop allowing file explorer to change in taskbar to the file opened, you don’t see file explorer and forget it’s open in a file name. LOL
Thanks for post even though didn’t help, not sure which added effect helped or if was just adding KB5054156, but don’t feel like disabling feature ID’s or removing reg keys to test it. LOL