Copy Files from a USB Drive to Your Laptop in Windows 11

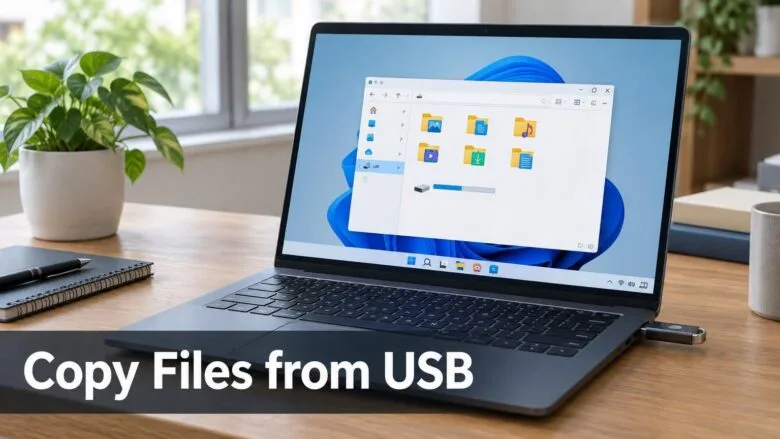
File Explorer copies files from a USB drive to a Windows 11 laptop. Small transfers usually finish in about a minute. To copy files from a USB drive to your laptop, plug in the drive. Open File Explorer, select the files and copy them. Then paste them into a folder on the laptop, such as Documents.
File Explorer is the Windows 11 file manager, the window where you browse folders and drives. The same method copies photos, documents, videos and whole folders. It works with USB flash drives and external USB hard drives too.
The numbered steps below cover the full process, from plugging in to removing the drive safely. After them, you’ll find fixes for the problems that most often get in the way.
To copy files from a USB drive to your laptop in Windows 11, plug in the drive, open File Explorer , select the files, press Ctrl+C, then open a folder such as Documents and press Ctrl+V. The originals stay on the USB drive, and the copy takes about a minute for small transfers.
What “download from USB to laptop” actually means
Nothing is downloaded from the internet in this task. Windows copies files from the USB drive to the laptop’s internal storage, and the originals stay on the USB drive unless you choose to move them.
Copy and move are different actions. Copy leaves the original in place. Move (Cut and Paste) removes it from the USB drive once the transfer finishes.
If you are unsure, copy. A copy costs nothing, and you can delete the originals later after checking the files opened correctly.
Copy files from a USB drive to your laptop step by step
These steps download from USB to laptop by copying the files into a folder on the laptop's own drive. No administrator rights are needed for any of them.
- Plug the USB drive into a USB port on the laptop. Windows 11 plays a connection sound. A notification or an AutoPlay prompt may appear in the corner of the screen. You can ignore it. The first time you use a drive, Windows may take a few seconds to set it up.
- Open File Explorer. Press the Windows key + E, or select the yellow folder icon on the taskbar. A File Explorer window opens.
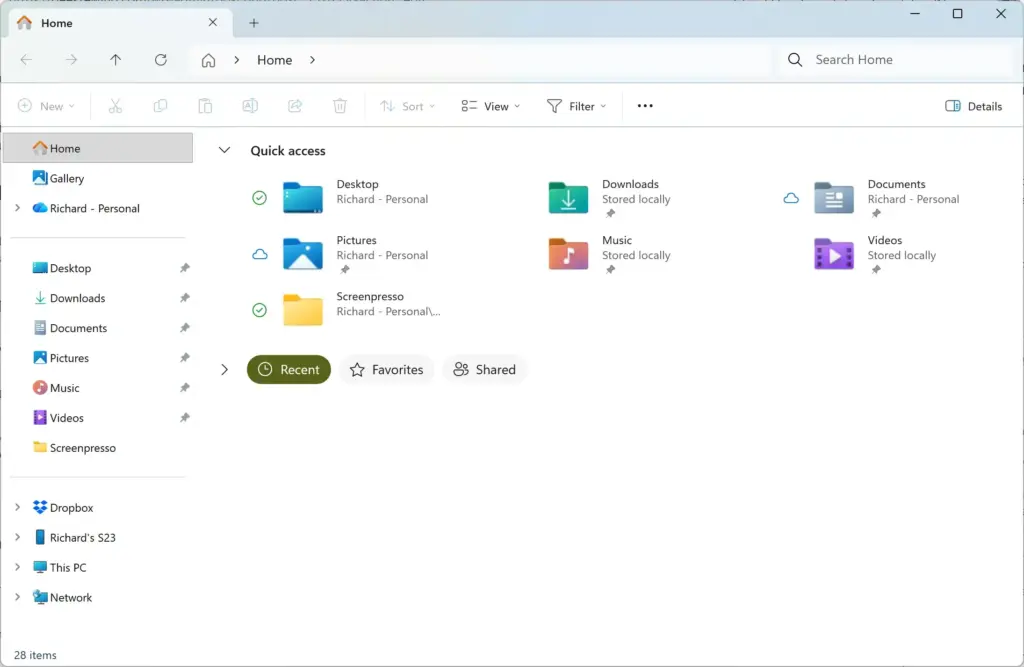
Windows 11 File Explorer showing Dropbox folder in sidebar. - Select the USB drive in the left pane. Look for an entry named after the drive with a letter in brackets, such as USB Drive (E:). If you don't see it there, select This PC and look under Devices and drives. The letter varies from one computer to another. The folders and files on the drive appear in the main pane.
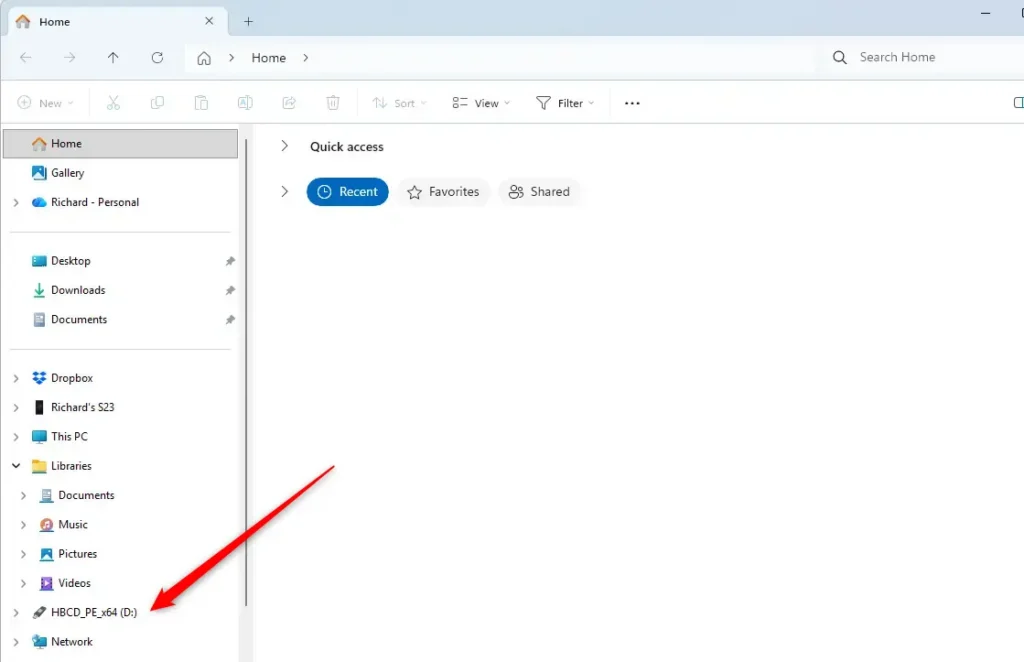
- Open the folder that holds your files. Double-click each folder until you reach the files you want. If they sit at the top level of the drive, stay where you are.
- Select the files or folders to copy. Click one item to select it. Hold Ctrl and click to add more items one at a time. Click the first item, hold Shift and click the last to select a continuous range. Press Ctrl + A to select everything in the folder. Selected items turn light blue.
- Press Ctrl + C to copy the selection. You can also select the Copy icon on the command bar at the top of the window. Nothing visible happens. Windows holds the selection in memory until you paste it.
- Open the destination folder on the laptop. Select Documents, Pictures or another folder in the left pane. To keep things tidy, create a new folder first. Right-click an empty area, select New Folder, type a name and press Enter, then open the new folder.
- Press Ctrl + V to paste the files. You can also select the Paste icon on the command bar. A copy progress window opens and shows the speed and the time remaining. Small files finish almost instantly.
- Wait for the progress window to close. Do not unplug the drive while it is open. If the file names already exist in the destination, a Replace or Skip Files window appears. Choose Replace the files in the destination, Skip these files, or Let me decide for each file.
- Check that the files are in the destination folder. The copied files appear in the folder. Open one or two to confirm they work, especially for large videos or important documents.
- Select the arrow for hidden icons on the taskbar. It sits at the right end of the taskbar, next to the clock, and looks like a small upward caret (^). This starts the safe removal process, which prevents corrupted files on the drive.
- Select the Safely Remove Hardware and Eject Media icon. It looks like a USB plug with a green check mark. A small menu lists the connected drives.
- Select Eject next to your USB drive. Windows shows a notification when the drive is safe to remove. Pull the drive out of the port at that point.
To eject the drive from File Explorer instead, right-click the drive in the left pane and select Eject.
Other ways to copy the files
Drag and drop between two windows
Open two File Explorer windows. Show the USB drive in one and the laptop folder in the other, side by side. Drag the selected files from the USB window into the laptop window.
When you drag between two different drives, Windows copies the files by default. A small + Copy to label appears while you drag. If you see Move to instead, hold Ctrl as you drag to switch it back to a copy.
Right-click and Copy to
Right-click the selected files and look for the Copy icon at the top of the menu. Windows 11 shows a short menu of icons for Cut, Copy, Rename, Share and Delete. Older menu commands are under Show more options.
Move instead of copy
Cut is hard to undo: the originals disappear once the paste finishes. If the laptop's drive fails later, you have no second copy. Copy first and delete the originals only after you've confirmed the files are safe.
If the USB drive does not appear in File Explorer
This is the most common problem, so start here. Work through the fixes in order, quickest first.
Check the port, the cable and the drive
Unplug the drive and plug it into a different USB port on the laptop. Ports on a docking station, and USB hubs without their own power adapter, sometimes do not supply enough power. Plug the drive directly into the laptop's own port instead.
For an external hard drive, try a different cable. Try the drive on another computer to find out whether the drive itself is the problem.
Check whether Windows sees the drive but gave it no drive letter
Windows sometimes detects a drive but does not assign it a letter, so File Explorer hides it. Disk Management (the built-in tool that lists every drive and partition, where a partition is a separate section of a drive) shows these drives. Changing a drive letter requires administrator privileges.
- Right-click the Start button. A menu of system tools opens.
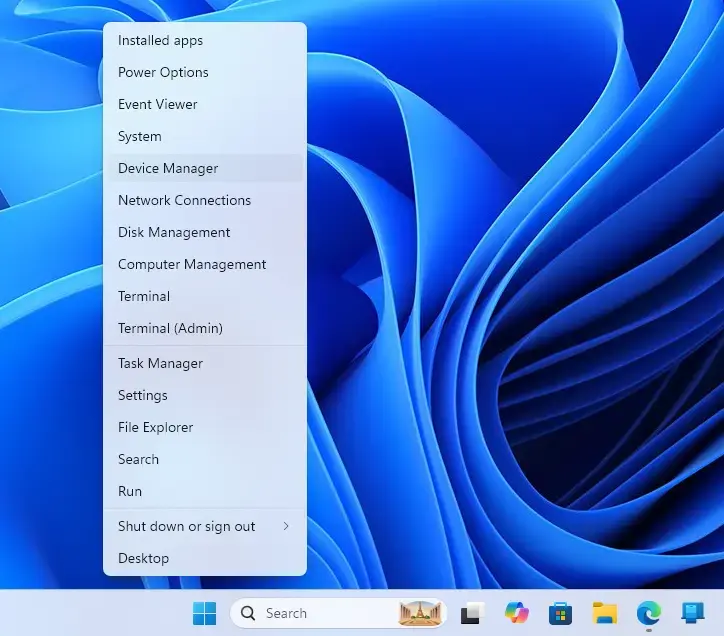
- Select Disk Management. Approve the User Account Control prompt if one appears. This step needs an administrator account.
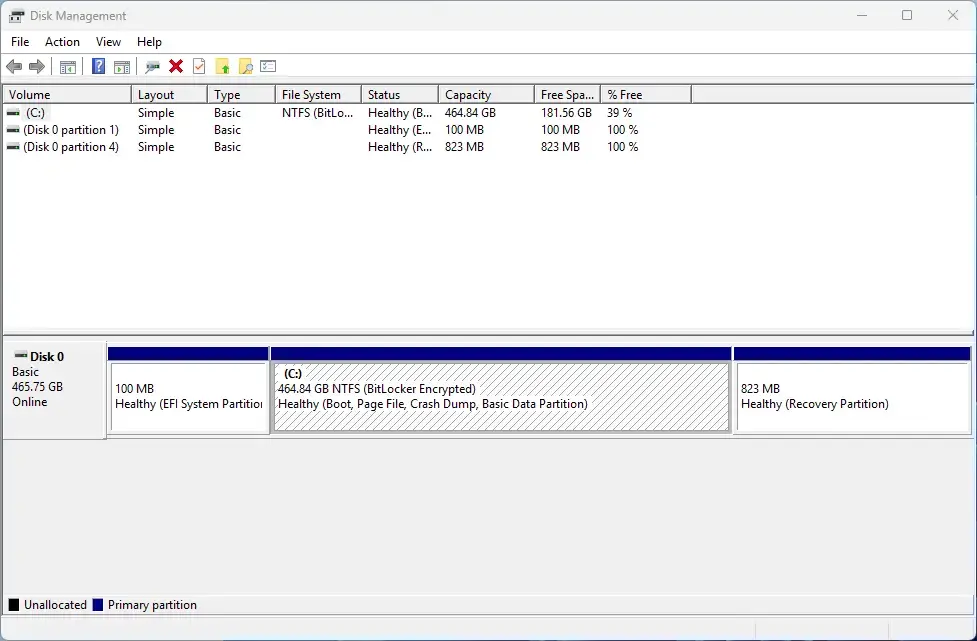
Disk Management - Find your USB drive in the lower pane. Removable drives are labelled Removable. Compare the size with what you expect.
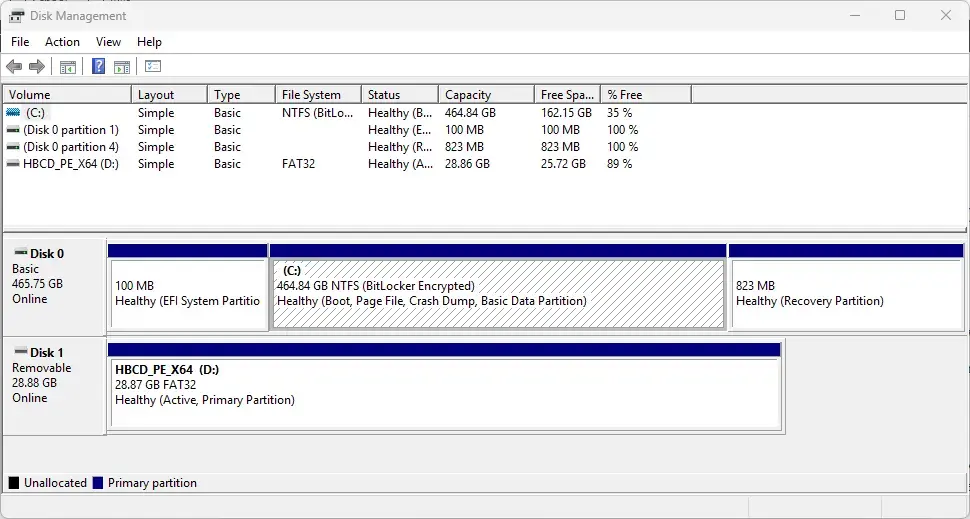
- Check that the volume says Healthy. If it shows a file system such as FAT32 or exFAT but no letter, continue to the next step.
- Right-click the volume and select Change Drive Letter and Paths. A small window opens.
- Select Add, choose a letter and select OK. The drive now appears in File Explorer under that letter.
Formatting erases everything on the drive.
The same warning applies if Disk Management shows the drive as Unallocated or RAW. Unallocated means the drive has no partition set up, and RAW means Windows cannot read its file system. Those states can mean damage, and formatting will remove any chance of recovering the files yourself.
Enter the password for a protected drive
If the drive was encrypted with BitLocker (Windows disk encryption), a prompt asks for a password when you open it. Type the password and press Enter on the prompt. Without the password or the recovery key, Windows cannot open the files.
If the copy fails or stalls
The "file is in use" or "access denied" message
An open program can lock a file. Close the program that is using it and try again. If the message says you need permission, the files may have been created under another account.
Right-click the file, select Properties, and open the Security tab. This tab shows which account owns the file and what that account can do with it. Changing permissions requires administrator privileges.
The copy is very slow
Large numbers of small files copy much more slowly than a few large ones, because Windows handles each file separately. An older USB 2.0 drive also limits speed, even in a fast port. If the progress window shows speed dropping to near zero, wait a minute before cancelling. Cancelling partway can leave incomplete files in the destination folder.
The copy stops with an error on one file
Windows usually shows a Retry or Skip choice. Choose Retry once. If it fails again, choose Skip and let the rest finish. A file that cannot be read repeatedly points to a failing drive, so copy everything else off it promptly.
Scan the drive before opening files from it
Check a drive you did not buy or fill yourself before opening anything on it. This applies to drives from shared computers, events or unknown sources.
Open File Explorer, right-click the USB drive, and select Show more options. Then select Scan with Microsoft Defender. Microsoft Defender is the antivirus built into Windows 11. The scan results appear in the Windows Security app.
Change what happens when you plug in a drive
If a prompt opens every time you connect a drive and you want to change that, go to Settings Bluetooth & devices > AutoPlay. There you can set the default action for removable drives. Choose Take no action to stop the prompts, or Open folder to view files if you want the drive's contents to open as soon as you connect it.
What to do next
To copy files the other way, from the laptop to the USB drive, repeat the same steps with the source and destination swapped. Keep a second copy of anything important, because a single USB drive can fail without warning. If you want a backup that does not depend on a drive you carry around, move your laptop folders to cloud storage next.
Have a question about this guide?
Answered by AI from this guide. Good questions may be added to this page — please don't include personal details.
Did this guide fix your problem?

About the Author
Richard
Tech Writer, IT Professional
Richard is a writer at Geek Rewind who turns complex IT tasks into clear, step-by-step guides. He draws on years of hands-on experience in system administration and enterprise IT operations, focusing on Windows, Linux and WordPress: the problems people actually run into, and the fixes that work. His server and WordPress guides come from systems he runs himself. Richard builds and maintains the platform behind Geek Rewind, from its Ubuntu servers and Nginx configuration to its custom WordPress plugins. Many new tutorials start with readers' questions, and he's always glad to answer them in the comments.
No comments yet — be the first to share your thoughts!