How to Add Drive to Windows 11 Storage Pool
This article explains how to add a drive to a Storage pool with Storage Spaces on Windows 11.
Storage Spaces is a feature in Windows that lets you combine multiple hard drives into one virtual drive. This is also called a storage pool. This feature helps you create flexible and scalable storage for your computer.
With Storage Spaces, you can create a Storage pool, rename a Storage pool, and more.
Why add drives to your storage pool? Adding new drives to an existing storage pool gives you several benefits:
- More storage space: You can store more data on your computer.
- Better protection: If one drive fails, your data is still safe on another drive.
- Faster performance: Multiple drives working together read and write data more quickly.
Adding drives helps protect important data and prevents data loss.
How to Add a Drive to a Storage Pool on Windows 11
Adding a drive to a Storage pool on Windows 11 requires accessing Storage Spaces through Settings, then selecting your pool and adding a physical disk from the available drives. This process expands your virtual storage capacity and improves data redundancy within minutes. Open Settings by pressing Windows key + I, navigate to System, select Storage, then click Advanced storage options to locate Storage Spaces.
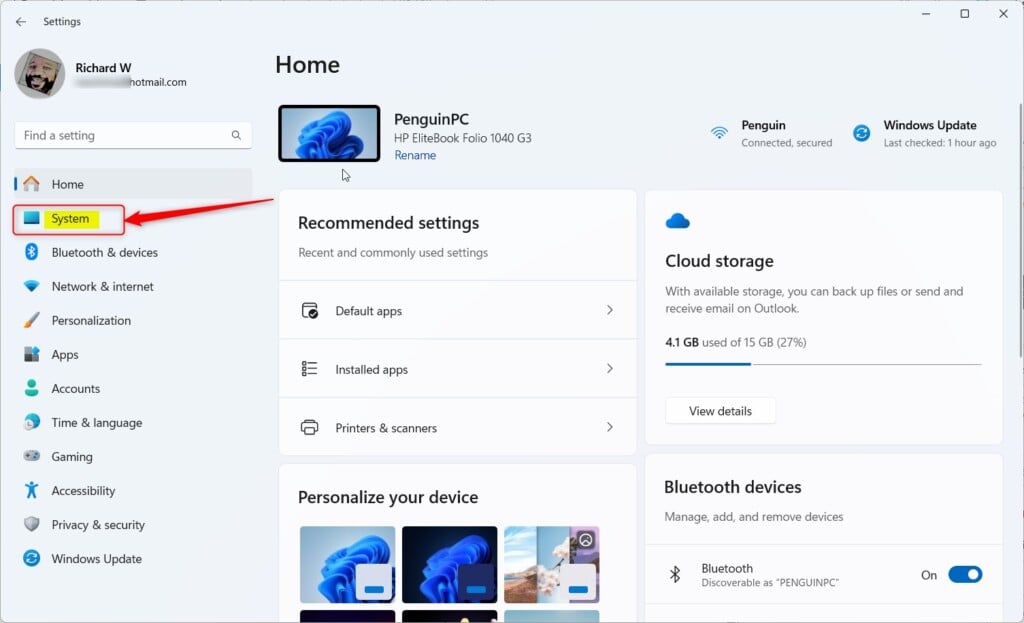
Click the Start menu and select Settings. Or press Windows key + I on your keyboard to open the Settings app.
Step 2: Go to System Settings
When the Settings app opens, click the System button on the left side.
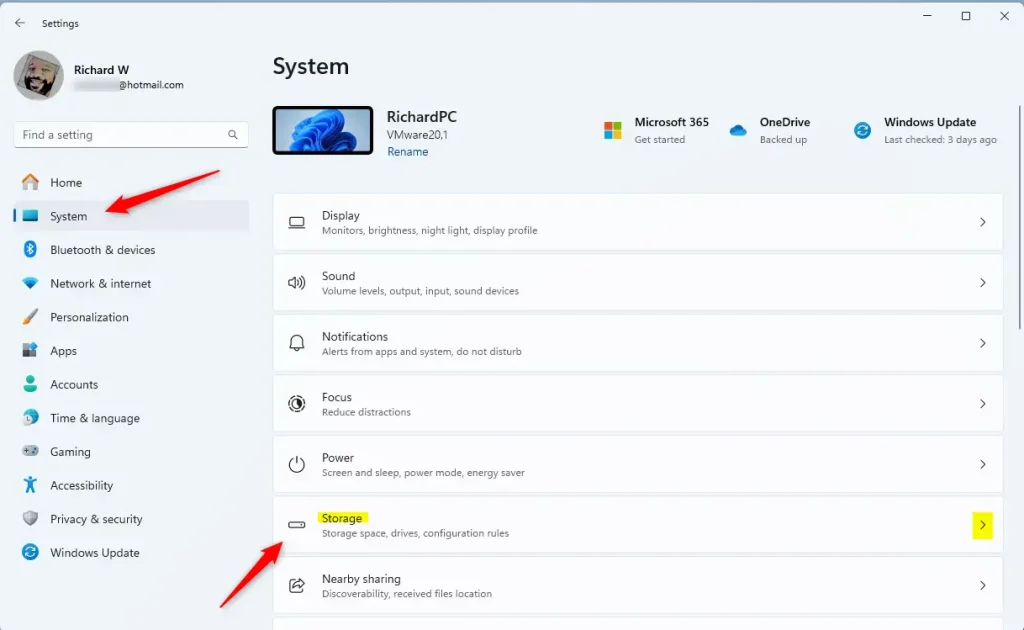
Step 3: Find Storage Settings
Select the Storage tile on the right to expand it.
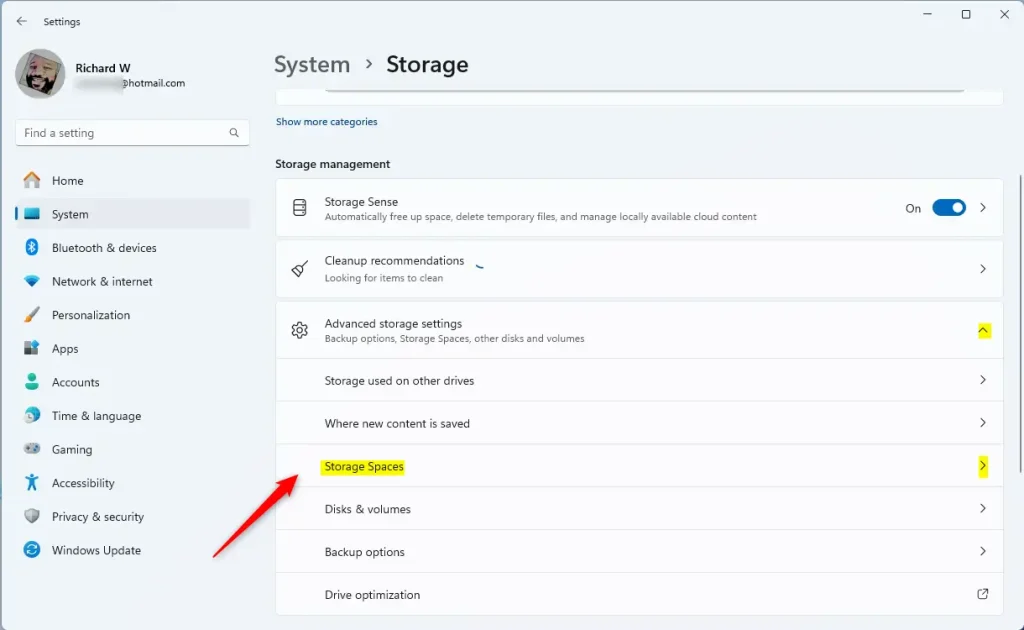
Step 4: Open Advanced Storage Settings
On the System → Storage settings page, find and expand the “Advanced storage settings” tile. Then click the “Storage Spaces” tile to expand it.
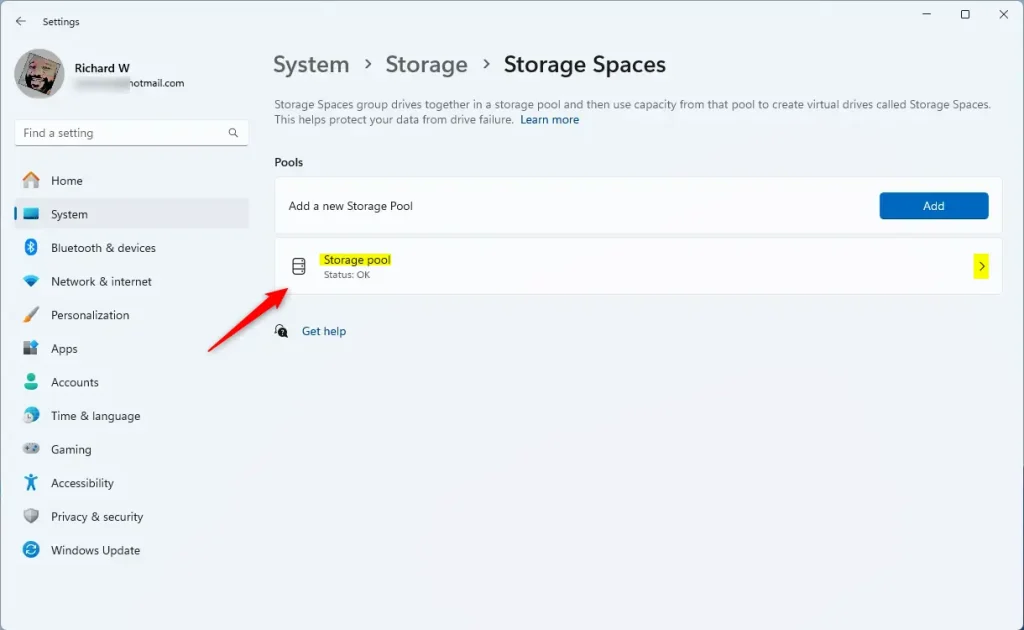
Step 5: Select Your Storage Pool
Select the “Storage pool” tile to expand it.
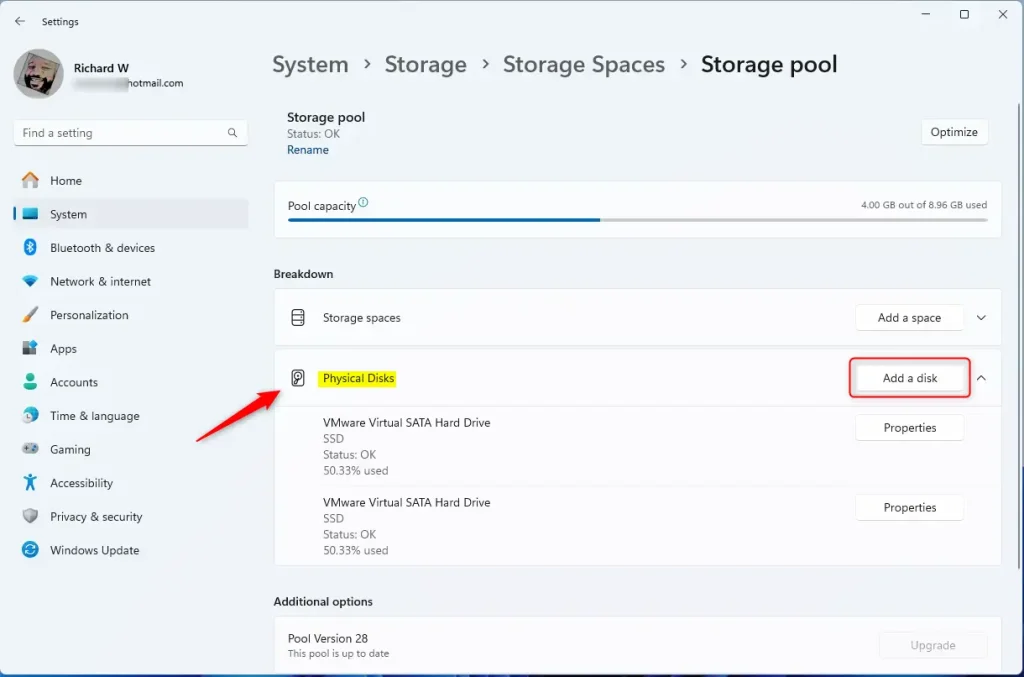
Step 6: Add a New Disk ⚙️ (Requires admin privileges)
Select the “Physical Disk” tile. Then click the “Add a disk” button to add a new disk drive to the pool.
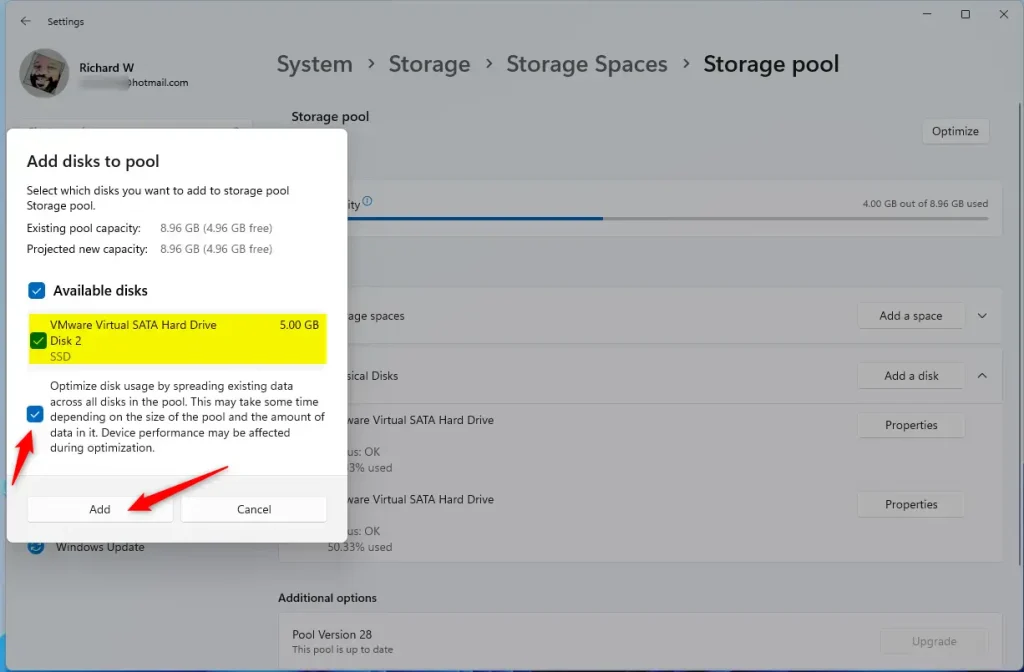
Step 7: Choose the Disk
Select the disk you want to add to the pool and click the Add button. The disk will be formatted and added to the pool automatically.
Step 8: Close Settings
You can close the Settings app when you are done.
That’s it! Your new drive is now part of your storage pool.
Summary
Adding a drive to a Storage pool with Storage Spaces on Windows 11 gives you more storage space, better data protection, and faster performance. The process is simple: open Settings, go to System, find Storage Spaces, select your storage pool, add a physical disk, choose which disk to add, and you’re done. This helps you create a flexible storage solution that protects your important files.
Frequently Asked Questions
What is a Storage pool in Windows 11?
How do I add a drive to a Storage pool in Windows 11?
What are the benefits of adding a drive to a Storage pool?
Can I remove a drive from a Storage pool in Windows 11?
Will adding a drive to a Storage pool erase my data?
Was this guide helpful?


[…] Storage spaces, you can create a Storage pool, rename a Storage pool, add physical disk drives to a Storage pool, add a Storage space to an existing Storage pool, and […]
[…] is logical rather than physical, allowing you to configure the Storage Space to exceed the current capacity of the storage pool. You can then expand the pool capacity by adding more disks […]
[…] Storage spaces, you can create a Storage pool, rename it, add physical disk drives to it, add a Storage space to an existing Storage pool, optimize it, and […]
[…] If you don’t have enough physical space right now, you can always add more hard drives to your Storage Pool later to increase capacity. Learn how to add drives to your Storage Pool here. […]