How to Change Mouse Scroll Speed in Windows 11
You can easily change your mouse scroll speed in Windows 11 directly within the Settings app.
This setting controls how many lines your screen scrolls with each notch of your mouse wheel, impacting how quickly you navigate documents and web pages.
Adjusting this offers a more comfortable PC experience. For instance, you might want to scroll more lines per notch if you read long articles, or fewer if you find yourself overshooting your target.
Windows 11 offers adjustments that let you fine-tune this to your preference, ensuring smooth navigation.
Change your mouse scroll speed in Windows 11 via Settings. Go to Bluetooth & devices > Mouse, then adjust “Lines to scroll at a time” or select “One screen at a time” under the Scrolling section.
Why Change Mouse Scroll Speed?
Everyone has their own preferences. Adjusting the scroll speed can make your computer feel more comfortable to use. It helps you navigate websites and documents at a pace that feels right for you.
What Happens When Done?
When you change this, your mouse wheel will scroll pages faster or slower depending on the number you pick. This affects how much content scrolls with every single click of the wheel.
Change Scroll Speed Using Windows Settings
You can change your mouse scroll speed in Windows 11 using the Settings app, which is the easiest way for most people to adjust how many lines your mouse scrolls at once.
- Open the Windows Settings app by pressing the Windows key + I on your keyboard.
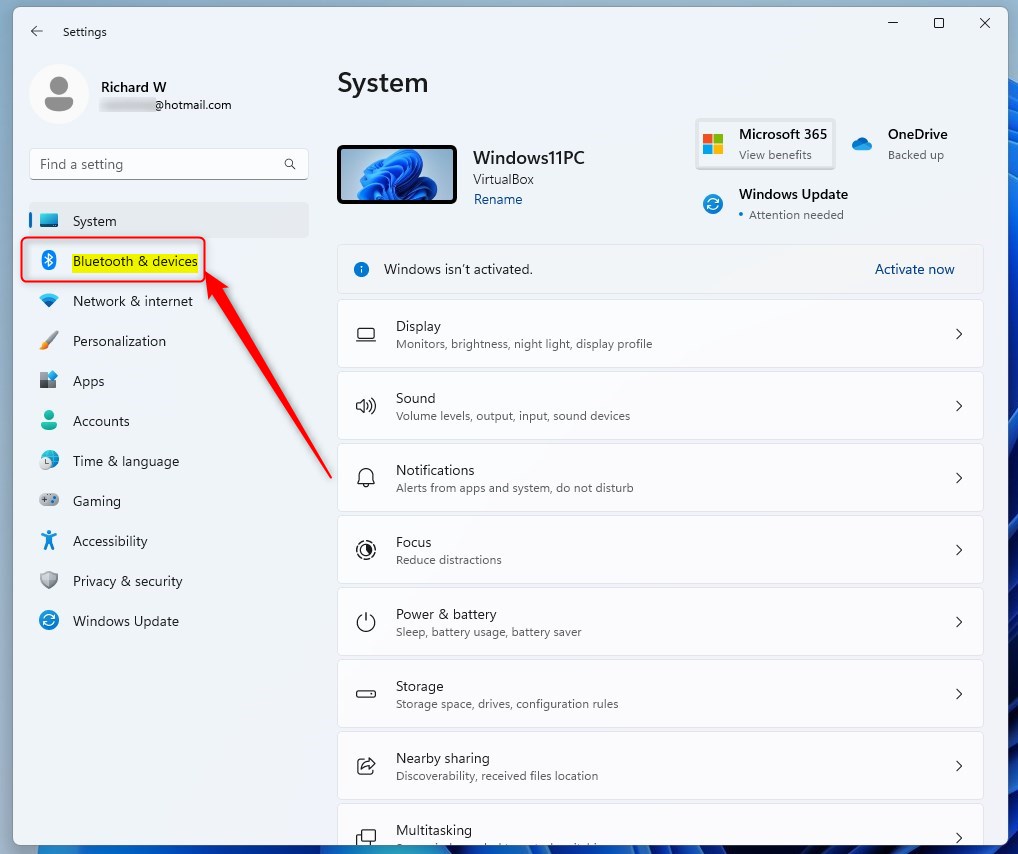
- Click on Bluetooth & devices on the left side menu.
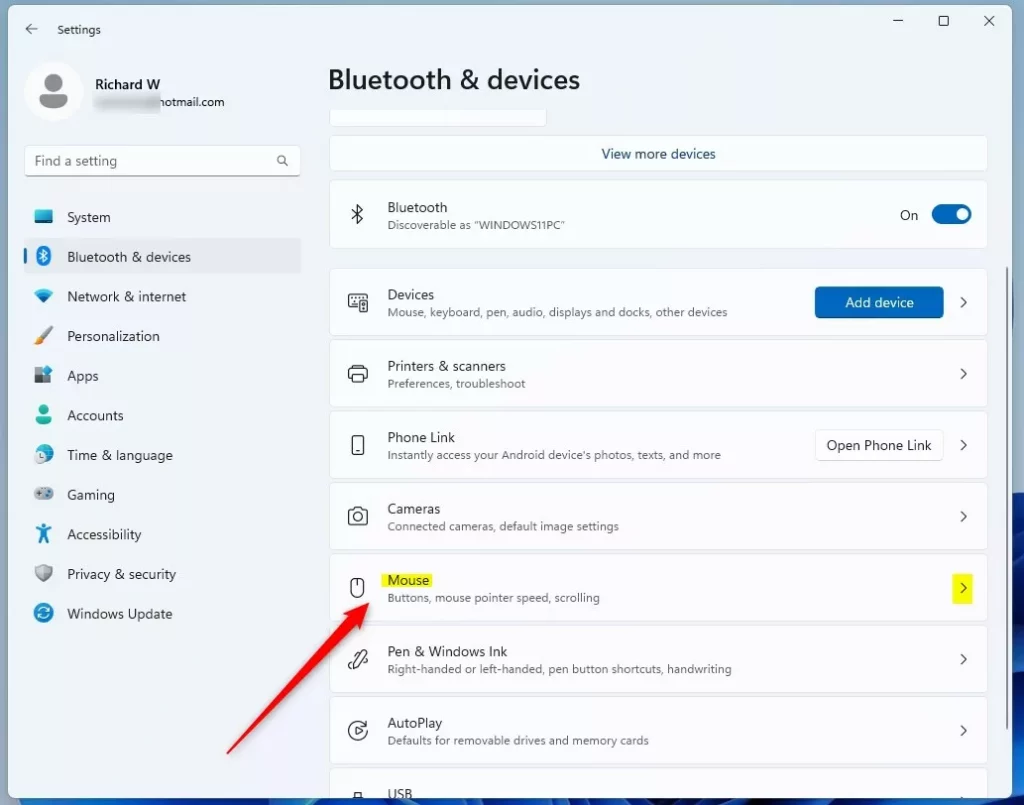
- Click the Mouse tile on the right.
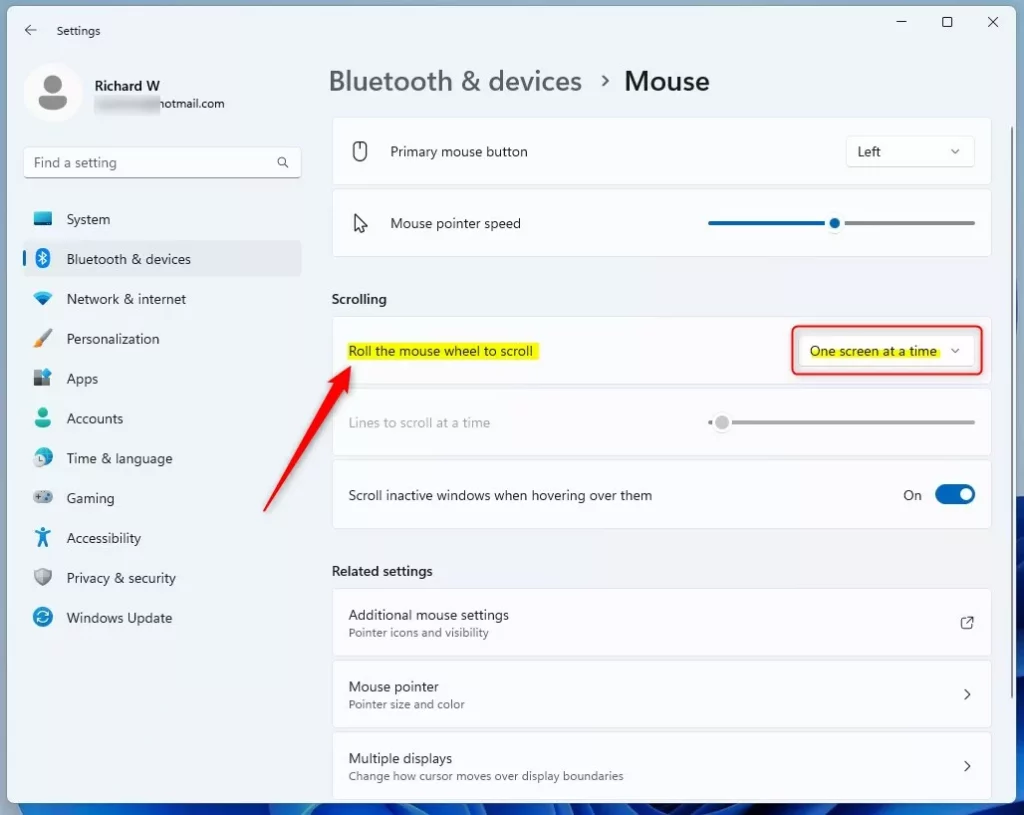
- Under the Scrolling section, look for Lines to scroll at a time.
- Move the slider to increase or decrease the number of lines.

You can also change the setting to One screen at a time if you prefer to jump through pages quickly.
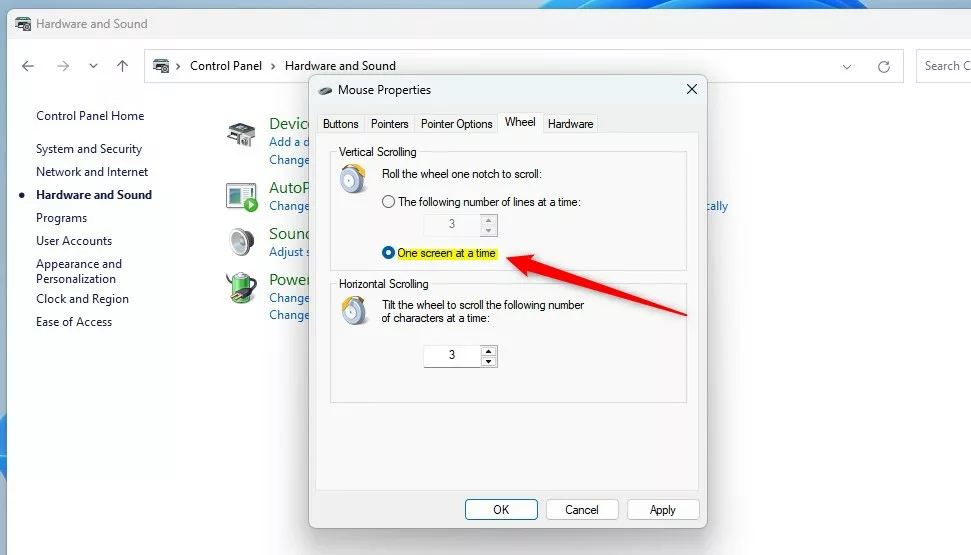
Change Scroll Speed Using the Control Panel
You can change your mouse scroll speed using the Control Panel if you like the older Windows interface, letting you adjust scrolling sensitivity in a familiar window.
- Search for Control Panel in the Start menu and open it.
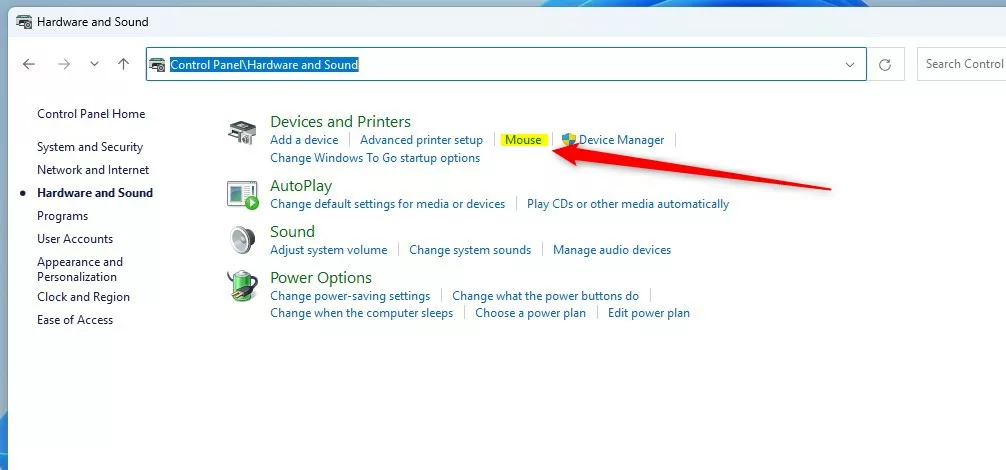
- Go to Hardware and Sound and click on Mouse.
- Click the Wheel tab at the top of the window.
- Adjust the number of lines to scroll at a time.

Once you click Apply, your changes will take effect immediately.
Advanced Customization: Registry Editor
Experienced users can change mouse scroll speed with more control by editing the Windows Registry, but you need to be careful with these steps to adjust the scroll lines value.
- Press the Windows key + R, type
regedit, and hit Enter. - Navigate to this path:
HKEY_CURRENT_USER\Control Panel\Desktop
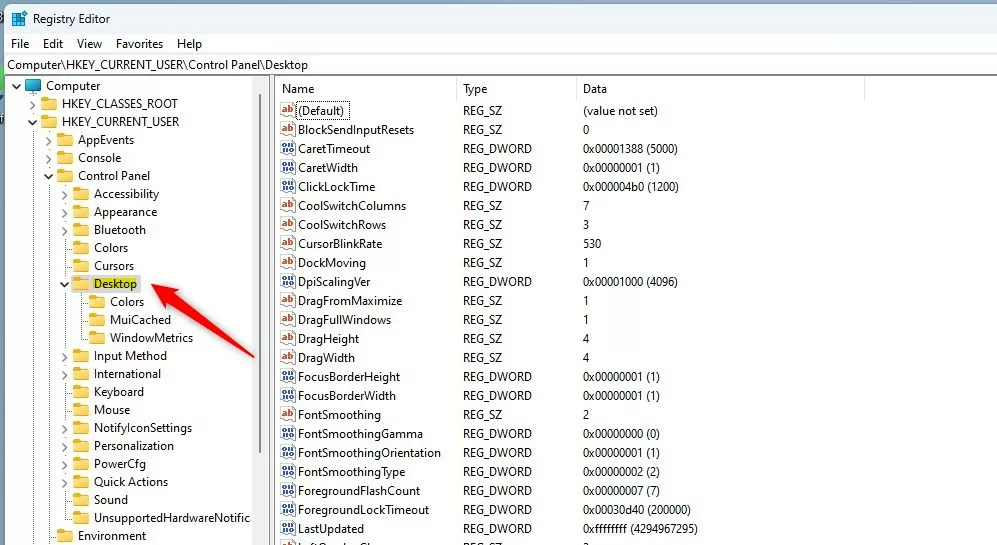
- Find the WheelScrollLines value in the right pane and double-click it.
- Type a number between 1 and 100.
- Click OK and restart your computer to apply the change.

Third-Party Software: X-Mouse Button Control
If Windows settings are not enough, try X-Mouse Button Control. This free tool lets you customize scroll speed for specific applications. It is great for users who need different speeds for web browsers and design software.
Updating Mouse Drivers
Does updating mouse drivers affect scroll speed? Yes, it can. Outdated drivers may cause erratic scrolling. Visit the official Microsoft mouse driver download page to ensure you have the latest software installed for your HID-compliant mouse (this is a standard that most mice follow).
Frequently Asked Questions
Summary
You have multiple ways to change your mouse scroll speed in Windows, from the easy Settings app to the advanced Registry Editor. Each method offers a different approach to adjusting how your mouse scrolls.
Why does my mouse scroll speed change on its own?
This often happens due to conflicting software or outdated mouse drivers. Sometimes, Windows updates reset your preferences. Check your mouse driver configuration or disable background software that might be overriding your system settings to keep the speed consistent.
Can I use a modifier key to slow down scrolling?
Windows does not have a native modifier key to slow down scrolling. However, you can use third-party tools like X-Mouse Button Control to assign a specific key to toggle scroll speed or sensitivity, allowing for more precise control when you need it.
Was this guide helpful?

About the Author
Richard
Tech Writer, IT Professional
Richard, a writer for Geek Rewind, is a tech enthusiast who loves breaking down complex IT topics into simple, easy-to-understand ideas. With years of hands-on experience in system administration and enterprise IT operations, he’s developed a knack for offering practical tips and solutions. Richard aims to make technology more accessible and actionable. He's deeply committed to the Geek Rewind community, always ready to answer questions and engage in discussions.


No comments yet — be the first to share your thoughts!