How to Create a Storage Pool in Windows 11
You create a Storage Pool in Windows 11 to combine multiple physical drives into a single logical drive, making managing your storage simpler and more flexible.
A Storage Pool is a feature that allows you to aggregate the capacity of several disks, presenting them as one large volume to Windows. This is particularly useful for expanding storage beyond the capacity of a single drive.
This technology is crucial for data redundancy. For instance, you can configure a Storage Pool to mirror your data across multiple drives, ensuring that if one drive fails, your files remain accessible from another.
For best results, ensure you have at least two physical drives available to create a Storage Pool and leverage its data protection features.
Open Settings, go to System, then Storage, and finally Advanced storage settings to access Storage Spaces. Click Add to create a new pool, name it, select at least two drives, and choose your desired protection type and size.
How to Create a Storage Pool in 🪟 Windows 11
Follow these simple steps to make a storage pool on your Windows 11 computer:
- Open Settings
Click the Start menu and choose Settings. Or press the Windows key + I on your keyboard. Learn more about opening Settings
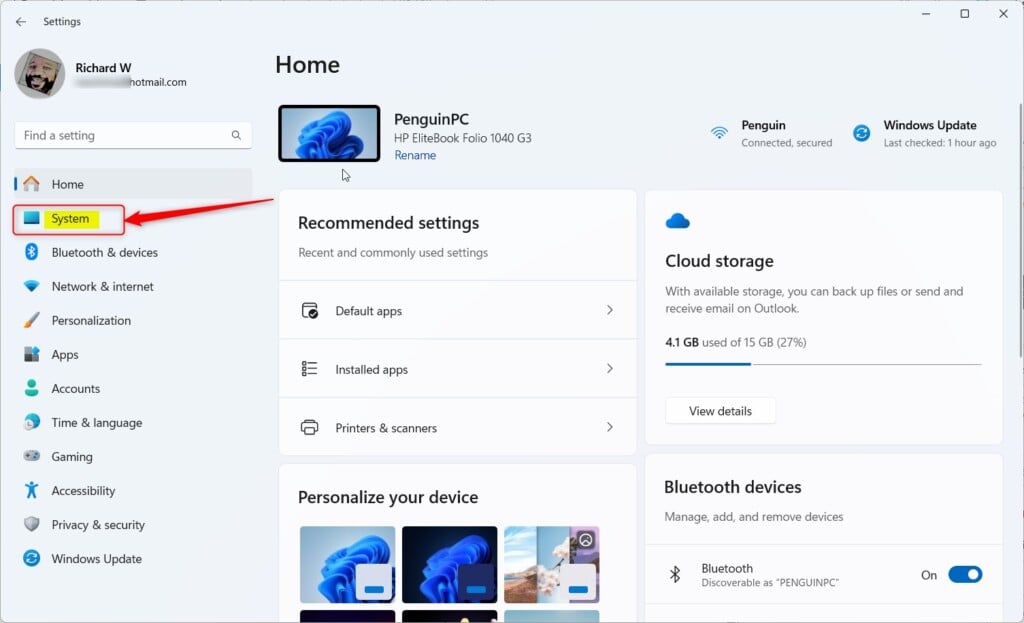
Windows 11 System button in Settings Click System in Settings.
- Go to Storage
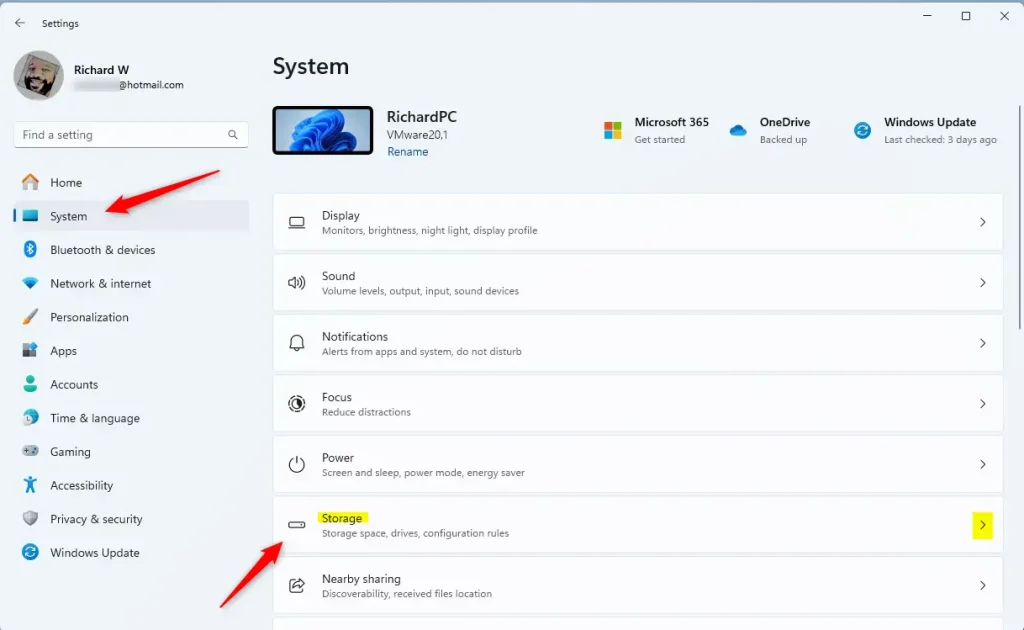
In the System section, find and click on Storage.
Windows 11 Storage tile in Settings app - Open Storage Spaces
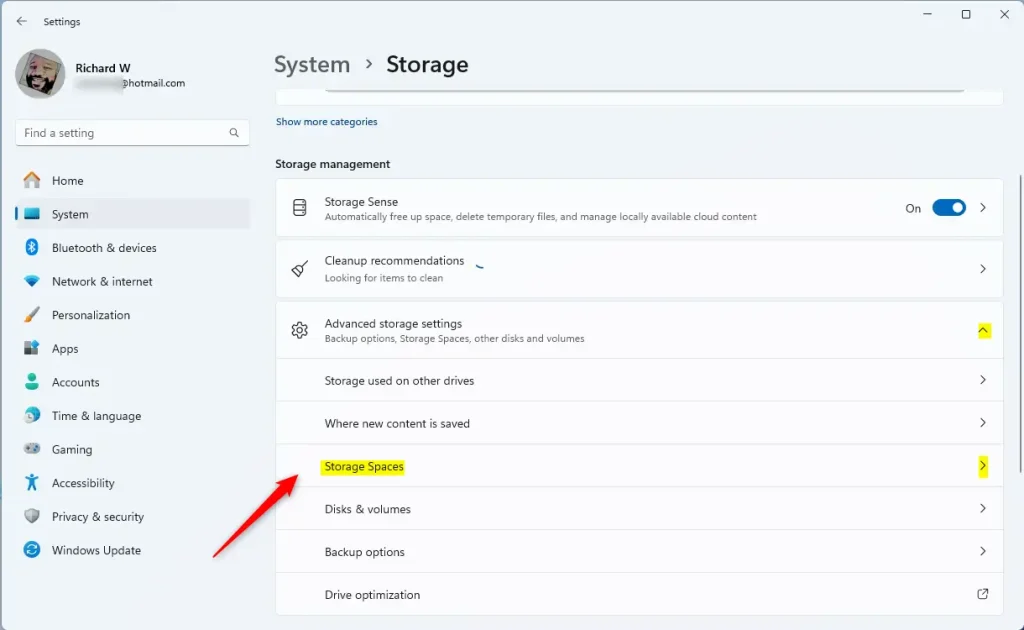
Scroll down and click on Advanced storage settings. Then select Storage Spaces.
Windows 11 Storage Spaces tile in Settings app - Create a New Storage Pool
Click the Add button under “Add a new Storage Pool.”
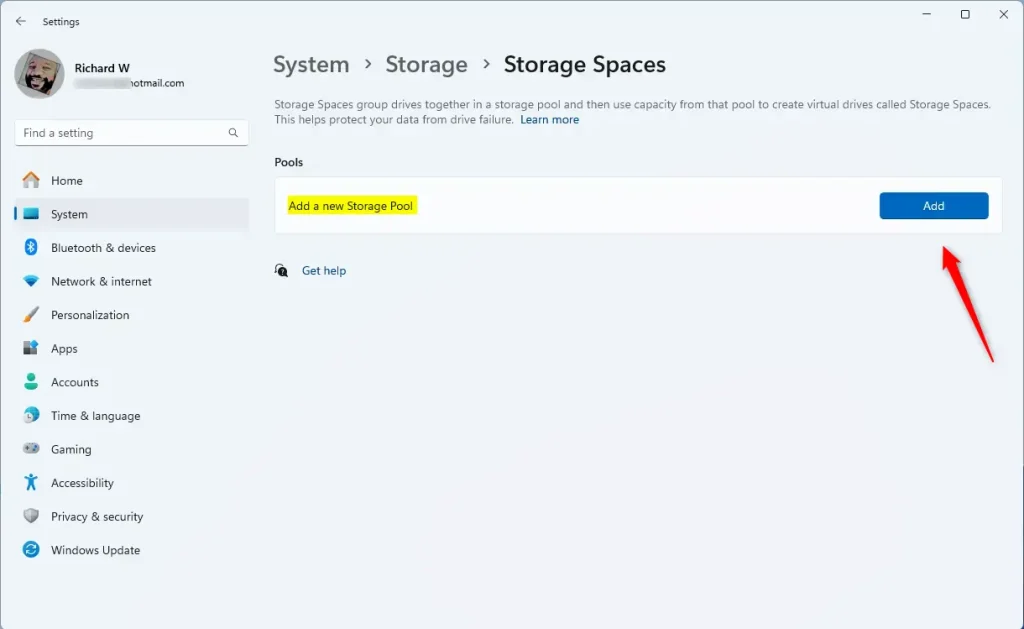
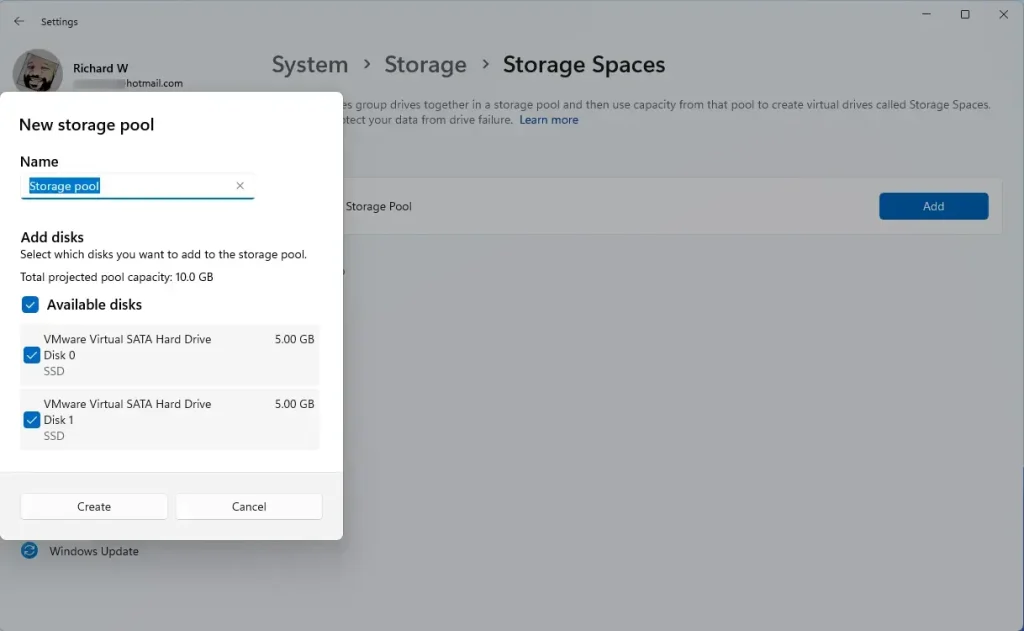
Windows 11 new storage pool button - Name Your Storage Pool and Pick Drives
Enter a name for your new storage pool.
Select at least two extra drives. They can be internal or external drives. These drives will be combined together.
Then click Create.
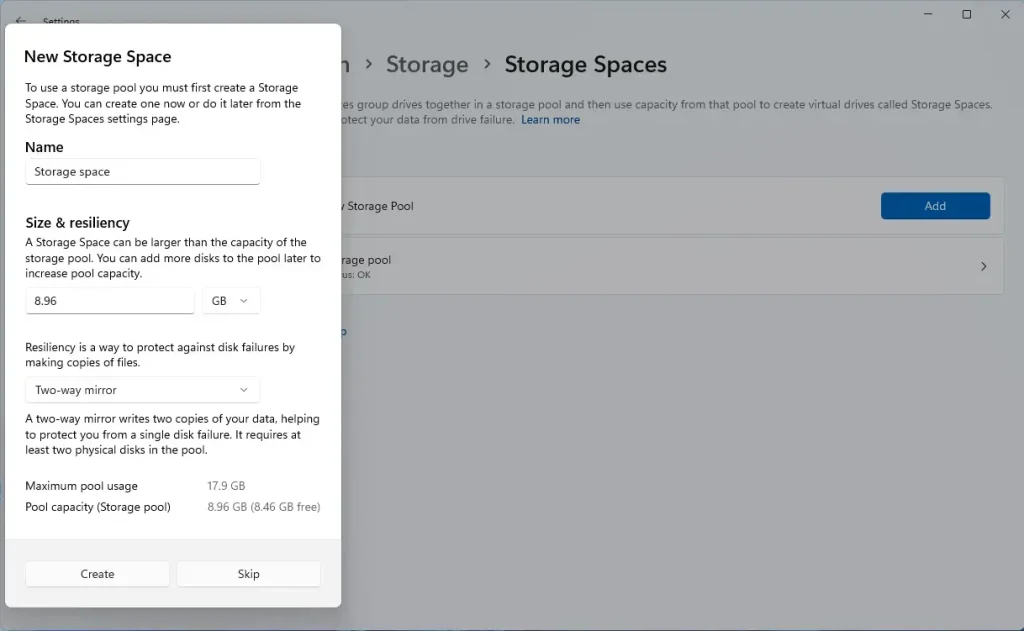
Windows 11 new storage pool disks - Choose Size and Protection Type
Pick the size of your storage space. Then choose how you want to protect your data:
- Simple: Uses at least 2 drives. No data backup.
- Two-way mirror: Uses 2 drives and keeps a backup in case one drive fails.
- Three-way mirror: Needs 5 drives. Protects against two drives failing.
- Parity: Needs 3 drives. Balances protection and speed.
- Dual parity: Needs 7 drives. Protects against two drive failures with good speed.
Click Create when finished.
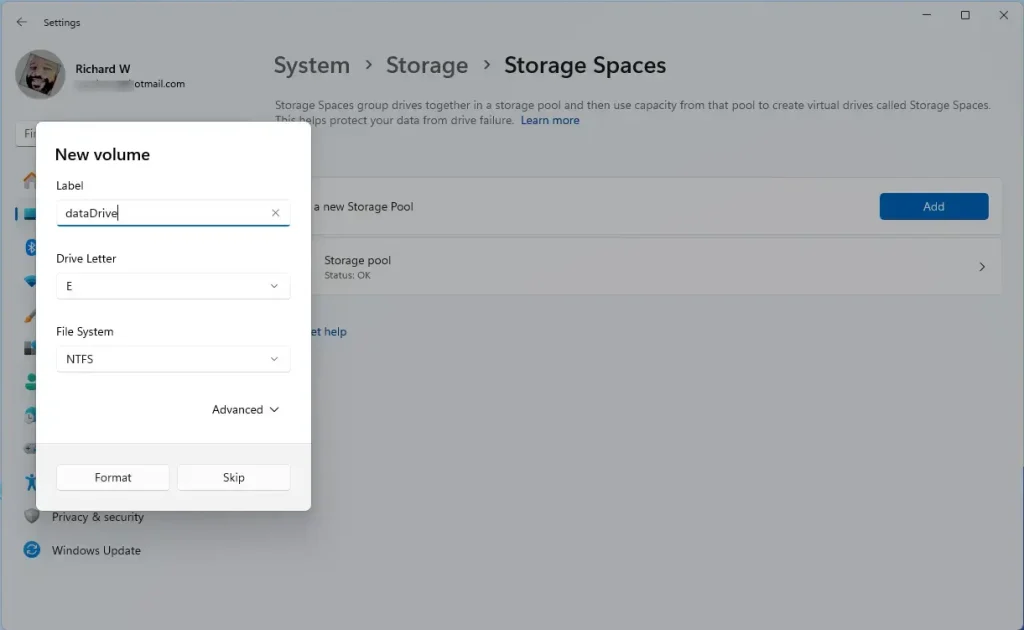
Windows 11 new storage pool options - Set Up Your New Drive
Give your new virtual drive a name. Pick a drive letter like D: or E:.
Choose a format:
- NTFS: Best for Windows computers.
- FAT32: Works with some other devices.
Then click Format.
Windows 11 new storage pool drive letter Format your new storage space.
- Done!
Your new storage pool will now appear as a drive in File Explorer. File Explorer You can start saving files there just like with any other drive.
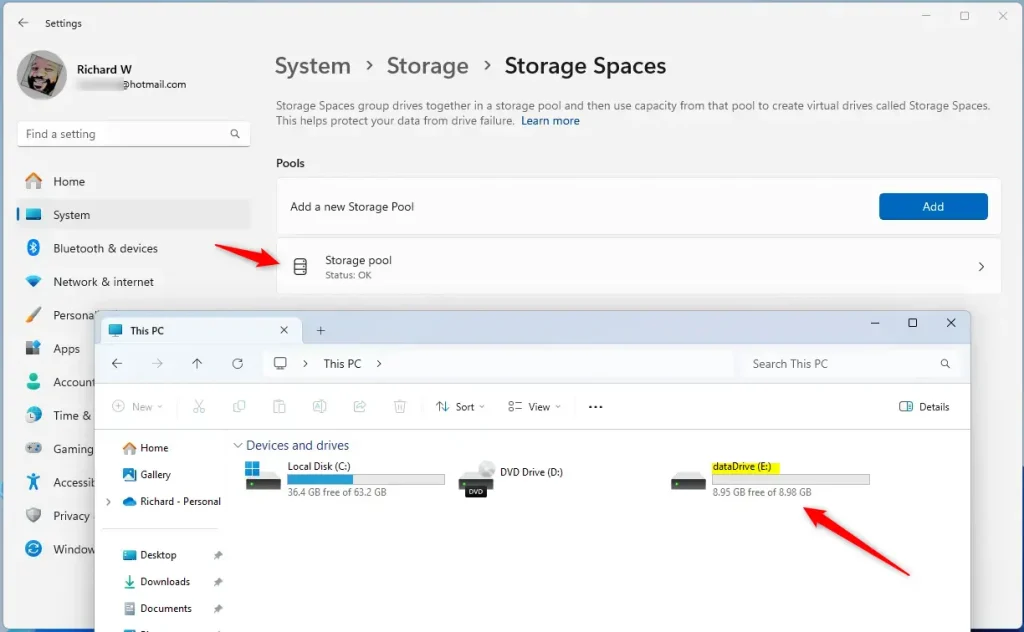
Windows 11 new storage pool complete
Why Use Storage Pools?
- You can combine many smaller drives into one big drive. This makes managing files easier.
- You get extra protection for your files. If one drive breaks, your data stays safe.
- You can add more drives later to increase your storage without hassle.
More Help
For official details and troubleshooting, visit Microsoft Storage Spaces Support.
Summary
- Storage Pools let you combine multiple drives into one virtual drive in Windows 11.
- They protect your data by keeping extra copies. The protection level depends on the option you choose.
- Setting one up is easy through the Windows Settings app.
- Once created, your new storage pool is ready to use. It shows up like a regular drive on your computer.
Now you know how to create a storage pool and keep your data safer on Windows 11!
What is a storage pool on 🪟 Windows 11?
Windows Storage Spaces lets you combine multiple drives into a single storage pool to protect data from drive failures and expand storage over time. You can create virtual drives—called storage spaces—from the pool and choose resiliency options such as mirroring to keep data available if a drive fails.
What happens if I delete the storage pool?
The removal of a storage pool, which can only be performed after all virtual disks have first been removed, destroys the storage pool, and returns the physical disks back to a non-pooled state, where they may be re-consumed.
What is the difference between storage space and storage pool?
The maximum number of storage pools [1] on a system is unlimited; the maximum size of a storage pool is 4PB [2]. Storage spaces are virtual hard drives that are available to the system under a drive letter.
Was this guide helpful?

About the Author
Richard
Tech Writer, IT Professional
Richard, a writer for Geek Rewind, is a tech enthusiast who loves breaking down complex IT topics into simple, easy-to-understand ideas. With years of hands-on experience in system administration and enterprise IT operations, he’s developed a knack for offering practical tips and solutions. Richard aims to make technology more accessible and actionable. He's deeply committed to the Geek Rewind community, always ready to answer questions and engage in discussions.

No comments yet — be the first to share your thoughts!