How to Let Windows 11 Change Brightness Automatically Based on Content

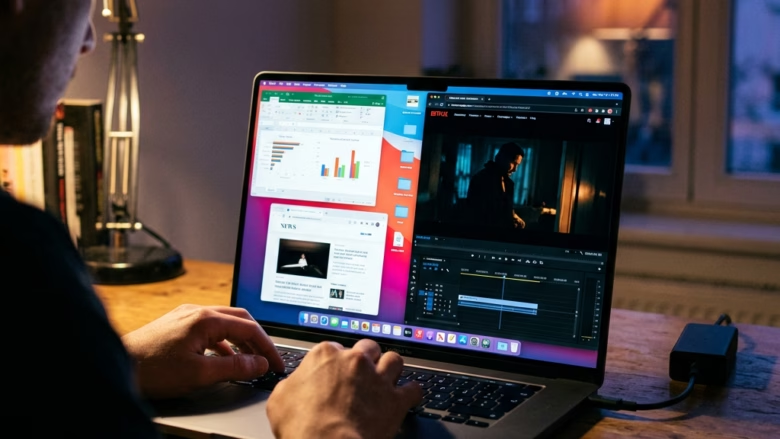
Content Adaptive Brightness Control (CABC) is a Windows 11 feature that changes your screen brightness automatically based on what is on the screen, to save battery life. A dark movie scene makes the display dim. A bright web page makes the backlight brighter.
Most modern laptops and HDR screens have this turned on by default. If you prefer a steady brightness level, you can check the setting and change it in the Windows display options. The steps below show how.
Open Settings , go to System Display, scroll to the Brightness section, and select Always or On Battery Only from the content adaptive brightness list. The change applies immediately without restarting.
What is Content Adaptive Brightness?
Content adaptive brightness changes screen contrast and backlight levels on the fly, according to what is being shown. You may notice the screen shift slightly when the picture changes from a dark scene to a bright one. That shift is the feature at work, not a fault. It is most obvious on plain backgrounds, such as a white document next to a dark app.
It depends on the display panel and the graphics driver, so you will mostly see it on laptops and tablets. Many desktop monitors do not offer it.
How to Turn On and Change Content Adaptive Brightness
You change how the feature behaves in Display Settings. There are two ways to get there. The right-click method below is the quickest.
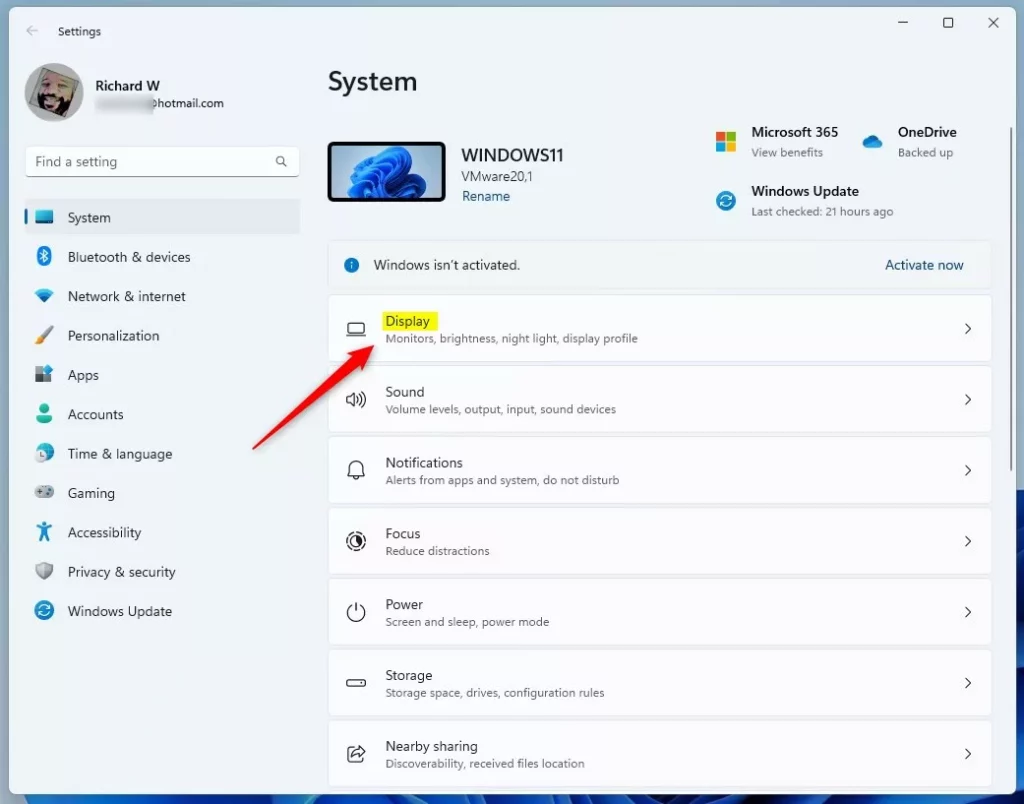
Open Display Settings
- Right-click an empty area of the desktop.
- Select Display settings from the context menu .
The Settings app opens on System and then Display. If you prefer, you can open Settings from the Start menu and go to System and then Display yourself. You end up on the same page.
Find Brightness Settings
- Scroll down inside the Display page.
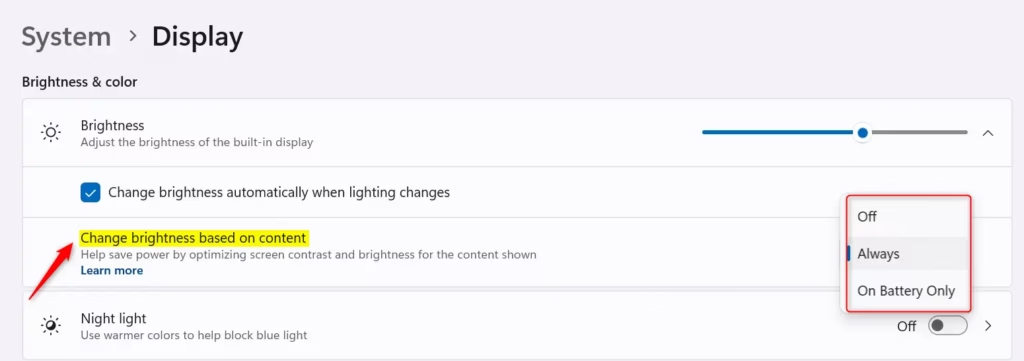
- Find the Brightness section. This is where the luminance controls are.
If you see only the slider, your screen or driver does not support the feature. Desktop PCs with an external monitor usually fall into this group. A missing option can also mean the graphics driver is outdated, so run Windows Update or install the latest driver from your PC maker.
Enable Content Adaptive Brightness
Content Adaptive Brightness Control (a power-saving feature that adjusts screen brightness based on what is displayed) is turned on in Windows 11 through the Settings app. Go to System and then Display. There you will find the option to manage your battery and brightness levels for different types of content.
Open the list for the content-based brightness option. It is the setting about improving battery life by optimizing the content shown and brightness. Pick one of the choices below. The change applies straight away, and you do not need to restart.
Off: Leaves the feature disabled, so brightness and contrast stay static. Choose this if the shifting bothers you, or if you do colour-sensitive work such as photo editing.
- Off: This is the default if the feature is not turned on. Your screen brightness and contrast will not change based on what's on the screen. You have full control, but you won't get the battery saving or better viewing for different scenes. Your battery will also likely run out faster.
- Always: When you choose 'Always', content adaptive brightness will be on all the time. This works whether your device is plugged in or running on battery. This gives you the best experience for brightness and contrast for everything you do.
- On Battery Only: This is a good choice for laptop users. When you choose this, adaptive brightness will only work when your device is running on battery power. This helps save battery when you are out and about. When you are plugged in, you will still have normal brightness control.
The other choices turn the feature on. One keeps it on all the time. The other keeps it on only while the laptop runs on battery, so you get a steady picture when plugged in. These choices are the ones shown above. To undo any change, return to the same list and select Off.
Some PCs also have a separate display power-saving option in the graphics driver software, such as the Intel, AMD or NVIDIA control apps. If the screen still changes brightness after you turn this setting off in Windows, check there as well.
Reference:
Summary
Content adaptive brightness in Windows 11 automatically adjusts your screen's brightness and contrast based on what you are viewing. It helps save battery, and you can turn it off at any time from System and then Display if you want a steady picture.
Was this guide helpful?

About the Author
Richard
Tech Writer, IT Professional
Richard is a writer at Geek Rewind who turns complex IT tasks into clear, step-by-step guides. He draws on years of hands-on experience in system administration and enterprise IT operations, focusing on Windows, Linux and WordPress: the problems people actually run into, and the fixes that work. His server and WordPress guides come from systems he runs himself. Richard builds and maintains the platform behind Geek Rewind, from its Ubuntu servers and Nginx configuration to its custom WordPress plugins. Many new tutorials start with readers' questions, and he's always glad to answer them in the comments.



No comments yet — be the first to share your thoughts!