What Happens When You Enable Windows 11 Virtualization Based Security


- 27 steps
- Needs administrator rights
- Hyper-V needs Windows 11 Pro, Enterprise or Education
- Includes a restart or sign-out
Virtualization-based Security (VBS) in Windows 11 creates a secure, isolated area of system memory. It protects your computer from advanced malware and credential theft. VBS uses the hardware virtualization built into your processor to shield vital system parts from attack.
Turning on VBS makes your PC much safer, but it can reduce gaming performance by 3% to 10% on certain processors. On most modern Windows 11 devices the feature already runs automatically, especially on new installs and PCs that shipped with Windows 11. You can check its status in System Information, and you can turn on its Memory integrity part in the Windows Security app under Core isolation.
Enabling Virtualization-based Security (VBS) in Windows 11 creates an isolated region of system memory, using your processor’s hardware virtualization, where core system code runs out of reach of malware. Turning it on, especially Memory Integrity under Core isolation in the Windows Security app, blocks malicious drivers and credential theft. Gaming performance may drop 3% to 10% on certain processors.
What Is Virtualization-Based Security (VBS)?
VBS is a Windows 11 security feature that uses hardware virtualization to carve out a secure, isolated region of memory. Core operating system parts run inside that region. Malware cannot run unauthorized code there or tamper with it.
Think of it as a locked room inside a building. The processor’s virtualization hardware builds the room, and it is completely separated from the rest of Windows 11. Suppose a malicious program breaks into your normal Windows environment. It still cannot reach the locked room. The critical security features run inside that room, out of reach of attackers and dangerous software.
VBS needs a processor with hardware virtualization support, and that support must be switched on in the firmware (BIOS/UEFI). Almost every PC sold in the last several years meets this requirement.
The Main Features Powered by VBS
VBS powers several Windows 11 protection features. The best known are Memory Integrity (also called Hypervisor-protected Code Integrity, or HVCI) and Credential Guard. Both use the secure virtual environment to block malicious drivers and stop attackers from stealing account passwords.
- Memory Integrity: Also known as HVCI (Hypervisor-protected Code Integrity). It checks every piece of kernel-mode software, such as drivers, before it touches your memory. Only safe, trusted code gets through. You can turn it on yourself in Windows Security, and it is available in both Home and Pro.
- Credential Guard: This tool protects your network login details and passwords. Malicious software cannot steal them and use them to log into other computers on a network. It is aimed mainly at business setups and is managed through policy on Enterprise and Education editions.
- Secure Boot Integration: It helps ensure your computer only starts up using software trusted by the computer manufacturer. Secure Boot itself is a firmware setting, and VBS builds on it.
What Happens to Your Computer When You Enable VBS?
Turning on VBS changes how your system handles everyday tasks. Here is a look at the benefits and the drawbacks you might notice. For most people the security gain is worth it. Gamers and people running older hardware or drivers should read the drawbacks first.
Enhanced Protection Against Advanced Threats
VBS gives a major boost to your digital safety by protecting your computer’s core system architecture from modern attacks. Traditional antivirus software mostly scans files and watches behavior. VBS goes further and stops malicious code from hiding deep inside your computer memory. Attacks that try to inject code into the kernel, load a bad driver or dump stored credentials have a much harder time getting anywhere.
Potential Impact on System Performance
VBS can cause a small performance drop of a few percentage points in games and heavy applications. Everyday tasks like web browsing, email and office work are normally unaffected. Demanding software may run slightly slower, because the processor has to do extra work to maintain the secure memory space.
Players running heavy video games, or professionals using intensive rendering software, might notice a slight drop in frame rates or processing speed once Windows 11 VBS is on. The cost is in the range of 3% to 10% on certain processors, and in some cases your computer dedicates up to five percent of its processor power to maintaining the isolated memory space. The impact depends on your processor, the game and your other settings, so test your own games before and after if frame rate matters to you. Newer processors generally lose less.
Compatibility and Software Issues
VBS can sometimes cause older programs and specialized hardware drivers to crash or fail to open. Legacy software often does not know how to work alongside strict memory protection. Old drivers for printers, capture cards, anti-cheat tools and similar hardware are the usual culprits. Check for developer updates before you turn VBS on. If something breaks afterward, you can turn Memory integrity back off in Windows Security.
How to Check If VBS Is Already Enabled
System Information is the built-in Windows 11 tool you use to check whether VBS is running. Open it by typing msinfo32 into the Start menu search bar. Then scroll down the summary list and look for Virtualization-based Security.
- Click the Start button on your taskbar .
- Type msinfo32 into the search box and press Enter. The System Information window opens.
- Make sure System Summary is selected in the left pane. Then look at the items listed in the right-hand column.
- Scroll down near the bottom of the list until you find Virtualization-based Security.
- Check the status next to it. It will say Running, Enabled, or Not enabled. If it says Enabled but not running, VBS is configured but has not started, usually until you restart.
The rows just below it, such as the ones for services configured and running, show which VBS features are active.
How to Enable Memory Integrity and VBS
Windows Security is the app you use to turn on Memory Integrity, which relies on VBS. You reach it through Settings. The steps below apply to Windows 11 Home and Pro.
- Click the Start button and open the Settings app.
- Click Privacy & security in the left menu.
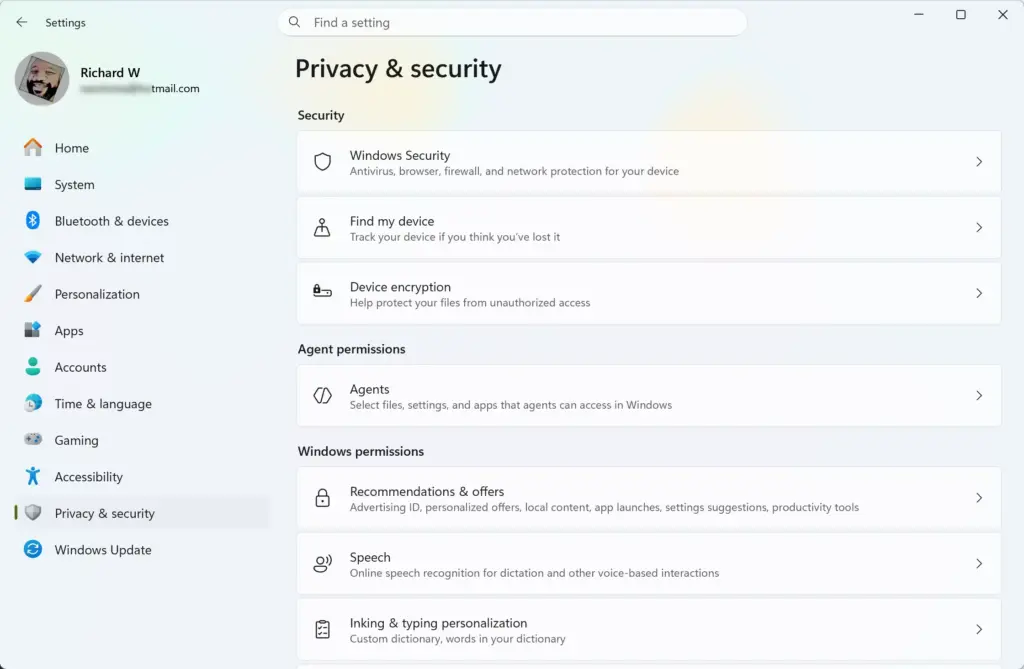
Settings › Privacy & security - Click Windows Security.
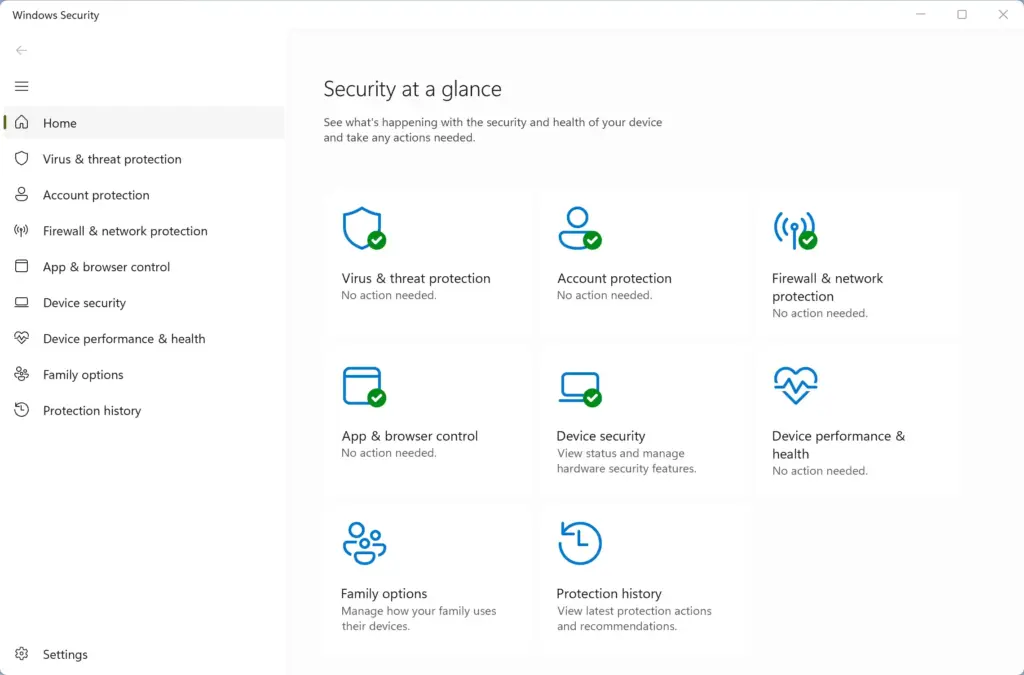
- Click the button that says Open Windows Security. The Windows Security window opens.
- In the security window, click Device security.
- Find the section titled Core isolation and click Core isolation details.
- Find the switch for Memory integrity and click it to turn it On. If Windows lists incompatible drivers, it will not turn on until you deal with them. See the troubleshooting section below.
- Restart your computer when Windows prompts you to finish the setup process.
To undo the change, return to the same page, turn Memory integrity off and restart. If the switch is missing, greyed out or turns itself back on, your device may not support it, or a policy or firmware setting may be controlling it.
How to Enable VBS Using the Registry Editor
Open it by typing regedit in the Start menu. Then go to 🗝️HKEY_LOCAL_MACHINE\
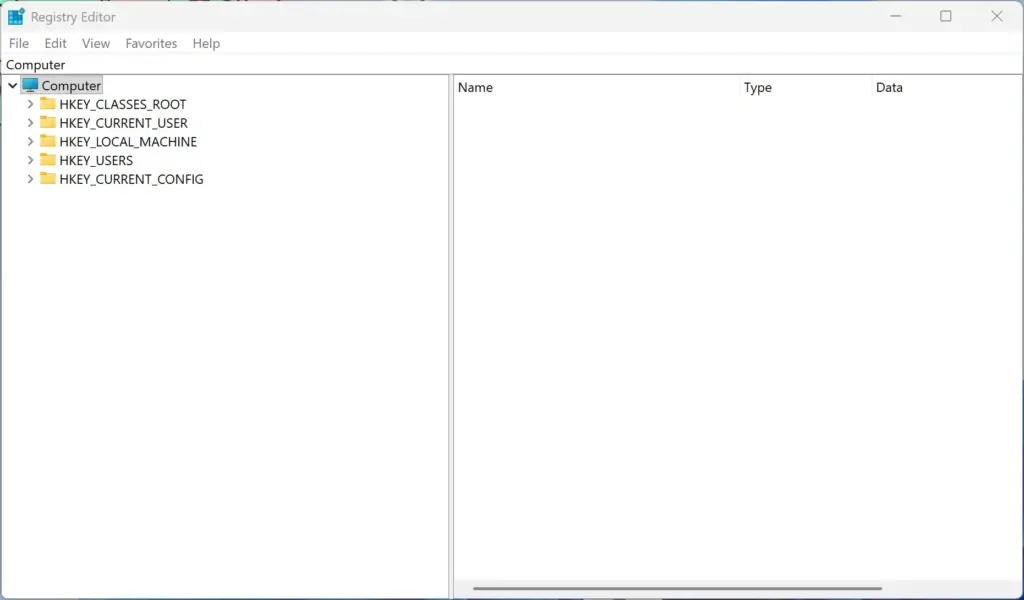
In Registry Editor, you can do the second with File Export. You also need an administrator account.
- Click the Start button, type regedit, and click the Registry Editor result to open it. Click Yes if User Account Control asks for permission.
- In the Registry Editor window, use the left sidebar to navigate to this location: 🗝️HKEY_LOCAL_MACHINE\
SYSTEM\ CurrentControlSet\ Control\ DeviceGuard - Look in the middle pane for a value named EnableVirtualizationBasedSecurity.
- If the value is not there, right-click an empty space in the right pane and select New. Then choose DWORD (32-bit) Value. Name the new value EnableVirtualizationBasedSecurity.
- Double-click EnableVirtualizationBasedSecurity and change its Value data to 1. Click OK.
- To enable memory integrity as well, look in the same folder for a value named RequirePlatformSecurityFeatures. Double-click it and set its Value data to 1. If it does not exist, create it as a DWORD (32-bit) Value and set it to 1.
- Close Registry Editor and restart your computer.
After the restart, run msinfo32 as described earlier to confirm VBS shows as running. To undo the change, set EnableVirtualizationBasedSecurity back to 0 and restart. You can also restore the registry backup you exported.
Expert Tips for Troubleshooting VBS Issues
Sometimes turning on VBS causes unexpected behavior, or Windows refuses to turn it off when you try. Here are some tips for handling the common snags.
Dealing with Incompatible Drivers
An incompatible driver is the most common reason Memory Integrity will not turn on. Windows Security lists the exact file name of each driver that blocks it. Here is how to deal with them:
- Open Windows Security Device security Core isolation details. When a driver blocks the switch, Windows shows a link to review incompatible drivers. Click it and write down the file names.
- Search online for the file name, or check which device or program it belongs to.
- Go to the device manufacturer’s website and download an updated driver. Check Windows Update for optional driver updates too.
- Install the update, restart, and try the Memory integrity switch again.
If the driver belongs to a device or program you no longer use, uninstalling it also clears the block. If no updated version exists, you have to choose between that old hardware and Memory Integrity.
Clearing Persistent VBS Settings
If VBS refuses to turn off in Windows, check your computer's BIOS firmware. Hardware virtualization locks can force VBS to stay active until you disable the related security options in your motherboard settings. Try the easy fixes first.
- Turn off Memory integrity in Windows Security and restart. Check whether msinfo32 still shows VBS as running.
- If the switch is greyed out, or VBS comes back after a restart, a policy or the firmware may be controlling it. This is common on work or school PCs, where only your administrator can change it.
- On a personal PC, restart into the BIOS/UEFI setup and look for the virtualization and related security options. Their names vary by manufacturer, so check your motherboard or PC manual.
Be careful with virtualization in the BIOS. Turning it off also stops Hyper-V, Windows Subsystem for Linux 2, Windows Sandbox and most virtual machine software from working. Change only the options you need, and note the original settings first so you can put them back.
Summary
VBS creates a protected, isolated workspace inside your computer memory using hardware built into your processor. It defends your system against complex security threats and powers safety tools like Memory Integrity. The cost can be minor performance changes in video games, and occasional trouble with older drivers and software. Check its status with System Information, turn on Memory integrity in Windows Security, and keep the Registry method as a last resort.
Have a question about this guide?
Answered by AI from this guide. Good questions may be added to this page — please don't include personal details.
Did this guide fix your problem?

About the Author
Richard
Tech Writer, IT Professional
Richard is a writer at Geek Rewind who turns complex IT tasks into clear, step-by-step guides. He draws on years of hands-on experience in system administration and enterprise IT operations, focusing on Windows, Linux and WordPress: the problems people actually run into, and the fixes that work. His server and WordPress guides come from systems he runs himself. Richard builds and maintains the platform behind Geek Rewind, from its Ubuntu servers and Nginx configuration to its custom WordPress plugins. Many new tutorials start with readers' questions, and he's always glad to answer them in the comments.
No comments yet — be the first to share your thoughts!