Reset Quick Settings in Windows 11

Resetting Quick Settings in Windows 11 restarts the panel that holds your volume, Wi-Fi , and Bluetooth buttons. It helps when the menu freezes, opens blank, or stops responding. The fix works by restarting the Windows Shell Experience Host, the program that runs visual elements like your taskbar flyouts and Start menu , along with the Windows Explorer process that draws the taskbar .
In Windows 11 version 22H2 and newer you can force this restart from Task Manager without rebooting your whole PC. A full reboot also clears the problem, but the steps below are faster and you keep your open apps running. Save your work first anyway, because the taskbar disappears for a moment.
To reset Quick Settings in Windows 11, press Win+R, type cmd, press Ctrl+Shift+Enter to open Command Prompt as administrator, then run these commands one by one: REG DELETE “🗝️HKCU\
What is Quick Settings?
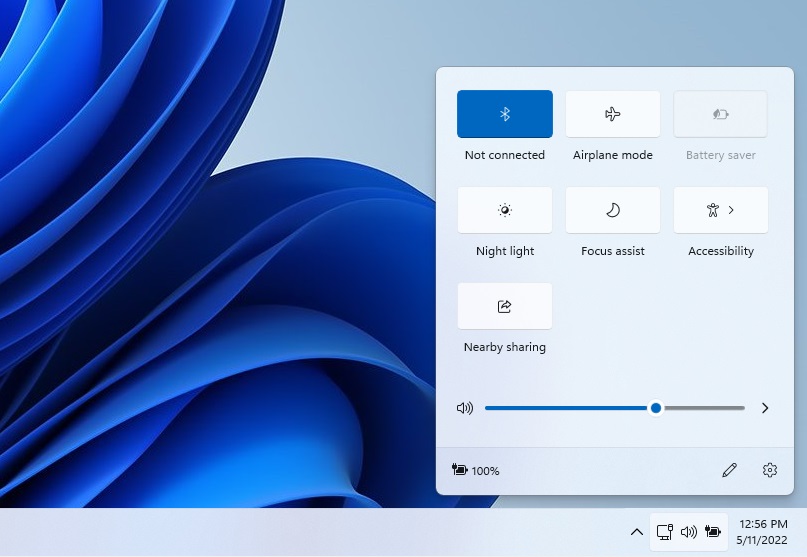
Quick Settings is the menu in the bottom-right corner of the taskbar . It holds toggles for Wi-Fi , Bluetooth , volume, and screen brightness. To open it, click the network, sound, or battery icons next to the clock, or press Win+A.
Windows 11 22H2 and later split this corner into two panels:
- Notification Center (open it by pressing
Win + N) - Quick Settings (open it by pressing
Win + A)
Quick Settings is where the common toggles for hardware and network controls live, such as:
- Volume
- Screen Brightness
- Wi-Fi
- Bluetooth
- Focus Assist (to reduce distractions)
A desktop PC with no Bluetooth adapter, for example, won’t list Bluetooth, and brightness usually appears only on laptops and some monitors. Don’t treat a missing button as a fault until you’ve checked that.
Media playing in apps like Spotify or Microsoft Edge appears in controls directly above Quick Settings.
Why Reset Quick Settings?
The reset returns the panel to its default layout. That also means any buttons you added, removed, or rearranged will go back to their default positions.
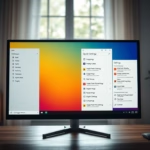
Example of Quick Settings in 🪟 Windows 11
How to Reset Quick Settings
When icons disappear or stop working, restart the Windows Explorer process from Command Prompt. This clears out glitches and brings back missing buttons like Wi-Fi or volume without restarting your whole computer. The steps work the same on Windows 11 Home and Pro.
- Press Windows key + R on your keyboard. The Run box opens in the bottom-left corner of the screen.
- Type
cmdand press Ctrl + Shift + Enter. This opens Command Prompt as an administrator. If a permission prompt appears, click Yes. If you are signed in with a standard account, you will need to enter an administrator's password. A black Command Prompt window should now be open. - In the Command Prompt window, type or copy and paste the following commands one by one, pressing Enter after each:
REG DELETE "HKCU\Control Panel\Quick Actions" /F taskkill /f /im explorer.exe start explorer.exe - Wait a few seconds after the last command. The taskbar and desktop icons will vanish and then come back. This is normal, because Explorer is restarting.
- Click the network, sound, or battery icons, or press Windows key + A, to open Quick Settings and check that it works.
These commands perform specific system actions:
- Delete the settings that control your Quick Settings layout.
- Close the Windows Explorer (the part of Windows that shows your desktop and taskbar).
- Restart Windows Explorer to apply the changes.
Once these steps finish, Quick Settings comes back with its default layout and should respond normally.
If the taskbar does not come back after a few seconds, press Ctrl + Shift + Esc to open Task Manager, click Run new task, and run the last command from the list above, the one that restarts Explorer. A lighter alternative for a simple freeze is to open Task Manager, find Windows Explorer on the Processes tab, right-click it, and choose Restart.
To undo the reset, there is nothing to restore. The deleted settings are recreated with defaults. To rebuild your own layout, open Quick Settings, click the pencil (Edit quick settings) icon, and add, remove, or reorder buttons as you like. If the problem comes back, restart the PC once, then run Windows Update, since Quick Settings glitches are often fixed in cumulative updates.
Need More Help?
You can find more Windows 11 tutorials and documentation on the official Microsoft support page: Microsoft Windows Support
Was this guide helpful?

About the Author
Richard
Tech Writer, IT Professional
Richard is a writer at Geek Rewind who turns complex IT tasks into clear, step-by-step guides. He draws on years of hands-on experience in system administration and enterprise IT operations, focusing on Windows, Linux and WordPress: the problems people actually run into, and the fixes that work. His server and WordPress guides come from systems he runs himself. Richard builds and maintains the platform behind Geek Rewind, from its Ubuntu servers and Nginx configuration to its custom WordPress plugins. Many new tutorials start with readers' questions, and he's always glad to answer them in the comments.
No comments yet — be the first to share your thoughts!